How to Use Lifting Straps
/
(A Blast from the Past article originally posted on 09/23/22)
In a past article and a couple of videos, we’ve covered how to quickly and cheaply make yourself a pair of durable lifting straps. Today, let’s cover how to use them.
As is often the case, this process is best understood when you can see it, so I’d recommend watching one of the included videos.
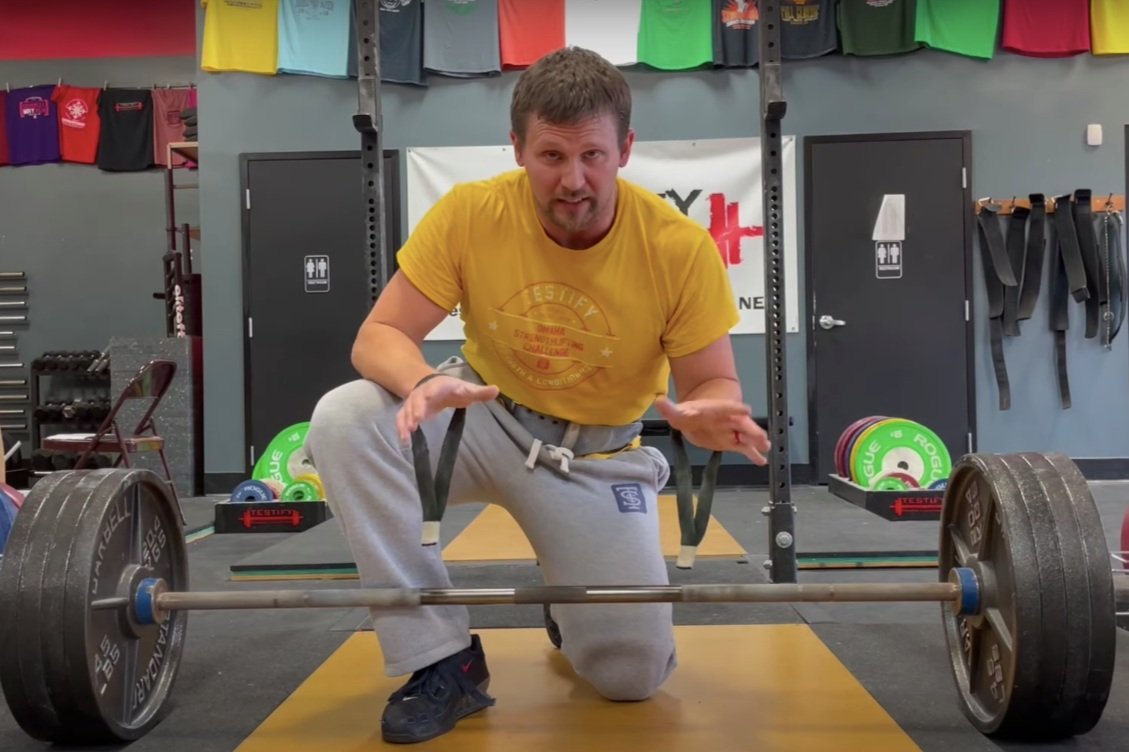
Step 1
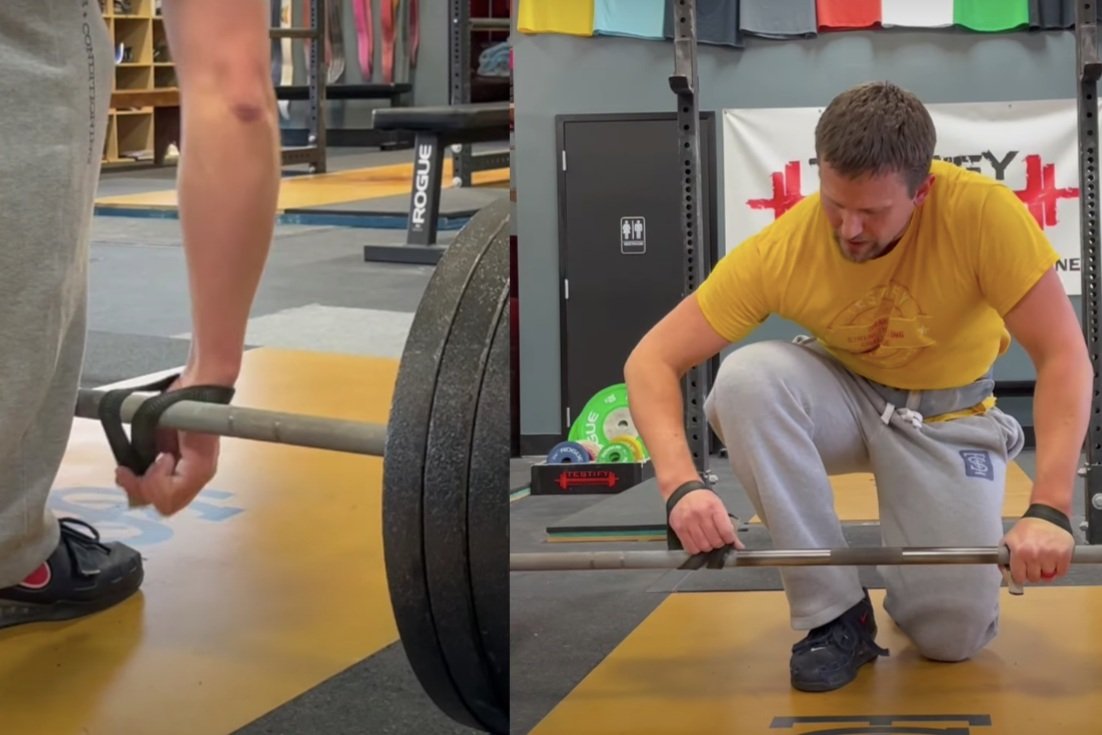
Place the straps over both hands. The threads face up, and the smooth side of the straps (the side without the threads) should face forward.
This step assumes you’re using the type of DIY straps we make in this video (or a similar commercial design). If you’re using the “loop-and-cinch” style of strap such as this pair, you can move on to step 2, but make sure that your straps are oriented in the correct direction (click here to see a demonstration).
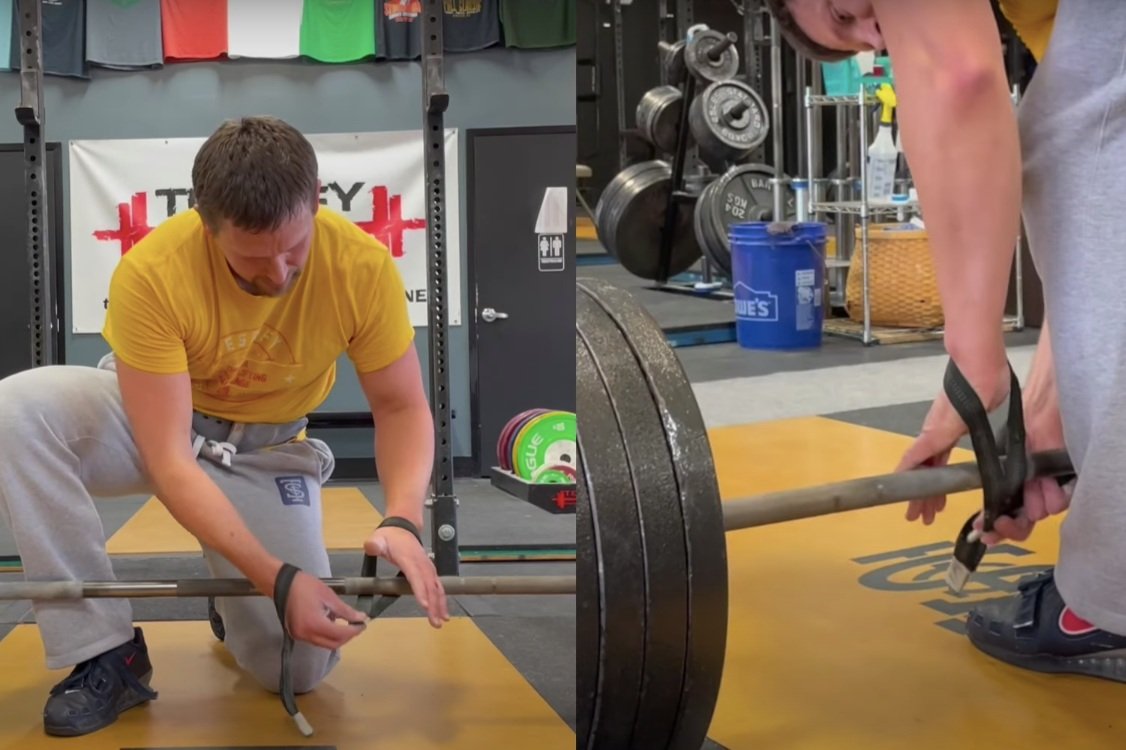
Step 2
Place your left hand on the barbell - your hand goes over the bar, and the strap goes behind the bar.
Step 3
Use your right hand to help wrap the strap around the bar once, pinning it into place with your left thumb.
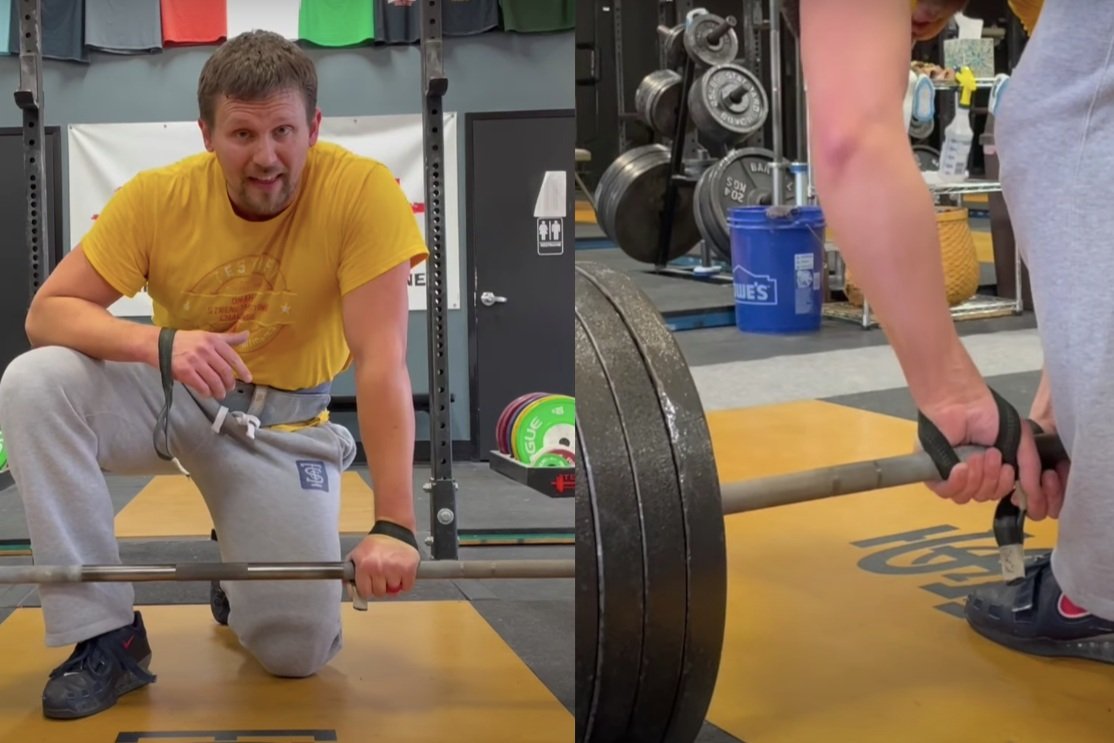
Step 4
Repeat steps 2 and 3 to get your right hand and its strap securely attached to the barbell, but note that the right hand will have to do this on its own as it doesn’t get any help from your left hand, which is already attached to the bar.
Step 5
When you tighten up the right strap (i.e., when you make it so that it’s wrapped snugly around the bar), you may find that you have to allow the left strap to loosen just a bit so that both straps have the same amount of “snugness” against the bar. Once that’s done, you can rotate both hands to tighten up both straps.
Step 6
Even though you’re using straps, be sure to still use chalk and grab the bar tightly. No hook grip is needed (don’t attempt a mixed grip either).
As always, we hope this helps you get stronger and live better.
(Some links may be affiliate links. As an Amazon Associate, Testify earns from qualifying purchases.)
If you found this helpful, you’ll love our weekly email. It’s got useful videos, articles, and training tips just like the one in this article. Sign up below, and of course, if you don’t love it, you can unsubscribe at any time.
At Testify, we offer small group training, private coaching (in-person or remotely via Zoom), online coaching, and form checks. Would you like to get quality coaching from a Starting Strength Coach?
The Bench Press DISASTER You Had No Idea You Were Causing
/Got a weak bench press? You might be missing out on a vital aspect of the lift that's commonly forgotten. Starting Strength Coach Phil Meggers explains.
At Testify, we offer small group training, private coaching (in-person or remotely via Zoom), online coaching, and form checks. Click the button below to get quality coaching from a Starting Strength Coach and start getting stronger TODAY.
Testify Herald - September 30, 2024
/THIS WEEK'S SUBMISSION
From our video 3 Habits that Instantly Boost Your Deadlift (click the title to watch):
Art Barkley
Another excellent tutorial! Much appreciated. I tried your idea of “bowing to the floor and looking for my mid foot” and it really helped, particularly on the 4th and 5th reps. Thank you!
Phil
That's great to hear, and you're welcome!
TESTIFY ONLINE COACHING
Want to get stronger working remotely with one of our Starting Strength Coaches? Click here to contact us and learn more.
Get Stronger. Live Better. Start today.
ARTICLES & VIDEOS

3 Habits that Instantly Boost Your Deadlift
Phil covers 3 habits that will improve your deadlift and add weight to the bar immediately. Click here to watch.

What You Should NEVER Do When Pressing!
Is your bar path all sorts of terrible when you press? It's destroying your press. Here are 3 simple cues to help you fix it. Click here to read.

Blast from the Past: Power Jerk vs Squat Jerk vs Split Jerk: Which One is BEST?
There are 3 different types of jerk, and each has its own advantages and disadvantages. Phil and Becky explain and demonstrate the power jerk, squat jerk, and split jerk. Click here to watch.

Blast from the Past: The Box Squat: What, How, and Why
What are box squats, how do you perform them, and why might a lifter do them? Phil explains. Click here to read.

“GET STRONGER - LIVE BETTER” SHIRTS ARE AVAILABLE!
Why do you train? Because getting stronger makes everything else easier. Get stronger. Live better. “Testify” to this message and represent your favorite gym with this shirt in several color options.
Click here to head to the Testify Store.
WHAT'S COMING UP
Below are a few of our upcoming events, and you can find out what else is on the calendar by heading to our events page at www.testifysc.com/events.
Testify Fall Classic
October 26, 2024
The annual Testify Fall Classic is back, and we invite you to be a part of it! This is a strengthlifting meet, which means the contested lifts will be the squat, press, and deadlift.
Click here to register or for more information.
Benching Bonanza! The Annual Testify Bench Press Jubilee
November 22, 2024
Benching Bonanza is a strength meet wherein the only contested lift is - you guessed it - the bench press. There will be one bar, and the meet will be conducted in a "rising bar" format, so the weight on the bar only goes up! It'll be a ton of fun, so come on out!
Click here to register or for more information.
Barbell Blizzard! A Winter Wonderland of Weights
December 14, 2024
Barbell Blizzard is a team strength meet wherein the contested lifts will be the squat, press, bench press, and deadlift. Competitors will form teams of 2-4 lifters/team and perform all 4 lifts; each lifter will receive 3 attempts for each lift.
Click here to register or for more information.
THIS WEEK’S CONDITIONING
Option 1
Sled Pyramid – 4, 5, or 6 tiers
Go up and down a 4, 5, or 6 tier “sled pyramid” – rest as needed. The distance for each round is 80 m indoors (a down-back on the 40m course) or 200 ft outdoors (2 down-backs on the 50 ft course). Rest as needed.
For example, Bob does the following (4 tiers):
Round 1: Empty sled
Round 2: 25#
Round 3: 50#
Round 4: 75#
Round 5: 50#
Round 6: 25#
Round 7: Empty sled
Compare to 2024.07.29.
Option 2
Bike/Row for 9 rounds:
1 min on
1 min off
Record distance for each round.
Compare to 2024.07.08.
Option 3
Outdoors:
5-10 rounds:
10 sledgehammer strikes (5R, 5L)
50 yd farmer carry (25 yd down-back)
Rest 1 minute
Indoors:
5-10 rounds:
10 sledgehammer strikes (5R, 5L)
100 ft farmer carry (50 ft down-back)
Rest 1 minute
Compare to 2024.06.10.
Option 4
5-8 rounds:
50 ft sled push
50 ft sled pull (hand over hand)
Row 1 minute
Rest 1 minute
This can also be done in a group of three where the sledder determines how long the other two people row and rest.
Compare to 2024.06.10.
As always, we hope this helps you get stronger and live better!
What You Should NEVER Do When Pressing!
/If you've trained the press long enough, you've had the experience wherein you push that barbell slightly forward out of that nice bar path you're aiming for, and suddenly, a press that should have been merely challenging instead becomes nearly impossible. Today, we cover three cues to fix this problem.

figure 1: Getting ready to aim for the nose
Solution 1: Target
For starters, give yourself a target at which to aim before starting each rep. Specifically, aim for your nose.
Don’t worry - your nose will be safely out of the way. There’s a natural counterbalancing movement that happens with the hips action of the press - the hips go forward, and your head moves back and out of the way.
Having a target can help significantly, so aim for your nose, or aim for where you nose was if you’re feeling pedantish (in which case “pedantish” bothers you to no end).
Solution 2: Overcue the Bar Path
If aiming for your nose doesn’t help you solve the problem, simply cue yourself to “press it backward” or “throw it back.” This is most certainly an overcue - an exaggeration of the correction needed - but overcues are often useful when trying to fix an error.
Solution 3: Elbows Forward
When you press the bar forward of the correct trajectory, you may accidentally be allowing the elbows to drift backward when you reach forward with your hips.

figure 2: the elbows have correctly dipped down but not backward.
Make no mistake, as you push the hips forward, the bar should dip slightly, which means the elbows should dip slightly as well. However, the elbows start the lift slightly in front of the bar and should stay slightly in front of the bar during this process (Figure 2). In other words, the elbows will dip down, but they should not drift backward as well.
If the elbows drift back (Figure 3), it greatly increases the chance that you will launch the bar forward. To fix this error, cue yourself to “keep the elbows forward” while you reach with your hips. The shorter version of this cue is simply “elbows forward.”

figure 3: the elbows have incorrectly drifted backward.
As always, we hope this helps you get stronger and live better.
(Some links may be affiliate links. As an Amazon Associate, Testify earns from qualifying purchases.)