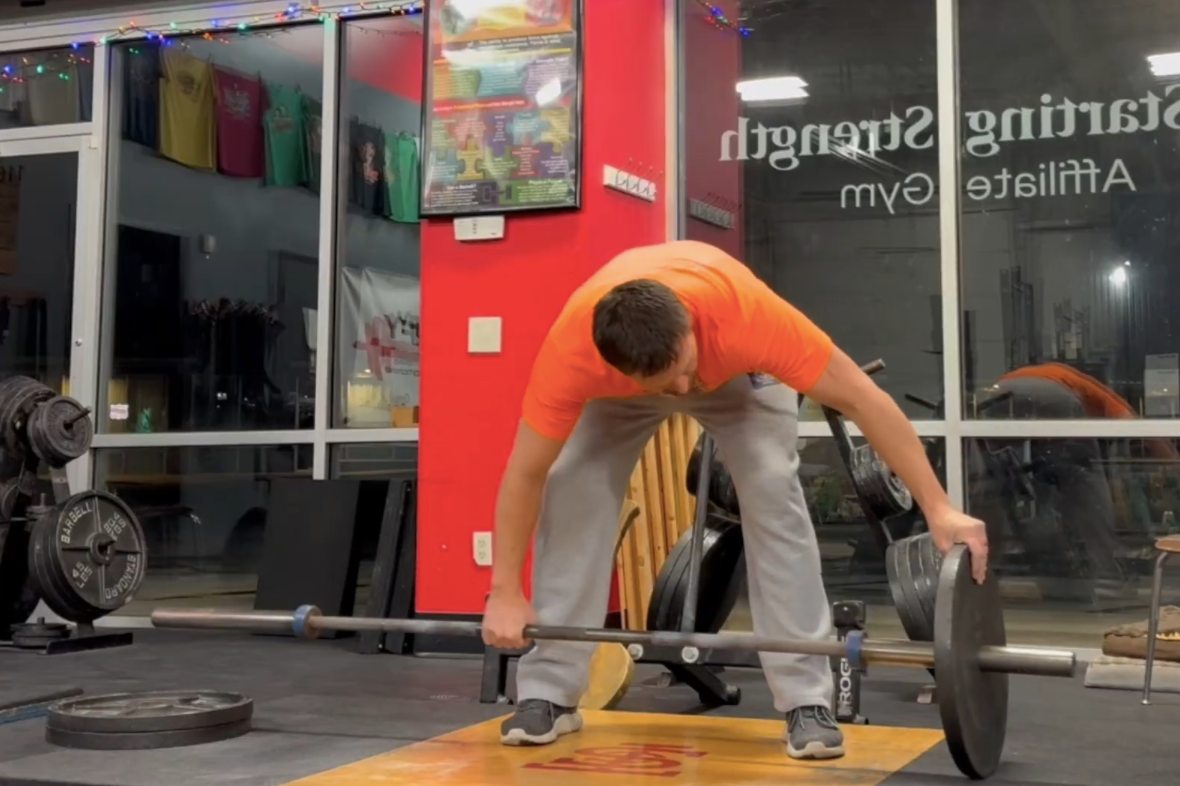
The 9th Circle of Deadlift Hell: The Drifting Barbell

(A Blast from the Past article originally posted on 01/29/21)

You’ve memorized the 5 step setup for the deadlift, you rehearse it in your head every night as you lie in bed, and yet, somehow, you still struggle with step 5 - “Drag the bar up your shins.” No matter how hard you try, that stupid bar seems to always swing away from your legs as you pull it off the floor.

In the deadlift, the barbell needs to be in a close, committed relationship with your shins as you pull it off the floor, and a bar that swings away from you betrays that relationship and makes for a much harder deadlift, so if you’re struggling to escape this 9th circle of deadlift hell, try out one of the following fixes:

Use Chalk
This is so obvious as to be painful, but please, for the love of all that is good in the world, use chalk when you’re lifting, and use chalk especially when deadlifting. Get some chalk on your hands before you start warming up the deadlift, and then apply some more chalk before you pull your work set(s).

If you won’t use chalk, summon up your inner Kelly Clarkson and just walk away. You’ve decided not to lift weights today, so leave the gym and come back when you’ve changed your mind.

As you can tell, the phenomenon of not using chalk aggravates me somewhat. Most people use chalk, and the phenomenon is - not surprisingly - restricted only to those who would lift more and be stronger if they also used chalk. I have other words on this topic, but they are not fit for print.

Chalk affects your ability to transmit force to the bar efficiently, and that, in turn, affects your ability to control the bar and keep it close. Use chalk.

Use the Appropriate Grip
You can’t use double overhand forever, so start using a hook grip, an alternate grip, or straps before your grip starts to become an issue. If you persist in using a grip that isn’t working for you, I have other words for you, too.

Grip affects your ability to transmit force to the bar efficiently, and that in turn affects your ability to control the bar and keep it close. Sounds familiar, doesn’t it? Get a grip.

Midfoot Balance
The combined center of mass of the lifter-barbell system should be balanced over the middle of the foot. In other words, you and the barbell together should be balanced - not on the balls of your feet and not on your heels - but rather right over the middle of your feet.

People often get onto the balls of their feet in steps two or three of the setup process - the “bend at the waist and take a grip” step or the “bend your knees to bring your shins to the bar” step, respectively - and this will cause the bar to swing away from you as you break it off the floor. The easiest fix is to simply make sure that you stay midfoot as you execute these steps, but if you find that you’ve rocked forward a bit onto the balls of your feet, simply rock back a bit until you are balanced over the middle of your feet again. Ideally, you want to do this before step four (i.e., before you squeeze your chest up to set your back).

“Pin It to Your Shins”
Your lats are responsible for keeping the bar close, i.e., keeping it on your shins, but you don’t need to think about your massive lats while deadlifting. Instead, just cue yourself to keep the bar pinned to your shins as you squeeze the bar off the floor. Pin it to your shins.

Step 4: Squeeze Your Chest Up . . . Then Pause
During step four of the setup process, you squeeze your chest up and set your back in rigid extension. Many people will squeeze their chest up and immediately try to break the bar off the floor. This often results in hips that drop and a bar that swings away from the lifter (if it actually comes off the floor at all).

Instead, try this: Squeeze your chest up hard like you always do (without dropping your hips), putting a lot of tension on the bar, and then . . . pause one second.

Do NOT relax that tension that you’ve placed on the bar - keep pulling. It should feel like the bar is bending upward in the middle, and indeed, if it’s heavy enough, it will be. THEN put even more tension on the bar, pulling harder until the bar comes off the floor.

This pause has helped a number of lifters for two reasons. First, it tends to discourage dropping the hips right before pulling the bar off the floor. Second, it also allows step four to function as a quick diagnostic step of sorts - when you’ve got a decent amount of tension on the bar, you can assess whether or not you and the barbell are still balanced on your midfoot and you can also assess whether or not you’re trying to keep the bar pinned to your shins. If you’re not doing one of these tasks, you can make a small correction and then pull the bar off the floor.

If your deadlift keeps swinging away, see if one of the tips above helps. Dante will be cheering for you.

As always, we hope this helps you get stronger and live better.

-Phil

PS: Whenever you want even more Testify in your life, here are some free resources:

  • Book a free intro and strategy session with us HERE.

  • Pick up a free copy of Testify’s Squat Guide: 12 Tips to Improve Your Squat Now HERE.

  • Get our free weekly email - containing useful videos, articles, and training tips - HERE.

  • Follow Testify on Instagram HERE.

  • Subscribe to Testify’s YouTube channel HERE.

(Some links may be affiliate links. As an Amazon Associate, Testify earns from qualifying purchases.)


At Testify, we offer small group training, private coaching (in-person or remotely via Zoom), online coaching, and form checks. Interested in getting stronger, looking better, and having more energy?


At Testify, we offer small group training, private coaching (in-person or remotely via Zoom), online coaching, and form checks. Would you like to get quality coaching from a Starting Strength Coach?

Most Common Deadlift Error? (it's not what you think...)

Today’s deadlift error is most commonly seen in newer lifters, but even experienced lifters have been known to make this mistake. 

Figure 1: Loren makes the error of releasing his grip between reps.

The Error
The mistake is simply that of releasing your grip on the barbell between reps (Figure 1). This error makes the entire set take longer, you don’t gain anything by releasing and re-gripping the bar, and it makes your life miserable because you now have to wait that much longer before you get to move on to the best resting position for the deadlift . . . the chair that you’re going to sit in when you’re done with your work set.

Why This Happens and Why It’s a Problem
Lifters commit this error out of procrastination. The last rep was hard, you’re not exactly thrilled at the prospect of pulling the next rep, and so you start fidgeting with your grip instead of getting set to pull, subconsciously thinking that perhaps you’ll get a bit more rest between reps in the process.

The problem is that - instead of recovering for the next rep - you’re actually tiring yourself out in that position. The “resting position” for the deadlift - i.e., when the bar is on the floor - is not much of a resting position at all. You’re crouched over, supporting yourself on flexed knees, and it can also be hard to breathe in this position.

Spending extra time at the bottom of the deadlift is inefficient and exhausting, so instead of spending additional time in this position, you actually want to spend as little time here as productively possible.

What to Do and What NOT to Do
As is the case with many situations, don’t think about how to avoid the problem. In other words, when you set the bar down, don’t bother cueing yourself, “don’t let go of the bar, DON’T let go of the bar.”

Instead, give yourself something to do as opposed to something to avoid doing. If you’ve learned to ride a motorcycle, you know how this works - you are taught to always look toward where you want to go as opposed to focusing on something you’re trying to avoid (for example, if you’re a new rider and find yourself drifting toward the curb, don’t look at the curb - instead, focus on the middle of your lane, which is where you want to go).

The same concept applies here - again, give yourself something to do, not something to avoid doing.

The Solution
Part of the solution is to remind yourself before the set starts, “I’m going to hang on to the bar throughout the entire set.” Then, every time you set the bar down, remind yourself of this task - “Hang on to the bar.”

figure 2: mike has midfoot bar position, midfoot balance, and his shins are touching the bar.

Beyond that, assuming you set the bar down over the middle of your foot (and if you didn’t, get it there first) and that your balance is over the middle of your foot, you can simply bend your knees to bring your shins to the bar, squeeze your chest up to set your back in rigid extension, and then pull.

Those three criteria (Figure 2) are what you should focus on between reps - bar over midfoot, balance over midfoot, and shins touching the bar. If those three aspects are covered, you’re ready to set your back and pull.

In summary, remind yourself to hang on to the bar and then take care of the three criteria just mentioned - after that, you’re ready to set your back and pull. Giving yourself something to do and work toward will make it that much easier to avoid fidgeting with your grip - you’ll be too busy taking care of important things.

As long as the bar is over the middle of the foot, your balance is over the middle of the foot, and your shins are touching the bar, you are ready to set the back and pull.

This will make for a more efficient, quicker set, and as always, we hope this helps you get stronger and live better,

-Phil

PS: Whenever you want even more Testify in your life, here are some free resources:

  • Book a free intro and strategy session with us HERE.

  • Pick up a free copy of Testify’s Squat Guide: 12 Tips to Improve Your Squat Now HERE.

  • Get our free weekly email - containing useful videos, articles, and training tips - HERE.

  • Follow Testify on Instagram HERE.

  • Subscribe to Testify’s YouTube channel HERE.

(Some links may be affiliate links. As an Amazon Associate, Testify earns from qualifying purchases.)


At Testify, we offer small group training, private coaching (in-person or remotely via Zoom), online coaching, and form checks. Interested in getting stronger, looking better, and having more energy?

Don't Let This Mistake RUIN Your Deadlift!

You know the five step deadlift setup, and you’ve memorized it well - stance, grip, shins, chest, and pull. However, you very well might be screwing up steps four and five, i.e., the “squeeze your chest up to set your back” and the “pull - dragging the barbell up your legs” steps.

Let’s fix this.

If you don’t know the five step deadlift setup, be sure to watch the included video.

What This Error Looks Like (i.e., What NOT to Do)
When people make this mistake, they do so because they’re combining steps four and five instead of treating them like the distinct steps that they are and should be. In other words, if you are squeezing your chest up and then moving right into the pulling motion, you’re making this mistake.

This fool has combined steps 4 and 5 and has thus created a host of problems for himself. don’t be this guy.

It’s an easy bad habit to accidentally acquire, and it causes a number of problems for the lift. You’ll drop your hips, the bar will roll forward of mid-foot, it will continue to swing forward as it leaves the floor (if it’s light enough that you can get it off the floor in this suboptimal position), and you’ve now made your deadlift significantly harder than it should’ve been.

The Solution
This problem can occur in any of the pulls from the floor - deadlifts, snatches, cleans, even rows - and the solution is the same for each lift.

Remind yourself to pause between step four and step five.

It’s not much of a pause, mind you, but simply waiting a half second to a full second between the setting of your back (step four) and the start of the pull (step five) nicely fixes this error and thus prevents all of the subsequent problems that accompany it.

Try the following mental sequence the next time you deadlift:

1. Stance
2. Grip
3. Shins
4. Chest
—Pause—
5. Pull

Don’t be lazy during that pause - you should be applying a lot of tension to the bar since you’ve just set your back in extension. If you record yourself on video, during step four, you should see the bar bend upward slightly in the middle and you should hear a click as you pull the slack out of the bar, and you have to maintain that tension during this short pause. Watch the included video to see this in action.

Remember: “Chest - pause - pull.”

As always, we hope this helps you get stronger and live better.

-Phil

PS: Whenever you want even more Testify in your life, here are some free resources:

  • Book a free intro and strategy session with us HERE.

  • Pick up a free copy of Testify’s Squat Guide: 12 Tips to Improve Your Squat Now HERE.

  • Get our free weekly email - containing useful videos, articles, and training tips - HERE.

  • Follow Testify on Instagram HERE.

  • Subscribe to Testify’s YouTube channel HERE.

(Some links may be affiliate links. As an Amazon Associate, Testify earns from qualifying purchases.)


At Testify, we offer small group training, private coaching (in-person or remotely via Zoom), online coaching, and form checks. Interested in getting stronger, looking better, and having more energy?

Improve Your Deadlift by FIXING These 3 Errors!

Fix these THREE errors for a stronger and more efficient deadlift. Starting Strength Coach Phil Meggers and Becky Meggers explain and demonstrate as Addy, Anna, Milo, and Parker all help out.

(A Blast from the Past video originally published on 09/17/22)

Whenever you want even more Testify in your life, here are some free resources:

  • Book a free intro and strategy session with us HERE.

  • Pick up a free copy of Testify’s Squat Guide: 12 Tips to Improve Your Squat Now HERE.

  • Get our free weekly email - containing useful videos, articles, and training tips - HERE.

  • Follow Testify on Instagram HERE.

  • Subscribe to Testify’s YouTube channel HERE.


At Testify, we offer small group training, private coaching (in-person or remotely via Zoom), online coaching, and form checks. Interested in getting stronger, looking better, and having more energy?

The Mistake that is RUINING Your Deadlift (FAST FIX)

This deadlift mistake is easy to make and it makes the deadlift harder than it should be, but it's also a quick fix. Starting Strength Coach Phil Meggers explains.


At Testify, we offer small group training, private coaching (in-person or remotely via Zoom), online coaching, and form checks. Interested in getting stronger, looking better, and having more energy?

Are You Finishing Your Deadlift Wrong?

(A Blast from the Past article originally posted on 11/11/22)

A common problem in the deadlift is a misunderstanding of what finishing the lift should look and feel like. This typically results in one of two situations - a lifter who doesn’t completely open the hips and therefore doesn’t actually complete the rep or a lifter who overdoes it and ends up finishing the lift with the back in overextension.

One of these results is insufficient, and the other is unnecessary. Both of them look ridiculous, so we’re going to try and fix this.

To see these errors demonstrated as well as how to correct them, watch the video below.

A finished deadlift (Figure 1) will have the knees fully extended, the hips fully extended, the chest up, and the shoulders back. In other words, the knees will be straight, the hips will be straight, and the shoulders will be behind the barbell. In even simpler terms, the lifter simply stands all the way up.

Figure 1: A correctly finished deadlift

If you find that you’re not finishing your deadlift, i.e., if your hips don’t open all the way and you look like you’re leaning over the bar like the fool in Figure 2, simply cue yourself to “Stand up” or “Stand up tall.”

Figure 2: An unfinished deadlift - don’t be like this fool.

If, on the other hand, you find that you’re overdoing the top of the deadlift, i.e., if you’re finishing the lift with your lumber spine in overextension (Figure 3), you can still use the cue “Stand up” (or “stand tall”) or you can also simply tell yourself, “Don’t lean back.”

Figure 3: An “overdone” deadlift - don’t be like this fool, either.

Fixing either of these problems is not complicated, but you’ve got to be aware that you have the problem in order to fix it, so we recommend that you either have a coach, or if that’s not possible, make sure that you record your lifts so that you can watch them.

As always, we hope this helps you get stronger and live better.

(Some links may be affiliate links. As an Amazon Associate, Testify earns from qualifying purchases.)

If you found this helpful, you’ll love our weekly email. It’s got useful videos, articles, and training tips just like the one in this article. Sign up below, and of course, if you don’t love it, you can unsubscribe at any time.


At Testify, we offer small group training, private coaching (in-person or remotely via Zoom), online coaching, and form checks. Interested in getting stronger, looking better, and having more energy?