Cheap & Easy DIY Sled Drag Harness Options

(A Blast from the Past article originally posted on 12/16/22)

The sled or prowler is an extremely effective conditioning tool (albeit a rather evil one). You can get in some great conditioning pushing the sled, but you can also get in some great conditioning pulling it, so let’s cover a couple of options to construct a simple and cheap sled drag harness so you don’t have to go out and buy an expensive one.

First, a few notes . . .

Sled vs Prowler
A sled has 2 skids while a prowler has 3 skids. They accomplish the same purpose as they both can be pushed or pulled, and for our purposes, I’m going to use the word “sled” for both implements.

Don’t Have a Sled?
If you don’t have a sled for pulling, you don’t need to go out and put down a bunch of cash for a new one. You can construct a “tire sled” from an old tire and an eyebolt - it’s cheap, pretty quick, and it works very well for pulls.

Watch the included video - Free (or cheap!) Strongman and Conditioning Equipment - to see what I’m talking about.

And now, let’s get to the harness options . . .

Sled Drag Harness - Waist Option
You’ll need a fairly large carabiner, and you’ll also need to get an automotive recovery strap, which you can obtain at pretty much any hardware store or by clicking here. Each end of the strap has a loop, and we’ll simply connect each loop to the carabiner, and then we’ll hook the carabiner to the sled. Simply place the middle of the recovery strap around your waist, and you’ve now got a cheap and easy-to-make harness for walking either forward or backward while dragging the sled.

Shoulder Harness option

Sled Drag Harness - Shoulder Option
For this version, you’ll need to get some 1-inch climbing webbing. This is the same tubular webbing that we use for making lifting straps (see the video below) - you can find this type of webbing at an R.E.I. or a something store, or you can get some on Amazon by clicking here. You could probably use wider material if you want to make it more comfortable, but conditioning is not terribly comfortable anyway, and this is what we had on hand, and it works well.

Take 7-8 feet of webbing and tie a water knot with the ends to create one long, continuous loop. To tie a water knot (other knots won’t work as well with webbing), check out the DIY Sled Drag Harness Options video above. Feeding that loop through the loop created by your recovery strap, you have now created “backpack straps,” so simply put one arm through each end of the backpack straps, and you’re all set to go.

Seeing this on video helps quite a bit, so as mentioned earlier, I’d recommend watching the short DIY Sled Drag Harness Options video above (this video was the basis for this article).

As always, we hope this helps you get stronger (or at least more conditioned!) and live better.

-Phil

PS: Whenever you want even more Testify in your life, here are some free resources:

  • Follow Testify on Instagram HERE.

  • Subscribe to Testify’s YouTube channel HERE.

  • Book a free intro and strategy session with us HERE.

  • Pick up a free copy of Testify’s Squat Guide: 12 Tips to Improve Your Squat Now HERE.

  • Get our free weekly email - containing useful videos, articles, and training tips - HERE.

(Some links may be affiliate links. As an Amazon Associate, Testify earns from qualifying purchases.)

At Testify, we offer small group training, private coaching (in-person or remotely via Zoom), online coaching, and form checks. Interested in getting stronger, looking better, and having more energy?

4 Key Things to Do AFTER You Lift Weights

What should you be doing after you lift weights so that you get the most out of your strength training? Starting Strength Coach Phil Meggers covers 4 actions to take when you finish lifting.

Whenever you want even more Testify in your life, here are some free resources:

  • Follow Testify on Instagram HERE.

  • Subscribe to Testify’s YouTube channel HERE.

  • Book a free intro and strategy session with us HERE.

  • Pick up a free copy of Testify’s Squat Guide: 12 Tips to Improve Your Squat Now HERE.

  • Get our free weekly email - containing useful videos, articles, and training tips - HERE.


At Testify, we offer small group training, private coaching (in-person or remotely via Zoom), online coaching, and form checks. Interested in getting stronger, looking better, and having more energy?

The Testify Inquirer - December 16, 2024

THIS WEEK'S SUBMISSION

From our video 4 Simple Exercises to Get Stronger, Feel Better, and Have More Energy in 2025 (click the title to watch):

Tom (Senior Gym Bro)
I appreciate your videos, Film Makers!

“No Siri, it’s Phil Meggers, not Film Makers!”

All joking aside, I turned 65 two months ago, and I do these lifts 3 days a week, along with some other lifts.

I got back into weightlifting 3 years ago. Today I’m Much stronger and feel Much better, than I did when I started. Your channel has helped me So much since I found it a year ago. Thank you Phil!👍💪

Phil
That's fantastic, Tom (and Siri has actually made that mistake for me as well) - way to stick with it, and a happy belated birthday to you! Thanks for the kind words, and I'm glad our videos have been helpful for you.

Tom (Senior Gym Bro)
Thanks Phil! I’m also a survivor of colorectal cancer and melanoma in the last 8 years. I’m blessed to be cancer free right now.

Phil
You're welcome, and that's wonderful news!


TESTIFY ONLINE COACHING

Interested in getting stronger working remotely with one of our Starting Strength Coaches? Click here to book a free intro call and strategy session.

Get Stronger. Live Better. Start today.


ARTICLES & VIDEOS

4 Simple Exercises to Get Stronger, Feel Better, and Have More Energy in 2025
Want to get stronger, feel better (look better too!), and have more energy in the new year? We cover 4 simple exercises to help you achieve your fitness and health goals. Click here to watch.


The TRUTH About Breathing, Bracing, and Lifting Heavy
”Stop making this mistake. It’s inefficient, it’s unnecessary, and it makes you look like you’ve been reading too many 80s and 90s fitness magazines. The mistake we’re discussing is…” Click here to read.


Blast from the Past: The THREE Things Everyone Should Know About the Squat
Do these 3 things to get yourself into the strongest position when squatting. Click here to watch.


Blast from the Past: Shakira and the Press: Hips Don't Lie
”A common problem in the press is that - instead of reaching forward with the hips and using the rebound this creates - a lifter will accidentally…” Click here to read.


TESTIFY BEANIES ARE AVAILABLE!

Represent your favorite gym - even when it's cold outside!

And, it gets better - you can choose your beanie from EIGHT different colors!

Click here to head to the Testify Store.


WHAT'S COMING UP

The first ever Barbell Blizzard team event was a fantastic success! We had 9 different teams, over 30 people, and it was great to see people having fun and lifting big weights . . . to Christmas music, of course. The annual Testify Christmas party afterward was a ton of fun as well (complete with annual awards!) and y’all brought some amazing dishes. Thank you to everyone who was there!

Reminder: Below are the hours for the weeks of Christmas and New Year's (you can also find these on our Location & Hours page). Any days not listed retain their normal hours.

Christmas Week (2024)
Tuesday, 12/24/24: 5:00 a.m. - 9:30 a.m. (closed in the evening)
Wednesday, 12/25/24: Closed
Thursday, 12/26/24: 4:00 p.m. - 7:30 p.m. (closed in the morning)

New Year’s Week (2024-2025)
Tuesday, 12/31/24: 5:00 a.m. - 9:30 a.m. (closed in the evening)
Wednesday, 01/01/25: Closed
Thursday, 01/02/25: 4:00 p.m. - 7:30 p.m. (closed in the morning)

You can always find out what else is on the calendar by heading to our events page at www.testifysc.com/events as we’ll be posting some 2025 events soon!


THIS WEEK’S CONDITIONING

Option 1
Sled
Outdoors:
10-20 x 25 yds EMOM at a weight of your choice

Every minute, push the sled 25 yards, i.e., if pushing the sled takes 20 seconds, then you have 40 seconds to rest. Perform 10-20 rounds.

Indoors:
10-20 x 100 ft EMOM at a weight of your choice

Every minute, push the sled 100 feet, i.e., if pushing the sled takes 20 seconds, then you have 40 seconds to rest. Perform 10-20 rounds.

Compare to 2024.10.14.

Option 2
Bike/row:
3 rounds of:
8 x 20 sec on/40 sec off
Rest 3 min between rounds

Score = lowest distance

Compare to 2024.09.23.

Option 3
Outdoors:
5-10 rounds:
10 sledgehammer strikes (5R, 5L)
50 yd farmer carry (25 yd down-back)
Rest 1 minute

Indoors:
5-10 rounds:
10 sledgehammer strikes (5R, 5L)
100 ft farmer carry (50 ft down-back)
Rest 1 minute

Compare to 2024.08.26.

Option 4
1. 5 yoke carries @ 30 yd (15 yd downback) – work up to heaviest carry
2. 5 rounds of 5 reps on the axle “clean and press away” – work up to heavy set of 5

Compare to 2024.08.26.


As always, we hope this helps you get stronger and live better!

Whenever you want even more Testify in your life, here are some free resources:

  • Follow Testify on Instagram HERE.

  • Subscribe to Testify’s YouTube channel HERE.

  • Book a free intro and strategy session with us HERE.

  • Pick up a free copy of Testify’s Squat Guide: 12 Tips to Improve Your Squat Now HERE.

  • Get our free weekly email - containing useful videos, articles, and training tips - HERE.

The TRUTH About Breathing, Bracing, and Lifting Heavy

Stop making this mistake. It’s inefficient, it’s unnecessary, and it makes you look like you’ve been reading too many 80s and 90s fitness magazines.

The mistake we’re discussing is that of breathing like a buffoon when lifting.

This error shows up in a number of ways, but a very popular version of this mistake is seen when people breathe in on the way down and breathe out on the way up. We have a lot of old fitness magazines and books to thank for this preposterous way of breathing, and in short, don’t do it.

Your body intuitively knows that this is silly nonsense. You don’t breathe like this when you’re constipated, and you don’t breathe like this when you’re trying to push a stuck vehicle out of a ditch. In these situations, your body automatically takes the correct and most efficient action - you take a big breath, you tighten your abs and “bear down,” you then push as hard as you can, and you don’t release that breath until the effort is over.

The same is true in lifting, and the way to remember this is simple: All breathing (both in and out) takes place only at one location - the start and finish point of the lift.

Put another way - if the barbell is moving, you’re not breathing.

Let’s cover the specifics of this for the squat, bench, press, and be sure to read all the way to the end for the deadlift since that’s the lift in which people breathe the silliest.

The Squat
Take a breath in at the top, hold that breath all the way down and back up again with every muscle in your trunk bracing hard, and then release the breath. Be sure to watch the video below on how to brace correctly (i.e., perform the Valsalva maneuver).

The Bench Press
Breathing for the bench press is identical to that of the squat - take a breath in at the top, hold it all the way down and back up again, and then release it.

The Press
Unlike the squat and bench, in which each rep starts from the top of the lift, the press starts at the bottom of the movement, so the breathing takes place at this location instead. In the press, take a breath in at the bottom and get tight, press the bar up, then lower it (don’t blow out your air at the top), and then release your breath when you’re back at the starting position.

The Deadlift
Don’t do it. Just don’t. I die a little bit inside every time a lifter makes this error in the deadlift . . . don’t blow out your air at the top of the lift.

Breathing for the deadlift is identical to that of the press since the lift starts at the bottom, so take a breath when the bar is on the floor, set your back, pull the bar up to the lockout position, set it down quickly, and then release your breath.

If you’ve been releasing your breath at the top of the deadlift, it can be a hard habit to break, but it’s not a physically difficult challenge. People have performed long, grueling pulls - 8, 9, and 10 second deadlifts - and then set the bar back down before releasing the breath. If they can do it, you can do it.

Remember that breathing only takes place in one location - the start (and finish) point of the lift - and you’ll be good to go. Breath is stability, so hold that breath until you’re back where you started.

As always, we hope this helps you get stronger and live better.

-Phil

PS: Whenever you want even more Testify in your life, here are some free resources:

  • Follow Testify on Instagram HERE.

  • Subscribe to Testify’s YouTube channel HERE.

  • Book a free intro and strategy session with us HERE.

  • Pick up a free copy of Testify’s Squat Guide: 12 Tips to Improve Your Squat Now HERE.

  • Get our free weekly email - containing useful videos, articles, and training tips - HERE.

(Some links may be affiliate links. As an Amazon Associate, Testify earns from qualifying purchases.)


At Testify, we offer small group training, private coaching (in-person or remotely via Zoom), online coaching, and form checks. Interested in getting stronger, looking better, and having more energy?

The THREE Things Everyone Should Know About the Squat

Do these 3 things to get yourself into the strongest position when squatting. Starting Strength Coach Phil Meggers explains.

(A Blast from the Past video originally published on 09/12/22)


At Testify, we offer small group training, private coaching (in-person or remotely via Zoom), online coaching, and form checks. Interested in getting stronger, looking better, and having more energy?

Shakira and the Press: Hips Don't Lie

(A Blast from the Past article originally posted on 12/09/22)

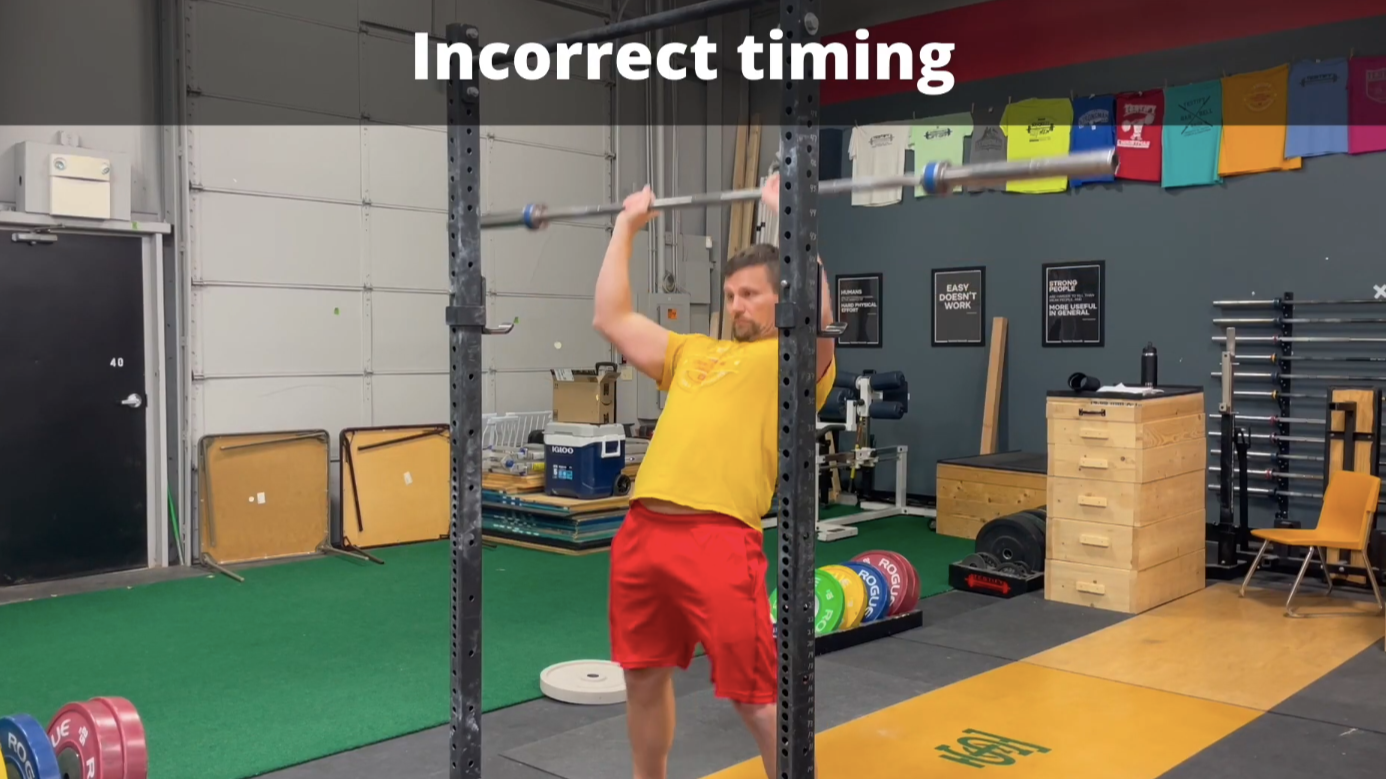
A common problem in the press is that - instead of reaching forward with the hips and using the rebound this creates - a lifter will accidentally reach backwards with the shoulders. The two movements - reaching forward with the hips and reaching backward with the shoulders - look almost the same, but one makes for a stronger press while the other absolutely hinders the press.

To see this in action as it’s being explained, check out one of the short videos included in this article.

Reaching forward with the hips helps us in two ways - first, that nice rebound out of the hips gives us a nice launch at the beginning of the movement. Second, it helps clear our face back out of the way of the barbell (a natural countermovement).

However, if you reach backward with your shoulders instead, you’ll still clear your head out of the way of the bar, but you won’t get any sort of launch or rebound from the hips, and indeed, it will actually make for a much harder and weaker press.

In the photo at left, Becky correctly reaches forward with her hips. In the photo at right, Becky incorrectly reaches backward with her shoulders. For comparison, check the position of the bar with respect to the squat stand in the background.

To check whether or not you’re making this error, ask yourself, “Where am I feeling my balance?” when you reach forward with your hips. If you feel your weight shift momentarily to the balls of your feet, you’re on the right track.

However, if you feel your weight shift to your heels, then you know that you’re accidentally reaching backwards with your shoulders instead of forward with your hips.

Remind yourself of this the next time you press. Simply make your balance shift briefly to the balls of your feet as you reach with your hips, and you’ll be off to an excellent start.

As always, we hope this helps you get stronger and live better.

(Some links may be affiliate links. As an Amazon Associate, Testify earns from qualifying purchases.)

If you found this helpful, you’ll love our weekly email. It’s got useful videos, articles, and training tips just like the one in this article. Sign up below, and of course, if you don’t love it, you can unsubscribe at any time.


At Testify, we offer small group training, private coaching (in-person or remotely via Zoom), online coaching, and form checks. Interested in getting stronger, looking better, and having more energy?