STOP Using Your Back Like This (How to Squat Correctly)

Are you using your back like a doofus when you squat? Let’s fix it.

We’re not talking about a conceptual misunderstanding of what to do with your back - if you’re reading this article or watching the accompanying video below, you’re probably aware of what you should be doing with your back as you squat. You’re trying to reach back with your hips and point your chest at the floor as you start your descent. You’re already aware that this relatively horizontal back angle in the squat makes for a stronger, more efficient back angle and is indeed how we train our backs to get stronger as well.

In this case, what could possibly go wrong?

We’re talking about the problem of overextension in the low back (i.e., arching the low back). Watch a video of yourself squatting, and as you start your descent, if you see more wrinkles develop in the back of your shirt - specifically, in the lower half of your back - then you are probably overextending your back.

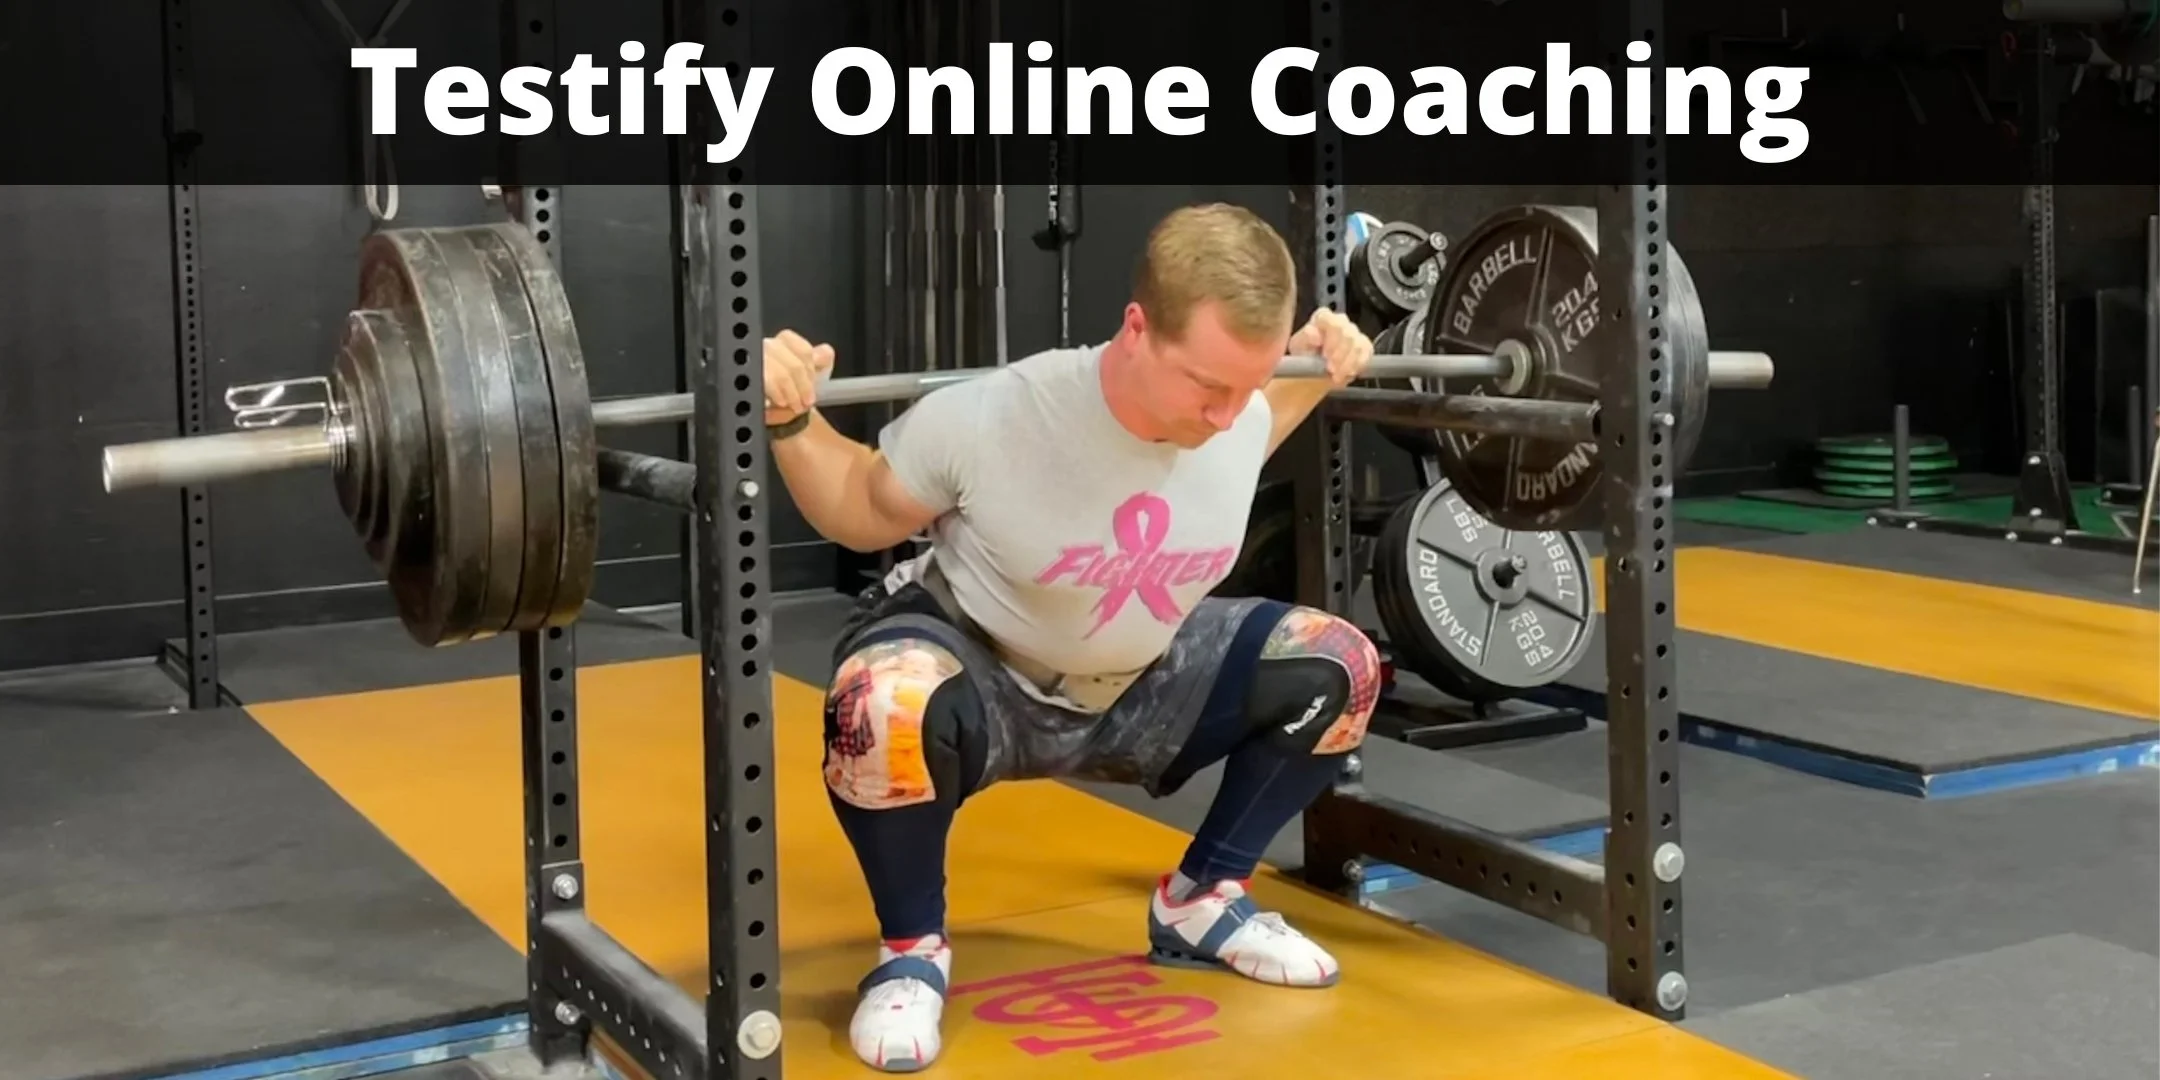
In other words, if it looks like you’re twerking when you start to squat (Figure 1), you’ve got a problem.

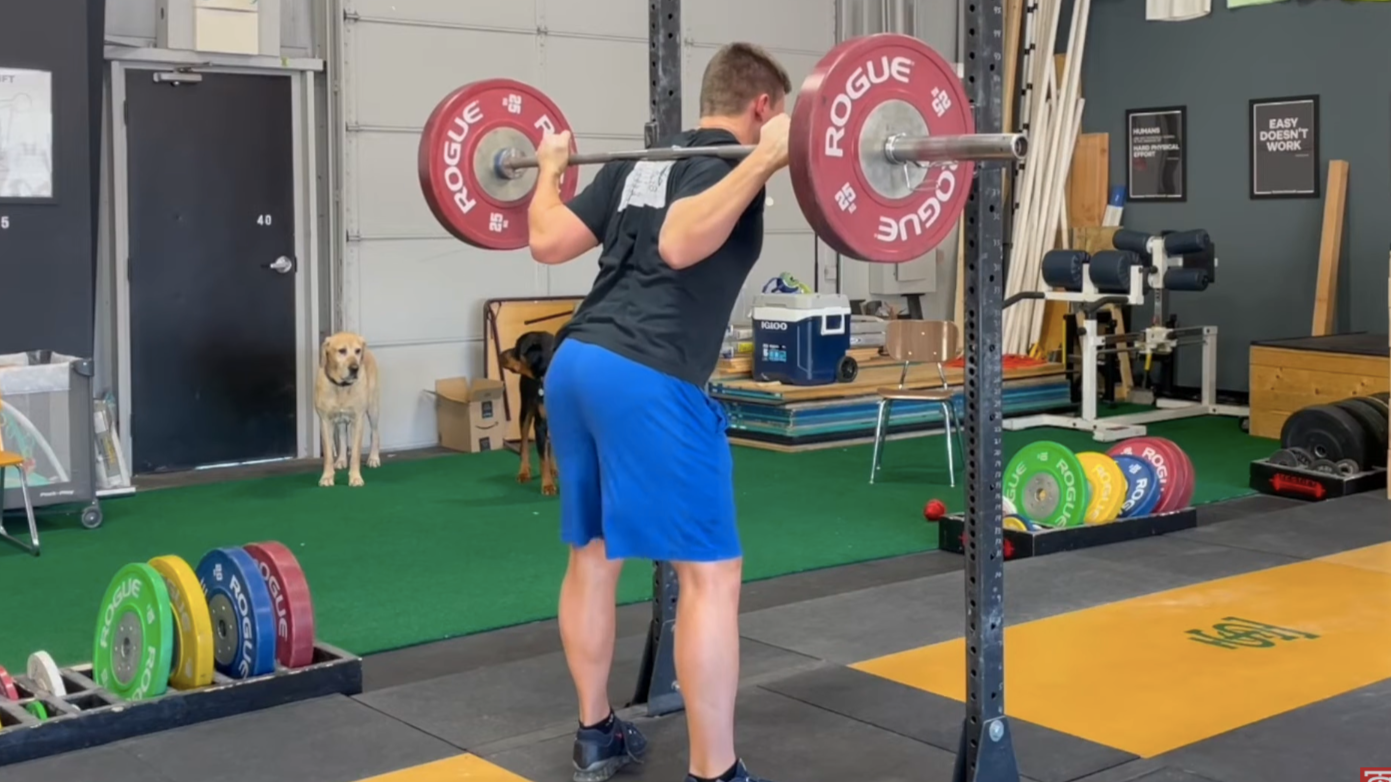
Figure 1: don’t squat like this fool.

This problem tends to show up more often with young kids and women, but the error can happen with anyone regardless of age or gender, and - on a rather important note - this problem tends to cause more back discomfort issues than a rounded (i.e., flexed) back.

Don’t get me wrong - we want a straight, rigid back when we squat, so we’re not looking for either an overextended (arched) back or a flexed (rounded) back, but of these two errors, the overextended back tends to cause more problems, and there are two situations which commonly cause this error to happen, so let’s take a look at them.

Cause #1: Bad Focal Point
A high focal point means lifters have to keep their eyes up, which usually causes them to keep their chest up (instead of pointing it at the floor), which - combined with reaching the hips backward - makes for an arched back.

This also means that if you squat in front of a mirror (and I’m terribly sorry if your gym is silly enough to put mirrors in front of the squat rack), you need to ignore that mirror. Looking at yourself while squatting means you’re keeping your gaze too high, which is no good. You don’t watch yourself while throwing a baseball or shooting a basketball, and you certainly don’t need to watch yourself while squatting either.

The solution is to choose a fixed point on the floor about four to six feet in front of you and stare at it the entire time you’re squatting. Stare at it before your first rep, during each rep, and between reps as well. Looking forward and down will help you reach your hips back and point your chest down as you start to descend, which allows you to achieve the correct back position.

Cause #2: Reaching Back Without Leaning Over
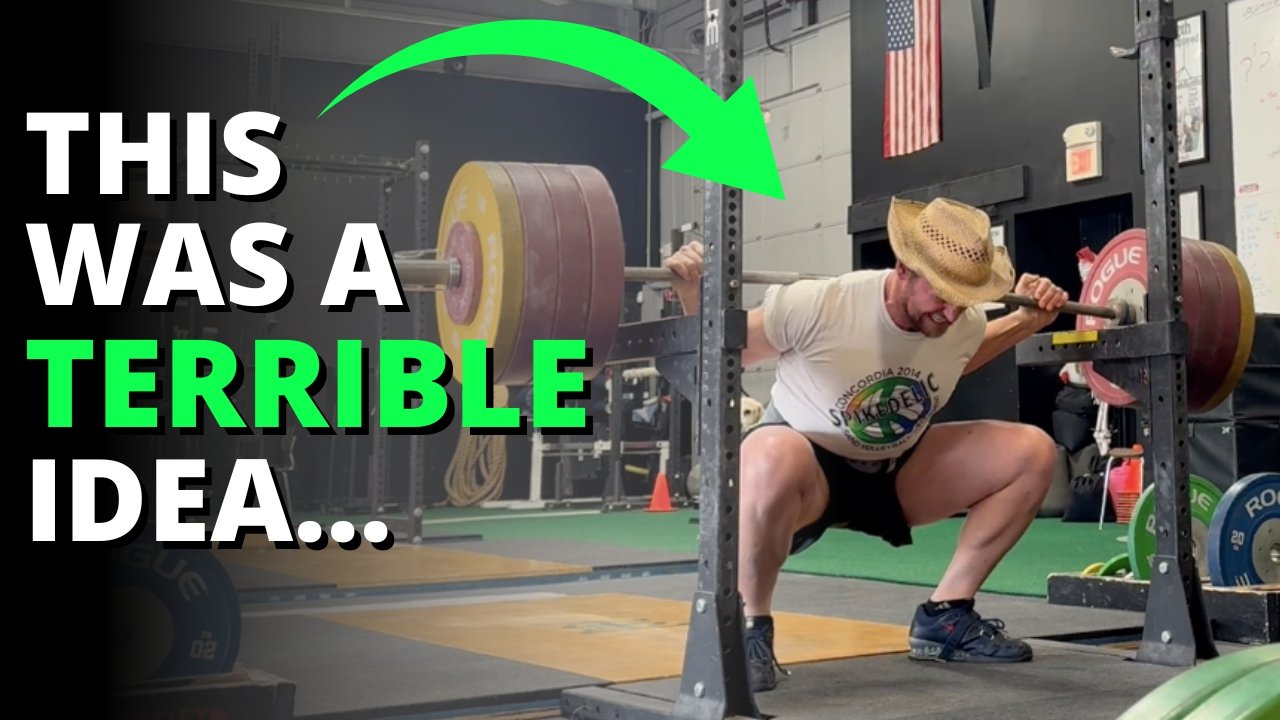
This version of the error shows up when a lifter knows he should reach back with his hips and lean over, but he accidentally only focuses on the “reaching back” part of the movement (Figure 2).

If you reach back with your hips and accidentally keep your chest up, you will be overextending your back, so the “reaching back” aspect of the movement must be accompanied by the “leaning over” or “pointing the chest down” aspect of the movement.

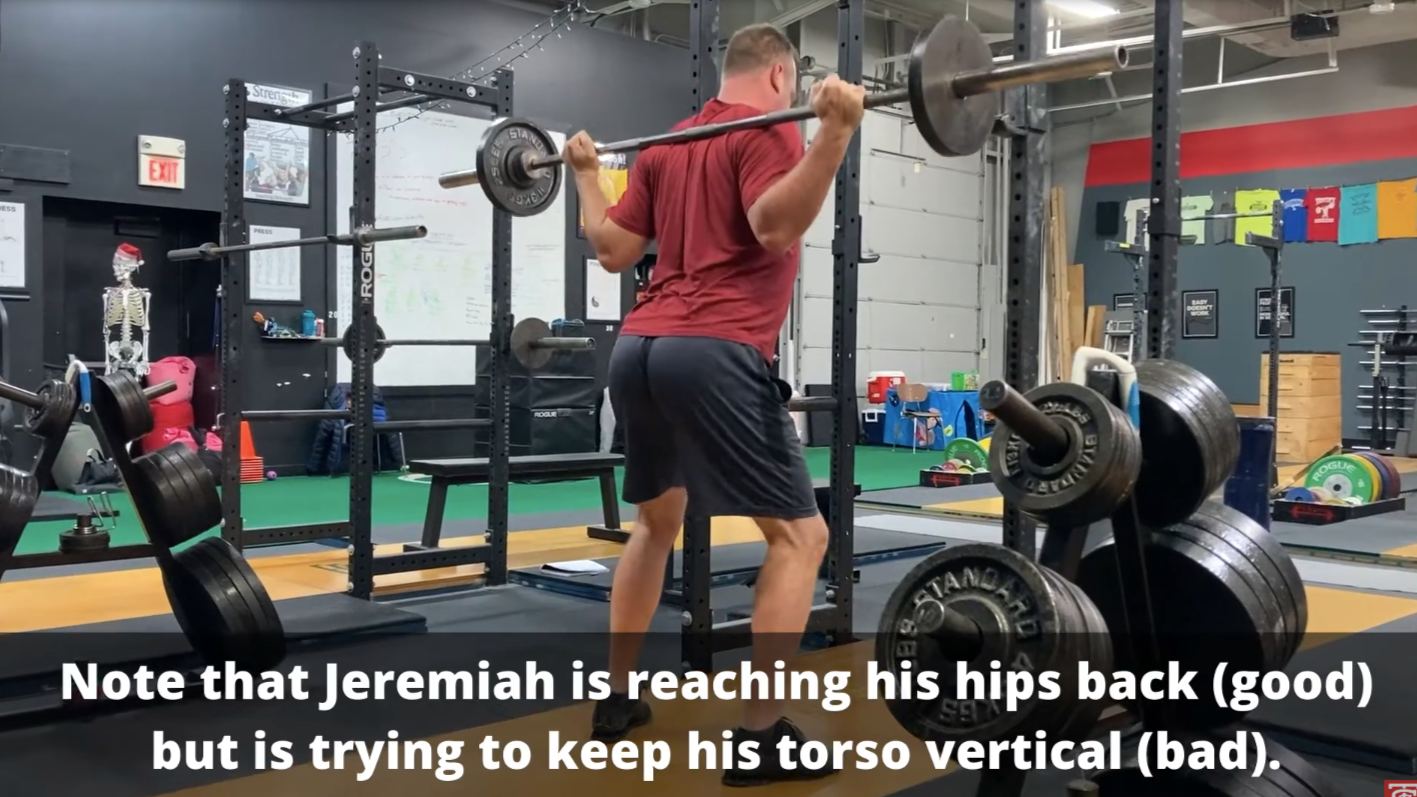
Figure 2: jeremiah was kind enough to purposely demonstrate the mistake of reaching back without leaning over. . . . don’t do this.

Reaching back and leaning over should go hand-in-hand, but if you can only focus on one part of that duo, I’d recommend focusing on the “lean over” cue. After all, you are probably quite adept at not falling over, so you’ll naturally reach back with your hips as you lean over to help with balance.

Bonus Cue
If you find that you still arch your back when you squat, then you can try out the overcue “round your back” or “flex your back” as you start to descend.

Remember - this is an overcue, i.e., an exaggeration of what you truly want to do. You don’t actually want a rounded or flexed back, but exaggerating the mental picture of what to do may help you achieve a straight back, which is what you want.

Find a good focal point, reach back with your hips, point your chest down, and as always, we hope this helps you get stronger and live better.

-Phil

PS: Whenever you want even more Testify in your life, here are some free resources:

  • Book a free intro and strategy session with us HERE.

  • Pick up a free copy of Testify’s Squat Guide: 12 Tips to Improve Your Squat Now HERE.

  • Get our free weekly email - containing useful videos, articles, and training tips - HERE.

  • Follow Testify on Instagram HERE.

  • Subscribe to Testify’s YouTube channel HERE.

(Some links may be affiliate links. As an Amazon Associate, Testify earns from qualifying purchases.)


At Testify, we offer small group training, private coaching (in-person or remotely via Zoom), online coaching, and form checks. Interested in getting stronger, looking better, and having more energy?

Do CrossFitters Make the BEST Deadlifters?!

What are CrossFitters good at when it comes to the deadlift, and how can this help you improve your deadlift? Starting Strength Coach Phil Meggers explains.

(A Blast from the Past video originally published on 04/10/23)

Whenever you want even more Testify in your life, here are some free resources:

  • Book a free intro and strategy session with us HERE.

  • Pick up a free copy of Testify’s Squat Guide: 12 Tips to Improve Your Squat Now HERE.

  • Get our free weekly email - containing useful videos, articles, and training tips - HERE.

  • Follow Testify on Instagram HERE.

  • Subscribe to Testify’s YouTube channel HERE.


At Testify, we offer small group training, private coaching (in-person or remotely via Zoom), online coaching, and form checks. Interested in getting stronger, looking better, and having more energy?

The Deadlift Setup Mistake That Makes Lifters Look Ridiculous

(A Blast from the Past article originally posted on 08/20/21)

Have you seen that guy at the gym who gets the deadlift dry-heaves? You know the guy - the one who sets his back two, three, or four times before pulling the bar off the floor? If this guy happens to be you, let’s fix this.

When you set up for your deadlift, keep it simple with the 5-step setup:

  1. Stance: Take a relatively narrow stance with your shins one inch from the barbell.

  2. Grip: Bend at the waist (not the knees - keep them “straight-ish” for now) and take a narrow grip on the bar - just wide enough to ensure that your hands are on the knurl and that your thumbs don’t drag up your legs on the pull.

  3. Shins: Drop your shins to the bar by bending your knees slightly (do NOT rock forward).

  4. Chest: Squeeze your chest up ONCE to set your back in extension.

  5. Pull: Drag the bar up your legs as you stand up.

On step 4, don’t complicate things (and exhaust yourself!) by squeezing your chest up (i.e., setting your back) and then relaxing multiple times. You are not a ratchet strap, so setting your back multiple times doesn’t make it any tighter than setting it once, and it’s also a waste of energy, which, as you know, is also bad for the climate.

Again, keep it simple. When you get to step 4, squeeze your chest up hard, which sets off a wave of contraction down your back, and then drag the bar up your legs. Set the back once. Set it hard - but set it once.

We hope this helps you get stronger and live better!

-Phil

PS: Whenever you want even more Testify in your life, here are some free resources:

  • Book a free intro and strategy session with us HERE.

  • Pick up a free copy of Testify’s Squat Guide: 12 Tips to Improve Your Squat Now HERE.

  • Get our free weekly email - containing useful videos, articles, and training tips - HERE.

  • Follow Testify on Instagram HERE.

  • Subscribe to Testify’s YouTube channel HERE.

(Some links may be affiliate links. As an Amazon Associate, Testify earns from qualifying purchases.)


At Testify, we offer small group training, private coaching (in-person or remotely via Zoom), online coaching, and form checks. Interested in getting stronger, looking better, and having more energy?

How Many Lifters Are Actually Using the Wrong Grip on Bench Press and Press?

Are you using the right grip on the bench press and press? Many lifters aren’t—and it’s costing them strength and consistency. Starting Strength Coach Phil Meggers gives you the grip that sets you up for stronger, more effective lifts.

Whenever you want even more Testify in your life, here are some free resources:

  • Book a free intro and strategy session with us HERE.

  • Pick up a free copy of Testify’s Squat Guide: 12 Tips to Improve Your Squat Now HERE.

  • Get our free weekly email - containing useful videos, articles, and training tips - HERE.

  • Follow Testify on Instagram HERE.

  • Subscribe to Testify’s YouTube channel HERE.


At Testify, we offer small group training, private coaching (in-person or remotely via Zoom), online coaching, and form checks. Interested in getting stronger, looking better, and having more energy?

Testify Independent - February 2, 2026

THIS WEEK'S SUBMISSION

From our video 8 Unavoidable Truths About Seniors and Lifting Weights… (click the title to watch):

Mat Mackenzie
This stuff should be in public service films. People need to know this - for themselves, and for a more independent society in general.

Phil
Thanks, Mat!


TESTIFY ONLINE COACHING

Interested in getting stronger working one-on-one remotely with us? Click here to book your free strategy session.

Get Stronger. Live Better. Start Today.


ARTICLES & VIDEOS

8 Unavoidable Truths About Seniors and Lifting Weights…
Bad advice wastes time and holds people back. We cover eight unavoidable truths about seniors and lifting weights so you don’t fall for the same myths twice. Click here to watch.


3 Pieces of Gym Gear That Separate Beginners from Serious Lifters
If your gym bag only has shoes and earbuds, you’re probably just exercising. Exercise is certainly better than nothing - but if you actually train, then you show up with a few specific tools that quietly separate progress from plateaus. Click here to read.


Blast from the Past: Never Make This Belt Mistake Again! | Fast Fix
If you use a belt when lifting - and you should - you're going to make this mistake eventually. Learn to prevent it in a few short minutes. Click here to watch.


Blast from the Past: Stop Destroying Your Squat - Do This Instead
Stop raising your chest early in the squat - it makes for a weaker squat. If you struggle to drive your hips up, Phil provides a simple fix. Click here to read.


TESTIFY TRUCKER CAPS ARE AVAILABLE!

Represent your favorite gym with this trucker cap in several color options - perfect for outdoors or a training session.

Click here to head to the Testify Store.


WHAT'S COMING UP

Below is one of our upcoming events, and you can find out what else is on the calendar by heading to our events page at www.testifysc.com/events.

Testify Strengthlifting Challenge

  • April 11, 2026

  • The annual Testify Strengthlifting Challenge is back, and we invite you to be a part of it! This is a strengthlifting meet, which means the contested lifts will be the squat, press, and deadlift.

  • Click here to register or for more information.


THIS WEEK’S CONDITIONING

Option 1
Sled
Outdoors:
10-20 x 25 yds EMOM at a weight of your choice

Every minute, push the sled 25 yards, i.e., if pushing the sled takes 20 seconds, then you have 40 seconds to rest. Perform 10-20 rounds.

Indoors:
10-20 x 100 ft EMOM at a weight of your choice

Every minute, push the sled 100 feet, i.e., if pushing the sled takes 20 seconds, then you have 40 seconds to rest. Perform 10-20 rounds.

Compare to 2025.12.29.

Option 2
Bike/row:
12 min TT

Score = distance

Compare to 2025.11.10.

Option 3
5-10 rounds of:
30 sec ME tire flips
30 sec rest

Compare to 2025.10.13.

Option 4
For time:
500m row
5 x 80m sled push (200 ft if indoors)
500m row

Rest 1 minute after the first row and after each sled push.

Compare to 2025.10.13.


As always, we hope this helps you get stronger and live better!

Whenever you want even more Testify in your life, here are some free resources:

  • Book a free intro and strategy session with us HERE.

  • Pick up a free copy of Testify’s Squat Guide: 12 Tips to Improve Your Squat Now HERE.

  • Get our free weekly email - containing useful videos, articles, and training tips - HERE.

  • Follow Testify on Instagram HERE.

  • Subscribe to Testify’s YouTube channel HERE.

3 Pieces of Gym Gear That Separate Beginners from Serious Lifters

If your gym bag only has shoes and earbuds, you’re probably just exercising. Exercise is certainly better than nothing - but if you actually train, then you show up with a few specific tools that quietly separate progress from plateaus.

#1: Training Log
The training log separates training from exercise, and you are showing up to train.

Training means there’s a goal, which means there’s a plan - a program - designed to help you achieve that goal. That plan needs data, and your training log is that data. It’s the history of where you’ve been, and thus, it allows you to make decisions to help you move forward.

I recommend a paper notebook, but if you want to go the digital route, that will work, too. Record your warm-ups, record your work sets, record the cues you should be using, and before you walk out the door, record what you plan to do next time. 

The training log is your most important piece of training equipment - more important than your shoes, belt, barbell, etc. All those items are replaceable, but your training log is specific to you, so be an intelligent lifter and start using a training log today.

#2: Chalk
Any decent, dedicated barbell gym should provide chalk for you, but most commercial gyms (i.e., globo-style gyms and chain-gyms) won’t. If your gym doesn’t provide it, there are two solutions - either buy your own chalk or find another gym.

Correctly chalked hands

Seriously, it’s that important. Sneak it in if you need to or use liquid chalk, but if you care about your training, this is nonnegotiable. You use chalk for the same reason climbers and gymnasts use it - friction. It absorbs the natural moisture and oils in your hands so that you have better - much better - grip on the bar.

#3: Fractional plates
Early in your training career - within the first month or two - you’ll need to start using fractional plates on your press, bench press, and possibly your olympic lifts. Females and older folks will find them useful for the squat and deadlift as well. Sadly, commercial gyms won’t have these, so at the very least, go out and get yourself a pair of 1.25 lb plates. Even better, purchase a full set of fractional plates, which includes a pair each of 0.25 lb, 0.5 lb, 0.75 lb, and 1 lb plates.

The ability to make a 2.5 lb jump (i.e, using a 1.25 lb plate on each side of the barbell)  is hugely useful to making continued progress on a number of the lifts, and the ability to make even smaller jumps (e.g., a 1 lb jump using two 0.5 lb plates) is beneficial for many people as well.

If you take your training seriously, have these pieces of equipment when you train. Your results - and therefore your strength - will thank you.

As always, we hope this helps you get stronger and live better.

-Phil

PS: Whenever you want even more Testify in your life, here are some free resources:

  • Book a free intro and strategy session with us HERE.

  • Pick up a free copy of Testify’s Squat Guide: 12 Tips to Improve Your Squat Now HERE.

  • Get our free weekly email - containing useful videos, articles, and training tips - HERE.

  • Follow Testify on Instagram HERE.

  • Subscribe to Testify’s YouTube channel HERE.

(Some links may be affiliate links. As an Amazon Associate, Testify earns from qualifying purchases.)


At Testify, we offer small group training, private coaching (in-person or remotely via Zoom), online coaching, and form checks. Interested in getting stronger, looking better, and having more energy?