What’s in Your Gym Bag? A Quick & Dirty Guide to Personal Lifting Gear

What gear should you have in your gym bag (or at home) when it’s time to train? Let’s dive in, and we’ll provide plenty of additional resources for each item along the way.

Heads up - the last item in this article is the most important, so keep reading.

Lifting Shoes
Lifting shoes have a rigid, non-compressible sole, a slightly elevated heel, and one or two metatarsal straps. They provide an extremely solid base of support and therefore permit efficient force transfer between you and the floor.

Big deal. Big. Huge.

For a more in-depth treatment of lifting shoes and the rationale for using them, click on the article below or watch the included video.

LIFTING SHOES: The Complete Guide to the Best and WORST Shoes! (Lifting Gear Series)

A number of manufacturers make quality lifting shoes - Nike, Do-Win, Inov-8, and Adidas are just a few of the more well-known brands. Below are some of the shoe recommendations and links we usually send to new members as a starting point for shopping:

Note: I would not recommend the Adidas Powerlift or any other lifting shoe with a compressed foam sole. The Powerlift is fairly popular due to its price point and is certainly still better than non-lifting shoe options, but the sole is not as rigid as we’d like, and quite simply, there are better options (such as its sibling, the Adidas Adipower 3).

A final note - Chuck Taylors are not lifting shoes. They are squishy and therefore provide lousy force transfer between you and the floor. Walk in Chucks. Don’t lift in Chucks.

Lifting Belt
A quality lifting belt helps you provide rigidity and stability when lifting. As a result, it allows you to have efficient force transfer from the things generating force in a given lift all the way to the barbell - e.g., transferring force from the hips and the legs in the squat through your rigid midsection (i.e., trunk) up to the barbell sitting on your back.

Some people can use a belt with a 4” width, and some people need a 3” belt (or even a 2.5” belt). For more information on belt widths as well as everything else belt-related, check out the article below or watch the included video.

LIFTING BELTS: The Complete Guide and What NOT to Get! (Lifting Gear Series)

A quality belt will last years - possibly your entire training career - so invest in a good one. With this in mind, here are a few belt options we typically recommend:

Knee Sleeves
Most people will come to appreciate and benefit from knee sleeves at some point in their lifting careers. They provide warmth and compression to the knees (specifically for squatting), and your knees will probably appreciate this greatly.

Sleeves are typically made of neoprene and most often come in 5 mm or 7 mm thicknesses. Skip the 5 mm option and go with the 7 mm sleeves.

For a more in-depth treatment on knee sleeves, check out the article below or watch the included video.

KNEE SLEEVES: The Complete Guide and the BEST Way to Put Them On (Lifting Gear Series)

Below are a few solid options for sleeves that we commonly recommend to our members:

Wrist Wraps
Wrist wraps (or simply “wraps”) provide support for your wrists, come in pairs, and each wrap typically includes a thumb loop at one end, the elastic body of the wrap, and then a velcro closure system at the other end of the wrap.

Since wraps provide stability to the wrist joint, they are very useful for pressing movements (e.g., press and bench press) and are also sometimes used when snatching, cleaning, or jerking.

For more information on wrist wraps, check out the article below or watch the included video.

WRIST WRAPS: The Complete Guide and How NOT to Put Them On! (Lifting Gear Series)

18” and 24” are the most common lengths, and here are some solid options:

Lifting Straps
Straps (not to be confused with wraps) are very useful for pulling movements such as deadlifts, rows, and possibly even snatches (don’t ever use them for cleans - it’s a good way to break a wrist).

When you start training, perform all of your deadlift work sets with either a hook grip or a mixed grip (and chalk, of course). Over time, however, you’ll find that straps can be a useful tool when training the pulls.

You can easily make your own straps in about 2 minutes, and we cover that in the video below (these are the straps that I use and that we make for our members).

If you prefer to buy your straps instead of making them yourself, IronMind provides some good options:

Here’s a quick video that covers how to use straps:

A final note on straps - don’t purchase or use cloth straps. They will eventually tear, and it will inevitably happen at a very unfortunate moment.

Fractional Plates
You’ll want to make smaller jumps on the press and the bench press over time, i.e., smaller than the typical 5 lb jump permitted by two 2.5 lb plates. Females and older lifters will also want to make smaller jumps on the squat and deadlift, and such increments are also useful for the Olympic lifts. 

With this in mind, get yourself a set of fractional plates. We cover this more in the video below:

We have several sets of the 44Sport fractional plates (click here) at Testify, and they are used daily. They are a solid option, but there are many other choices out there as well.

Chalk
If you train, use chalk. Chalk absorbs the natural moisture and oils of your hands (and that of whatever doofus used the bar before you at the commercial gym) so that you have better friction - much better friction - between you and the barbell.

If you deadlift without chalk, stop kidding yourself. You’re not training - you’re just wasting time in the gym.

If your gym doesn’t provide chalk, bring your own. If your gym doesn’t allow chalk, sneak it in anyway or find another gym. It’s that important. The difference between chalk and no-chalk on your deadlift may well be over 100 lb.

We use Spider Chalk (click here) at Testify as the blocks are very dense and remain intact longer than other brands. If you need to be sneaky about your chalk use, I’d recommend liquid chalk (click here).

Training Log
Your training log is your most important piece of equipment.

Everything else - shoes, belt, wraps, barbell, etc. - can be replaced, but your training log contains your personal training history. It’s the one thing that can’t be replaced.

Because your log contains your history and thus where you’ve been (in the training sense), it’s also the guide to where you want to go.

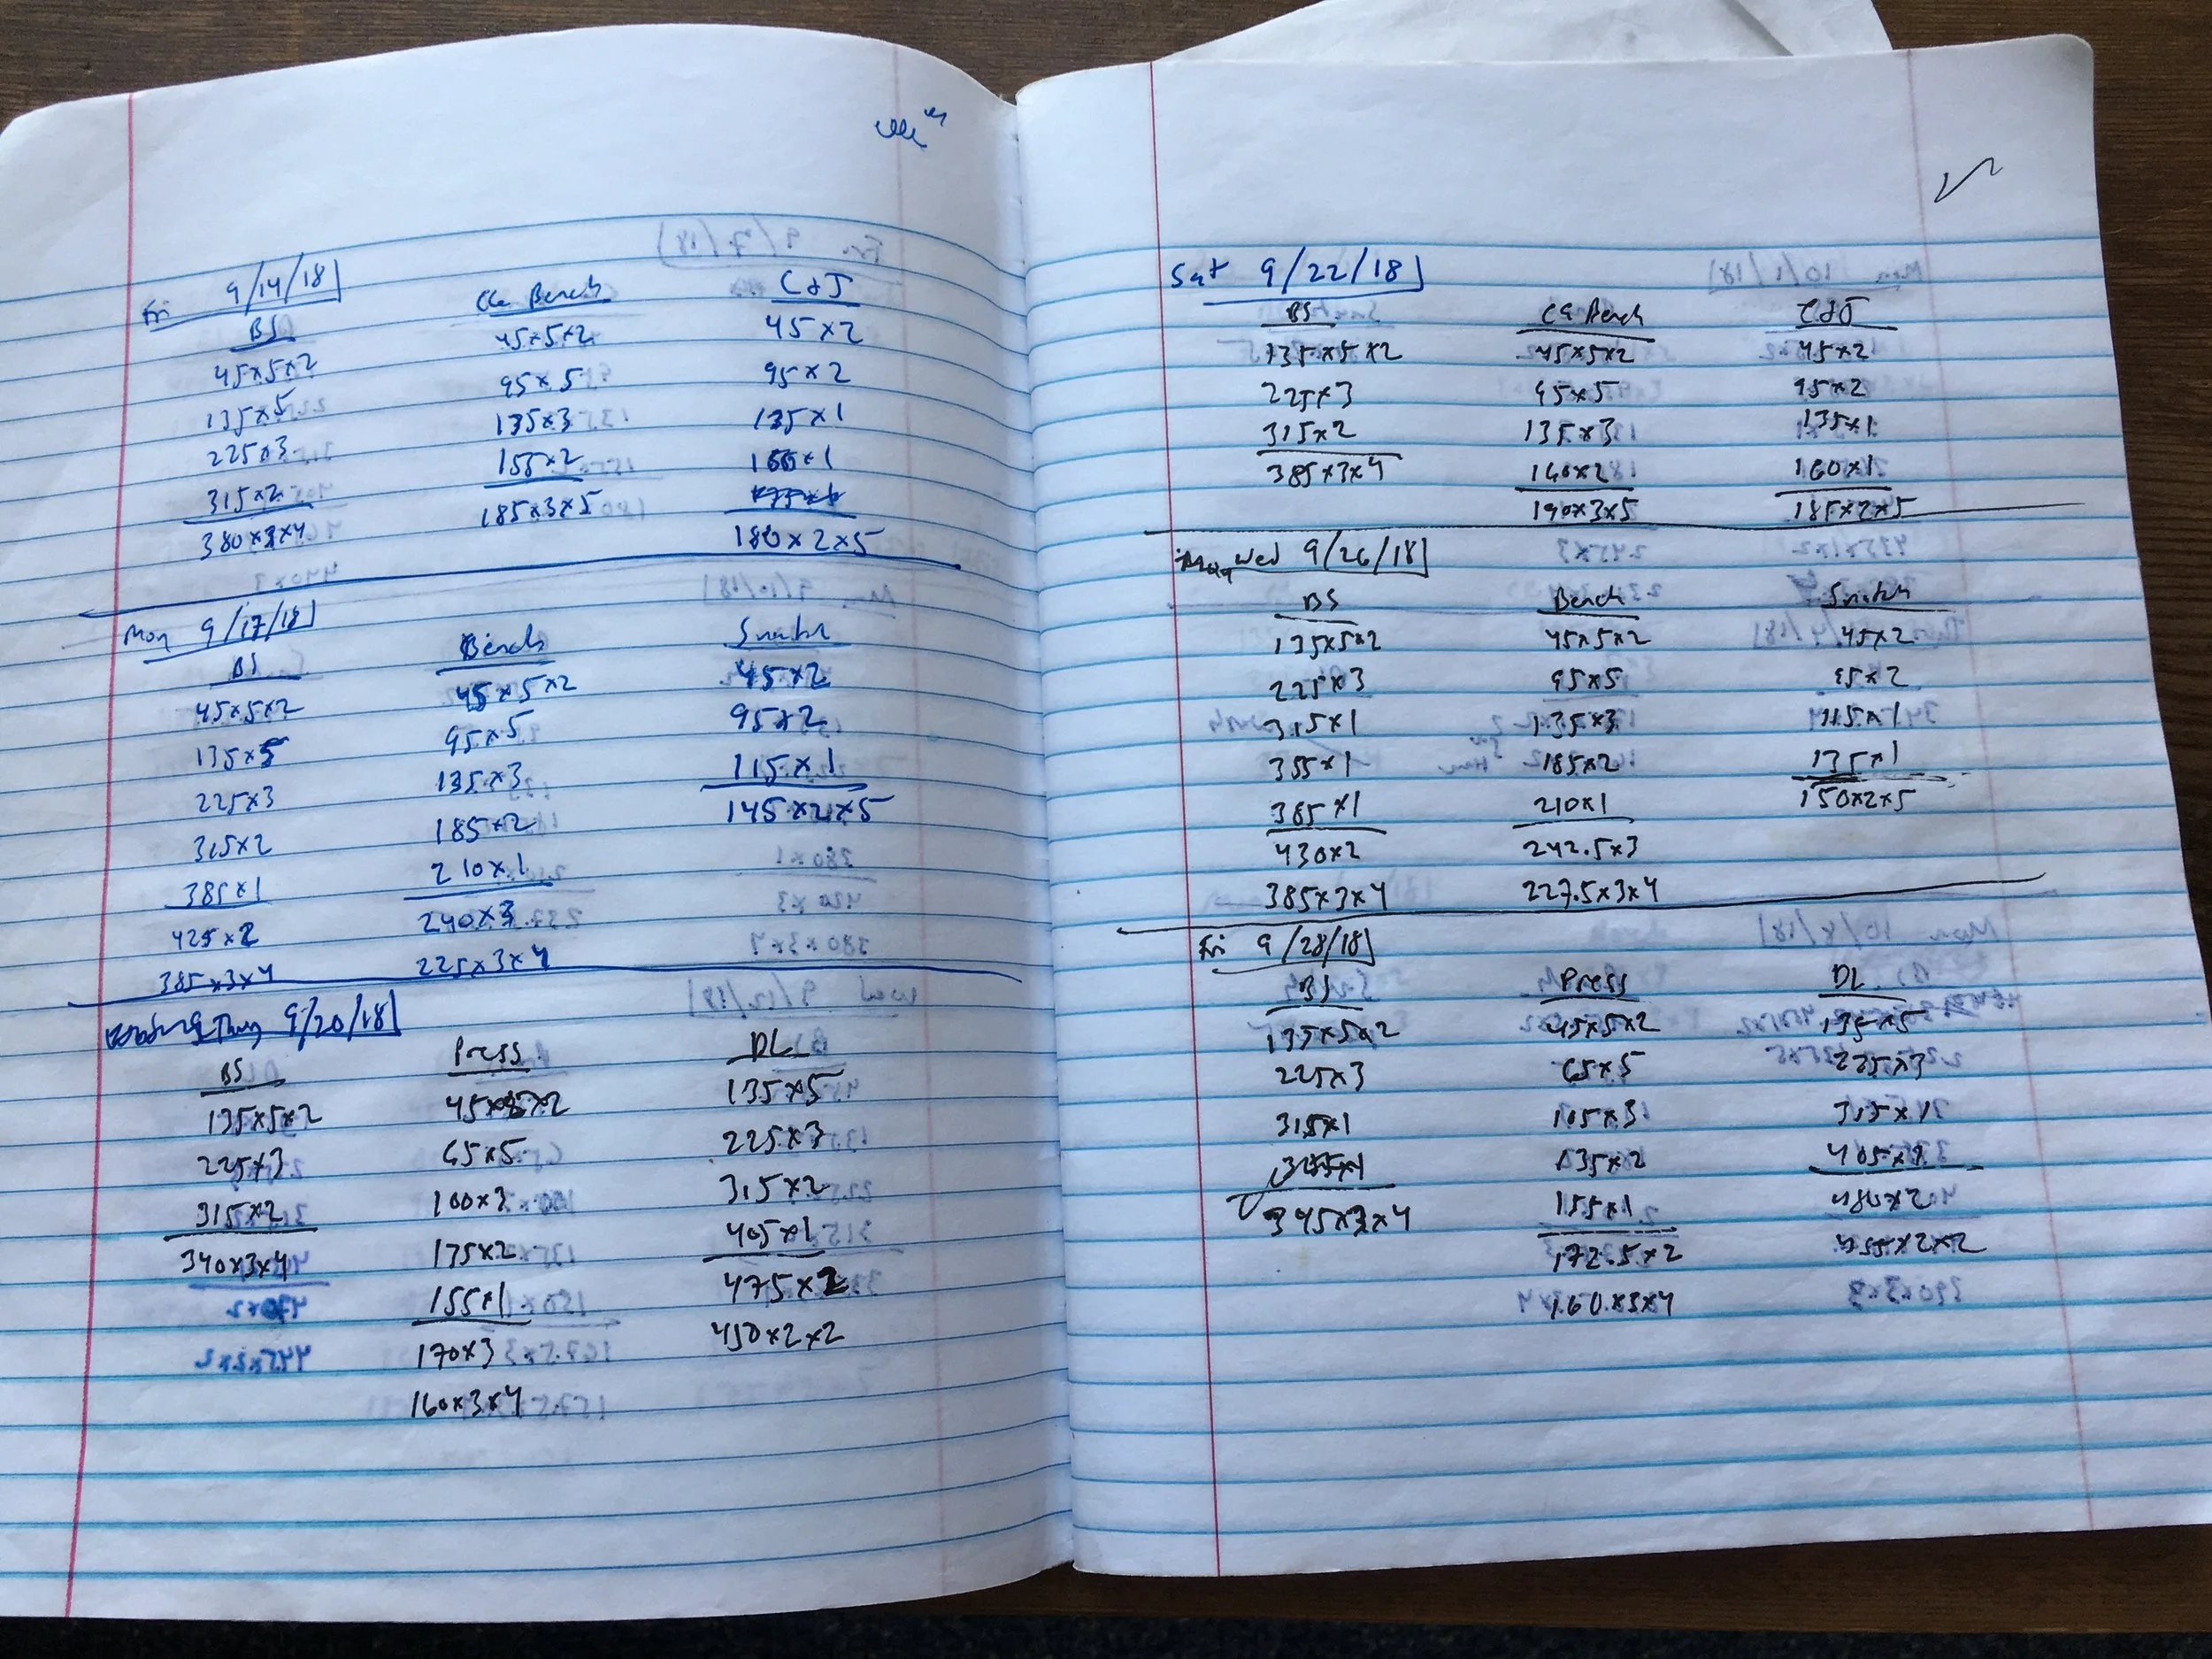
A simple composition notebook will serve you very well (click here), and below are two articles and a video to get you started on properly keeping a training log.

As always, we hope this helps you get stronger and live better.

-Phil

PS: Whenever you want even more Testify in your life, here are some free resources:

  • Book a free intro and strategy session with us HERE.

  • Pick up a free copy of Testify’s Squat Guide: 12 Tips to Improve Your Squat Now HERE.

  • Get our free weekly email - containing useful videos, articles, and training tips - HERE.

  • Follow Testify on Instagram HERE.

  • Subscribe to Testify’s YouTube channel HERE.

(Some links may be affiliate links. As an Amazon Associate, Testify earns from qualifying purchases.)

At Testify, we offer small group training, private coaching (in-person or remotely via Zoom), online coaching, and form checks. Interested in getting stronger, looking better, and having more energy?

Why is EVERYONE Failing Their Deadlifts? (WHAT’S REALLY GOING ON?)

A lot of people are failing their deadlifts for a reason that's completely and easily preventable. Starting Strength Coach Phil Meggers explains and demonstrates.

Whenever you want even more Testify in your life, here are some free resources:

  • Book a free intro and strategy session with us HERE.

  • Pick up a free copy of Testify’s Squat Guide: 12 Tips to Improve Your Squat Now HERE.

  • Get our free weekly email - containing useful videos, articles, and training tips - HERE.

  • Follow Testify on Instagram HERE.

  • Subscribe to Testify’s YouTube channel HERE.


At Testify, we offer small group training, private coaching (in-person or remotely via Zoom), online coaching, and form checks. Interested in getting stronger, looking better, and having more energy?

Chalk: Don't Be a Fool

(A Blast from the Past article originally posted on 12/30/22)

Chalk is not a particularly exciting topic of conversation, so if you’re looking for a scintillating article on the finer points of lifting, you’ve come to the wrong place today, my friend. That said, man, this conversation needs to be had every now and then, so here we go.

There are two types of chalk abusers in the gym. The first type consists of those who simply don't use chalk for whatever reason - they don't like the feel of it, or they don't think they need it. This particular type simply needs to get their minds right or pull a Kelly Clarkson and just walk away. Don’t kid yourself - if you’re not willing to use chalk, you’re wasting your time. It’s not efficient, and at some point, it’s a recipe for disaster.

However, we’re really here today to talk about the second type of chalk abuser. You know this lifter. He takes a perfectly good block of chalk - the Sacred Block - and breaks it into smaller pieces. He coats his hands - sometimes even the back of his hands - with a thick layer of magnesium carbonate and inevitably leaves a bunch of excess chalk on the platform when he’s done lifting. And of course, he gets chalk everywhere on the floor and equipment around him while he’s actually chalking up.

You, of course, are not such a lifter. Because you know better. But you know such a lifter, and just on the off chance that you talk to this lifter, you can remind him how “chalking up” is properly accomplished:

Correctly chalked hands - this guy’s ready to lift.

  1. Put your hands in the bucket.

  2. Take the block (Do Not Break the Block) or the powder and rub some chalk on both of your hands.

  3. Rub your hands together so that any loose chalk falls back in the bucket.

Note that this entire process takes place inside the chalk bucket, and this way, any loose chalk ends up back in the bucket and not on the floor.

Be kind to your chalk, be kind to your gym, and I hope this helps you get stronger and live better. Now, I’m going to get back to yelling at those meddling kids walking across my lawn.

-Phil

PS: Whenever you want even more Testify in your life, here are some free resources:

  • Book a free intro and strategy session with us HERE.

  • Pick up a free copy of Testify’s Squat Guide: 12 Tips to Improve Your Squat Now HERE.

  • Get our free weekly email - containing useful videos, articles, and training tips - HERE.

  • Follow Testify on Instagram HERE.

  • Subscribe to Testify’s YouTube channel HERE.

(Some links may be affiliate links. As an Amazon Associate, Testify earns from qualifying purchases.)


At Testify, we offer small group training, private coaching (in-person or remotely via Zoom), online coaching, and form checks. Interested in getting stronger, looking better, and having more energy?

Wraps and Straps and Gloves, Oh My!

(A Blast from the Past article originally posted on 09/30/22)

You’re a lifter, so of course, you’ve got to accessorize. But with all the options for lifting gear and accessories out there, what’s useful and what’s garbage? This article is the first in a short series covering exactly that, and today’s topic is gear associated with your grip.

Lifting Straps
Also known simply as “straps” or sometimes “wrist straps” (which is inaccurate), straps are useful for pulling movements, such as deadlifts, rows, and even snatches. Do NOT use them for cleans, and it’s worth pointing out they are actually worn on the hand and not the wrist itself.

They save some wear and tear on the hands, and if you’ve got multiple sets on the deadlift, then a reasonable approach is to use your usual grip for the first set (hook grip or alternate grip) and then use straps for the remaining sets.

You can buy straps or make them (quite cheaply!), and we’ve got a few videos covering how to make them as well as use them.

Wrist Wraps
These are useful for pressing movements such as the press, bench press, close grip bench press, etc. Wrist wraps provide stability for the wrist by acting as a sort of belt or cast for the wrist. When the weights get challenging, a good approach is to warm up (mostly) without wrist wraps and then put your wraps on (tightly!) for your last warm up as well as your work sets.

Not surprisingly, we have a few videos covering this topic as well.

Gloves
Nope. Don’t use ‘em. They add something squishy and deformable between your hand and the bar, which is never good for force transfer. Also, because they add a layer between your hand and the bar, they effectively make the bar diameter larger, which makes it harder to keep your grip when pulling the bar off the floor with deadlifts, rows, etc.

Lifting gloves are stupid. I know this firsthand because I have worn them in a previous life. Don’t use them.

Ahem, we do not have a video on this topic.

Chalk
We’ll save this discussion for another day, but suffice to say chalk is very important for your grip. Use chalk.

As always, we hope this helps you get stronger and live better.

(Some links may be affiliate links. As an Amazon Associate, Testify earns from qualifying purchases.)

If you found this helpful, you’ll love our weekly email. It’s got useful videos, articles, and training tips just like the one in this article. Sign up below, and of course, if you don’t love it, you can unsubscribe at any time.


At Testify, we offer small group training, private coaching (in-person or remotely via Zoom), online coaching, and form checks. Would you like to get quality coaching from a Starting Strength Coach?

Cleans vs Power Cleans vs Hang Cleans - What's the Difference?!

Cleans, hang cleans, power cleans, hang power cleans - what are the differences between these lifts, and how can we remember these differences in an easy and practical manner? To sort this out, we first need to understand two words - hang and power.

HANG
Hang refers to a starting position, so if you see the word hang, then you know the lift starts with the bar hanging in your hands. Common hang positions include the mid-thigh, low thigh, above the knee, below the knee, and even mid-shin, but most often (without any other specific qualifiers), hang typically refers to a start position at the mid to low thigh. 

Finally, note that if you don’t see the word hang, then you know the lift starts with the bar resting on the floor.

POWER
Power refers to a landing position (AKA receiving position), i.e., the position in which you catch or rack the bar. When you see the word power, simply think partial squat (tip: power and partial both start with the letter “p”). Thus, if you see the word power, you’re going to receive the clean in a partial depth squat (i.e., not a full depth squat). If you don’t see the word power, then you know you’re going to receive the clean in a full depth squat.

Now that you’ve got those two terms down, it’s time for the actual lifts . . 

CLEAN (AKA squat clean or full clean)
Since you don’t see the word hang, the bar starts on the floor, and since you don’t see the word power, it’s not received in a partial squat and is therefore received in a full depth front squat before being stood up. 

In summary, the clean starts with the bar on the floor, the bar is accelerated upward, it is received in a full depth front squat, and then the lifter recovers (i.e., stands up).

POWER CLEAN
You don’t see the word hang, so the bar starts on the floor, but you do see the word power, so the bar is received in a partial depth front squat.

In summary, the power clean starts with the bar on the floor, the bar is accelerated upward, it is received in a partial depth front squat, and then the lifter recovers.

HANG CLEAN
You see the word hang, so the bar starts hanging in the lifter’s hands, but you don’t see the word power, so the bar is received in a full depth front squat.

In summary, the hang clean starts with the bar hanging in the hands, the bar is accelerated upward, it is received in a full depth front squat, and then the lifter recovers.

HANG POWER CLEAN
Not surprisingly, this is a combination of both the power clean and the clean - the love child of both of those lifts. You see the word hang, so the bar starts hanging in the lifter’s hands, and you also see the word power, so the bar is received in a partial depth front squat.

In summary, the hang power clean starts with the bar hanging in the hands, the bar is accelerated upward, it is received in a partial depth front squat, and then the lifter recovers.

By knowing what hang and power mean - and knowing what it means when those words aren’t present - you’ll be able to consistently figure out these variations of the clean. As always, we hope this helps you get stronger and live better.

(Some links may be affiliate links. As an Amazon Associate, Testify earns from qualifying purchases.)

If you found this helpful, you’ll love our weekly email. It’s got useful videos, articles, and training tips just like the one in this article. Sign up below, and of course, if you don’t love it, you can unsubscribe at any time.


At Testify, we offer small group training, private coaching (in-person or remotely via Zoom), online coaching, and form checks. Would you like to get quality coaching from a Starting Strength Coach?

2 Deadlifting Pieces of Equipment You NEED to Have!

Let’s quickly cover two pieces of equipment that will make you better at deadlifting . . . instantly.

Item #1: Long Socks
We are talking very long - socks that go above your calves (i.e., almost to your knees). You will simply be better at keeping the bar close when wearing long socks. Sweatpants and leggings will do just fine as well, but long socks are so much more stylish.

“But Phil, I’m already pretty good at keeping the bar close.” Good for you, and in this case, you already know that - every once in a while - you nick your shin with the bar. Shins bleed easily, and now that you’ve done this, it is annoyingly easy to catch that new scab with the bar and break it open again.

Because of this - whether consciously or subconsciously - you now try to avoid hitting that scab. As a result, you are suddenly worse at keeping the bar close to your legs, and this makes your deadlifts that much harder. So . . . wear long socks.

As an additional note, you might not care if you get a little bloody when you deadlift, but everyone else who has to use that same barbell does indeed care, so do your training companions a favor. Wear long socks and keep your DNA off the bar.

Item #2: Chalk
We’ve covered this before, and we’ll cover it again - chalk is hugely useful for all of the lifts, but it is especially useful for pulling lifts such as the snatch, clean, and deadlift. Rock climbers and gymnasts use it to save their lives - we’re just using it to save our deadlifts. But the reason for its use remains the same - it absorbs the sweat and natural oil from your hands so that you have as much friction as possible when taking your grip.

Don’t like using chalk? You have two options - pull a Kelly Clarkson and just walk away since you’ve decided not to lift today or put on your big boy (or big girl) pants and use chalk because it’s the intelligent thing to do.

It makes your current deadlifts easier, and it allows you to lift more weight with less effort, which allows you to get stronger more efficiently. We’ve had numerous conversations with members who started using chalk a bit later than they should have (which is on day one) and were astounded at how much of a difference it made.

A reasonable approach is to rub some chalk onto your hands when you start warming up the deadlift (brush your hands together lightly to get rid of any loose chalk) and then chalk up again when you get to your work set.

As always, we hope this helps you get stronger and live better.

(Some links may be affiliate links. As an Amazon Associate, Testify earns from qualifying purchases.)

If you found this helpful, you’ll love our weekly email. It’s got useful videos, articles, and training tips just like the one in this article. Sign up below, and of course, if you don’t love it, you can unsubscribe at any time.


At Testify, we offer small group training, private coaching (in-person or remotely via Zoom), online coaching, and form checks. Would you like to get quality coaching from a Starting Strength Coach?