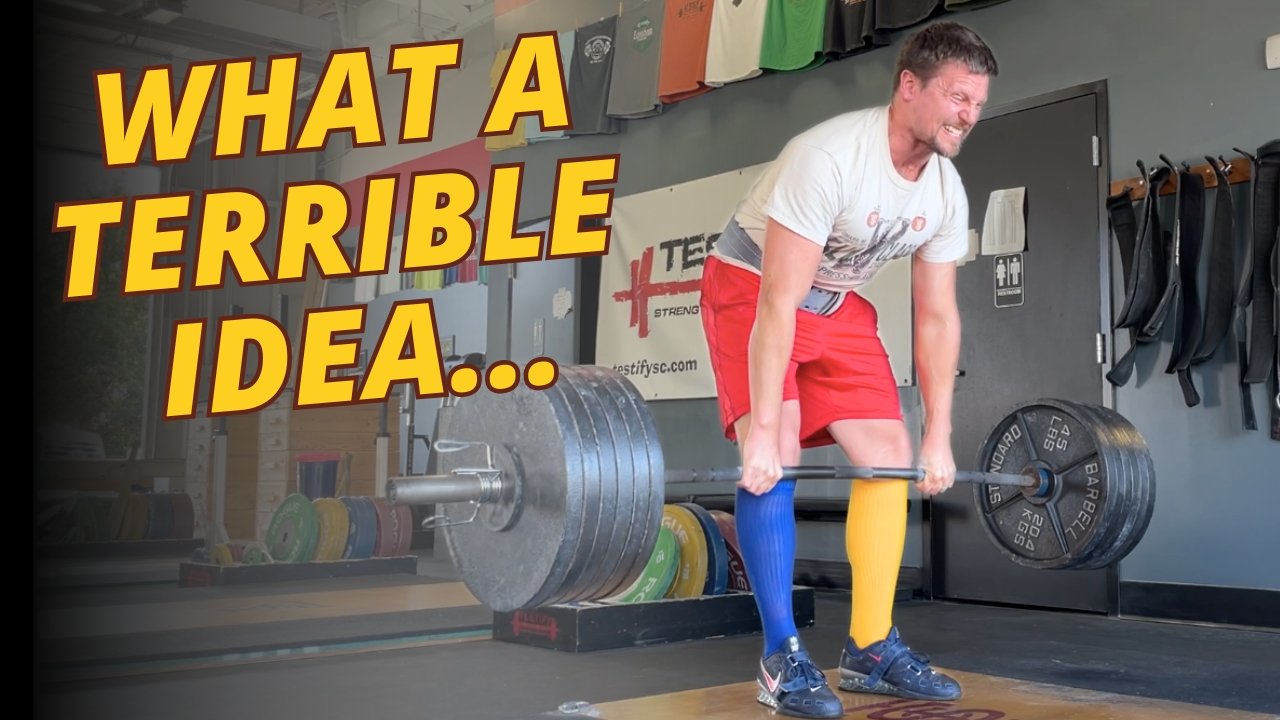
STOP Making These MISTAKES With Your Lifting Gear | Part 1: Straps, Wraps, Plates, and more…

There are all sorts of errors people make with their lifting gear, so let’s get some things straightened out in this multi-part series. In today’s article, we’re covering errors 1 - 7.

Error #1: Lifting Straps
Don’t wear your lifting straps up on your wrists. Whether you use the style of strap we make or if you use the strap-and-loop style, lifting straps are designed to be worn down on the hand.
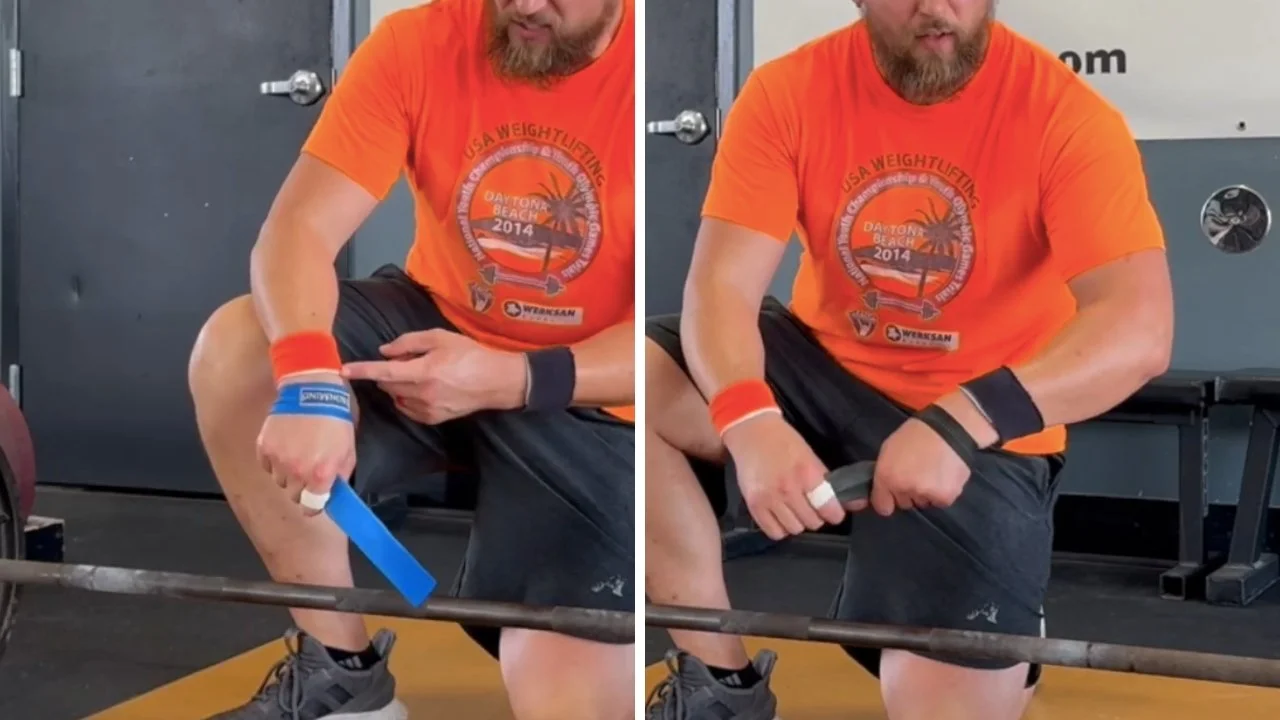
correct position for straps - whether strap-and-loop-style (left) or quick-release (right)

Error #2: Lifting Belt
Don’t wear your lifting belt loosely.

A lifting belt should be snug – it should feel tight. If you’re new to using a lifting belt, and if you’re wearing it correctly, it probably needs to feel uncomfortably tight at first.

A properly worn belt helps you brace harder – a loosely worn belt is just a fashion accessory.

Error #3: Straps . . . Again
Don’t use cloth straps.

Cloth straps wear poorly over time and will eventually tear at an inopportune moment.

We use climbing webbing to make ours, and as a result, they’re nearly indestructible. IronMind makes some excellent, durable straps out of a similar type of webbing (as do some other manufacturers), and seat belt straps are a great choice of material as well.

Error #4: Wrist Wraps
Don’t wear your wrist wraps too low on the arm.

If your wrap is low enough that you can easily flex and extend your wrist (I.e., bend it forward and backward), you’ve defeated the entire purpose of the wrist wrap.

A wrist wrap should help stabilize your wrist – its job is to prevent movement. With this in mind, make sure it actually covers the wrist. This means it will cover some of the hand and some of the arm. 

When in doubt, wrap it a bit higher than you think you should and see if that helps stabilize the wrist. It should be difficult to bend the wrist forward and backward.

Watch the short video below to see this error (and others) as well as the solution.

Error #5: Loading Metal Plates
Don’t load your metal plates onto the barbell with the numbers facing outward.

The numbers face inward - always. This allows you to have a solid purchase on the lip of the plate, which makes it easier to lift and handle the plates. This also makes it less likely that you will suffer lifting’s most common injury – a broken toe (i.e., from dropping a plate on your foot).

nate loades the plates incorrectly (left photo with numbers facing outward) and correctly (right photo with numbers facing inward)

There are a few reasons plates might be loaded with the numbers facing outward. First, it is usually a requirement at powerlifting meets – specifically, the first plate is loaded “numbers in” and all subsequent plates are loaded “numbers out.” This rule was probably created by equipment manufacturers who also sponsored meets and wanted to make sure their company name was as visible as possible.

Second, fitness influencers love to do this. Perhaps it looks better for the viewing public – I’m not sure, but it’s still silly.

Third, it’s possible that a lifter is sponsored by a plate manufacturer, and in this case, he might endeavor to have the company name visible whenever possible.

Last, a lifter simply might not know any better. He might not know how easy it is to grab the lip of every plate with your fingers. This is the only sensible reason, and after reading this article, you know better.

“Numbers in” is far superior to “numbers out,” and it’s common sense once you’ve done it.

Error #6: Lifting Straps . . . Seriously?
Don’t wear your strap-and-loop-style straps with the tail pointing the wrong way.

With this style of straps, you feed the tail through the loop so that the straps are mirror images of each other, and thus they are right- and left-hand specific. Wear them so that the tail of the strap points toward your thumb (i.e., toward the middle of the bar) and not toward your pinky.

Incorrect: tail pointing toward pinky (left photo) vs correct: tail pointing toward thumb (right photo)

Error #7: Lifting Straps . . . Last Time
Don’t wrap your straps toward the outside of the bar.

This should be a difficult mistake to make if you’ve taken care of error #6. Nonetheless, it’s worth remembering that you wrap the strap toward the center of the bar – not toward the collar of the bar.

Watch the short video below to see this error (and others) as well as the solution.

Straps wrap inward – never outward.

As always, we hope this helps you get stronger and live better.

-Phil

PS: Whenever you want even more Testify in your life, here are some free resources:

  • Book a free intro and strategy session with us HERE.

  • Pick up a free copy of Testify’s Squat Guide: 12 Tips to Improve Your Squat Now HERE.

  • Get our free weekly email - containing useful videos, articles, and training tips - HERE.

  • Follow Testify on Instagram HERE.

  • Subscribe to Testify’s YouTube channel HERE.

(Some links may be affiliate links. As an Amazon Associate, Testify earns from qualifying purchases.)


At Testify, we offer small group training, private coaching (in-person or remotely via Zoom), online coaching, and form checks. Interested in getting stronger, looking better, and having more energy?

The Gym Gear Nobody Talks About... But Everyone Needs.

Anyone can show up and lift. Training, however, requires intention - and a few specific items almost no one talks about. In this video, Starting Strength Coach Phil Meggers breaks down the overlooked gym gear that makes the difference between exercising and actually getting stronger.

Whenever you want even more Testify in your life, here are some free resources:

  • Book a free intro and strategy session with us HERE.

  • Pick up a free copy of Testify’s Squat Guide: 12 Tips to Improve Your Squat Now HERE.

  • Get our free weekly email - containing useful videos, articles, and training tips - HERE.

  • Follow Testify on Instagram HERE.

  • Subscribe to Testify’s YouTube channel HERE.


At Testify, we offer small group training, private coaching (in-person or remotely via Zoom), online coaching, and form checks. Interested in getting stronger, looking better, and having more energy?

What Most Lifters Never Learn About Weight Lifting Plates (15 facts)

Confused about weight lifting plates, kilgrams vs pounds, metal plates vs bumpers, numbers in vs numbers out, etc.? Starting Strength Coach Phil Meggers covers it all and clears up the confusion.

Whenever you want even more Testify in your life, here are some free resources:

  • Book a free intro and strategy session with us HERE.

  • Pick up a free copy of Testify’s Squat Guide: 12 Tips to Improve Your Squat Now HERE.

  • Get our free weekly email - containing useful videos, articles, and training tips - HERE.

  • Follow Testify on Instagram HERE.

  • Subscribe to Testify’s YouTube channel HERE.


At Testify, we offer small group training, private coaching (in-person or remotely via Zoom), online coaching, and form checks. Interested in getting stronger, looking better, and having more energy?

What’s in Your Gym Bag? A Quick & Dirty Guide to Personal Lifting Gear

What gear should you have in your gym bag (or at home) when it’s time to train? Let’s dive in, and we’ll provide plenty of additional resources for each item along the way.

Heads up - the last item in this article is the most important, so keep reading.

Lifting Shoes
Lifting shoes have a rigid, non-compressible sole, a slightly elevated heel, and one or two metatarsal straps. They provide an extremely solid base of support and therefore permit efficient force transfer between you and the floor.

Big deal. Big. Huge.

For a more in-depth treatment of lifting shoes and the rationale for using them, click on the article below or watch the included video.

LIFTING SHOES: The Complete Guide to the Best and WORST Shoes! (Lifting Gear Series)

A number of manufacturers make quality lifting shoes - Nike, Do-Win, Inov-8, and Adidas are just a few of the more well-known brands. Below are some of the shoe recommendations and links we usually send to new members as a starting point for shopping:

Note: I would not recommend the Adidas Powerlift or any other lifting shoe with a compressed foam sole. The Powerlift is fairly popular due to its price point and is certainly still better than non-lifting shoe options, but the sole is not as rigid as we’d like, and quite simply, there are better options (such as its sibling, the Adidas Adipower 3).

A final note - Chuck Taylors are not lifting shoes. They are squishy and therefore provide lousy force transfer between you and the floor. Walk in Chucks. Don’t lift in Chucks.

Lifting Belt
A quality lifting belt helps you provide rigidity and stability when lifting. As a result, it allows you to have efficient force transfer from the things generating force in a given lift all the way to the barbell - e.g., transferring force from the hips and the legs in the squat through your rigid midsection (i.e., trunk) up to the barbell sitting on your back.

Some people can use a belt with a 4” width, and some people need a 3” belt (or even a 2.5” belt). For more information on belt widths as well as everything else belt-related, check out the article below or watch the included video.

LIFTING BELTS: The Complete Guide and What NOT to Get! (Lifting Gear Series)

A quality belt will last years - possibly your entire training career - so invest in a good one. With this in mind, here are a few belt options we typically recommend:

Knee Sleeves
Most people will come to appreciate and benefit from knee sleeves at some point in their lifting careers. They provide warmth and compression to the knees (specifically for squatting), and your knees will probably appreciate this greatly.

Sleeves are typically made of neoprene and most often come in 5 mm or 7 mm thicknesses. Skip the 5 mm option and go with the 7 mm sleeves.

For a more in-depth treatment on knee sleeves, check out the article below or watch the included video.

KNEE SLEEVES: The Complete Guide and the BEST Way to Put Them On (Lifting Gear Series)

Below are a few solid options for sleeves that we commonly recommend to our members:

Wrist Wraps
Wrist wraps (or simply “wraps”) provide support for your wrists, come in pairs, and each wrap typically includes a thumb loop at one end, the elastic body of the wrap, and then a velcro closure system at the other end of the wrap.

Since wraps provide stability to the wrist joint, they are very useful for pressing movements (e.g., press and bench press) and are also sometimes used when snatching, cleaning, or jerking.

For more information on wrist wraps, check out the article below or watch the included video.

WRIST WRAPS: The Complete Guide and How NOT to Put Them On! (Lifting Gear Series)

18” and 24” are the most common lengths, and here are some solid options:

Lifting Straps
Straps (not to be confused with wraps) are very useful for pulling movements such as deadlifts, rows, and possibly even snatches (don’t ever use them for cleans - it’s a good way to break a wrist).

When you start training, perform all of your deadlift work sets with either a hook grip or a mixed grip (and chalk, of course). Over time, however, you’ll find that straps can be a useful tool when training the pulls.

You can easily make your own straps in about 2 minutes, and we cover that in the video below (these are the straps that I use and that we make for our members).

If you prefer to buy your straps instead of making them yourself, IronMind provides some good options:

Here’s a quick video that covers how to use straps:

A final note on straps - don’t purchase or use cloth straps. They will eventually tear, and it will inevitably happen at a very unfortunate moment.

Fractional Plates
You’ll want to make smaller jumps on the press and the bench press over time, i.e., smaller than the typical 5 lb jump permitted by two 2.5 lb plates. Females and older lifters will also want to make smaller jumps on the squat and deadlift, and such increments are also useful for the Olympic lifts. 

With this in mind, get yourself a set of fractional plates. We cover this more in the video below:

We have several sets of the 44Sport fractional plates (click here) at Testify, and they are used daily. They are a solid option, but there are many other choices out there as well.

Chalk
If you train, use chalk. Chalk absorbs the natural moisture and oils of your hands (and that of whatever doofus used the bar before you at the commercial gym) so that you have better friction - much better friction - between you and the barbell.

If you deadlift without chalk, stop kidding yourself. You’re not training - you’re just wasting time in the gym.

If your gym doesn’t provide chalk, bring your own. If your gym doesn’t allow chalk, sneak it in anyway or find another gym. It’s that important. The difference between chalk and no-chalk on your deadlift may well be over 100 lb.

We use Spider Chalk (click here) at Testify as the blocks are very dense and remain intact longer than other brands. If you need to be sneaky about your chalk use, I’d recommend liquid chalk (click here).

Training Log
Your training log is your most important piece of equipment.

Everything else - shoes, belt, wraps, barbell, etc. - can be replaced, but your training log contains your personal training history. It’s the one thing that can’t be replaced.

Because your log contains your history and thus where you’ve been (in the training sense), it’s also the guide to where you want to go.

A simple composition notebook will serve you very well (click here), and below are two articles and a video to get you started on properly keeping a training log.

As always, we hope this helps you get stronger and live better.

-Phil

PS: Whenever you want even more Testify in your life, here are some free resources:

  • Book a free intro and strategy session with us HERE.

  • Pick up a free copy of Testify’s Squat Guide: 12 Tips to Improve Your Squat Now HERE.

  • Get our free weekly email - containing useful videos, articles, and training tips - HERE.

  • Follow Testify on Instagram HERE.

  • Subscribe to Testify’s YouTube channel HERE.

(Some links may be affiliate links. As an Amazon Associate, Testify earns from qualifying purchases.)


At Testify, we offer small group training, private coaching (in-person or remotely via Zoom), online coaching, and form checks. Interested in getting stronger, looking better, and having more energy?