Wraps and Straps and Gloves, Oh My!

(A Blast from the Past article originally posted on 09/30/22)

You’re a lifter, so of course, you’ve got to accessorize. But with all the options for lifting gear and accessories out there, what’s useful and what’s garbage? This article is the first in a short series covering exactly that, and today’s topic is gear associated with your grip.

Lifting Straps
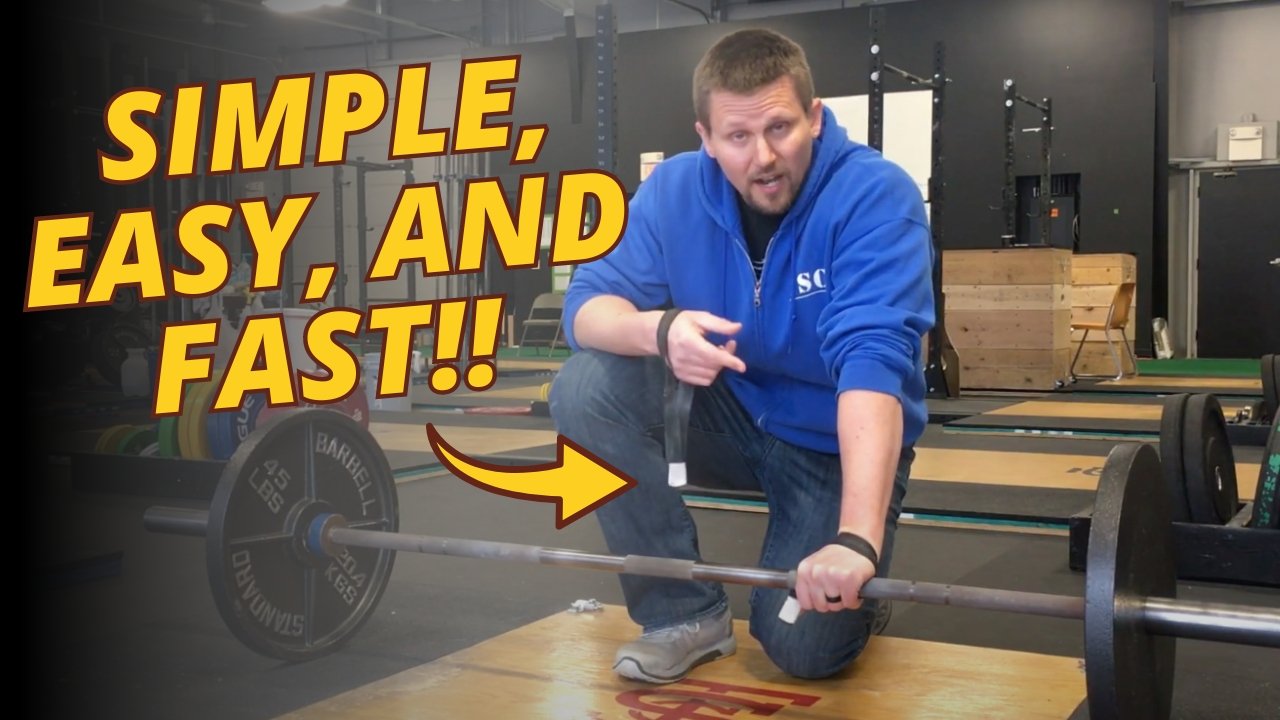
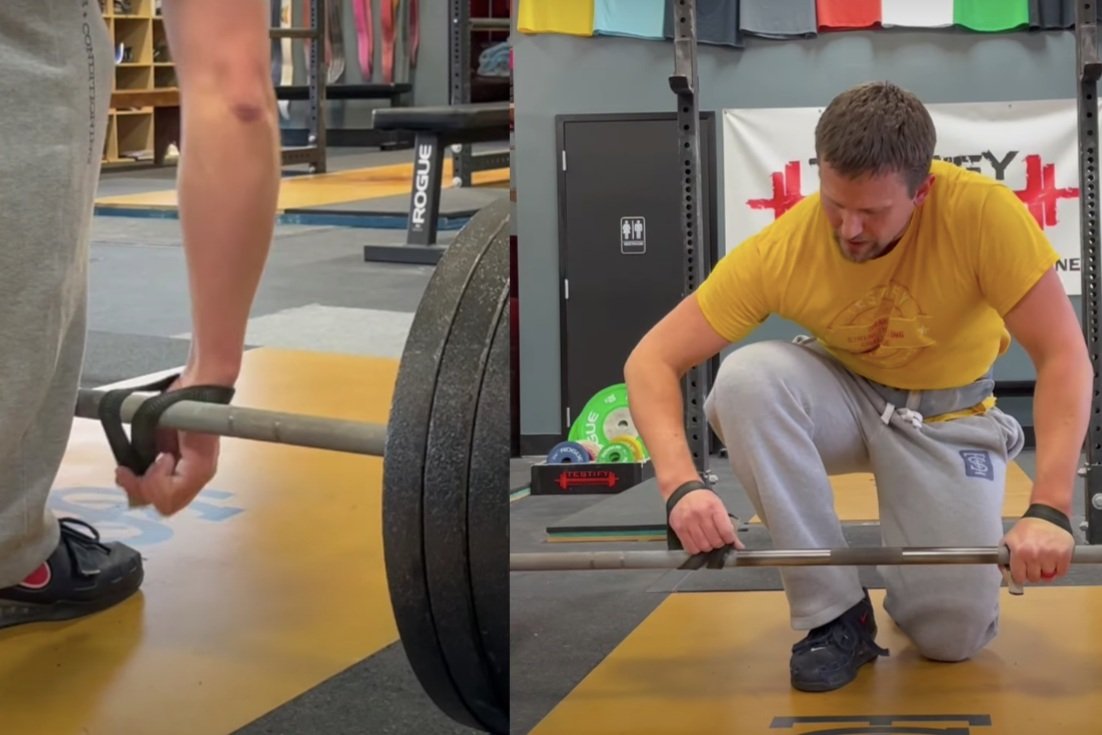
Also known simply as “straps” or sometimes “wrist straps” (which is inaccurate), straps are useful for pulling movements, such as deadlifts, rows, and even snatches. Do NOT use them for cleans, and it’s worth pointing out they are actually worn on the hand and not the wrist itself.

They save some wear and tear on the hands, and if you’ve got multiple sets on the deadlift, then a reasonable approach is to use your usual grip for the first set (hook grip or alternate grip) and then use straps for the remaining sets.

You can buy straps or make them (quite cheaply!), and we’ve got a few videos covering how to make them as well as use them.

Wrist Wraps
These are useful for pressing movements such as the press, bench press, close grip bench press, etc. Wrist wraps provide stability for the wrist by acting as a sort of belt or cast for the wrist. When the weights get challenging, a good approach is to warm up (mostly) without wrist wraps and then put your wraps on (tightly!) for your last warm up as well as your work sets.

Not surprisingly, we have a few videos covering this topic as well.

Gloves
Nope. Don’t use ‘em. They add something squishy and deformable between your hand and the bar, which is never good for force transfer. Also, because they add a layer between your hand and the bar, they effectively make the bar diameter larger, which makes it harder to keep your grip when pulling the bar off the floor with deadlifts, rows, etc.

Lifting gloves are stupid. I know this firsthand because I have worn them in a previous life. Don’t use them.

Ahem, we do not have a video on this topic.

Chalk
We’ll save this discussion for another day, but suffice to say chalk is very important for your grip. Use chalk.

As always, we hope this helps you get stronger and live better.

(Some links may be affiliate links. As an Amazon Associate, Testify earns from qualifying purchases.)

If you found this helpful, you’ll love our weekly email. It’s got useful videos, articles, and training tips just like the one in this article. Sign up below, and of course, if you don’t love it, you can unsubscribe at any time.


At Testify, we offer small group training, private coaching (in-person or remotely via Zoom), online coaching, and form checks. Would you like to get quality coaching from a Starting Strength Coach?

What You Don't Know About Your Barbell is KILLING Your Lifts (Barbell Basics)

If you don't know this about the barbell you lift with, you might be messing up your lifts. Starting Strength Coach Phil Meggers covers the difference between power bars, weightlifting bars (i.e., Olympic bars), dual-knurl bars, and how to easily tell the difference.


At Testify, we offer small group training, private coaching (in-person or remotely via Zoom), online coaching, and form checks. Click the button below to get quality coaching from a Starting Strength Coach and start getting stronger TODAY.

Testify Today - October 7, 2024

THIS WEEK'S SUBMISSION

From our video LIFTING BELTS: The Complete Guide and What NOT to Get! (Lifting Gear Series) (click the title to watch):

Alex M
that screwdriver tip is genius!

Phil
Thanks – glad you liked it!


TESTIFY ONLINE COACHING

Want to get stronger working remotely with one of our Starting Strength Coaches? Click here to contact us and learn more.

Get Stronger. Live Better. Start today.


ARTICLES & VIDEOS

The Bench Press DISASTER You Had No Idea You Were Causing
Got a weak bench press? You might be missing out on a vital aspect of the lift that's commonly forgotten. Click here to watch.


The Mistake That is RUINING Your Lifts! | Never Do This Again
Every lifter makes the mistake of a misload now and then, and it can really ruin your day. We give you a few quick tips to prevent it. Click here to read.


Blast from the Past: Starting Strength Squat/Low Bar Squat | Fix Your KNEES!
Are your awful knees ruining your squat? In this video - our 2nd in a series of Saturday Shorts on fixing the squat - Phil quickly discusses and demonstrates how to solve this problem. Click here to watch.


Blast from the Past: How to Use Lifting Straps
Save your thumbs and your delicate, little baby hands as Phil shows you how to use your lifting straps. No hook grip, no mixed grip, and you'll look super cool. Click here to read.


“GET STRONGER - LIVE BETTER” SHIRTS ARE AVAILABLE!

Why do you train? Because getting stronger makes everything else easier. Get stronger. Live better. “Testify” to this message and represent your favorite gym with this shirt in several color options.

Click here to head to the Testify Store.


WHAT'S COMING UP

Below are a few of our upcoming events, and you can find out what else is on the calendar by heading to our events page at www.testifysc.com/events.

Testify Fall Classic

  • October 26, 2024

  • The annual Testify Fall Classic is back, and we invite you to be a part of it! This is a strengthlifting meet, which means the contested lifts will be the squat, press, and deadlift.

  • Click here to register or for more information.

Benching Bonanza! The Annual Testify Bench Press Jubilee

  • November 22, 2024

  • Benching Bonanza is a strength meet wherein the only contested lift is - you guessed it - the bench press. There will be one bar, and the meet will be conducted in a "rising bar" format, so the weight on the bar only goes up! It'll be a ton of fun, so come on out!

  • Click here to register or for more information.

Barbell Blizzard! A Winter Wonderland of Weights

  • December 14, 2024

  • Barbell Blizzard is a team strength meet wherein the contested lifts will be the squat, press, bench press, and deadlift. Competitors will form teams of 2-4 lifters/team and perform all 4 lifts; each lifter will receive 3 attempts for each lift.

  • Click here to register or for more information.


IN OTHER NEWS . . .
There will be a small price increase for members who have grandfathered membership rates. Please be on the lookout for an email with the details (only members with grandfathered rates will receive an email from me).  If you have any questions or concerns, please reach out to me at barb.mueller@testifysc.com

Thank you for your understanding and commitment to getting stronger with us at Testify Strength & Conditioning!

Barb Mueller
barb.mueller@testifysc.com


THIS WEEK’S CONDITIONING

Option 1
Sled
Outdoors:
10 rounds of:
Push sled 100 ft
Pull sled 100 ft (hand over hand)

Indoors:
20 rounds of:
Push sled 50 ft
Pull sled 50 ft (hand over hand)

Compare to 2024.08.05.

Option 2
5 rounds:
10 cal bike
1 min rest
4 sandbag-over-bars
1 min rest

Set the yoke crossmember at 35/33, and the weight is 150#/75#.

Compare to 2024.07.15.

Option 3
5-10 rounds:
50 ft yoke carry
50 ft yoke push
100 ft sandbag carry and S.O.B. (sandbag-over-bar)

Perform 1 round every 2-3 minutes.

Compare to 2024.06.17.

Option 4
Row/Tire 10 min ladder:
2 cal row
2 tire flips
4 cal row
4 tire flips
6 cal row
6 tire flips

Climb the ladder as high as possible in 10 minutes.

Compare to 2024.06.17.


As always, we hope this helps you get stronger and live better!

The Mistake That is RUINING Your Lifts! | Never Do This Again

Stop making this mistake when you're lifting. New lifters commit this error regularly, and to be fair, even experienced lifters make this mistake once in a while.

The Problem
What mistake are we talking about? The error of misloading the barbell. Let’s quickly address two things - first, how to notice the problem when it happens (and the sooner the better), and second, how to ideally prevent it from happening in the first place.

How to Notice a Misload: Version #1
Suppose you’re preparing for your squat work sets - they’re going to be challenging, and you really don’t want to end up squatting the wrong weight. If you’re training with a buddy, an ideal approach is to ask him to do a “bar math” check. Don’t tell your pal what the weight is supposed to be - simply ask him to do the math and tell you the answer. By not telling him what the weight is supposed to be, you haven’t biased his calculations, and if you both arrive at the same number, you’ve probably got the bar loaded correctly.

If, on the other hand, you arrive at different numbers, then you know you’ve got some double-checking to do before you start to squat.

How to Notice a Misload: Version #2
It’s ideal to catch the misload before it happens, but more commonly, you’ll notice a misload after you’ve already lifted it.

For example, you plan on squatting 155 lb, and you’ve already got 135 lb loaded up (i.e., the 45 lb bar and one 45 lb plate on each side). You think to yourself, “I need 20 lb more to get to 155, so I need two 10 lb plates,” and then you proceed to absentmindedly add two 10 lb plates to each side of the bar, resulting in a total weight of 175 lb instead of the desired 155 lb.

You might survive the set or you might fail, but the end result is that the set is much tougher than you had anticipated. On the flip side, you might unknowingly underload the bar, in which case you notice that the set was easier than expected.

Either way, it’s these thoughts - the realization that “Hmm, that was way tougher than it should have been” or “Man, that was a piece of cake!” - that should alert you to double check the weight on the bar.

Sometimes, of course, you’re just having a rough day, in which case suck it up Buttercup - that’s the weight on the bar, and you’re going to keep squatting it. On the other hand, you might be having a great day, in which case go ahead and celebrate the fact that things are moving so well.

However, quite often, these realizations occur because you’ve misloaded the bar, so always double check in these situations.

How to Prevent a Misload: What NOT To Do
Preventing a misload has everything to do with how you go about doing your bar math, i.e., how you mentally add the plates onto the bar.

Do NOT do the math “one-plate-at-a-time.” For example, you’ve got 135 lb loaded, and you’re adding a 25 lb plate to each side. Don’t mentally add 25 lb to 135 lb to get 160 lb as you load one side of the bar and then add another 25 lb to 160 lb to get 185 lb as you load the other side. You might get it right, but you very well might get it wrong as this method is quite likely to cause errors (for reasons the math teacher in me would love to dive into . . . but won’t for now).

How to Prevent a Misload: Smash-and-Add
Instead, perform the math as “smash-and-add.” That is, mentally combine the two 25 lb plates together first (mentally “smashing” them together) to get 50 lb - a very nice number which kindly ends in a zero. Then, simply add that 50 lb to your 135 lb to get 185 lb.

Likewise, if you’ve got 95 lb on the bar and you’re adding a 10 lb plate on each side, don’t add one 10 lb plate to get 105 lb and then add the other 10 lb plate to get 115 lb. Instead, it’s easier to mentally add the 10 lb plates together first to get 20 lb, and then add that 20 lb to your 95 lb to get 115 lb.

We’ve seen both of these methods in action thousands of times over years of coaching, and the smash-and-add method creates far fewer errors than the one-plate-at-a-time method.

As always, we hope this helps you get stronger and live better.

(Some links may be affiliate links. As an Amazon Associate, Testify earns from qualifying purchases.)

If you found this helpful, you’ll love our weekly email. It’s got useful videos, articles, and training tips just like the one in this article. Sign up below, and of course, if you don’t love it, you can unsubscribe at any time.


At Testify, we offer small group training, private coaching (in-person or remotely via Zoom), online coaching, and form checks. Would you like to get quality coaching from a Starting Strength Coach?

Starting Strength Squat/Low Bar Squat | Fix Your KNEES!

Are your awful knees ruining your squat? In this video - our 2nd in a series of Saturday Shorts on fixing the squat - Starting Strength Coach Phil Meggers quickly discusses and demonstrates how to solve this problem.

(A Blast from the Past video originally published on 08/06/22)


At Testify, we offer small group training, private coaching (in-person or remotely via Zoom), online coaching, and form checks. Click the button below to get quality coaching from a Starting Strength Coach and start getting stronger TODAY.

How to Use Lifting Straps

(A Blast from the Past article originally posted on 09/23/22)

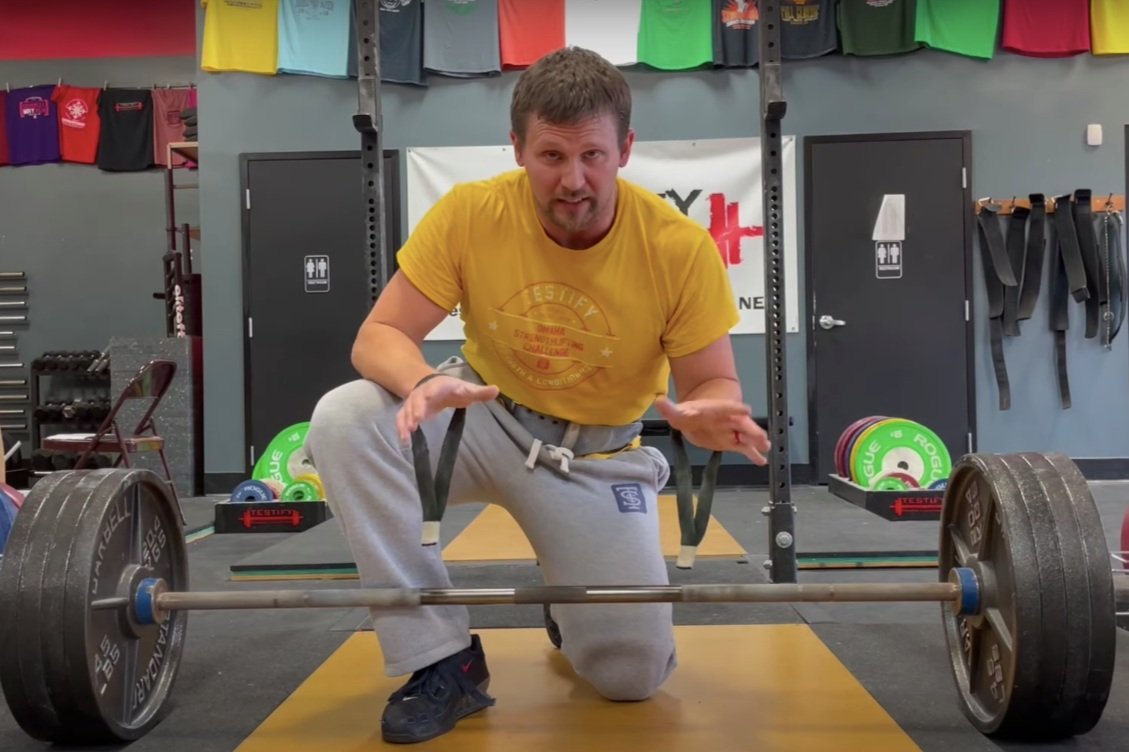
In a past article and a couple of videos, we’ve covered how to quickly and cheaply make yourself a pair of durable lifting straps. Today, let’s cover how to use them.

As is often the case, this process is best understood when you can see it, so I’d recommend watching one of the included videos.

Step 1
Place the straps over both hands. The threads face up, and the smooth side of the straps (the side without the threads) should face forward.

This step assumes you’re using the type of DIY straps we make in this video (or a similar commercial design). If you’re using the “loop-and-cinch” style of strap such as this pair, you can move on to step 2, but make sure that your straps are oriented in the correct direction (click here to see a demonstration).

Step 2
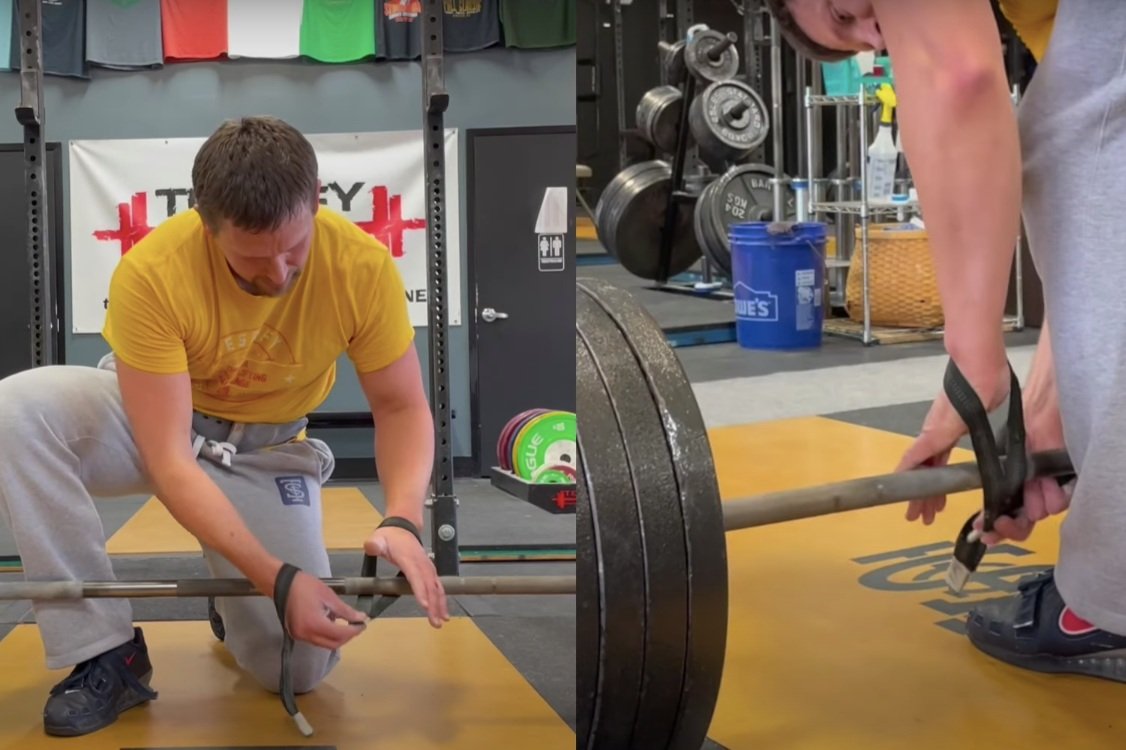
Place your left hand on the barbell - your hand goes over the bar, and the strap goes behind the bar.

Step 3
Use your right hand to help wrap the strap around the bar once, pinning it into place with your left thumb.

Step 4
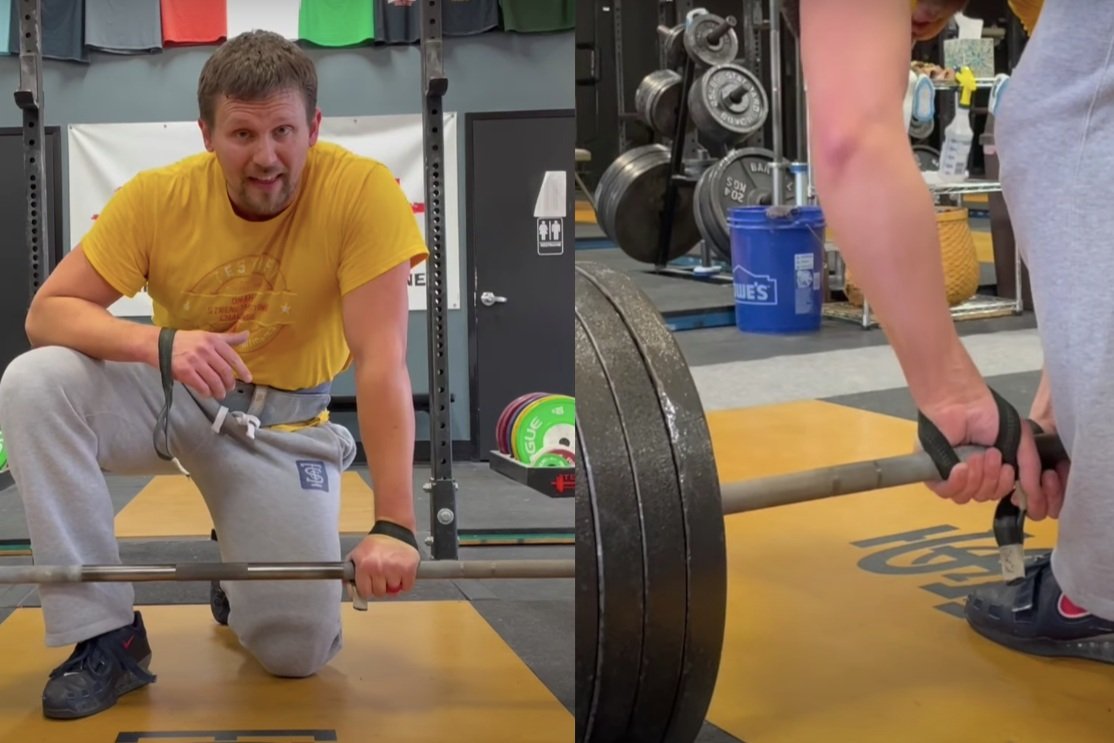
Repeat steps 2 and 3 to get your right hand and its strap securely attached to the barbell, but note that the right hand will have to do this on its own as it doesn’t get any help from your left hand, which is already attached to the bar.

Step 5
When you tighten up the right strap (i.e., when you make it so that it’s wrapped snugly around the bar), you may find that you have to allow the left strap to loosen just a bit so that both straps have the same amount of “snugness” against the bar. Once that’s done, you can rotate both hands to tighten up both straps.

Step 6
Even though you’re using straps, be sure to still use chalk and grab the bar tightly. No hook grip is needed (don’t attempt a mixed grip either).

As always, we hope this helps you get stronger and live better.

(Some links may be affiliate links. As an Amazon Associate, Testify earns from qualifying purchases.)

If you found this helpful, you’ll love our weekly email. It’s got useful videos, articles, and training tips just like the one in this article. Sign up below, and of course, if you don’t love it, you can unsubscribe at any time.


At Testify, we offer small group training, private coaching (in-person or remotely via Zoom), online coaching, and form checks. Would you like to get quality coaching from a Starting Strength Coach?