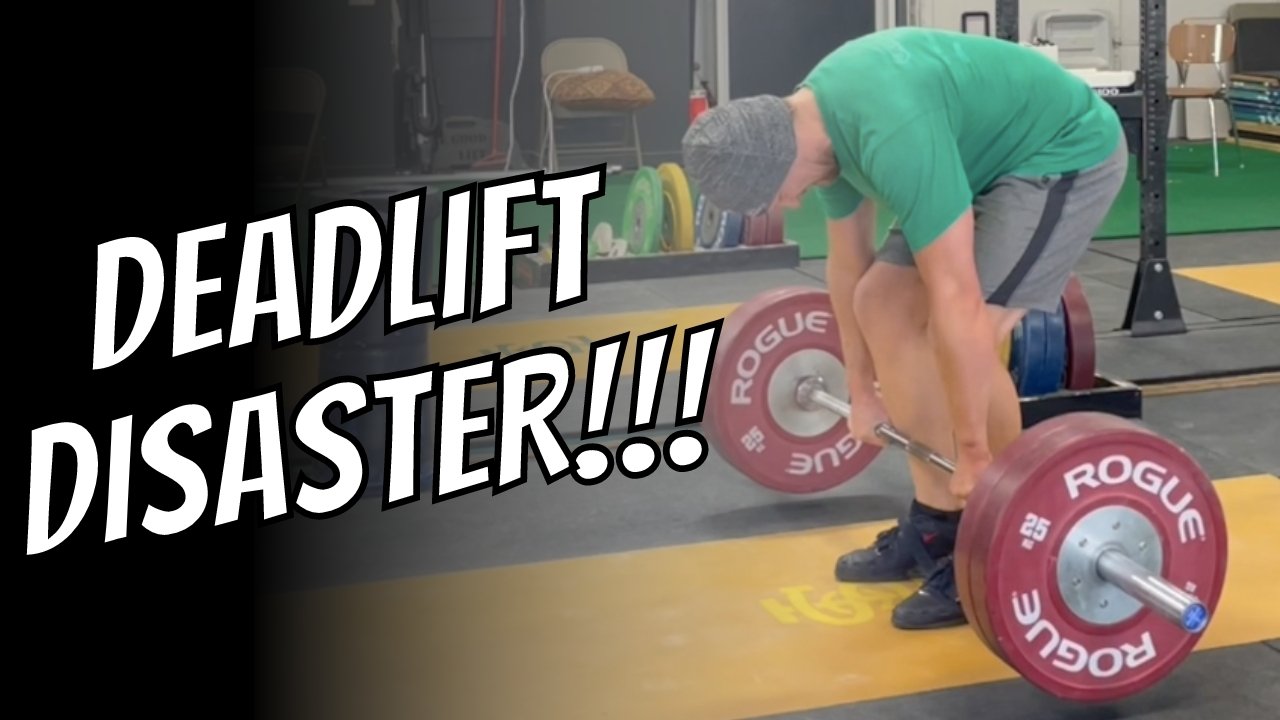
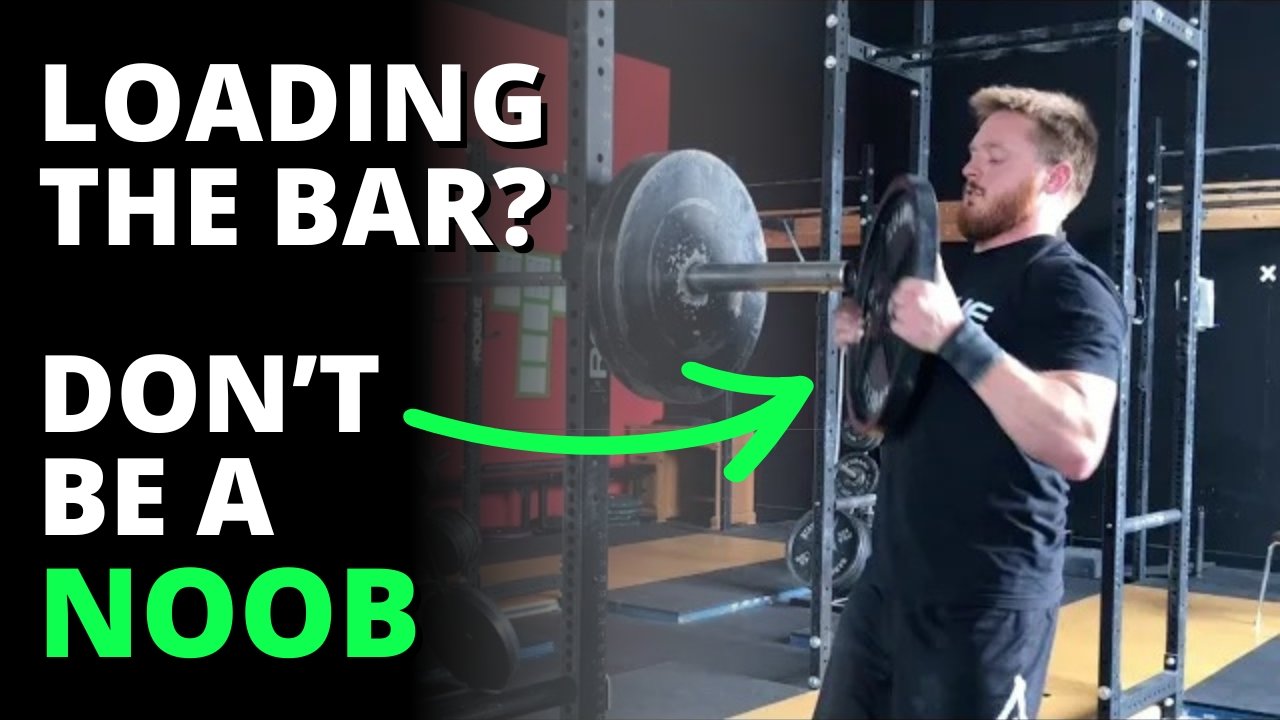
Don't be a Noob: Loading the Bar

(A Blast from the Past article originally posted on 01/06/19)

You have probably noticed (hopefully!) that whenever we load metal plates on a barbell, we always load them so that the numbers printed on the plates face inward (Figure 1), i.e., the numbers of the plates on one end of the bar can “see” the numbers of the plates on the other end of the bar.

figure 1: ted demonstrates the proper method of plate loading on his 405 lb squat.

You may also have wondered to yourself, “Self, why do we always load the plates this way?”

We briefly allude to the primary rationale for this method of loading on everyone’s first day at Testify, but in case you’ve forgotten, let’s chat.

Each metal plate has a lip - a ledge - that makes grasping the plate easier. Loading a plate with the lip facing inward (i.e., away from you) allows your fingers to grasp the plate in a very secure manner. This secure grip is important since the most common injury in a weight room is not a back injury, it’s not a knee injury, and it’s not a wrist injury - it’s a broken toe (or other bone in the foot) caused by dropping a plate on one’s foot.

Every plate is easier to grasp with the numbers facing inward rather than outward, and this is especially true for the 25 lb and 45 lb plates, which - dropped from even a few inches up in the air - are superbly unforgiving to one’s tarsals, metatarsals, and phalanges (mind you, dropping the smaller plates can have some nasty effects as well). With this in mind, we always load the plates with the numbers facing inward.

What about the bumper plates, you say? Bumper plates have a lip on both sides (albeit a rather small one), so load them as you please. There’s no rules!

(Some links may be affiliate links. As an Amazon Associate, Testify earns from qualifying purchases.)

If you found this helpful, you’ll love our weekly email. It’s got useful videos, articles, and training tips just like the one in this article. Sign up below, and of course, if you don’t love it, you can unsubscribe at any time.


At Testify, we offer small group training, private coaching (in-person or remotely via Zoom), online coaching, and form checks. Would you like to get quality coaching from a Starting Strength Coach?

This Mistake is DESTROYING Your Press | 5 Simple Tips to Fix It FAST

Are you making this mistake when you press? Let’s fix it quickly with these 5 simple tips.


At Testify, we offer small group training, private coaching (in-person or remotely via Zoom), online coaching, and form checks. Click the button below to get quality coaching from a Starting Strength Coach and start getting stronger TODAY.

Testify Today - April 8, 2024

THIS WEEK'S SUBMISSION

From our video The Knees Problem | If You Don't Change This, Your Deadlift Will NEVER Grow (click the title to watch):

TacticalLumberjack
K, so I’ve been lifting around my knees my whole lifting life (5+years) and now I know why I struggle with deadlifts.

Phil
I hope this helps out!


TESTIFY ONLINE COACHING

Want to get stronger working remotely with one of our Starting Strength Coaches? We have a few openings, so if you’re interested, click here to contact us and learn more.

Get Stronger. Live Better. Start today.


ARTICLES & VIDEOS

The Knees Problem | If You Don't Change This, Your Deadlift Will NEVER Grow
There are 2 deadlift mistakes you're making with your knees. Let's fix both of them with one simple concept. Click here to watch.


How to Deadlift: Set Your Back the RIGHT Way - Part 3
Having trouble getting your back flat and tight when you deadlift? In Part 3 of this series, Phil walks you through how to solve this problem. Click here to read.


Blast from the Past: First Weightlifting or Powerlifting Meet? MOST Important Advice Ever!
What is the most important tip ever for your first weightlifting, powerlifting, or strengthlifting meet? Check it out. Click here to watch.


Blast from the Past: The Snatch & Clean: Stay Over the Bar!
Are you incorrectly pulling around your knees when snatching or cleaning? Let’s fix this. Click here to read.


NEW TESTIFY HOODIES ARE AVAILABLE!

Looking to train in style? Get yourself a Testify hoodie - in practically any color! Get yours today and represent your favorite gym.

Click here to head to the Testify Store.


WHAT'S COMING UP

The annual Testify Strengthlifting Challenge was a great success this weekend, and we are immensely thankful to everyone who helped out! Loaders, judges, table officials, those who helped setup and tear down - we could not have hosted this meet without you all!

Below are a few of our upcoming events, and you can find out what else is on the calendar by heading to our events page at www.testifysc.com/events.

Testify Barbell MAYhem

  • May 11, 2024

  • Come on out and join us for the annual Testify Barbell MAYhem! This is a weightlifting meet, so the contested lifts are the snatch and clean-and-jerk.

  • Click here for more information.

Starting Strength Self-Sufficient Lifter Camp

  • May 18, 2024

  • Spend the day learning the Squat, Press, and Deadlift and how to self-evaluate your lifts while training in your garage or commercial gym without a coach.

  • Click here to register or for more information.


THIS WEEK’S CONDITIONING

Option 1
Sled
Outdoors:
10-20 x 25 yds EMOM at a weight of your choice

Every minute, push the sled 25 yards, i.e., if pushing the sled takes 20 seconds, then you have 40 seconds to rest. Perform 10-20 rounds.

Indoors:
10-20 x 100 ft EMOM at a weight of your choice

Every minute, push the sled 100 feet, i.e., if pushing the sled takes 20 seconds, then you have 40 seconds to rest. Perform 10-20 rounds.

Compare to 2024.02.05.

Option 2
Bike/row:
3 rounds of:
8 x 20 sec on/40 sec off
Rest 3 min between rounds

Score = lowest distance

Compare to 2024.01.15.

Option 3
Outdoors:
5-10 rounds:
10 sledgehammer strikes (5R, 5L)
50 yd farmer carry (25 yd down-back)
Rest 1 minute

Indoors:
5-10 rounds:
10 sledgehammer strikes (5R, 5L)
100 ft farmer carry (50 ft down-back)
Rest 1 minute

Compare to 2023.12.18.

Option 4
10 x 50 ft yoke carry
Each carry is 25 feet down and 25 feet back and is for time. Rest 1 minute between carries.

Compare to 2023.12.18.

How to Deadlift: Set Your Back the RIGHT Way - Part 3

Quick Recap
In the previous articles in this series, we covered two cues to help get your back correctly set in rigid and flat extension. In Part 1, we discussed the “squeeze your chest up cue” that’s already present in the deadlift 5-step setup, and in Part 2, we examined the cue of “push your belly down between your thighs.”

In this article, we introduce a third cue to help you get the job done. I’d also recommend watching the included video above to see this cue in action.

Cue #3: Wrinkles in the Shirt
When using this cue, you try to create a series of wrinkles along your back in the fabric of your shirt.

Figure 1: this poor fool can’t see how ridiculous he looks.

This cue often works quite well because - even though you might not have a good sense of how to set your back or even what’s going on with your back (since you can’t see it while lifting a barbell as shown in Figure 1) - you might still have a solid idea of what movement is necessary to create wrinkles in the back of your shirt (Figure 2). 

Another way to picture it . . .
Picturing an arched back (i.e., the opposite of a flexed or rounded back) can help with this process.

figure 2: Notice the wrinkles in becky’s shirt? this is much better.

Granted, you don’t want an arched back - if you arch (i.e., overextend) your back, you’re actually overdoing it. We don’t want an overextended back, but if you’re having a tough time getting your back in extension when setting up to pull, you can try to arch your back because you won’t actually be able to accomplish it anyway. In other words, the picture of an arched back is a useful overcue.

Try this cue the next time you deadlift, and we’ll be back in Part 4 of this series in the near future.

As always, we hope this helps you get stronger and live better.

(Some links may be affiliate links. As an Amazon Associate, Testify earns from qualifying purchases.)

If you found this helpful, you’ll love our weekly email. It’s got useful videos, articles, and training tips just like the one in this article. Sign up below, and of course, if you don’t love it, you can unsubscribe at any time.


At Testify, we offer small group training, private coaching (in-person or remotely via Zoom), online coaching, and form checks. Would you like to get quality coaching from a Starting Strength Coach?

First Weightlifting or Powerlifting Meet? MOST Important Advice Ever!

What is the most important tip ever for your first weightlifting, powerlifting, or strengthlifting meet? Check it out.

(A Blast from the Past video originally published on 05/07/22)


At Testify, we offer small group training, private coaching (in-person or remotely via Zoom), online coaching, and form checks. Click the button below to get quality coaching from a Starting Strength Coach and start getting stronger TODAY.

The Snatch & Clean: Stay Over the Bar!

DON’T CLEAN LIKE THIS DOOFUS.

(A Blast from the Past article originally posted on 03/11/22)

When learning to snatch and clean (sometimes even after we’ve learned!), a common error is that of pulling the barbell around the knees or - equivalently - making the back angle become more vertical too soon.

To fix this - cue yourself to “stay over the bar.” In other words, you need to keep your back relatively horizontal for longer than you think - in fact, roughly until after it passes your knees. Of course, the bar travels upward before this point, but it does so because of knee extension, i.e., you should be pushing the floor away from you like a leg press.

Here’s a mental picture: It’s raining, and you’ve decided to lift outside (not a good decision, mind you, but it’s too late now). Staying over the bar means that, from the start of the pull (i.e., your setup position) until just after it passes your knees, you want to stay leaned over so that your shoulders and upper back are keeping the middle of the bar from getting rained on (your shoulders will actually be slightly in front of the bar). If you raise your torso too soon, the bar gets wet, and that’s no good.

Eventually, your back angle will become more vertical as you reach what we call in the teaching progression the “jumping position,” but during the first part of the lift, stay over the bar. You’ll have a more vertical bar path (which means the bar doesn’t have to travel as far), and you’ll be able to accelerate the bar better as well.

We hope this helps you get stronger and live better!

(Some links may be affiliate links. As an Amazon Associate, Testify earns from qualifying purchases.)

If you found this helpful, you’ll love our weekly email. It’s got useful videos, articles, and training tips just like the one in this article. Sign up below, and of course, if you don’t love it, you can unsubscribe at any time.


At Testify, we offer small group training, private coaching (in-person or remotely via Zoom), online coaching, and form checks. Would you like to get quality coaching from a Starting Strength Coach?