Testify Free Press - September 25, 2023
/THIS WEEK'S SUBMISSION
From our video Is Your Squat Stuck? It's Not Why You Think. (click the title to watch):
Mcluhan Salem
Coach what can happen if I lift my chest? To be sure I'm not doing it
Phil
To be clear, you will lift your chest eventually - after all, we finish the squat in a standing up, vertical position. The key is that you don't want to raise your chest too soon, which is why the cue "stay in your lean" works well. If you maintain your back angle for about the first half to two-thirds of the ascent, you'll be in good shape.
If you raise your chest too soon, you'll note that the squat slows down, is harder than it should be, and depending on the severity of the error, your knees might actually move forward when you start raising your chest.
Mcluhan Salem
Thank you
Phil
You’re welcome.
ARTICLES & VIDEOS

BEST Strategy for a Stronger, Smoother Deadlift (6 Simple Tips)
Trying to grip it and rip it? Don't be silly. You're missing out on a better deadlift and bigger PRs. Let's fix this. Click here to watch.

What His Poor, Sad Bench Press Was Missing
Far too many lifters don't use their legs effectively when they bench press. Do you? Find out and fix it in 2 minutes. Click here to watch.

Why Your Press is WEAK: Fix Your Unrack and Grip with this Simple Mnemonic Device
Struggling with the press? Phil gives you a simple mnemonic device to help you fix your unrack and your grip - it'll pay big dividends. Click here to read.

Blast from the Past: The Best Way to Put On a Lifting Belt! (and a secret weapon!)
Phil shows the best way to put on your belt and also talks about what to do at lifting competitions when this method might not be possible. Click here to watch.

Blast from the Past: Wrist Wraps: What, Why, When, and How!
We cover the basics of wrist wraps - what they are, why you use them, when to use them, and how to use them. Click here to read.

NEW TESTIFY GEAR!
Baseball season is here, and so is Testify’s new 3/4 raglan shirt - in multiple colors! Get yours today and represent your favorite gym!
Click here to head to the Testify Store.
WHAT'S COMING UP
Below are a few of our upcoming events, and you can find out what else is on the calendar by heading to our events page at www.testifysc.com/events.
Testify Fall Classic
October 21, 2023
The Testify Fall Classic is back for 2023, and we invite you to be a part of it! This is a strengthlifting meet, which means the contested lifts will be the squat, press, and deadlift.
Click here to register or for more information.
Free Intro to Squat Session
October 28, 2023
Are you interested in getting stronger? Book your free "Intro to Squat" session and learn to squat, meet some of our coaches, and see the gym! All ages and abilities are welcome.
Click here to book your free session.
Benching Bonanza! The Annual Testify Bench Press Jubilee
November 17, 2023
Benching Bonanza is a strength meet wherein the only contested lift is - you guessed it - the bench press. There will be one bar, and the meet will be conducted in a "rising bar" format, so the weight on the bar only goes up! It'll be a ton of fun, so come on out!
Click here to register or for more information.
THIS WEEK’S CONDITIONING
Option 1
Sled
Outdoors:
10 rounds of:
Push sled 100 ft
Pull sled 100 ft (hand over hand)
Indoors:
20 rounds of:
Push sled 50 ft
Pull sled 50 ft (hand over hand)
Compare to 2023.07.24.
Option 2
Bike/row:
4 x 3 minutes
Rest 3 minutes between each round. Score = lowest distance.
Compare to 2023.07.03.
Option 3
Outdoors:
5-10 rounds:
10 sledgehammer strikes (5R, 5L)
50 yd farmer carry (25 yd down-back)
Rest 1 minute
Indoors:
5-10 rounds:
10 sledgehammer strikes (5R, 5L)
100 ft farmer carry (50 ft down-back)
Rest 1 minute
Compare to 2023.06.05.
Option 4
1. 5 yoke carries @ 30 yd (15 yd downback) – work up to heaviest carry
2. 5 rounds of 5 reps on the axle “clean and press away” – work up to heavy set of 5
Compare to 2023.06.05.
What His Poor, Sad Bench Press Was Missing
/Far too many lifters don't use their legs effectively when they bench press. Do you? Find out and fix it in 2 minutes.
At Testify, we offer small group training, private coaching (in-person or remotely via Zoom), online coaching, and form checks. Click the button below to get quality coaching from a Starting Strength Coach and start getting stronger TODAY.
Why Your Press is WEAK: Fix Your Unrack and Grip with this Simple Mnemonic Device
/A common problem in the press is a terrible unracking process, and we've covered this before in both videos and articles, but here’s a different take - a simple mnemonic device - that just might help you out.
The Problem
You know you want a neutral wrist when pressing. It shouldn’t be completely straight (although we might use the overcue “straight wrists” at times), but it certainly should not be bent backward in full extension, either. The problem of full extension is the more common of the two errors and is the situation we’re addressing here. For a video demonstration and explanation of this problem as well as how to solve it, be sure to watch one of the included videos.
When It Happens
You’re setting up to take your grip for the press - your grip is relatively narrow, you’ve pronated your hands slightly, and although you know you’re supposed to maintain a rigid, neutral wrist position as you approach and unrack the barbell, it’s at this point that everything goes in the crapper. Somehow, as you approached the bar, you allowed your wrists to bend backward into full extension - which is a very weak and inefficient position from which to press - and now your coach wants to gouge his eyes out. Let’s prevent this.
The Culprit
You simply didn’t get low enough to allow yourself to maintain a neutral wrist. Remember that the legs are responsible for unracking the bar correctly - in a manner of speaking, you pick it up with your legs, not your arms. You need to dip down low enough so that you can keep your wrists neutral when approaching and unracking the bar. A decent pair of wrist wraps can help maintain neutral wrists, but they won’t cover up the root problem of not dipping down low enough with your legs.
A Simple Mnemonic Device
“Chest to bar, chin to bar.”
When taking your pronated grip, be sure to squeeze the bar tightly - crush the bar, if you will - then walk your chest up to the bar with your feet directly under the bar. This “chest to bar” aspect ensures you are close enough to the bar. Next, squat down - you’re actually just bending your knees - until the underside of your chin touches the bar.
By doing this, you’ve dipped down far enough that you’ve given yourself sufficient room to maintain a neutral wrist. If you don’t dip down far enough to create that space, your wrists will have to bend backward into extension to allow you to pick up the bar (because bending your wrists backward makes your forearms artificially shorter), and this is what you’re trying to avoid.
That’s all there is to it - simply walk your chest up to the bar, dip down until your chin touches the bar as you rotate your elbows slightly in front of the bar, and then stand the bar up while maintaining that nice, neutral wrist.
As a side note, some people won’t need to dip that far down; “chin to bar” will be overkill in these cases, but it will still work for pretty much everyone.
As always, we hope this helps you get stronger and live better!
-Phil
PS: Whenever you want even more Testify in your life, here are some free resources:
Book a free intro and strategy session with us HERE.
Pick up a free copy of Testify’s Squat Guide: 12 Tips to Improve Your Squat Now HERE.
Get our free weekly email - containing useful videos, articles, and training tips - HERE.
Follow Testify on Instagram HERE.
Subscribe to Testify’s YouTube channel HERE.
(Some links may be affiliate links. As an Amazon Associate, Testify earns from qualifying purchases.)
At Testify, we offer small group training, private coaching (in-person or remotely via Zoom), online coaching, and form checks. Interested in getting stronger, looking better, and having more energy?
The Best Way to Put On a Lifting Belt! (and a secret weapon!)
/Phil explains and demonstrates the best way to put on your lifting belt and also talks about what to do at powerlifting and strengthlifting competitions when this method might not be possible.
(This is a Blast from the Past video originally published on 01/15/22.)
At Testify, we offer small group training, private coaching (in-person or remotely via Zoom), online coaching, and form checks. Click the button below to get quality coaching from a Starting Strength Coach and start getting stronger TODAY.
Wrist Wraps: What, Why, When, and How!
/(A Blast from the Past article originally posted on 07/09/21)
If you’re new to lifting, you might have seen these things called wrist wraps, but you might not be sure what purpose they actually serve, so let’s chat.
What are wrist wraps?
Your basic wrist wrap consists of a thumb loop at one end, the elastic body of the wrap, and a hook-and-loop closure system (i.e., Velcro). Countless manufacturers sell wrist wraps with this basic structure - some common ones include Harbinger, SBD, Rogue, Schiek, and the list goes on.

A very popular length of wrap is 18”, but you can find plenty of wraps that are both shorter or longer than this (longer is fine, but for most lifters, I wouldn’t recommend anything shorter than 18”). Some manufacturers (e.g., SBD) also make variations of their wraps that are either more rigid or more flexible depending on the lifter’s preference.
Why might I use wrist wraps?
You use wrists wraps when your wrists are in compression, i.e., when you’re pushing on something - not when you’re pulling on something. A wrap gives support to your wrist by acting as an external skeleton for your wrist - you can think of it as a cast or a lifting belt for your wrist.
Since the wrap is wrapped around your wrist, it lends support to your wrist and makes it very difficult for the wrist to be in positions of extreme extension (i.e., positions where you wrist is bent very far backward). Lifts that benefit from wrists wraps include all the pressing movements (press, bench press, close grip bench, etc.), snatches, jerks, cleans (this is a gray area as you need your wrists to be in extension to rack a clean), and the squat for those who wrap their thumbs around the bar and have their wrists in extension. Even if you don’t normally use a wrist wrap, it’s probably a good idea to use one if you are dealing with and training through a wrist injury.
When might I use wrist wraps?
A reasonable approach is to treat your wrist wraps the same way you treat your belt - put the wraps on for your last warm-up set, and then use them for all of your work sets as well. With some experience under your belt (under your wraps?), you may decide to put them on earlier than your last warm-up, and that’s fine as well.
How do I use wrist wraps?
(You can reference the steps below as well as the accompanying photos, and I would recommend also watching one of the included videos to see this in action.)
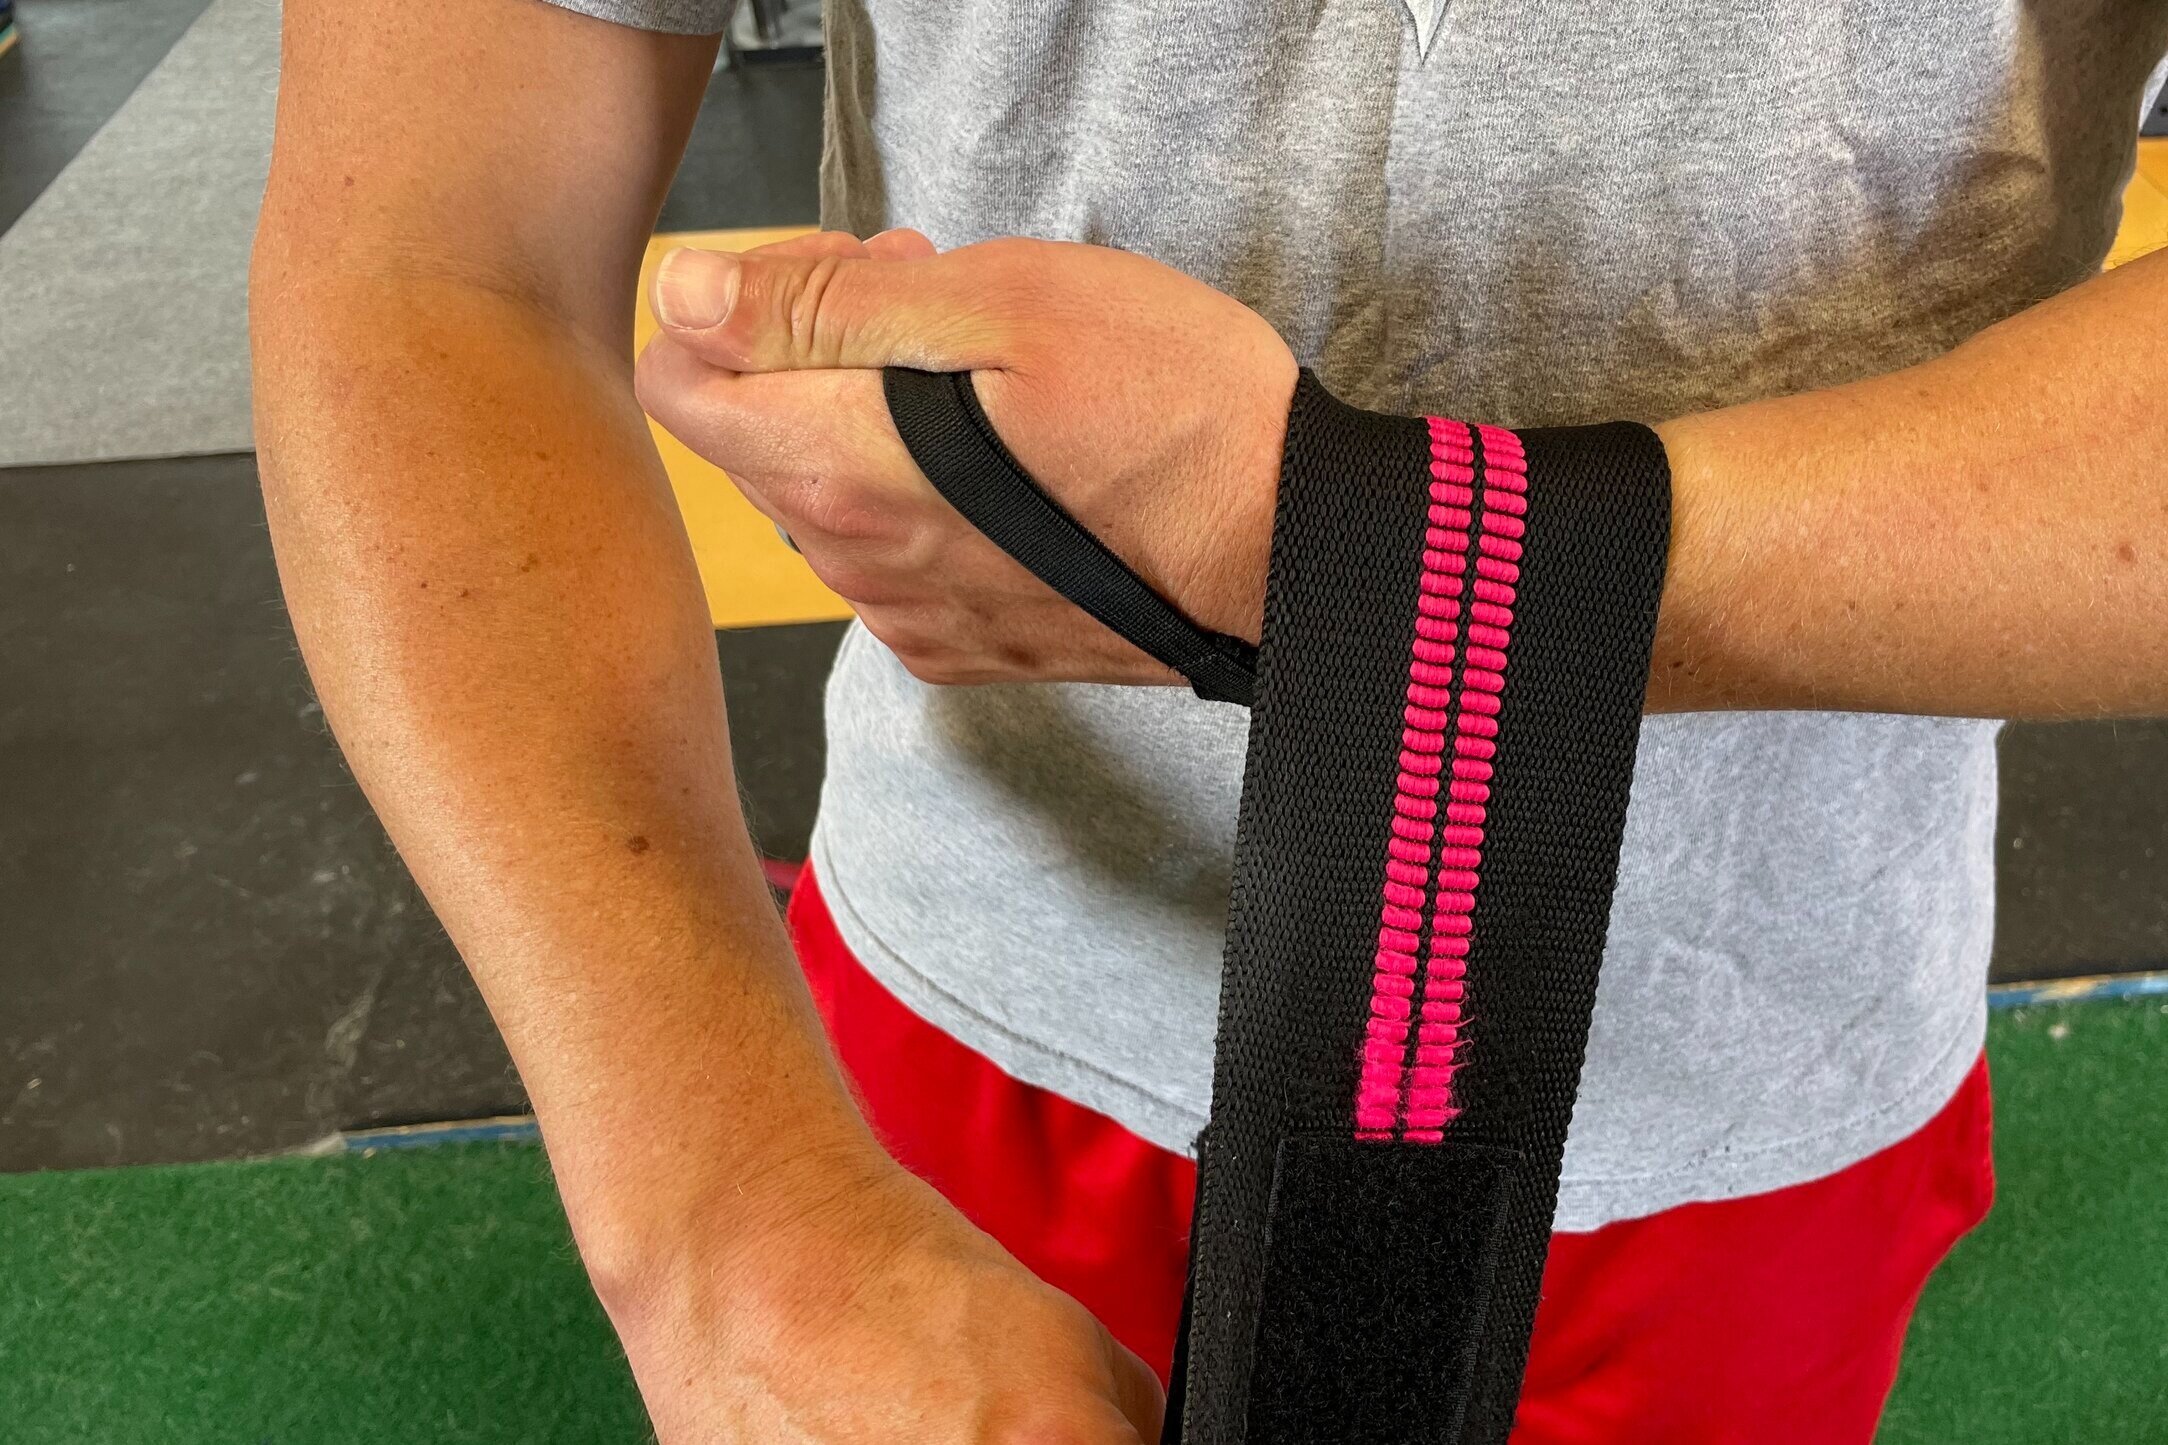
Step 1
Place your thumb through the thumb loop so that the wrap drapes over the back of your wrist.

Step 1: Place your thumb through the thumb loop so that the wrap drapes over the back of your wrist.
Step 2
Position the body of the wrap so that it lies half on your forearm and half on your hand.
Step 2: Position the body of the wrap so that it lies half on your forearm and half on your hand.
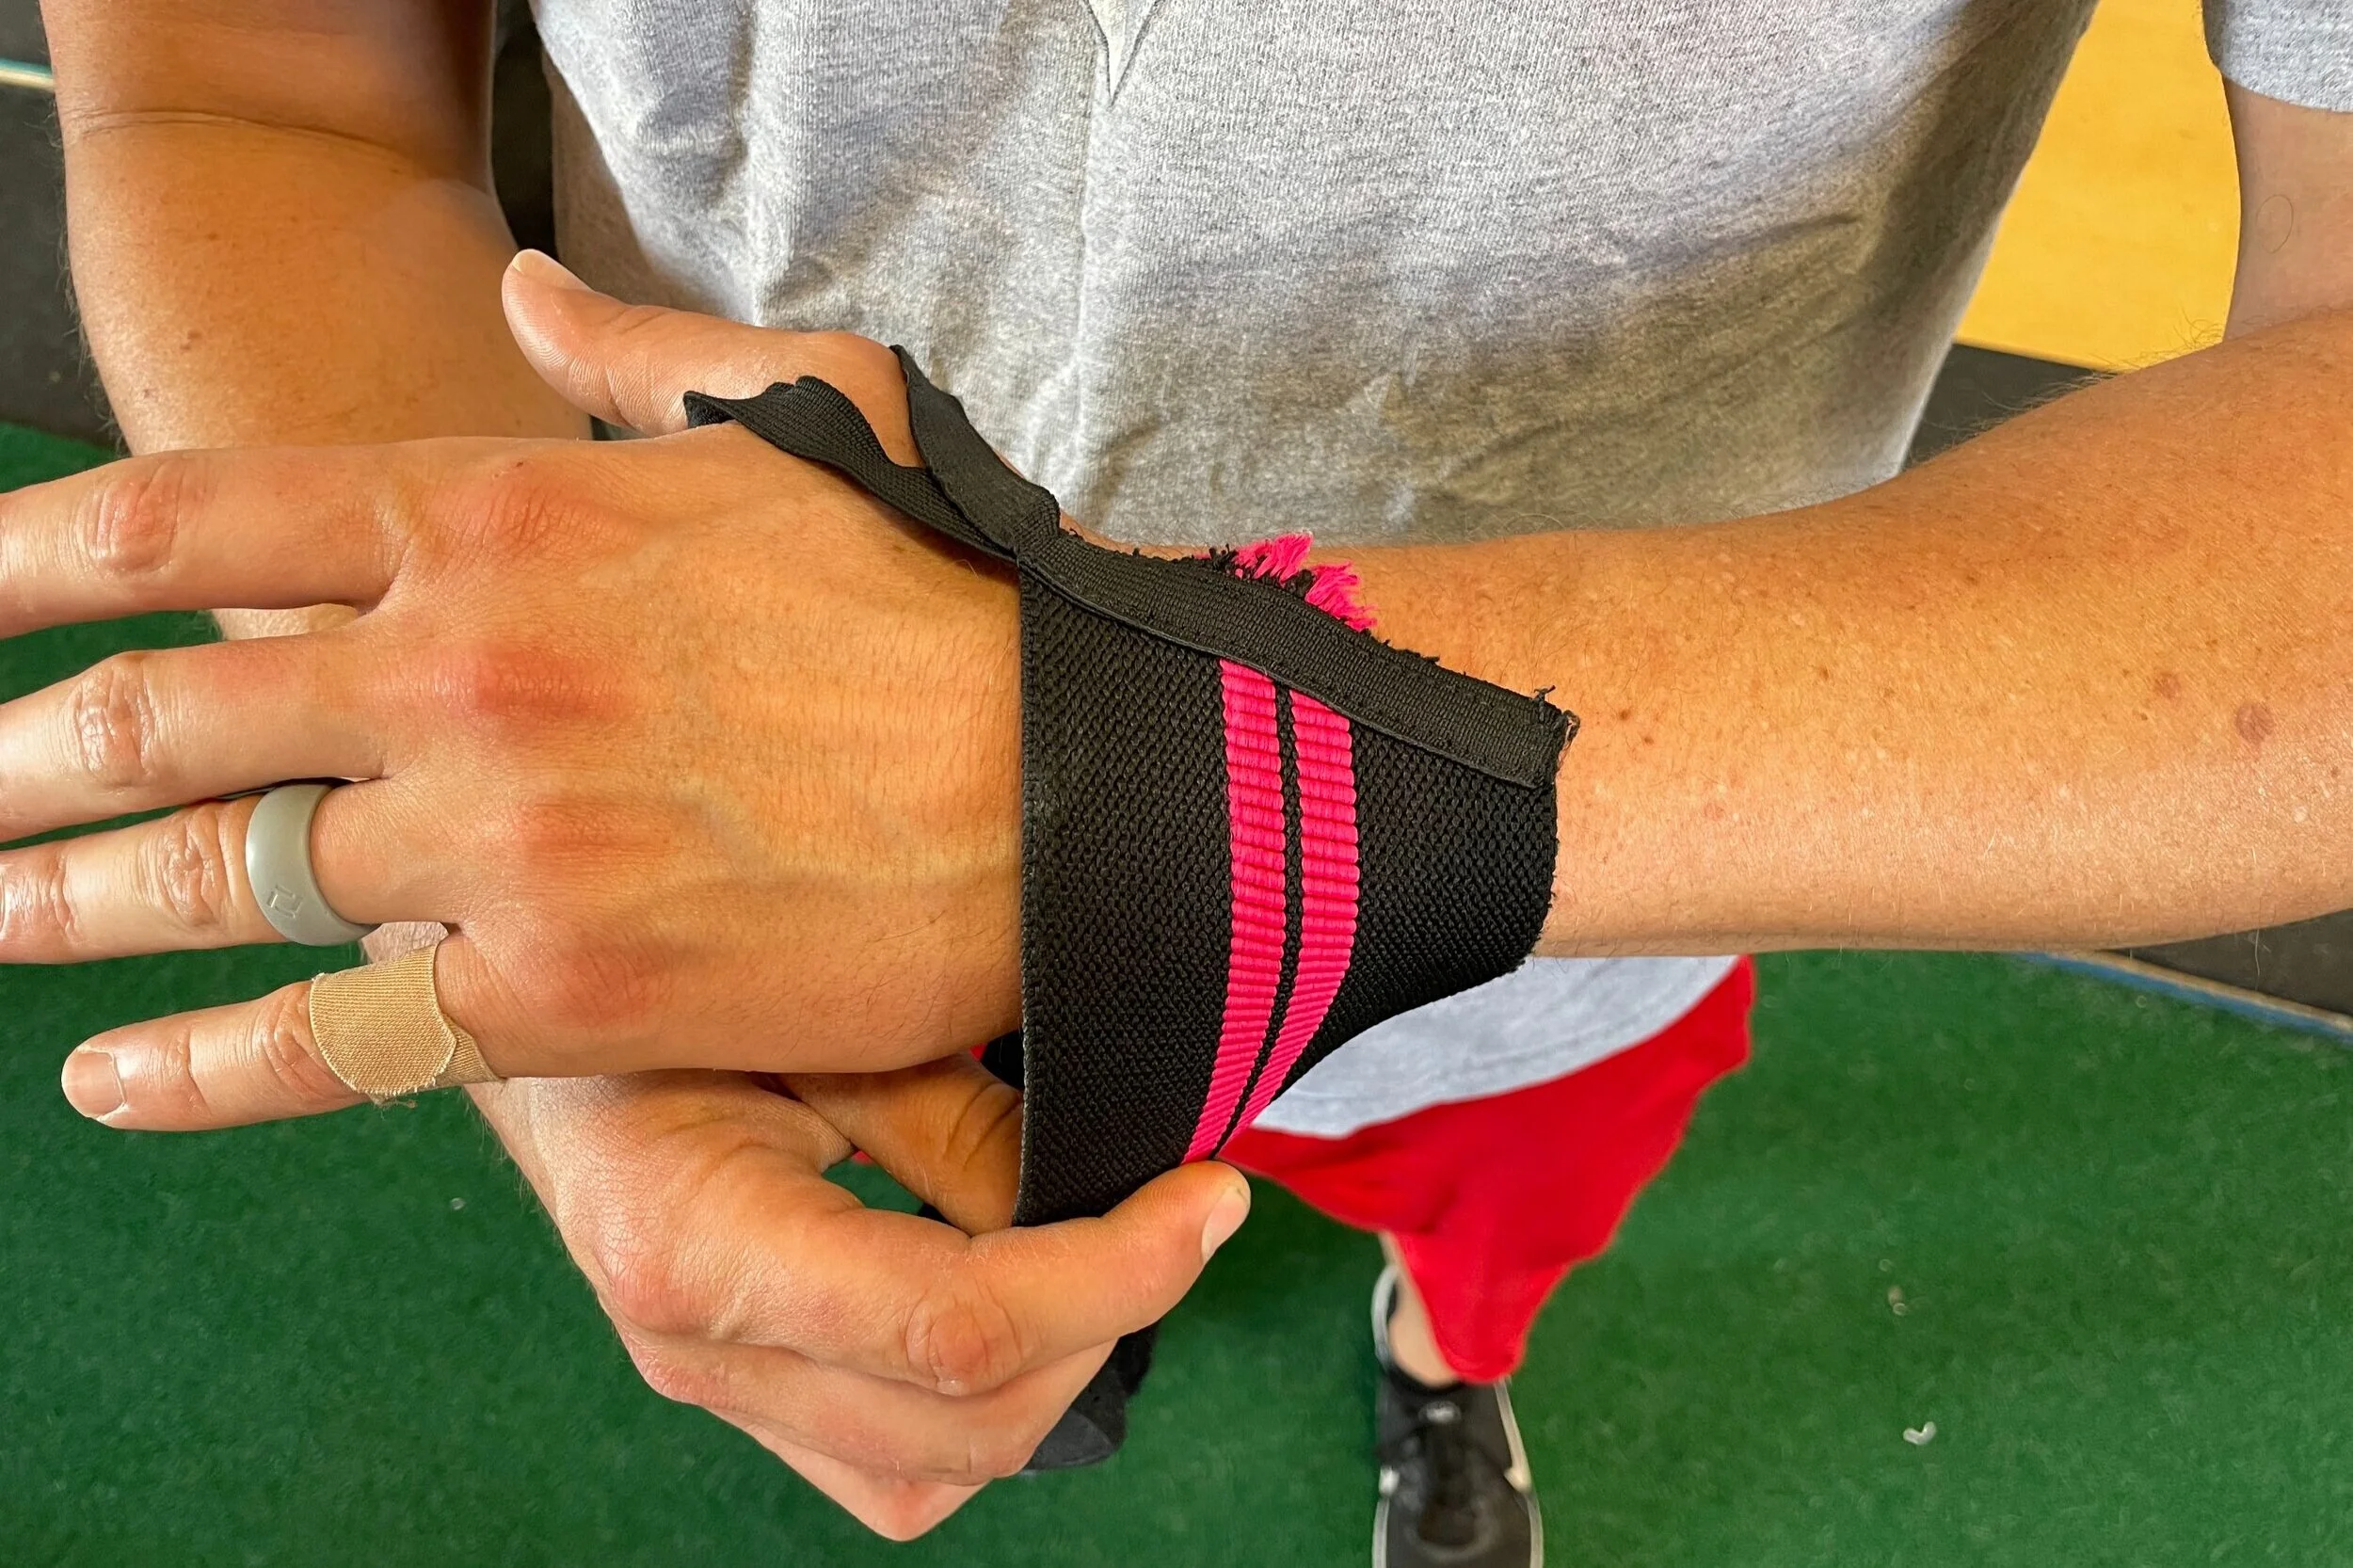
Step 3
Apply tension and wrap the length of the wrap around your wrist until you reach the end of the wrap.

Step 3: Apply tension and wrap the length of the wrap around your wrist until you reach the end of the wrap.
Step 4
Close off the wrap by attaching it to itself using the Velcro strap.

Step 4: Close off the wrap by attaching it to itself using the Velcro strap.
Step 5
Remove the thumb loop from your thumb (it is simply there to keep the wrap from spinning in place while you apply the wrap, so you no longer need it).

Step 5: Remove the thumb loop from your thumb (it is simply there to keep the wrap from spinning in place while you apply the wrap, so you no longer need it).
Remember: this is not a forearm wrap or a hand wrap - it’s a wrist wrap, so be sure to pay attention to Step 2. If you position the wrap too low, it’s simply a forearm warmer, and if it’s too high, it’s just a weird glove.

A wrist wrap worn too low on the arm . . . don’t do this.
In effect, the wrap should almost lock those two sections of your arm together (i.e., the forearm and the hand), and to do so, it has to straddle both sections of your arm. If you put the wrap on correctly, it will make it harder to extend your wrist (i.e., bend it backwards), which means the wrap is doing its job of support.
Quick re-wrap solution - pinch the thumb loop between your thumb and index finger and use that setup to anchor the beginning of the wrap in place while you re-tighten the wrap.
The wrap should be very snug - not so tight that you start losing circulation in your hand, but pretty darn tight. It needs to be tight so it can provide support. You will always loosen or perhaps even remove the wraps between sets. If you only loosen the wrap between sets, you don’t need to re-insert your thumb in the thumb loop - a quicker solution is to simply pinch the thumb loop between your thumb and index finger and use that setup to anchor the beginning of the wrap in place while you re-tighten the wrap.
That pretty much wraps it up, and we hope this helps you get stronger and live better!
-Phil
PS: Whenever you want even more Testify in your life, here are some free resources:
Book a free intro and strategy session with us HERE.
Pick up a free copy of Testify’s Squat Guide: 12 Tips to Improve Your Squat Now HERE.
Get our free weekly email - containing useful videos, articles, and training tips - HERE.
Follow Testify on Instagram HERE.
Subscribe to Testify’s YouTube channel HERE.
(Some links may be affiliate links. As an Amazon Associate, Testify earns from qualifying purchases.)