Wraps and Straps and Gloves, Oh My!

You’re a lifter, so of course, you’ve got to accessorize. But with all the options for lifting gear and accessories out there, what’s useful and what’s garbage? This article is the first in a short series covering exactly that, and today’s topic is gear associated with your grip.
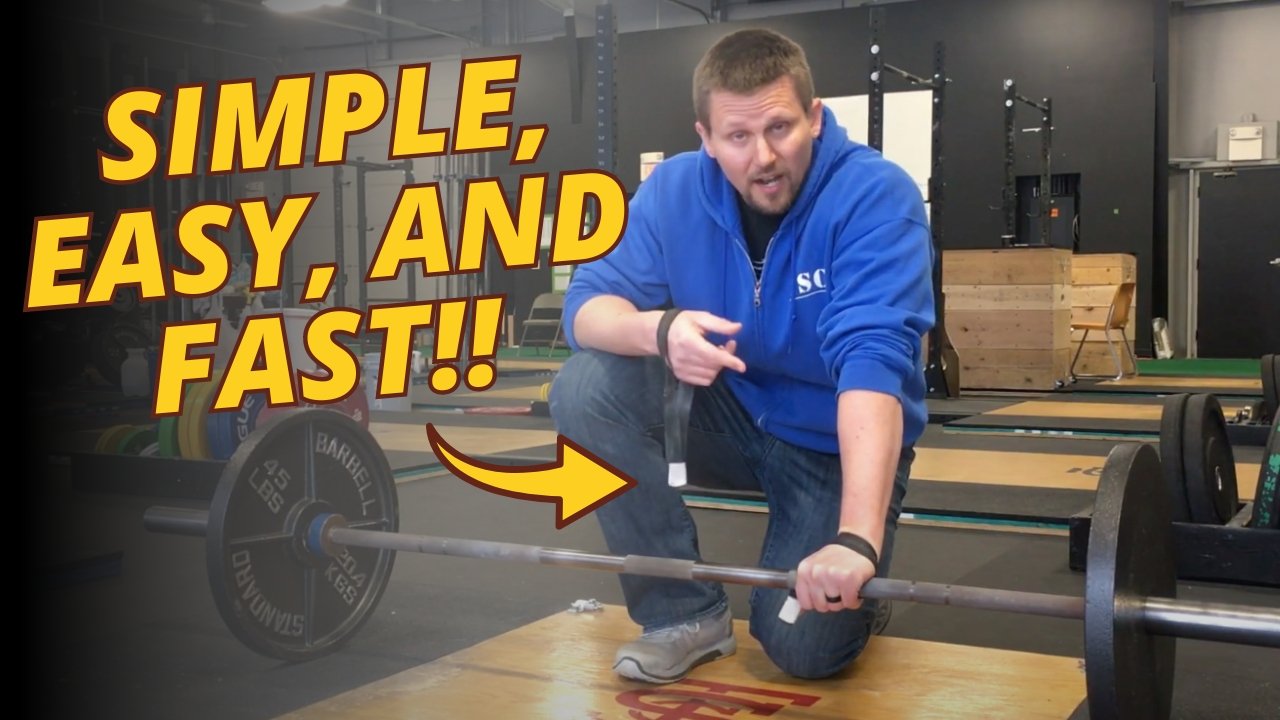
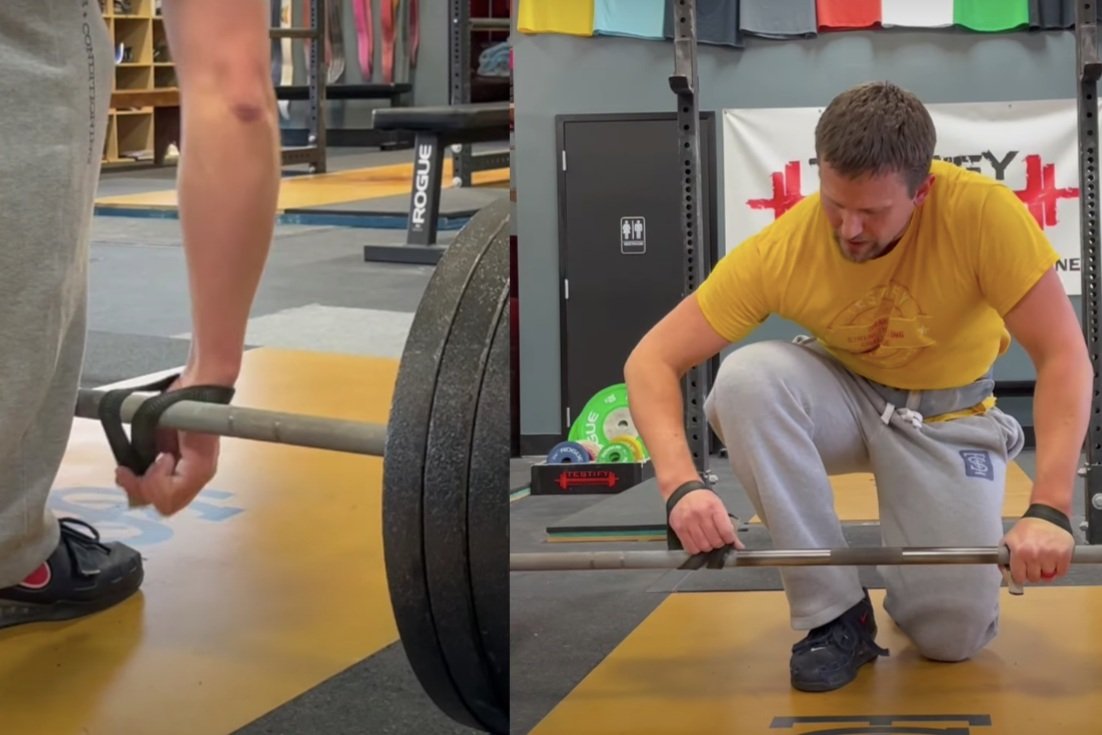
Lifting Straps
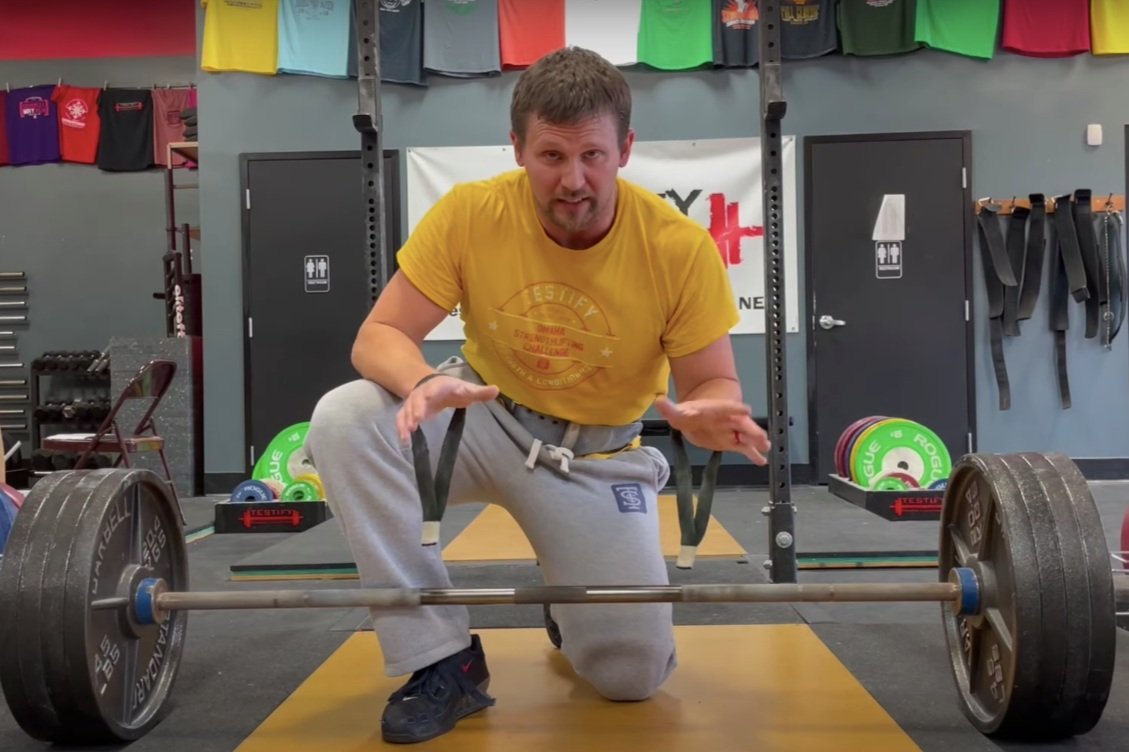
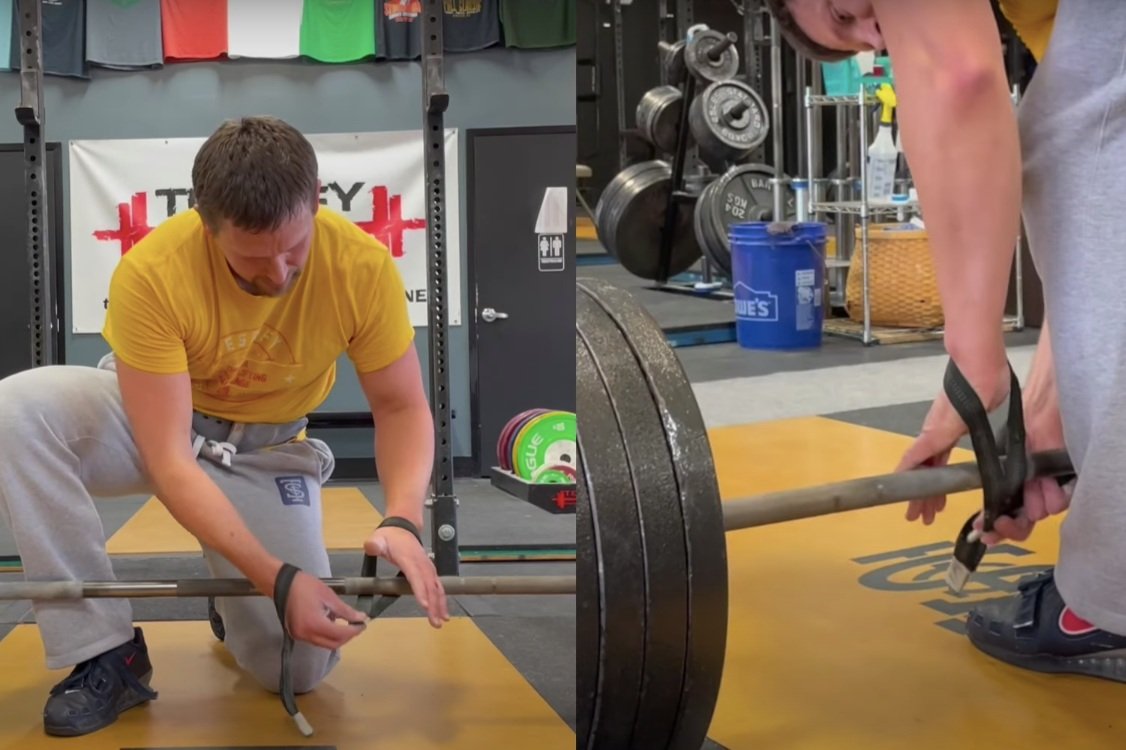
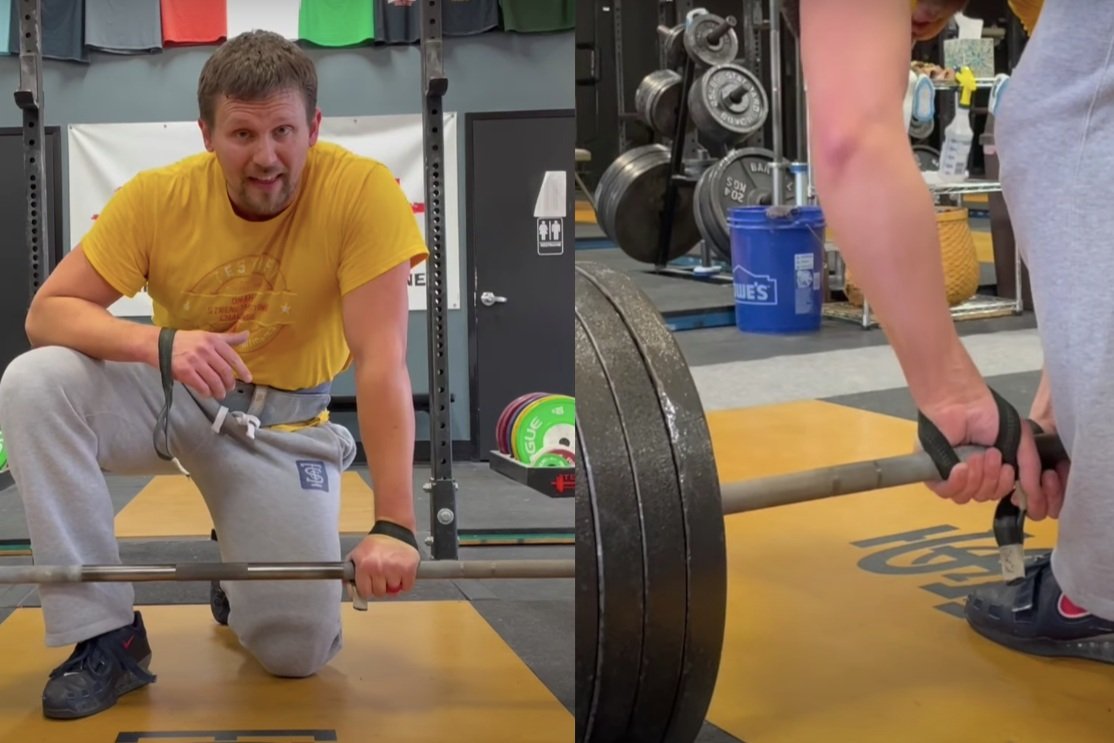
Also known simply as “straps” or sometimes “wrist straps” (which is inaccurate), straps are useful for pulling movements, such as deadlifts, rows, and even snatches. Do NOT use them for cleans, and it’s worth pointing out they are actually worn on the hand and not the wrist itself.

They save some wear and tear on the hands, and if you’ve got multiple sets on the deadlift, then a reasonable approach is to use your usual grip for the first set (hook grip or alternate grip) and then use straps for the remaining sets.

You can buy straps or make them (quite cheaply!), and we’ve got a few videos covering how to make them as well as use them.

Wrist Wraps
These are useful for pressing movements such as the press, bench press, close grip bench press, etc. Wrist wraps provide stability for the wrist by acting as a sort of belt or cast for the wrist. When the weights get challenging, a good approach is to warm up (mostly) without wrist wraps and then put your wraps on (tightly!) for your last warm up as well as your work sets.

Not surprisingly, we have a few videos covering this topic as well.

Gloves
Nope. Don’t use ‘em. They add something squishy and deformable between your hand and the bar, which is never good for force transfer. Also, because they add a layer between your hand and the bar, they effectively make the bar diameter larger, which makes it harder to keep your grip when pulling the bar off the floor with deadlifts, rows, etc.

Lifting gloves are stupid. I know this firsthand because I have worn them in a previous life. Don’t use them.

Ahem, we do not have a video on this topic.

Chalk
We’ll save this discussion for another day, but suffice to say chalk is very important for your grip. Use chalk.

As always, we hope this helps you get stronger and live better.

(Some links may be affiliate links. As an Amazon Associate, Testify earns from qualifying purchases.)

If you found this helpful, you’ll love our weekly email. It’s got useful videos, articles, and training tips just like the one in this article. Sign up below, and of course, if you don’t love it, you can unsubscribe at any time.


At Testify, we offer small group training, private coaching (in-person or remotely via Zoom), online coaching, and form checks. Would you like to get quality coaching from a Starting Strength Coach?

Click here to start today

Week 2022.09.26

This Week’s Conditioning

Option 1
“Prowler Base”
1. Load up a manageable weight.
2. Sprint 40m at 85% intensity.
3. Rest until breathing and heart rate slow down. (45 sec – 2 min)
4. Repeat 5-15 times.

Courtesy of “Death by Prowler” (on Starting Strength).

Compare to 2022.07.25.

Option 2
Bike/row:
4 x 3 minutes

Rest 3 minutes between each round. Score = lowest distance.

Compare to 2022.07.04.

Option 3
Outdoors:
5-10 rounds:
10 sledgehammer strikes (5R, 5L)
50 yd farmer carry (25 yd down-back)
Rest 1 minute

Indoors:
5-10 rounds:
10 sledgehammer strikes (5R, 5L)
100 ft farmer carry (50 ft down-back)
Rest 1 minute

Compare to 2022.06.06.

Option 4
10 x 50 ft yoke carry
Each carry is 25 feet down and 25 feet back and is for time. Rest 1 minute between carries.

Compare to 2022.06.06.

How to Use Lifting Straps

In a past article and a couple of videos, we’ve covered how to quickly and cheaply make yourself a pair of durable lifting straps. Today, let’s cover how to use them.

As is often the case, this process is best understood when you can see it, so I’d recommend watching one of the included videos.

Step 1
Place the straps over both hands. The threads face up, and the smooth side of the straps (the side without the threads) should face forward.

This step assumes you’re using the type of DIY straps we make in this video (or a similar commercial design). If you’re using the “loop-and-cinch” style of strap such as this pair, you can move on to step 2, but make sure that your straps are oriented in the correct direction (click here to see a demonstration).

Step 2
Place your left hand on the barbell - your hand goes over the bar, and the strap goes behind the bar.

Step 3
Use your right hand to help wrap the strap around the bar once, pinning it into place with your left thumb.

Step 4
Repeat steps 2 and 3 to get your right hand and its strap securely attached to the barbell, but note that the right hand will have to do this on its own as it doesn’t get any help from your left hand, which is already attached to the bar.

Step 5
When you tighten up the right strap (i.e., when you make it so that it’s wrapped snugly around the bar), you may find that you have to allow the left strap to loosen just a bit so that both straps have the same amount of “snugness” against the bar. Once that’s done, you can rotate both hands to tighten up both straps.

Step 6
Even though you’re using straps, be sure to still use chalk and grab the bar tightly. No hook grip is needed (don’t attempt a mixed grip either).

As always, we hope this helps you get stronger and live better.

(Some links may be affiliate links. As an Amazon Associate, Testify earns from qualifying purchases.)

If you found this helpful, you’ll love our weekly email. It’s got useful videos, articles, and training tips just like the one in this article. Sign up below, and of course, if you don’t love it, you can unsubscribe at any time.


At Testify, we offer small group training, private coaching (in-person or remotely via Zoom), online coaching, and form checks. Would you like to get quality coaching from a Starting Strength Coach?

Click here to start today

Week 2022.09.19

This Week’s Conditioning

Option 1
Sled
Outdoors:
10-20 x 25 yds EMOM at a weight of your choice

Every minute, push the sled 25 yards, i.e., if pushing the sled takes 20 seconds, then you have 40 seconds to rest. Perform 10-20 rounds.

Indoors:
10-20 x 100 ft EMOM at a weight of your choice

Every minute, push the sled 100 feet, i.e., if pushing the sled takes 20 seconds, then you have 40 seconds to rest. Perform 10-20 rounds.

Compare to 2022.07.18.

Option 2
Bike/row:
5 min on
4 min off
4 min on
3 min off
3 min on
2 min off
2 min on
1 min off
1 min on

Record distance for each interval and add for total distance.

Compare to 2022.06.27.

Option 3
5-10 rounds of:
30 sec ME tire flips
30 sec rest

Compare to 2022.05.30.

Option 4
For time:
500m row
5 x 80m sled push (200 ft if indoors)
500m row

Rest 1 minute after the first row and after each sled push.

Compare to 2022.05.30.

The Box Squat: What, How, and Why

In two of our recent articles, we covered the tempo squat and the pin squat. Today, let’s briefly discuss the box squat.

What is a box squat?
A box squat is a squat wherein you descend, pause with your rear end on a box, stack of bumper plates, or something similarly sturdy, and then squat the weight back up again.

How do you perform a box squat?
You descend as you would in a normal squat - hips go back, knees go forward and out (staying in line with your toes), and your chest points down - but you’re going to heavily focus on reaching back with your hips as you descend.

The box needs to be at a height so that - when your butt is on the box - your hip crease is just below the top of your patella. In other words, the box needs to be set so that you can hit depth. This may seem obvious, but checking this on video is always a good idea if you’re coaching yourself.

At the bottom of the squat, pause a legitimate one to two seconds (“one-thousand-one, one-thousand-two”) and stay tight during this pause. The box will take a little of the weight when your rear end is on the box, but it shouldn’t take much - we’re not relaxing at the bottom, and we’re not rocking back-and-forth. You should still be supporting most of the weight of the barbell.

After the pause, drive the hips up out of the hole as you would in a normal squat and continue your ascent. It will be slower than a regular squat as we’ve taken out the stretch reflex.

Why might you do box squats or where might you see them in your programming? 
Perhaps your coach has programmed you within a Heavy-Light-Medium structure or something similar. In this case, you might see a box squat show up as a medium day squat or even a light day squat (the loading and volume need to be carefully managed - especially if it’s a light day squat).

Due to the pause on the box, the box squat eliminates the stretch reflex out of the bottom, so it’s a disadvantaged squat, and thus you’ll need to use a lighter weight than with your regular squat, so it fits the bill for a medium or light squat. However, as with our previously discussed tempo squat and pin squat, remember that “lighter” does not necessarily mean easy.

The box squat, like the tempo squat and pin squat, can also be useful for a number of other reasons - one of which is that it can help a lifter focus on a specific technical issue. For example, if Jim-Bob struggles to reach backward with his hips as he initiates his descent and therefore tends to squat with a rather vertical back angle, a box squat can help with this since it gives a target for his hips. This can help him focus on reaching his hips back for something specific and tangible and thus will help him point his chest at the floor at the same time (because the lifter has to lean over more in order to reach back farther with the hips).

Box squats can also be used to help with achieving depth. Let's suppose that Jim-Bob is just starting off and is not strong enough to get down to depth and successfully squat back up again; in this case, we can set up a box height that is higher than normal (thus creating an above parallel squat). We would choose a height at which he can squat down, touch his butt to the box lightly, and then drive back up again.

On subsequent workouts, we would lower the box slightly each time (roughly an inch) and keep lowering it until Jim-Bob is actually squatting to depth. At this point, we’d remove the box. It’s worth noting that, in this case, we’re just using the box as a marker for depth, so Jim-Bob would lightly touch his butt to the box and immediately drive back up (i.e., don’t pause on the box when using the box for this purpose).

This wraps up our short discussion of the box squat, and as always, we hope this helps you get stronger and live better.

(Some links may be affiliate links. As an Amazon Associate, Testify earns from qualifying purchases.)

If you found this helpful, you’ll love our weekly email. It’s got useful videos, articles, and training tips just like the one in this article. Sign up below, and of course, if you don’t love it, you can unsubscribe at any time.


At Testify, we offer small group training, private coaching (in-person or remotely via Zoom), online coaching, and form checks. Would you like to get quality coaching from a Starting Strength Coach?

Click here to start today

Week 2022.09.12

This Week’s Conditioning

Option 1
Sled
Outdoors:
10 rounds of:
Push sled 100 ft
Pull sled 100 ft (hand over hand)

Indoors:
20 rounds of:
Push sled 50 ft
Pull sled 50 ft (hand over hand)

Compare to 2022.07.11.

Option 2
5 rounds:
10 cal bike
1 min rest
4 sandbag-over-bars
1 min rest

Set the yoke crossmember at 35/33, and the weight is 150#/75#.

Compare to 2022.06.20.

Option 3
Outdoors:
5-10 rounds:
50 yd sled push (25 yd down-back)
50 yd farmer carry (25 yd down-back)
Rest 1 min

Indoors:
5-10 rounds:
100 yd sled push (50 ft down-back)
100 yd farmer carry (50 ft down-back)
Rest 1 min

Compare to 2022.05.23.

Option 4
Row 10 x 100m
Rest 1 min between sprints. Your score is your slowest time.

Compare to 2022.05.23.