Wrist Wraps: THREE Mistakes Every Lifter Should STOP Making

Wearing your wrap here? don’t do that.

Let’s briefly cover a few mistakes lifters commonly make when using wrist wraps as well as how to easily fix these errors. I’d recommend watching some of the included videos to see these mistakes (and others) in action as well as how to correct them.

Mistake #1: Wearing the Wrap Only on the Arm
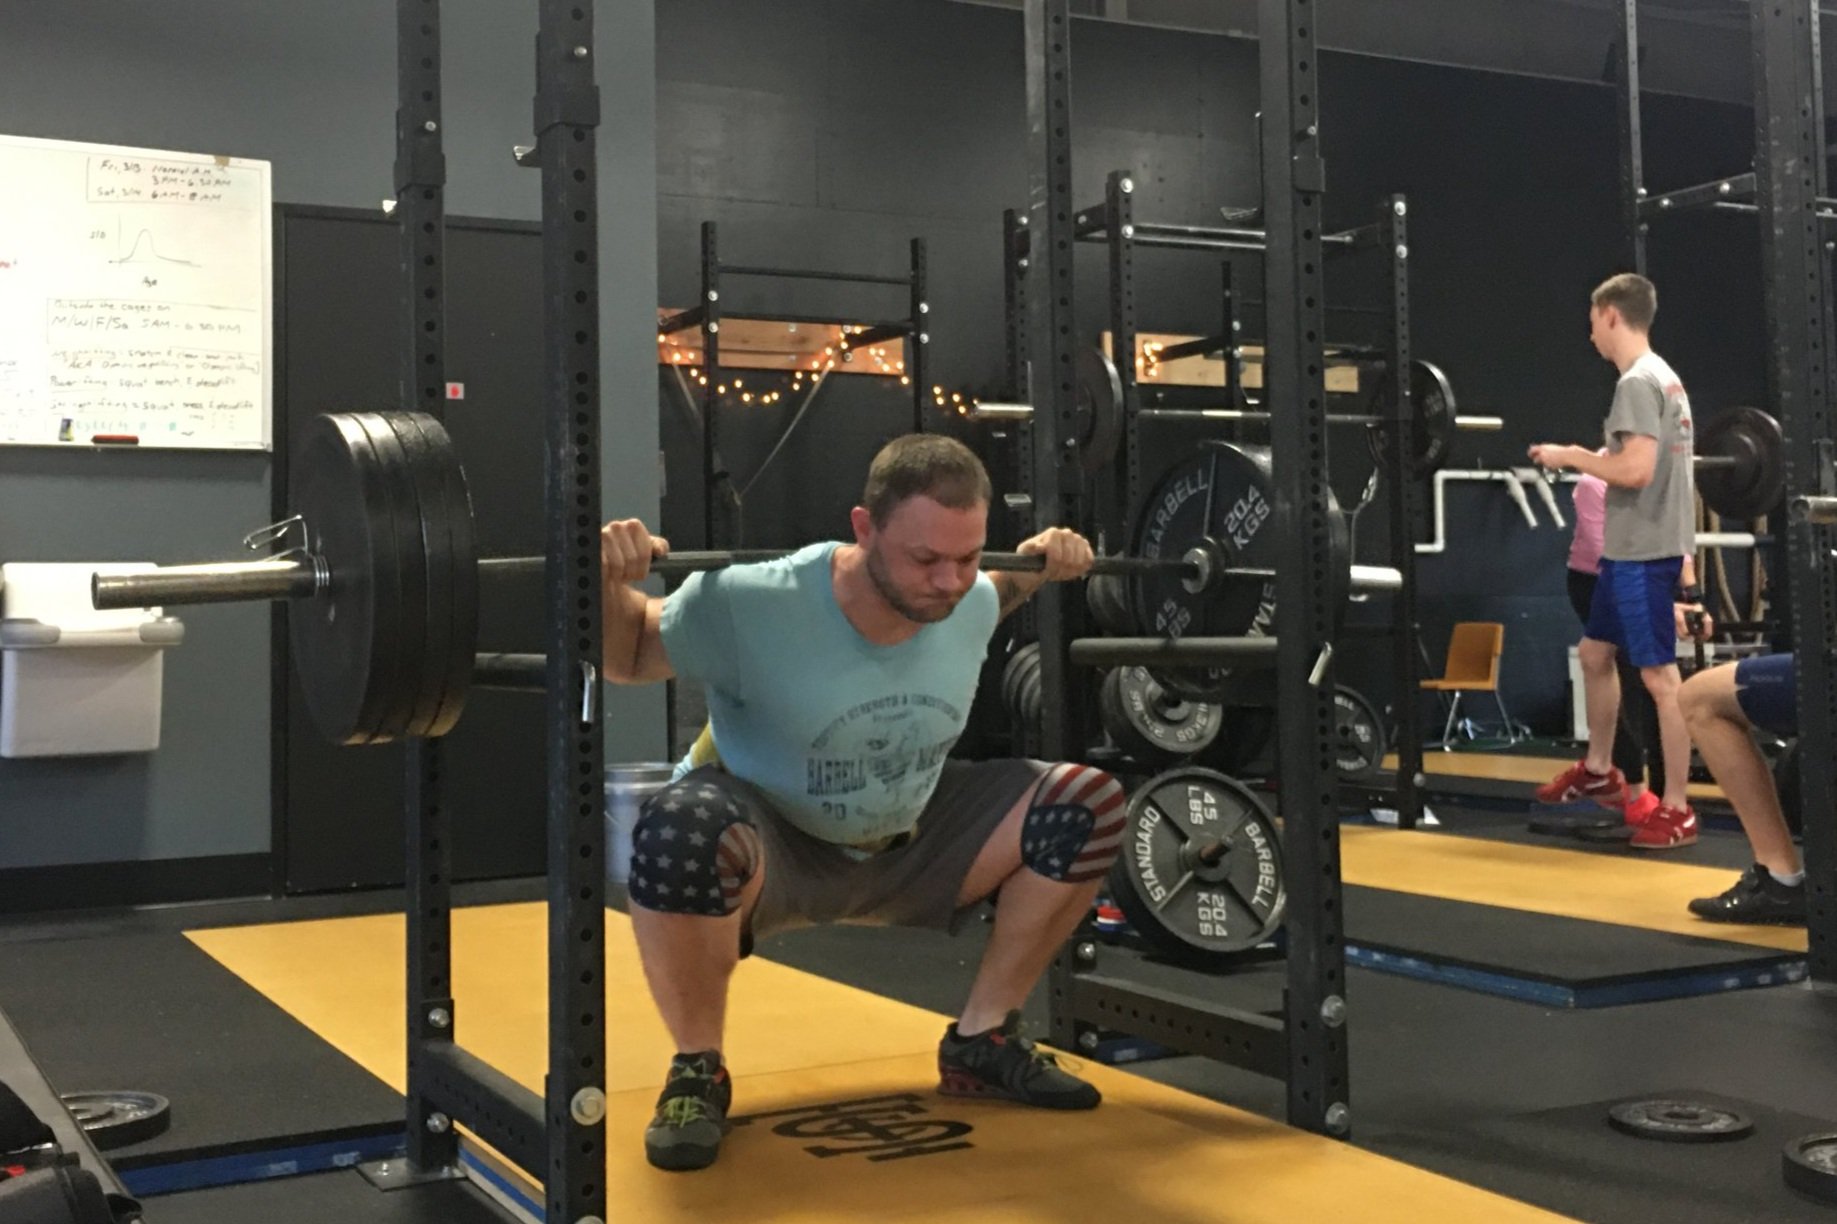
Wrist wraps are designed to be worn - not surprisingly - on the wrist. However, lifters often wear the wrap in such a way that it’s wrapped only around the arm (see the photo below this article’s title). In this case, the wrap doesn’t provide any support for the wrist itself and is now just functioning as an arm warmer.

Stylish, yes, but not very useful.

Since the wrist wrap should act somewhat as a belt for the wrist, make sure that it covers both the arm and the hand. As you put it on, start by wrapping it around the lower part of your hand and then wrap it further down as you go so that it crosses the wrist and ends up wrapping around the arm as well. You’ll know that you’re doing it correctly if the wrap makes it difficult to bend your wrist backward into extension.

Mistake #2: Wearing the Wrap Too Loosely
Wrist wraps should be worn tightly. If you are able to wear a wrap comfortably for five minutes, it’s too loose. Apply some serious tension to the wrap when putting it on and make sure that it’s very snug. Now, it shouldn’t be so tight that it immediately starts cutting off circulation to your hand, but it needs to be tight enough that - again - it should help prevent wrist extension. If it’s too loose, it won’t provide sufficient support.

Mistake #3: Taking the Wrap Off Between Sets
To be fair, this is more of an option than a mistake, but since lifters are often unaware of this option, we’ll call it a mistake of ignorance. You can take the wrap off between sets, and that’s perfectly acceptable as you certainly don’t want the wrap bound tightly around your wrist when resting. However, you can also choose to simply loosen the wrap instead.

To do this, simply undo the velcro and let the wrap slacken a bit. At this point, it’ll be comfortable enough that you can just leave it on until your next set, at which point you need to tighten it up again. To do this, tuck the thumb loop between your thumb and forefinger (i.e., you just need to pinch it, you don’t need to actually put the loop back over your thumb), and then you can once again apply the appropriate amount of tension to the wrap and secure it correctly.

This tactic is useful for all lifters, and it’s especially useful for competitors in weightlifting, powerlifting, or strengthlifting who may be on a clock and need to get their wraps on in a hurry.

You now have three ways to use your wrist wraps more efficiently, and as always, we hope this helps you get stronger and live better

(Some links may be affiliate links. As an Amazon Associate, Testify earns from qualifying purchases.)

If you found this helpful, you’ll love our weekly email. It’s got useful videos, articles, and training tips just like the one in this article. Sign up below, and of course, if you don’t love it, you can unsubscribe at any time.


At Testify, we offer small group training, private coaching (in-person or remotely via Zoom), online coaching, and form checks. Would you like to get quality coaching from a Starting Strength Coach?

click here to start today

The WORST Lifting Shoe? Why You Should NEVER Lift in Chuck Taylors!

Your lifting shoes should support your training, not hinder it. With this in mind, we take a look at the classic Converse Chuck Taylor and see how it holds up as a lifting shoe candidate.

(A Blast from the Past video originally published on 05/09/22)


At Testify, we offer small group training, private coaching (in-person or remotely via Zoom), online coaching, and form checks. Click the button below to get quality coaching from a Starting Strength Coach and start getting stronger TODAY.

Click here to start today

Don't be a Noob: Loading the Bar

(A Blast from the Past article originally posted on 01/06/19)

You have probably noticed (hopefully!) that whenever we load metal plates on a barbell, we always load them so that the numbers printed on the plates face inward (Figure 1), i.e., the numbers of the plates on one end of the bar can “see” the numbers of the plates on the other end of the bar.

figure 1: ted demonstrates the proper method of plate loading on his 405 lb squat.

You may also have wondered to yourself, “Self, why do we always load the plates this way?”

We briefly allude to the primary rationale for this method of loading on everyone’s first day at Testify, but in case you’ve forgotten, let’s chat.

Each metal plate has a lip - a ledge - that makes grasping the plate easier. Loading a plate with the lip facing inward (i.e., away from you) allows your fingers to grasp the plate in a very secure manner. This secure grip is important since the most common injury in a weight room is not a back injury, it’s not a knee injury, and it’s not a wrist injury - it’s a broken toe (or other bone in the foot) caused by dropping a plate on one’s foot.

Every plate is easier to grasp with the numbers facing inward rather than outward, and this is especially true for the 25 lb and 45 lb plates, which - dropped from even a few inches up in the air - are superbly unforgiving to one’s tarsals, metatarsals, and phalanges (mind you, dropping the smaller plates can have some nasty effects as well). With this in mind, we always load the plates with the numbers facing inward.

What about the bumper plates, you say? Bumper plates have a lip on both sides (albeit a rather small one), so load them as you please. There’s no rules!

(Some links may be affiliate links. As an Amazon Associate, Testify earns from qualifying purchases.)

If you found this helpful, you’ll love our weekly email. It’s got useful videos, articles, and training tips just like the one in this article. Sign up below, and of course, if you don’t love it, you can unsubscribe at any time.


At Testify, we offer small group training, private coaching (in-person or remotely via Zoom), online coaching, and form checks. Would you like to get quality coaching from a Starting Strength Coach?

click here to start today

This Mistake is DESTROYING Your Press | 5 Simple Tips to Fix It FAST

Are you making this mistake when you press? Let’s fix it quickly with these 5 simple tips.


At Testify, we offer small group training, private coaching (in-person or remotely via Zoom), online coaching, and form checks. Click the button below to get quality coaching from a Starting Strength Coach and start getting stronger TODAY.

Click here to start today

Testify Today - April 8, 2024

THIS WEEK'S SUBMISSION

From our video The Knees Problem | If You Don't Change This, Your Deadlift Will NEVER Grow (click the title to watch):

TacticalLumberjack
K, so I’ve been lifting around my knees my whole lifting life (5+years) and now I know why I struggle with deadlifts.

Phil
I hope this helps out!


TESTIFY ONLINE COACHING

Want to get stronger working remotely with one of our Starting Strength Coaches? We have a few openings, so if you’re interested, click here to contact us and learn more.

Get Stronger. Live Better. Start today.


ARTICLES & VIDEOS

The Knees Problem | If You Don't Change This, Your Deadlift Will NEVER Grow
There are 2 deadlift mistakes you're making with your knees. Let's fix both of them with one simple concept. Click here to watch.


How to Deadlift: Set Your Back the RIGHT Way - Part 3
Having trouble getting your back flat and tight when you deadlift? In Part 3 of this series, Phil walks you through how to solve this problem. Click here to read.


Blast from the Past: First Weightlifting or Powerlifting Meet? MOST Important Advice Ever!
What is the most important tip ever for your first weightlifting, powerlifting, or strengthlifting meet? Check it out. Click here to watch.


Blast from the Past: The Snatch & Clean: Stay Over the Bar!
Are you incorrectly pulling around your knees when snatching or cleaning? Let’s fix this. Click here to read.


NEW TESTIFY HOODIES ARE AVAILABLE!

Looking to train in style? Get yourself a Testify hoodie - in practically any color! Get yours today and represent your favorite gym.

Click here to head to the Testify Store.


WHAT'S COMING UP

The annual Testify Strengthlifting Challenge was a great success this weekend, and we are immensely thankful to everyone who helped out! Loaders, judges, table officials, those who helped setup and tear down - we could not have hosted this meet without you all!

Below are a few of our upcoming events, and you can find out what else is on the calendar by heading to our events page at www.testifysc.com/events.

Testify Barbell MAYhem

  • May 11, 2024

  • Come on out and join us for the annual Testify Barbell MAYhem! This is a weightlifting meet, so the contested lifts are the snatch and clean-and-jerk.

  • Click here for more information.

Starting Strength Self-Sufficient Lifter Camp

  • May 18, 2024

  • Spend the day learning the Squat, Press, and Deadlift and how to self-evaluate your lifts while training in your garage or commercial gym without a coach.

  • Click here to register or for more information.


THIS WEEK’S CONDITIONING

Option 1
Sled
Outdoors:
10-20 x 25 yds EMOM at a weight of your choice

Every minute, push the sled 25 yards, i.e., if pushing the sled takes 20 seconds, then you have 40 seconds to rest. Perform 10-20 rounds.

Indoors:
10-20 x 100 ft EMOM at a weight of your choice

Every minute, push the sled 100 feet, i.e., if pushing the sled takes 20 seconds, then you have 40 seconds to rest. Perform 10-20 rounds.

Compare to 2024.02.05.

Option 2
Bike/row:
3 rounds of:
8 x 20 sec on/40 sec off
Rest 3 min between rounds

Score = lowest distance

Compare to 2024.01.15.

Option 3
Outdoors:
5-10 rounds:
10 sledgehammer strikes (5R, 5L)
50 yd farmer carry (25 yd down-back)
Rest 1 minute

Indoors:
5-10 rounds:
10 sledgehammer strikes (5R, 5L)
100 ft farmer carry (50 ft down-back)
Rest 1 minute

Compare to 2023.12.18.

Option 4
10 x 50 ft yoke carry
Each carry is 25 feet down and 25 feet back and is for time. Rest 1 minute between carries.

Compare to 2023.12.18.

How to Deadlift: Set Your Back the RIGHT Way - Part 3

Quick Recap
In the previous articles in this series, we covered two cues to help get your back correctly set in rigid and flat extension. In Part 1, we discussed the “squeeze your chest up cue” that’s already present in the deadlift 5-step setup, and in Part 2, we examined the cue of “push your belly down between your thighs.”

In this article, we introduce a third cue to help you get the job done. I’d also recommend watching the included video above to see this cue in action.

Cue #3: Wrinkles in the Shirt
When using this cue, you try to create a series of wrinkles along your back in the fabric of your shirt.

Figure 1: this poor fool can’t see how ridiculous he looks.

This cue often works quite well because - even though you might not have a good sense of how to set your back or even what’s going on with your back (since you can’t see it while lifting a barbell as shown in Figure 1) - you might still have a solid idea of what movement is necessary to create wrinkles in the back of your shirt (Figure 2). 

Another way to picture it . . .
Picturing an arched back (i.e., the opposite of a flexed or rounded back) can help with this process.

figure 2: Notice the wrinkles in becky’s shirt? this is much better.

Granted, you don’t want an arched back - if you arch (i.e., overextend) your back, you’re actually overdoing it. We don’t want an overextended back, but if you’re having a tough time getting your back in extension when setting up to pull, you can try to arch your back because you won’t actually be able to accomplish it anyway. In other words, the picture of an arched back is a useful overcue.

Try this cue the next time you deadlift, and we’ll be back in Part 4 of this series in the near future.

As always, we hope this helps you get stronger and live better.

(Some links may be affiliate links. As an Amazon Associate, Testify earns from qualifying purchases.)

If you found this helpful, you’ll love our weekly email. It’s got useful videos, articles, and training tips just like the one in this article. Sign up below, and of course, if you don’t love it, you can unsubscribe at any time.


At Testify, we offer small group training, private coaching (in-person or remotely via Zoom), online coaching, and form checks. Would you like to get quality coaching from a Starting Strength Coach?

click here to start today