3 Ways You're Ruining Your Squat!
/
Let’s cover a few mistakes that you might be making with your squat, and then let’s fix them fast.
Mistake #1: Trying to Stay Upright
When you squat, don’t confuse a vertical back with a straight back. We want a straight back - it’s more efficient - but we’re not all that interested in a vertical back. Of course, your back will be vertical at the beginning and the end of the squat (i.e., when you’re standing up), but throughout the squat, it will (and should) move through a range of angles.
To fix this problem, as you start your squat, reach back with your hips and simultaneously point your chest at the floor as you descend (watch the included video for a demonstration). In other words, get leaned over as you descend - it will put you in a stronger, more efficient position at the bottom of the squat so that you can effectively drive your hips up out of the hole. Trying to stay upright (and trying to get upright too soon on the ascent) simply makes your squat harder and less efficient than it should be.
Mistake #2: Not Shoving Your Knees Out
When you squat, your knees travel forward - after all, that’s what knees generally do when they bend, but you are also going to shove them sideways, i.e., you’re going to shove your femurs apart from one another. We don’t want your knees to travel only forward; instead, your knees are going to travel both forward and out (i.e., forward and sideways).
To accomplish this, take a stance with your heels roughly shoulder-width apart, and then point your toes out at about a 30 degree angle. As you start to descend, point your knees in the direction of your toes so that your femurs are parallel to your feet (again, watch the included video for a demonstration).
When you shove your knees out, you allow your adductors (i.e., your groin muscles) to contribute to the lift, and this makes for a stronger squat. Shoving your knees apart also means that you get your femurs out of the way of your hips and torso, and this, in turn, makes it easier to achieve proper depth in the squat.
Mistake #3: Arching Your Back
You don’t want an arched back; in other words, you don’t want your spine in a position of overextension. Granted, you don’t want a rounded or flexed back, but we certainly don’t want an arched back either. An arched back is neither a comfortable nor a strong position in which to support a heavy load. You simply want your back to be straight and rigid as this is very efficient for transferring force from your hips and legs to the barbell. Watch the included video for a demonstration of what to do (and what not to do).
If you find yourself arching your back before or during the squat, remind yourself to clamp down hard by contracting your abs as tightly as you can. If this doesn’t work, you may need to use an overcue and tell yourself to “round your back” just a bit. However, remember that this is an overcue and be conservative with its use - you don’t actually want a rounded back, but you may find that this helps you successfully achieve a straight back.
As always, we hope this helps you get stronger and live better.
-Phil
PS: Whenever you want even more Testify in your life, here are some free resources:
Book a free intro and strategy session with us HERE.
Pick up a free copy of Testify’s Squat Guide: 12 Tips to Improve Your Squat Now HERE.
Get our free weekly email - containing useful videos, articles, and training tips - HERE.
Follow Testify on Instagram HERE.
Subscribe to Testify’s YouTube channel HERE.
(Some links may be affiliate links. As an Amazon Associate, Testify earns from qualifying purchases.)
At Testify, we offer small group training, private coaching (in-person or remotely via Zoom), online coaching, and form checks. Interested in getting stronger, looking better, and having more energy?
Slippery Bench? 10 Second Fix!
/Are you slipping and sliding when you bench press? Let’s fix it fast.
(This video is a Blast from the Past video originally published on 12/10/21.)
At Testify, we offer small group training, private coaching (in-person or remotely via Zoom), online coaching, and form checks. Click the button below to get quality coaching from a Starting Strength Coach and start getting stronger TODAY.
The Deadlift: Sock it to Me, Baby
/
(A Blast from the Past article originally posted on 05/28/21)
Want an easy way to improve your deadlift?
Wear long socks. Seriously. When you deadlift, wear socks that go over your calves and up to a point just below your knees. Of course, sweatpants or leggings will work as well, but for pure fashion - and I’m an expert on this topic - I recommend the classic, old-school tube sock with the horizontal stripes.
Why long socks? Two reasons:
First, you’ll keep the bar closer. Remember, step 5 in the deadlift setup is “drag” - i.e., drag the bar up your legs. This keeps the bar close to your body, over the middle of your foot, and it makes for the most efficient pull. Have you ever tried holding a jug of milk out at arm’s length? It’s a lot easier when you keep it close to your body, and the deadlift is no different. Lifters will automatically keep the barbell closer to their legs when they’re not worried about scraping their shins, which brings us to . . .
Second, you’ll prevent yourself from having bloody shins when you actually succeed in keeping the bar close. You don’t want bloody shins - once they bleed, it’s amazingly easy to break those scabs back open again in successive workouts - and we don’t want your DNA on the bar.
Now, if you’ve never let a deadlift drift away from your shins, and if you’ve never had bloody shins when pulling, then feel free to ignore this advice, but your day will come too, my friend, and when it does, you’ll wish you had a pair of those sweet socks.
As always, we hope this helps you get stronger and live better.
-Phil
PS: Whenever you want even more Testify in your life, here are some free resources:
Book a free intro and strategy session with us HERE.
Pick up a free copy of Testify’s Squat Guide: 12 Tips to Improve Your Squat Now HERE.
Get our free weekly email - containing useful videos, articles, and training tips - HERE.
Follow Testify on Instagram HERE.
Subscribe to Testify’s YouTube channel HERE.
(Some links may be affiliate links. As an Amazon Associate, Testify earns from qualifying purchases.)
At Testify, we offer small group training, private coaching (in-person or remotely via Zoom), online coaching, and form checks. Interested in getting stronger, looking better, and having more energy?
Why THIS is the Most Important Supplement for Building Muscle
/The best supplement for strength? It's not what you think.
At Testify, we offer small group training, private coaching (in-person or remotely via Zoom), online coaching, and form checks. Click the button below to get quality coaching from a Starting Strength Coach and start getting stronger TODAY.
Testify Review - July 17, 2023
/THIS WEEK'S SUBMISSION
From our video Bench Pressing Alone (safely!) and How to Unrack a Heavy Bench Press (click the title to watch):
Sjors Provoost
I always find myself precisely positioning the bench relative to the power rack and my position on the bench in order to ensure I don't waste a huge amount of energy on the unrack process. But this might be easier...
Phil
I hope it proves useful for you. People who bench on their own will typically line up a little bit closer to the hooks than does someone who gets a handoff from a spotter, but of course, the problem/trade-off is that if you line up too close, you put yourself in a precarious position of potentially benching up into the underside of the hooks, which is a real bad situation in which to find yourself.
ARTICLES & VIDEOS

The Sad Story of the Worst Squat Technique Ever
Want the history of the worst squat technique ever to be suggested by a coach? Watch and learn. Click here to watch.

Bench Press SECRET Every Lifter Should LEARN
What's the worst mistake on the bench press? It's not what you think. Click here to watch.
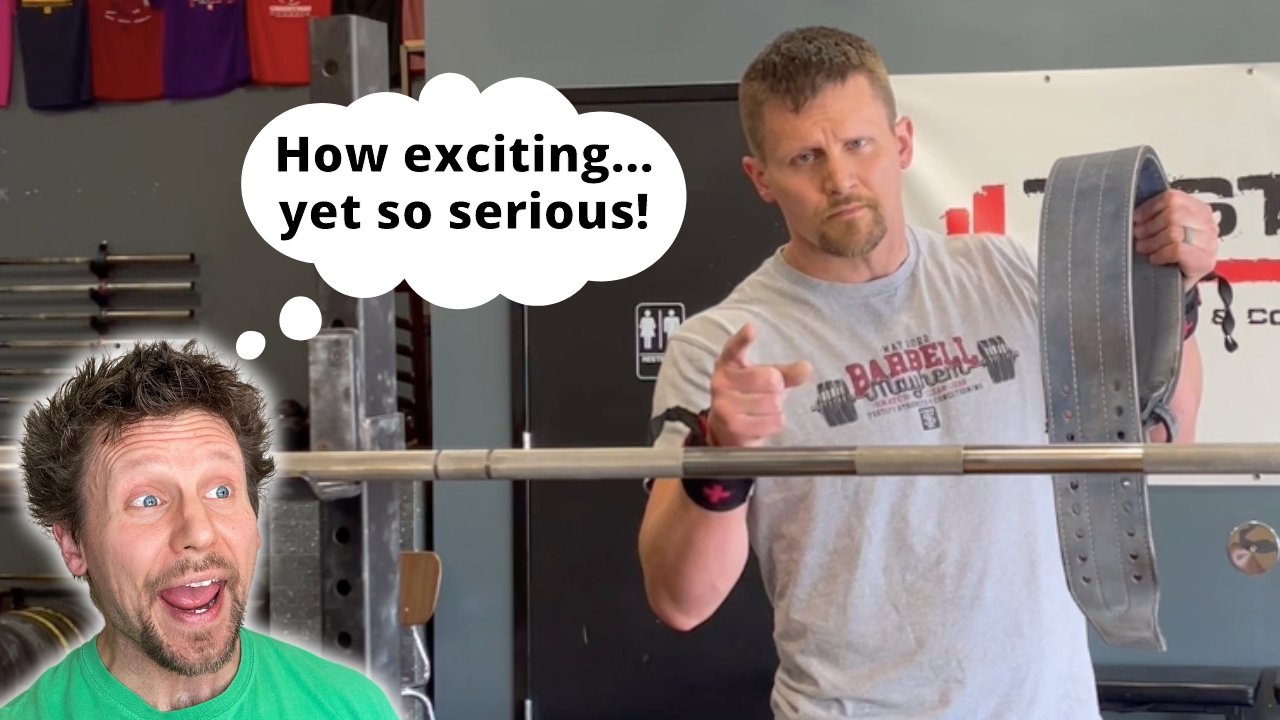
Everything You Need to Know About Lifting Belts . . . QUICK!
Phil covers the 4 Ws of lifting belts: width of belts, when to use one, where to wear your belt, and what to do once it's on. Click here to read.

Blast from the Past: Why Your Grandma Needs to Lift
Why do we focus so much on strength, and how does a high school math & physics teacher end up coaching people with barbells? Phil discusses the importance of strength and why it's life-changing. Click here to watch.

Blast from the Past: The Snatch: Landing Positions
Phil covers the three different landing positions for the snatch as well as the advantages that go with each position. Click here to read.

NEW TESTIFY GEAR!
Baseball season is here, and so is Testify’s new 3/4 raglan shirt - in multiple colors! Get yours today and represent your favorite gym!
Click here to head to the Testify Store.
WHAT'S COMING UP
Below are a few of our upcoming events, and you can find out what else is on the calendar by heading to our events page at www.testifysc.com/events.
Deadapalooza! The Annual Testify Deadlift Festival
August 25, 2023
Deadapalooza is a strength meet wherein the only contested lift is - you guessed it - the deadlift. There will be one bar (possibly multiple bars if numbers dictate), and the meet will be conducted in a "rising bar" format, so the weight on the bar only goes up! It's a ton of fun, so come on out!
Click here to register or for more information.
Starting Strength Self-Sufficient Lifter Camp
September 23, 2023
Spend the day learning the Squat, Press, and Deadlift and how to self-evaluate your lifts while training in your garage or commercial gym without a coach.
Click here to register or for more information.
Testify Fall Classic
October 21, 2023
The Testify Fall Classic is back for 2023, and we invite you to be a part of it! This is a strengthlifting meet, which means the contested lifts will be the squat, press, and deadlift.
Click here to register or for more information.
THIS WEEK’S CONDITIONING
Option 1
Sled Pyramid – 4, 5, or 6 tiers
Go up and down a 4, 5, or 6 tier “sled pyramid” – rest as needed. The distance for each round is 80 m indoors (a down-back on the 40m course) or 200 ft outdoors (2 down-backs on the 50 ft course). Rest as needed.
For example, Bob does the following (4 tiers):
Round 1: Empty sled
Round 2: 25#
Round 3: 50#
Round 4: 75#
Round 5: 50#
Round 6: 25#
Round 7: Empty sled
Compare to 2023.05.15.
Option 2
Bike/row:
8 x 30 sec on/2:00 off
Score = least distance covered in any 30 second interval
Compare to 2023.04.24.
Option 3
5-10 rounds:
50 ft yoke carry
50 ft yoke push
100 ft sandbag carry and S.O.B. (sandbag-over-bar)
Perform 1 round every 2-3 minutes.
Compare to 2023.03.27.
Option 4
Row/Tire 10 min ladder:
2 cal row
2 tire flips
4 cal row
4 tire flips
6 cal row
6 tire flips
…
Climb the ladder as high as possible in 10 minutes.
Compare to 2023.03.27.