Testify Today - May 1, 2023
/THIS WEEK’S QUESTION
From our video Get a BIGGER Squat Now with 3 SIMPLE Tips! (click the title to watch):
Palm life UK
Is there a cue once you are at the bottom of the squat? Is it "push the floor away with your feet " or similar? I'm finding it hard with everything else going on to get my mind on one clear instruction ( apart from just stand up) to help me out of the hole.... thanks
Phil
Indeed - "drive your hips up." I'd recommend taking a look at our "How to Start Lifting: Learn to Squat" video - the whole thing will be useful, but you'll want to pay special attention around the 1:32 mark (and the link below is cued up to that point). This is where we cover hip drive without the bar before adding the bar to the movement.
https://www.youtube.com/watch?v=iDWIeTVoGG8&t=92s
ARTICLES & VIDEOS
The TRUTH About Lifting (What No One Tells You!)
We cover why lifting weights is pretty stupid and - more importantly - why it isn't. This is why we do what we do. Click here to watch.
"This Made Him Look STUPID!" | Squat Mistake
Are you making this mistake when squatting? Well . . . don't. It's unnecessary, inefficient, and it makes you look like a newbie. Click here to watch.
Your Hideous Deadlift: Do It WRONG . . . to Get It Right?
Are you having a tough time setting your back correctly when deadlifting? To get it right, it can help to do it wrong first. Click here to read.
Blast from the Past: When to Use Lifting Straps! ( . . . and when NOT to!)
When should you use lifting straps in your training, and when should you not use them? Click here to watch.
Blast from the Past: Simple and Cheap DIY Chalk Stand
We show you how to quickly make a simple and cheap chalk stand (with an included video). Click here to read.

NEW TESTIFY GEAR!
Sun's out, guns out, and we've got men's and women’s tank tops in multiple colors. Get yours today and represent your favorite gym!
Click here to head to the Testify Store.
WHAT'S COMING UP
Below are a few of our upcoming events, and you can find out what else is on the calendar by heading to our events page at www.testifysc.com/events.
Reminder: The gym will be closed for training this Saturday (05/06/23) as we are hosting the annual Testify Barbell MAYhem weightlifting meet.
Starting Strength Self-Sufficient Lifter Camp
May 20, 2023
Spend the day learning the Squat, Press, and Deadlift and how to self-evaluate your lifts while training in your garage or commercial gym without a coach.
Click here to register or for more information.
Testify IronFest V
July 8, 2023
IronFest is a team-based strength meet wherein the contested lifts will be the squat, press, bench press, and deadlift. Competitors will form teams of 2 lifters/team and perform all 4 lifts; each lifter will perform one upper body lift and one lower body lift, and each lifter will receive 3 attempts for each lift.
Click here to register or for more information.
Testify Fall Classic
October 21, 2023
The Testify Fall Classic is back for 2023, and we invite you to be a part of it! This is a strengthlifting meet, which means the contested lifts will be the squat, press, and deadlift.
Click here to register or for more information.
THIS WEEK’S CONDITIONING
Option 1
Sled
Outdoors:
10-20 x 25 yds EMOM at a weight of your choice
Every minute, push the sled 25 yards, i.e., if pushing the sled takes 20 seconds, then you have 40 seconds to rest. Perform 10-20 rounds.
Indoors:
10-20 x 100 ft EMOM at a weight of your choice
Every minute, push the sled 100 feet, i.e., if pushing the sled takes 20 seconds, then you have 40 seconds to rest. Perform 10-20 rounds.
Compare to 2023.02.27.
Option 2
Bike/row:
12 min TT
Score = distance
Compare to 2023.02.06.
Option 3
5-10 rounds of:
30 sec ME tire flips
30 sec rest
Compare to 2023.01.09.
Option 4
For time:
500m row
5 x 80m sled push (200 ft if indoors)
500m row
Rest 1 minute after the first row and after each sled push.
Compare to 2023.01.09.
"This Made Him Look STUPID!" | Squat Mistake
/Are you making this mistake when squatting? Well . . . don't. It's unnecessary, inefficient, and it makes you look like a newbie.
At Testify, we offer small group training, private coaching (in-person or remotely via Zoom), online coaching, and form checks. Click the button below to get quality coaching from a Starting Strength Coach and start getting stronger TODAY.
Your Hideous Deadlift: Do It WRONG . . . to Get It Right?
/
Are you having a tough time setting your back correctly when deadlifting? To get it right, it can help to do it wrong first.
(Watch the included video near the end of this article for a quick demonstration of how to do this.)
In this approach, you're going to set the barbell on the pins (AKA “safeties) of your squat rack with some weight on the bar. You don’t need a lot of weight - just enough to allow yourself to put some tension on the bar (i.e., some upward pull) without actually allowing the bar to start moving upward.
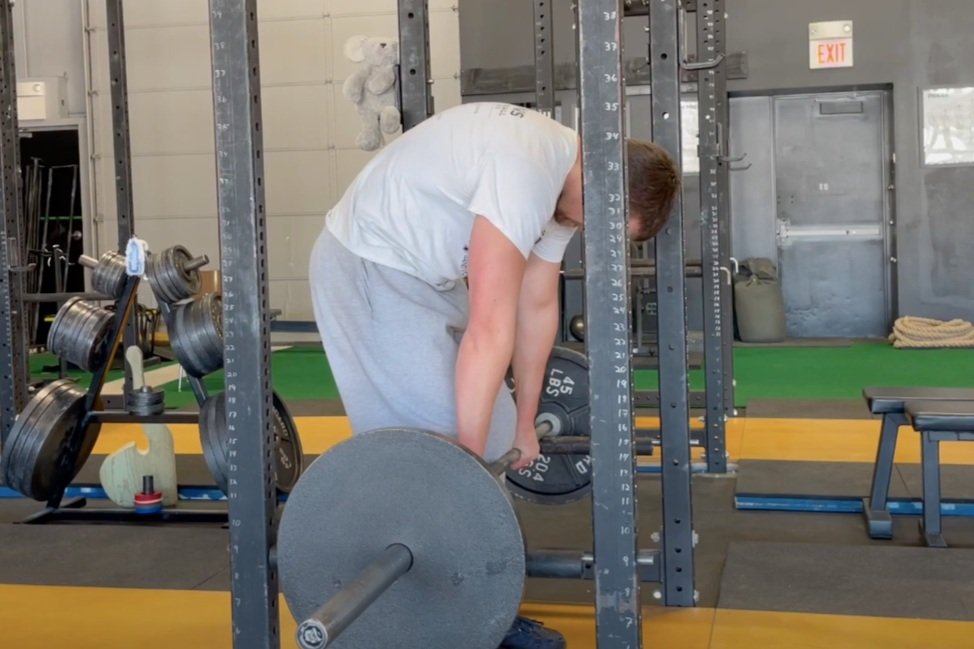
figure 1: his back is so terrible he won’t even show his face.
You're setting the bar on the pins because - when going through the 5-step setup for the deadlift (click here for a video) - most people find it easier to set the back correctly in rigid extension from this higher position as compared to the usual position wherein the plates are on the floor. In Figure 2, I have the barbell set just below my knees, but if you need to start higher than this, that’s perfectly acceptable.

figure 2: The bar is set just below the knees.
Back flexion - or rounding your back - is pretty easy for most people to achieve, and you're going to take advantage of that here. First, cue yourself to flex your back (Figure 3). In other words, you're going to do it wrong. Remember that a person who struggles with back extension can usually do this pretty well - in fact, it’s typically the default position - but if you need a little additional help, you can cue yourself to round your back as high in the air as possible or cue yourself to make your back into a mountain.

figure 3: back flexion
Additionally, make sure your shins stay in contact with the bar throughout this process, and the bar must remain motionless. From your hips on down, nothing should move or change shape.
Once you're in this position, you can feel what it’s like to do it incorrectly, so you're simply going to cue yourself to do the exact opposite of what you just did. You're going to push your belly down between your thighs, thus extending - or straightening - your back (Figure 4). Previously, your back was a mountain, and you now cue yourself to make it a valley (which is an overcue, but we’ll cover that in a bit).

figure 4: Back extension
Perform five reps alternating between the positions of flexion and extension. The cues now become: “Flex - Extend” or simply “Round - Arch.” The cues “arch” and “make a valley” are overcues as you don’t want your back actually arched or overextended. You just want it to be straight, but for someone who struggles with extension, these two overcues can be quite useful.
Once you can set your back in extension at a given pin height, move the pins lower and repeat the process - a set of five reps works pretty well. If you’re working without a coach, record yourself so you can watch it afterward and see if you were indeed setting your back correctly. Once you’ve “graduated” from a certain height, continue to work lower and lower until you’re setting up correctly for a regular deadlift with the plates on the floor.
As always, we hope this helps you get stronger and live better.
-Phil
PS: Whenever you want even more Testify in your life, here are some free resources:
Book a free intro and strategy session with us HERE.
Pick up a free copy of Testify’s Squat Guide: 12 Tips to Improve Your Squat Now HERE.
Get our free weekly email - containing useful videos, articles, and training tips - HERE.
Follow Testify on Instagram HERE.
Subscribe to Testify’s YouTube channel HERE.
(Some links may be affiliate links. As an Amazon Associate, Testify earns from qualifying purchases.)
At Testify, we offer small group training, private coaching (in-person or remotely via Zoom), online coaching, and form checks. Interested in getting stronger, looking better, and having more energy?
Simple and Cheap DIY Chalk Stand
/
(A Blast from the Past article originally posted on 02/26/21)
When you chalk up for your next set, it’s nice to have a chalk stand. It’s not absolutely necessary, of course, as you can just use a bag of chalk or - better yet - a chalk bucket sitting on the ground. Although those options work, a chalk stand makes much less of a mess than a bag of chalk, and as the stand is raised, you don’t have to reach all the way down to the floor level as you do with a bucket of chalk, which can be a bit of pain if you already have your belt tightened.
With all this in mind, here’s how you can make a simple and cheap chalk stand (feel free to watch the video above if you’d rather not read the steps below):
Step 1
Go to your nearest hardware store and purchase the following items (you may already have some of these items at home). If you’d rather not make the trip, you can click the items below and order from Amazon.
Two 5-gallon buckets. Choose a color option that allows you to find matching spray paint.
A lid for one of the buckets (preferably the same color as the buckets). You only need one lid.
One can of spray paint - ideally the same color as the buckets
One roll of duct tape
Step 2
Set one bucket on the ground - upside down.
Step 3
Set the other bucket on top of the first bucket - right side up. The closed ends of the two buckets should now be touching.

Step 4
Tape the two buckets together by wrapping duct tape around the buckets several times. Tape the “seam” between the buckets as well as above and below the seam. Five or six times around the buckets should do nicely.
Step 5
Spray paint the buckets. This step is optional and is for aesthetic purposes only - it covers up any logos or printing on the buckets. It’s nice to have the paint match the buckets (or as closely as possible) for two reasons:
This is supposed to be a quick process, so don’t worry too much about whether you’ve painted the entire apparatus or not. If the logos are covered and the paint closely matches the bucket, it will look just fine.
Eventually, the paint will chip or wear in places, and if the bucket is close to the same color as the paint, this won’t be a big deal.
Step 6
Place the lid on the ground - upside down - with a brick, 10 lb plate, or some other relatively heavy object on top of the lid, and then set your new chalk stand on top of the lid and press down so that the lid is attached to the stand. You’ve now weighted the base of your chalk stand and made it much less likely to tip over and spill.

Step 7
Put a chalk-topper over the top of the stand. This is optional, but if other people use your chalk stand, you’ll find this greatly helps keep the chalk dust inside the stand. Our chalk toppers are from www.junkbrands.com.
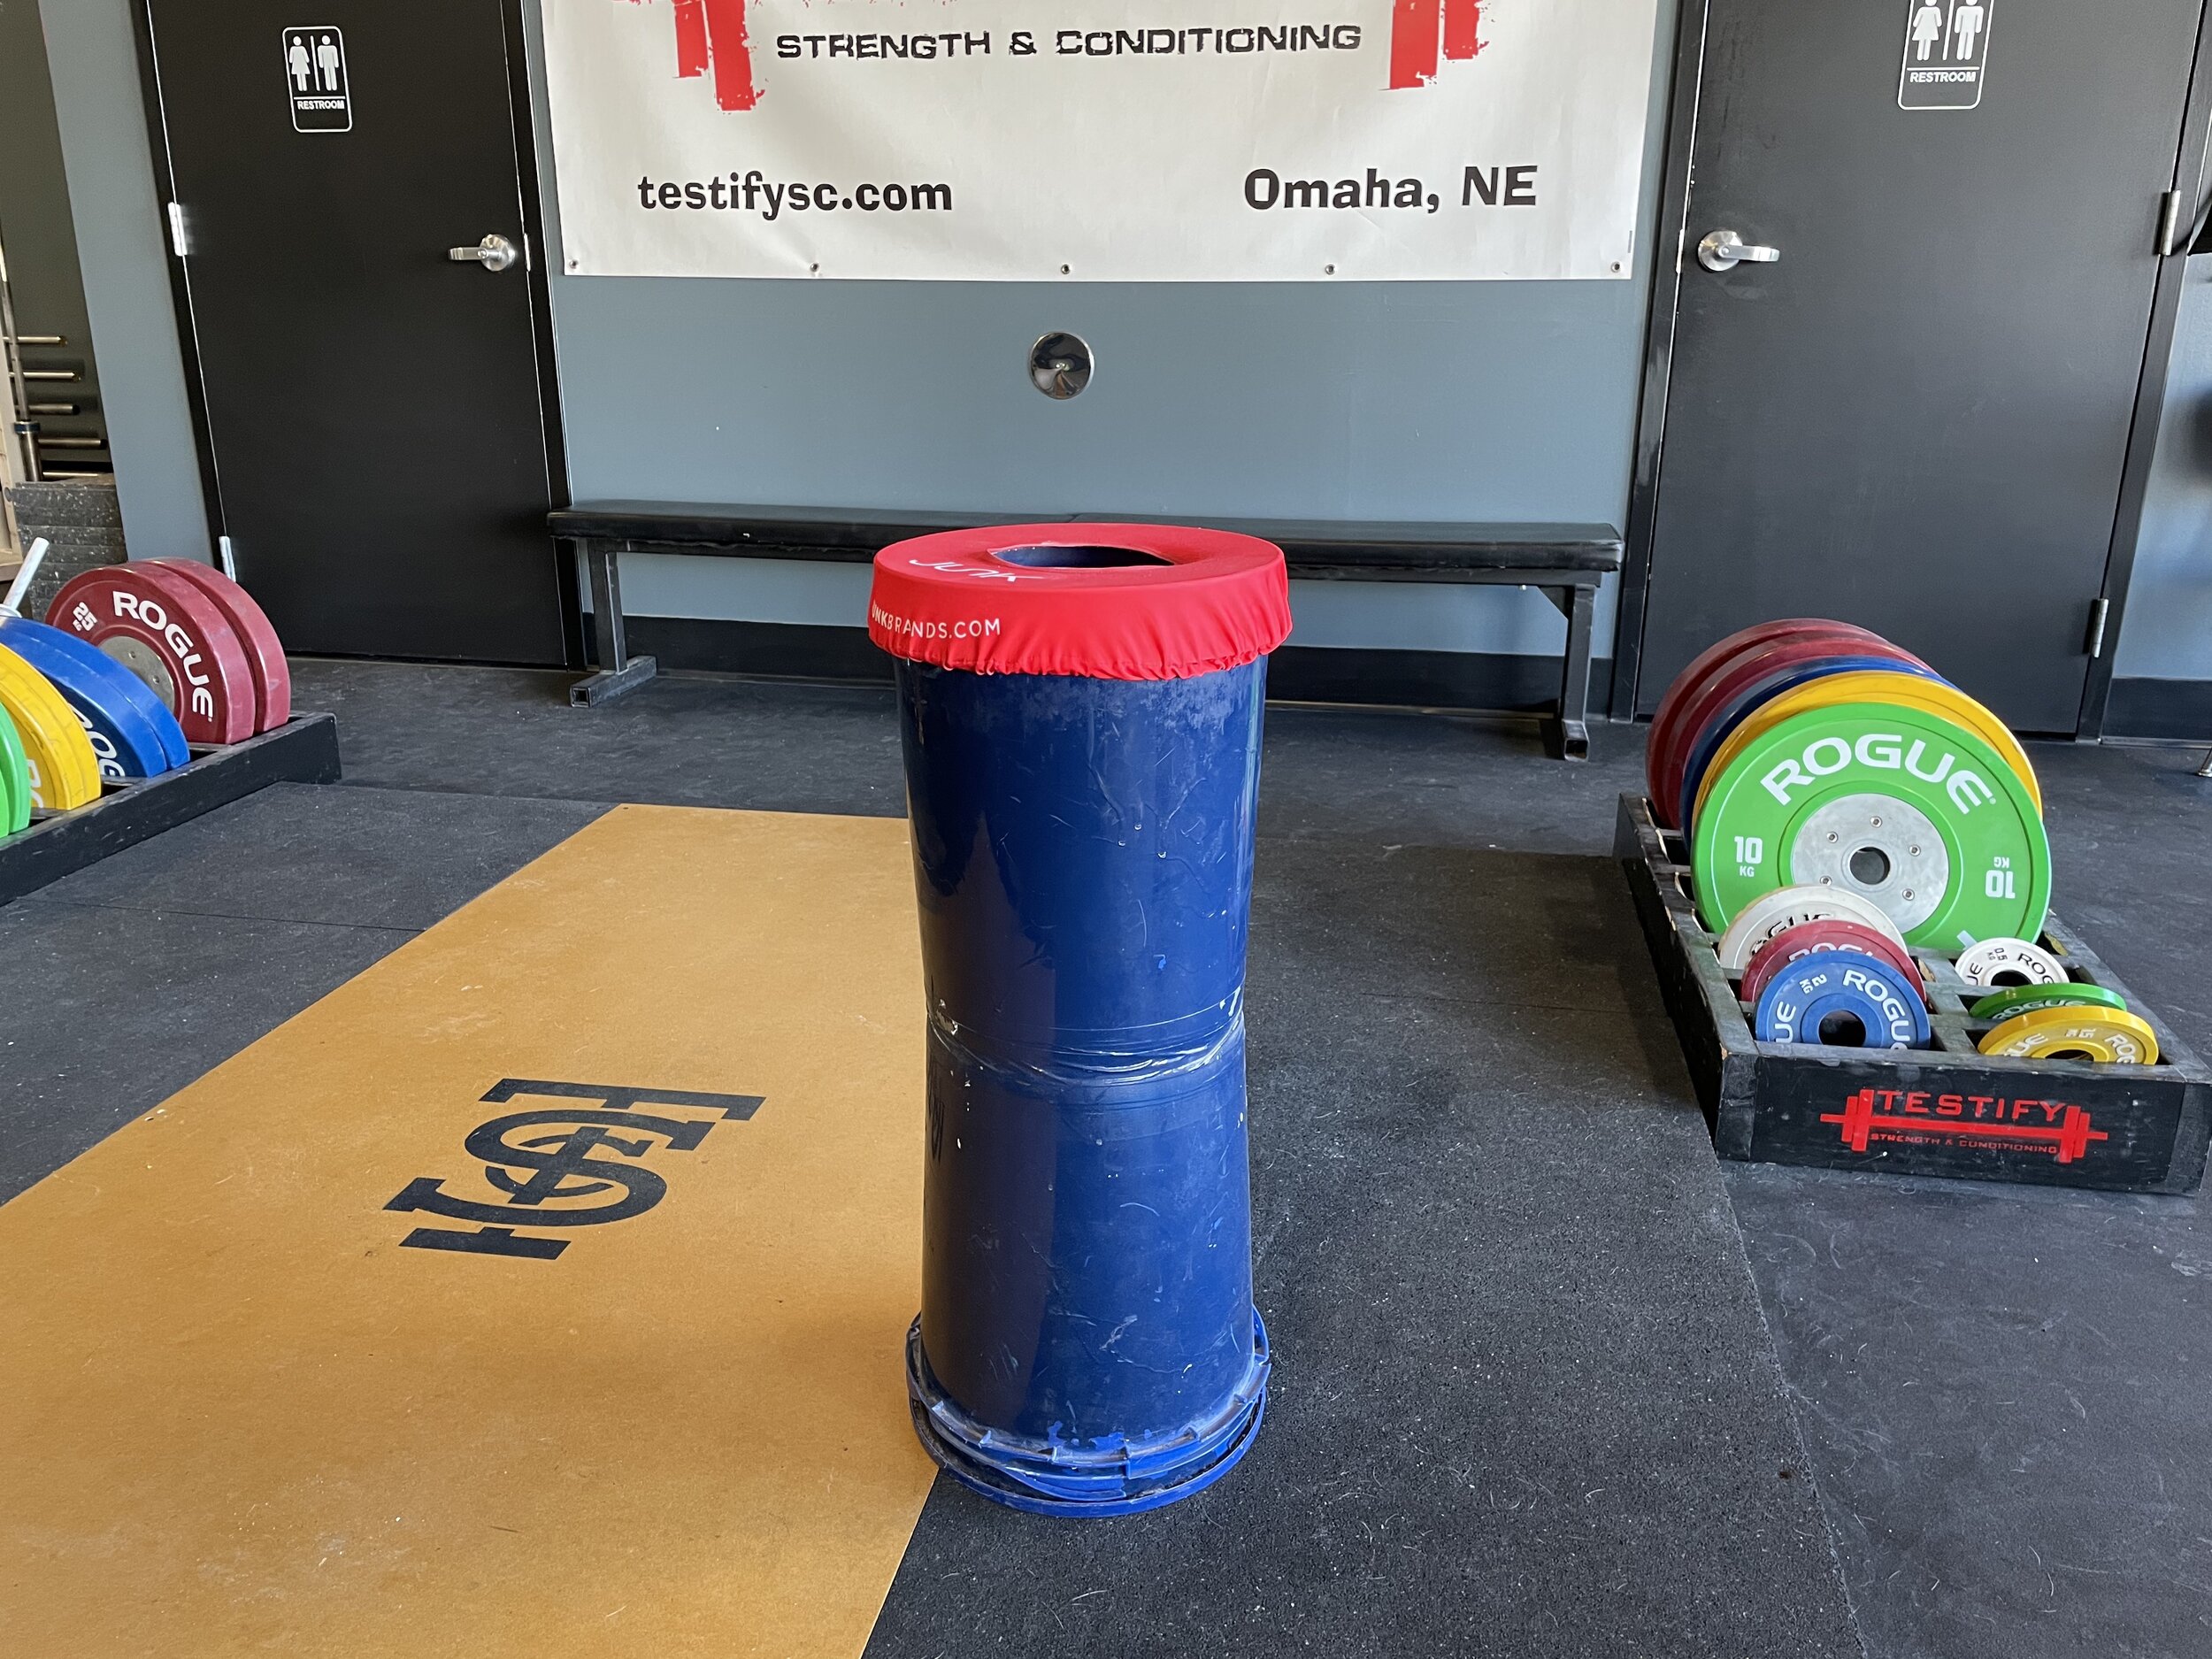
Step 8
Place some chalk in the top bucket, and you’re good to go!
As always, we hope this helps you get stronger and live better.
-Phil
PS: Whenever you want even more Testify in your life, here are some free resources:
Book a free intro and strategy session with us HERE.
Pick up a free copy of Testify’s Squat Guide: 12 Tips to Improve Your Squat Now HERE.
Get our free weekly email - containing useful videos, articles, and training tips - HERE.
Follow Testify on Instagram HERE.
Subscribe to Testify’s YouTube channel HERE.
(Some links may be affiliate links. As an Amazon Associate, Testify earns from qualifying purchases.)