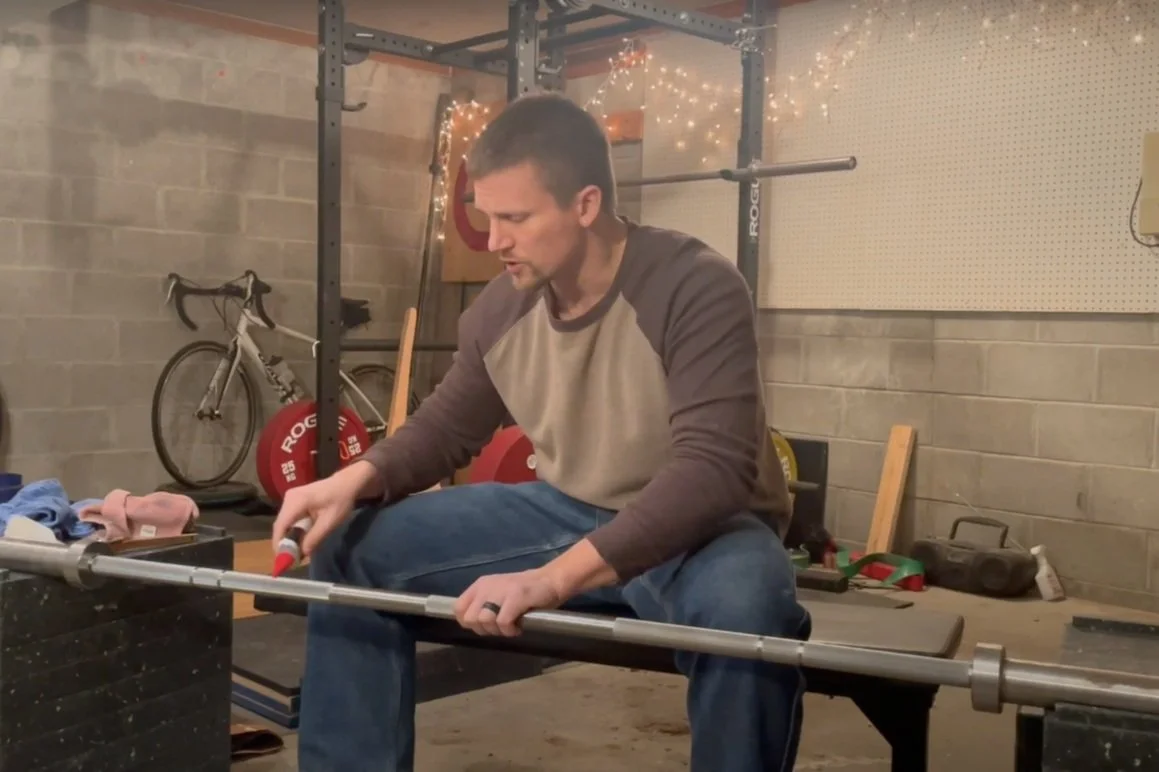
Basic Barbell Maintenance

(A Blast from the Past article originally posted on 01/13/23)

My wife, Becky, and I have two bare steel barbells in our garage gym, and while bare steel is unmatched in terms of grip and feel, it does require a bit of maintenance. Bars with a protective coating (e.g., zinc) will need some attention from time to time as well - simply less frequently.

With all of this in mind, let’s dive into how to perform some simple barbell maintenance.

Brush the Chalk Off the Barbell
The upside to chalk is that it absorbs the moisture of your hands and thus provides a secure grip on the bar. However, the downside is that chalk can hold some of that moisture and keep it on the bar even after you’re done training, and that can encourage rust formation on your bar.

To prevent this, simply brush the chalk off the bar every time you’re done training. A cheap nylon bristle brush will do the job just fine, and brushing off the chalk will take you about 20 seconds tops. Every member at Testify does this (whether the bar is bare steel or not) as well, and it helps tremendously.

APPLYING OIL TO THE BARBELL

Oil the Barbell Shaft
About once a month (perhaps even more infrequently), you’ll need a few things: 3-IN-ONE Multi-Purpose Oil, a brass bristle brush, and a clean rage or two. The oil will help remove rust from the bar as well as apply a protective coating to help prevent future rust. Simply apply a bit of oil to the bar (watch the video above for an example) and then use the brass bristle brush to brush in the oil. After that, take a clean rag and then wipe down the bar to absorb any excess oil.

You can spend more time on any trouble spots, but if you’re doing this on a semi-regular basis, this will do an excellent job of protecting and caring for your bar. If you’ve got a bar that needs some serious rust removal, we also have a video that goes into depth on that process.

As always, we hope this helps you get stronger and live better.

-Phil

PS: Whenever you want even more Testify in your life, here are some free resources:

  • Book a free intro and strategy session with us HERE.

  • Pick up a free copy of Testify’s Squat Guide: 12 Tips to Improve Your Squat Now HERE.

  • Get our free weekly email - containing useful videos, articles, and training tips - HERE.

  • Follow Testify on Instagram HERE.

  • Subscribe to Testify’s YouTube channel HERE.

(Some links may be affiliate links. As an Amazon Associate, Testify earns from qualifying purchases.)


At Testify, we offer small group training, private coaching (in-person or remotely via Zoom), online coaching, and form checks. Interested in getting stronger, looking better, and having more energy?

How to Build a Home Gym - Part 1: Equipment

As a Starting Strength Coach, a commercial gym owner, and a home gym owner, I’m often asked, “What equipment would you recommend for a home gym setup?” If you’re looking to set up a home gym - whether in your basement, your garage, or in a backyard shed - this guide will set you on the right path.

A few notes before we get started:

  1. I’ve generally included what I would purchase for myself, and where that differs from what I’d recommend for others, I’ve noted that distinction as well as why.

  2. Some categories of equipment will have multiple options. Sometimes this is because lifters’ needs will vary (e.g., those doing the Olympic lifts will need bumper plates while those not doing them may not), and at other times, I’ve provided a second or third choice based on lifters’ personal preferences or budgetary considerations.

  3. I have personal experience with most of the items in this list, and for those pieces of equipment that I haven’t used, I’ve noted that.

  4. I’ll cover personal gear such as shoes, belt, knee sleeves, etc. in a future article.

Barbell
The barbell is the most important piece of general equipment (i.e., not your personal gear such as shoes and belt) that you’ll buy, and as such, this is not the place to buy cheap. A quality barbell will last you a lifetime, so invest wisely.

1. Starting Strength Bar (20 kg) by Texas Power Bars 
This is my favorite all-purpose bar and definitely my first choice of barbell. It’s an excellent bar for squatting, pressing, deadlifting, benching, snatching, and clean-and-jerking. We have five of these bars at Testify Strength & Conditioning, and had this bar come out earlier, my wife and I would have two of these at home as well instead of the two Rogue B&R bars we currently have (the B&R is also an excellent bar, and we have five of those at Testify as well).

2. Original Texas Power Bar (20 kg) by Texas Power Bars 
This bar has a more aggressive knurl than the Starting Strength Bar and is the bar I’d choose first when going for a heavy deadlift. If you have no plans to clean or snatch, this might be the bar for you. You can purchase this bar in bare steel, black zinc, chrome, or cerakote coatings. Be prepared - the knurling is no joke.

3. Powerlifting Bar 2.0 (20 kg) by Bells of Steel
If you’re looking to save a bit of money, this barbell might be a reasonable choice. I don’t have any personal experience with it, but it’s received good reviews. At the time of this article, the price is $249.99, and I wouldn’t trust any barbell cheaper than that.

Power Rack

1. R-3 Power Rack by Rogue Fitness 
This power rack is my favorite of anything that’s out there and has been for over a decade. It’s the workhorse rack at Testify (we have six of them), and if we had room, we’d get more of them. If you want the bolt together version (potentially useful if you’re dealing with very tight circumstances when getting the rack to its final destination in your house), then click here.

2. T-3 Power Rack by Titan Fitness
This is essentially Titan’s version of the R-3 but at a lower price point. Unlike the R-3, the T-3 doesn’t come with safeties, so you’ll need to purchase those separately (click here). I haven’t lifted on the T-3, but we (i.e., Testify) have several clients (both local and online) who own them, and it’s received excellent reviews from them.

A few notes:

  • These racks must be bolted to the floor. Absolutely do this.

  • These racks both have 2” x 3” uprights as I avoid 3” x 3” uprights like the plague. A 3” x 3” upright simply means you’re paying for more metal and you have either less room between the hooks (potentially making it harder for those with stiff shoulders to take their squat grip) or less room between the hooks and the plates (making it more likely you’ll bang into the uprights when unracking or racking your squat). This is not an issue of rack strength - Rogue told me each 2” x 3” upright is rated at 10,000 lb (the weakest link is the j-hook, and even the j-hooks are rated at 1,000 lb each), so you don’t need the 3” x 3” uprights.

  • If you want to utilize two barbells on the same power rack (e.g., you’d like to warm-up your bench press between work sets of your squat, or you have a training partner), you’ll want to purchase an additional pair of j-hooks, and you’ll want to purchase two pairs of spotter arms as well (as opposed to pin/pipe safeties) so that you can safely squat and bench outside the cage. Again, bolt the rack to the floor - the concrete floor.

Plates

1. Iron plates by The Strength Co.
These are the best iron plates out there and are both precise and accurate. If Testify had to get new plates, these are the plates we’d get.

Disclaimer: My wife and I train on calibrated, steel, kilogram, competition plates at home since Testify’s competition plates reside at our house except on meet days. I don’t recommend that anyone go out and buy calibrated plates on which to train; in fact, I recommend against it - the lip of each plate is stupidly small (for grabbing the plate), and the plates are inordinately expensive. With that said, I’m not about to spend more money on plates when we already can use these (it’s certainly a champagne problem). However, if we were purchasing pound plates for our home gym, we’d get The Strength Co. plates.

2. Iron plates by Iron Crush
If you’re looking to save some dough, these plates might do the job. I do not have personal experience with these plates, but they’ve received solid reviews.

3. Bumper plates by Rep Fitness
You’ll need bumper plates if you perform the Olympic lifts or if your deadlift warm-up needs to start lighter than 135 lb (which is very common for those beginning their strength training journey). We have kilogram bumpers at Testify as we host a number of weightlifting meets, but the average lifter in the U.S. will probably prefer pound bumpers, and that’s the option I’ve provided here. I don’t have personal experience with these bumpers, but several of our online clients have provided good feedback on these plates from Rep Fitness.

4. Fractional plates by 44 Sport
To increase your lifts by 2.5 lb increments, you’ll need 1.25 lb plates, and you might need to make jumps smaller than 2.5 lb on some lifts (for example, female lifters and older male lifters on the press and bench press). With this in mind, I’d recommend this fractional set of 0.25 lb, 0.5 lb, 0.75 lb, and 1 lb plates. We have several sets of these plates at Testify.

What plates should you get? In general, you’ll want the following to get started:

  • 2 x 1.25 lb plates (or the fractional set listed above)

  • 2 x 2.5 lb plates

  • 2 x 5 lb plates

  • 4 x 10 lb plates (i.e., two pairs of 10 lb plates)

  • 2 x 25 lb plates

  • 2 x 45 lb plates

As you get stronger, you’ll need to purchase additional 45 lb plates - this is a good problem to have (albeit an expensive one at times). Bumper plates can be purchased starting at 10 lb (and heavier), and if you need to load your deadlift lighter than 135 lb, you’ll want to purchase a pair of 10 lb, 15 lb, and/or 25 lb bumpers.

Bench

1. Flat Bench by Rep Fitness
Our benches at Testify are from Rogue Fitness, and while they are fine, if I were to purchase a bench for home use right now, the Rep Fitness bench would be my choice. I don’t have personal experience with it, but it seems to provide better grip than Rogue’s, and a number of our online clients have said positive things about it.

2. Adjustable Bench by Rep Fitness
I don’t have personal experience with this bench either, but if I was going to get an adjustable bench (e.g., for incline bench press) for home use, this is probably the option I’d go with. We have an adjustable bench from Rogue at Testify, and it’s solid, but it’s unwieldy, and we probably wouldn’t buy it again for the price.

Chalk

1. Spider Chalk
This is our favorite chalk on the market, and there’s no point in having a second option in this category. It seems silly to even have a favorite chalk brand, but the blocks are more dense than other brands, and the blocks stay intact far better than other brands. Bear in mind that one block will last you a long time.

Collars

1. Metal spring collars by Power Systems
These are my favorite collars - we have many of these at Testify, and these are the type Becky and I have at home as well. With a bit of know-how, they are easy to slide on and off with only one hand.

2. Plastic collars by Clout Fitness
If you prefer the plastic collars that tend to be quite popular, you can find a bunch of options online. It’s possible that I’ve had personal experience with these, but there’s so many options out there that it’s tough to keep track. At any rate, these are popular and have received solid reviews.

Platform

1. 8’ x 8’ platform
Don’t buy a platform - build one (watch the included videos). It’s not difficult, and you’ll save a ton of money in the process. The platform will protect your plates, your floor, it reduces noise, and it clearly delineates your lifting space (which is very important if you have anyone else in your gym with you, such as your kids).

2. 4’ x 8’ platform
If you don’t have room for an 8’ x 8’ platform, you’ll at least want a 4’ x 8’ platform for deadlifting. We cover this in the videos as well.

Happy home gym shopping (and building), and as always, we hope this helps you get stronger and live better.

(Some links may be affiliate links. As an Amazon Associate, Testify earns from qualifying purchases.)
If you found this helpful, you’ll love our weekly email. It’s got useful videos, articles, and training tips just like the one in this article. Sign up below, and of course, if you don’t love it, you can unsubscribe at any time.


At Testify, we offer small group training, private coaching (in-person or remotely via Zoom), online coaching, and form checks. Would you like to get quality coaching from a Starting Strength Coach?

Simple and Cheap DIY Chalk Stand

(This article is a Blast from the Past article originally posted on 02/26/21.)

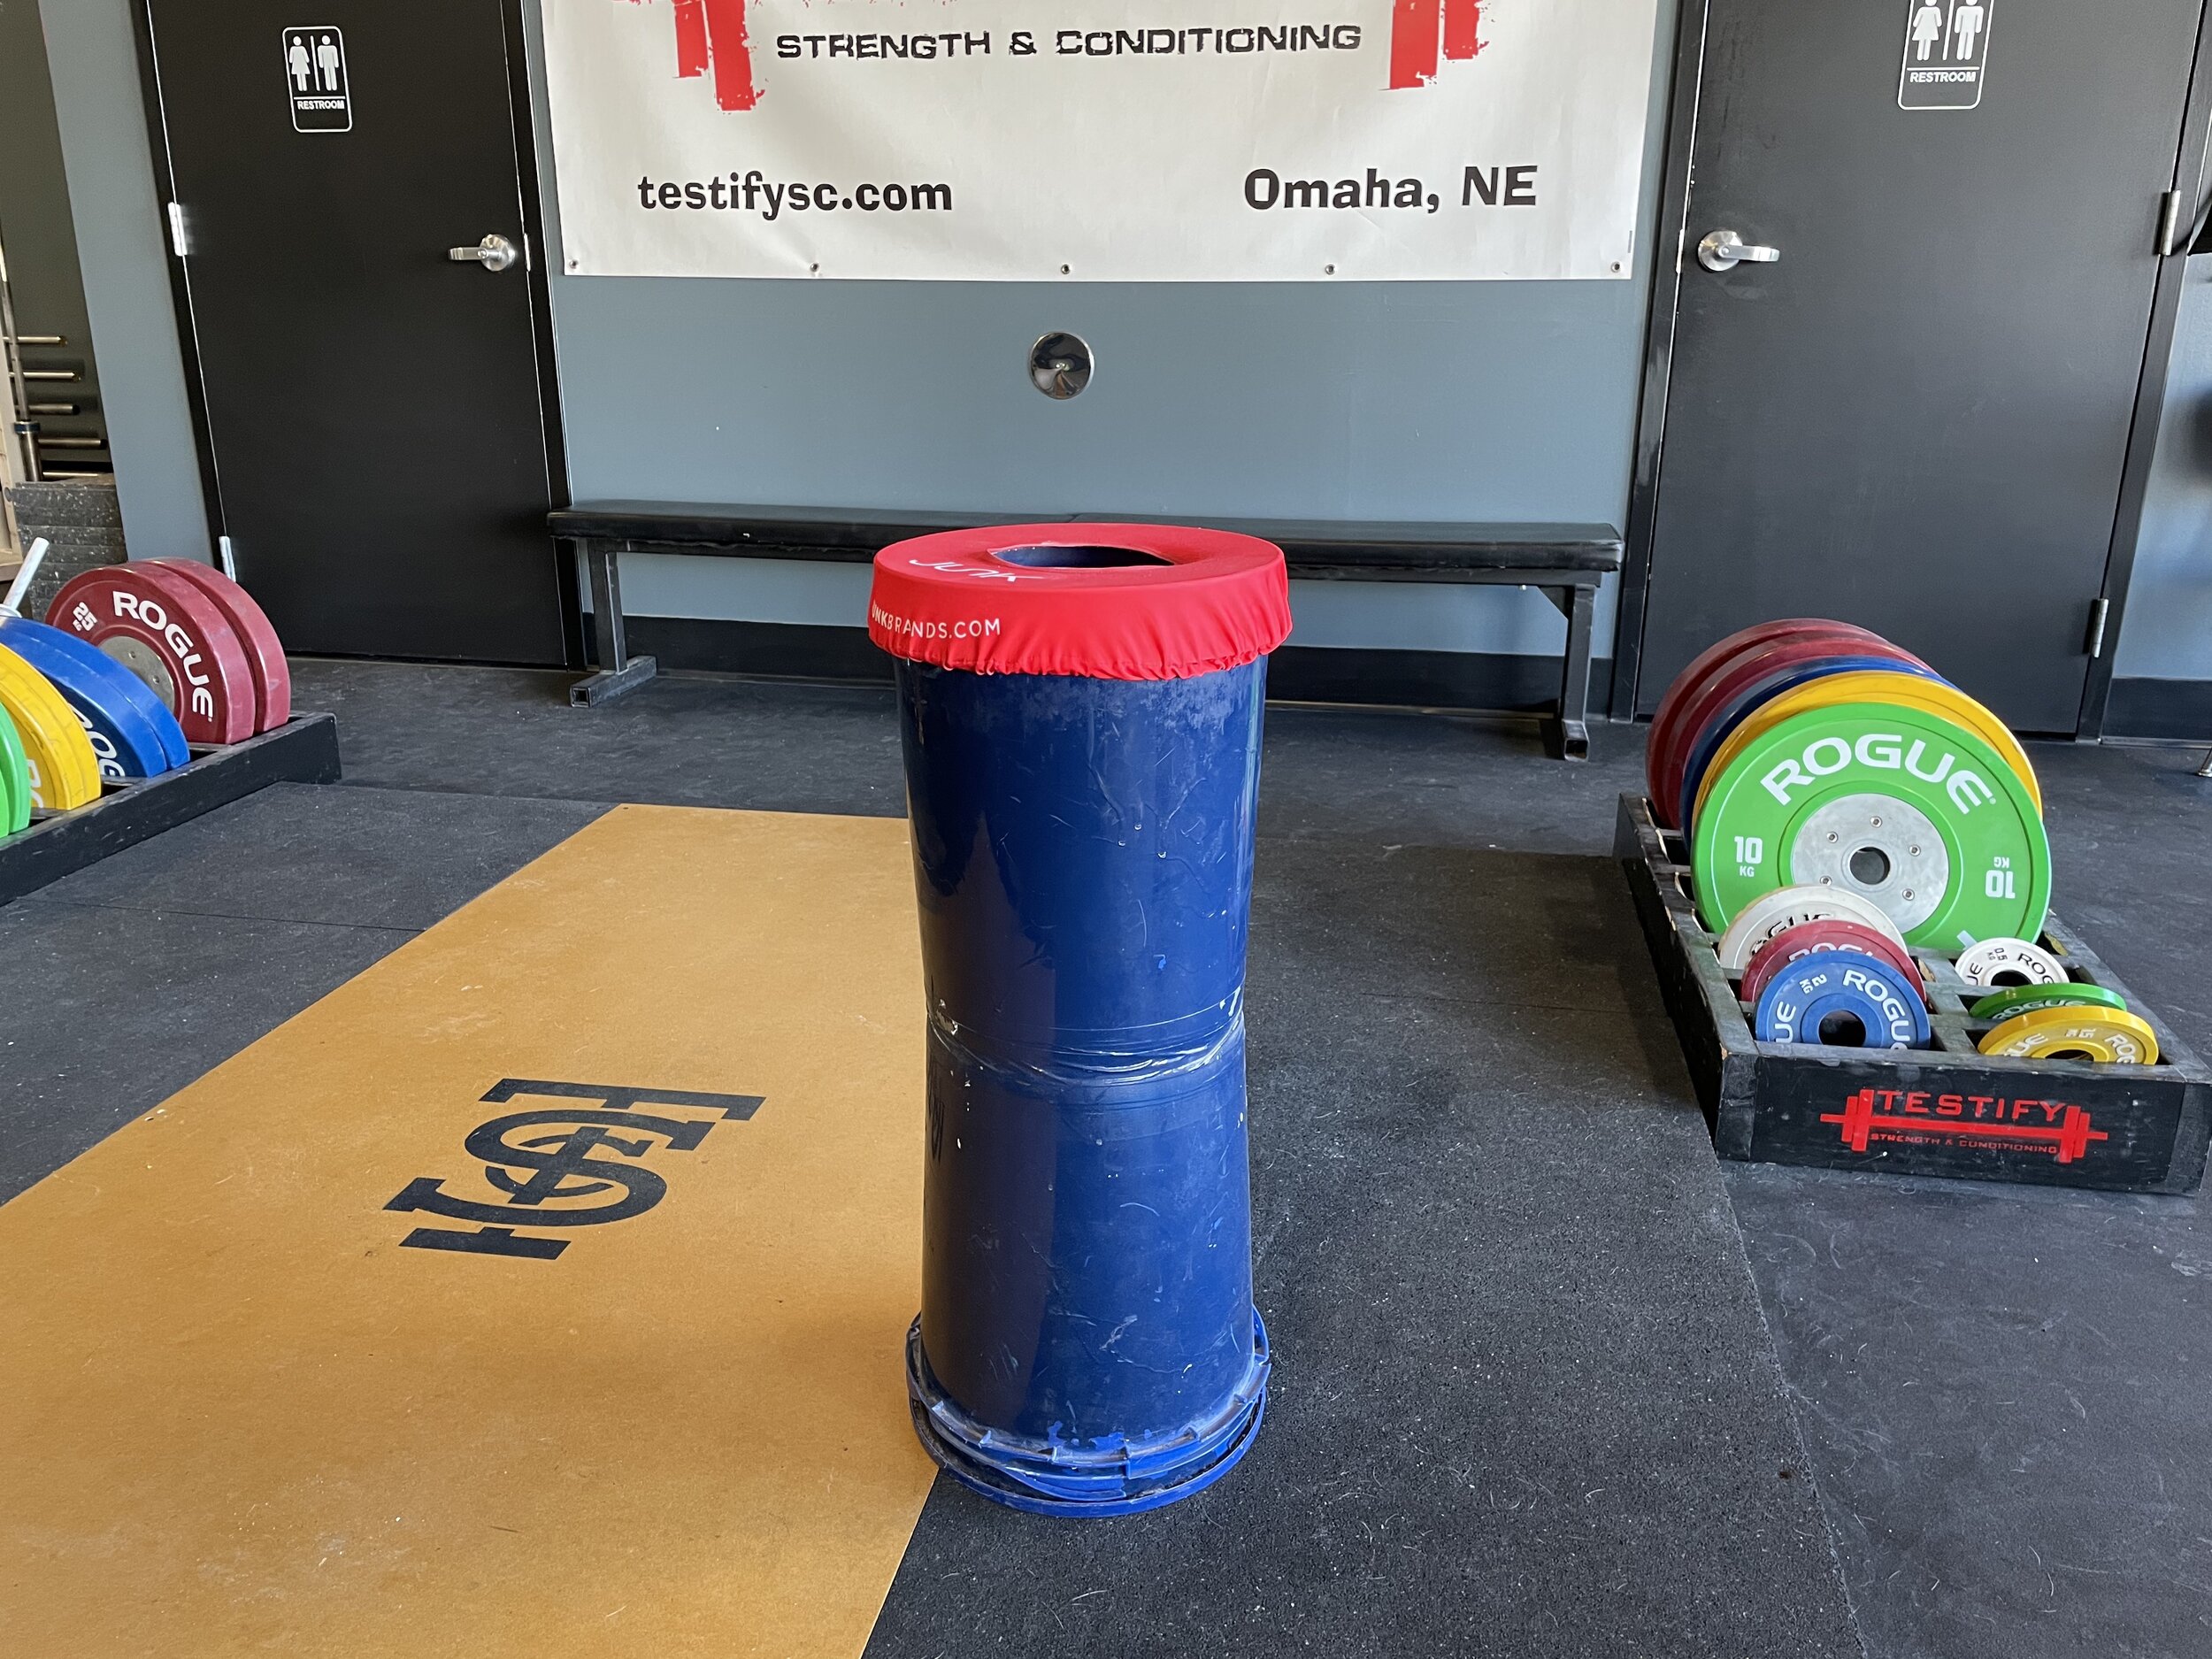
When you chalk up for your next set, it’s nice to have a chalk stand. It’s not absolutely necessary, of course, as you can just use a bag of chalk or - better yet - a chalk bucket sitting on the ground. Although those options work, a chalk stand makes much less of a mess than a bag of chalk, and as the stand is raised, you don’t have to reach all the way down to the floor level as you do with a bucket of chalk, which can be a bit of pain if you already have your belt tightened.

With all this in mind, here’s how you can make a simple and cheap chalk stand:

  1. Go to your nearest hardware store and purchase the following (you may already have some of these items at home):

    • Two 5-gallon buckets. Choose a color option that allows you to find matching spray paint.

    • A lid for one of the buckets (preferably the same color as the buckets). You only need one lid.

    • One can of spray paint - ideally the same color as the buckets.

    • One roll of duct tape.

  2. Set one bucket on the ground - upside down.

  3. Set the other bucket on top of the first bucket - right side up. The closed ends of the two buckets should now be touching.

  4. Tape the two buckets together by wrapping duct tape around the buckets several times. Tape the “seam” between the buckets as well as above and below the seam. Five or six times around the buckets should do nicely.

  5. Spray paint the buckets. This step is optional and is for aesthetic purposes only - it covers up any logos or printing on the buckets. It’s nice to have the paint match the buckets (or as closely as possible) for two reasons:

    • This is supposed to be a quick process, so don’t worry too much about whether you’ve painted the entire apparatus or not. If the logos are covered and the paint closely matches the bucket, it will look just fine.

    • Eventually, the paint will chip or wear in places, and if the bucket is close to the same color as the paint, this won’t be a big deal.

  6. Place the lid on the ground - upside down - with a brick, 10 lb plate, or some other relatively heavy object on top of the lid, and then set your new chalk stand on top of the lid and press down so that the lid is attached to the stand. You’ve now weighted the base of your chalk stand and made it much less likely to tip over and spill.

  7. Put a chalk-topper over the top of the stand. This is optional, but if other people use your chalk stand, you’ll find this greatly helps keep the chalk dust inside the stand. Our chalk toppers are from www.junkbrands.com.

  8. Place some chalk in the top bucket, and you’re good to go!

IMG_6318.JPG
IMG_6317.jpg
IMG_6316.JPG

If you found this helpful, you’ll love our weekly email. It’s got useful videos, articles, and training tips just like the one in this article. Sign up below, and of course, if you don’t love it, you can unsubscribe at any time.


At Testify, we offer small group training, private coaching (in-person or remotely via Zoom), online coaching, and form checks. Would you like to get quality coaching from a Starting Strength Coach?

Basic Barbell Maintenance

My wife, Becky, and I have two bare steel barbells in our garage gym, and while bare steel is unmatched in terms of grip and feel, it does require a bit of maintenance. Bars with a protective coating (e.g., zinc) will need some attention from time to time as well - simply less frequently.

With all of this in mind, let’s dive into how to perform some simple barbell maintenance.

Brush the Chalk Off the Barbell
The upside to chalk is that it absorbs the moisture of your hands and thus provides a secure grip on the bar. However, the downside is that chalk can hold some of that moisture and keep it on the bar even after you’re done training, and that can encourage rust formation on your bar.

To prevent this, simply brush the chalk off the bar every time you’re done training. A cheap nylon bristle brush will do the job just fine, and brushing off the chalk will take you about 20 seconds tops. Every member at Testify does this (whether the bar is bare steel or not) as well, and it helps tremendously.

APPLYING OIL TO THE BARBELL

Oil the Barbell Shaft
About once a month (perhaps even more infrequently), you’ll need a few things: 3-IN-ONE Multi-Purpose Oil, a brass bristle brush, and a clean rage or two. The oil will help remove rust from the bar as well as apply a protective coating to help prevent future rust. Simply apply a bit of oil to the bar (watch the video above for an example) and then use the brass bristle brush to brush in the oil. After that, take a clean rag and then wipe down the bar to absorb any excess oil.

You can spend more time on any trouble spots, but if you’re doing this on a semi-regular basis, this will do an excellent job of protecting and caring for your bar. If you’ve got a bar that needs some serious rust removal, we also have a video that goes into depth on that process.

As always, we hope this helps you get stronger and live better.

-Phil

PS: Whenever you want even more Testify in your life, here are some free resources:

  • Book a free intro and strategy session with us HERE.

  • Pick up a free copy of Testify’s Squat Guide: 12 Tips to Improve Your Squat Now HERE.

  • Get our free weekly email - containing useful videos, articles, and training tips - HERE.

  • Follow Testify on Instagram HERE.

  • Subscribe to Testify’s YouTube channel HERE.

(Some links may be affiliate links. As an Amazon Associate, Testify earns from qualifying purchases.)


At Testify, we offer small group training, private coaching (in-person or remotely via Zoom), online coaching, and form checks. Interested in getting stronger, looking better, and having more energy?