Why do I Keep FAILING?!

Are you missing reps on your linear progression? Let’s address one potential problem, and it’s one that’s easy to fix.

Specifically, let’s talk about rest periods (i.e., how long you’re resting between sets). I know - not very exciting. However, rest periods are important because they can either support your training, or - if chosen poorly - they can derail your training.

When someone starts training with us here at Testify, we have a conversation on day one wherein we discuss rest periods, and during this conversation, we address two things:

1. Resting Between Warm-up Sets
The short version? You don’t need to do it. That’s right. Don’t rest between warm-up sets. The act of changing your weights will provide enough rest while you're warming up. These are warm-up weights and don’t require much of a break between sets. You are welcome to rest several minutes, but most people don’t have all day to train, and this is the place to save time in the workout.

One caveat - you’ll probably want to rest a few minutes after your last warm-up set, i.e., before your first work set, which brings us to . . .

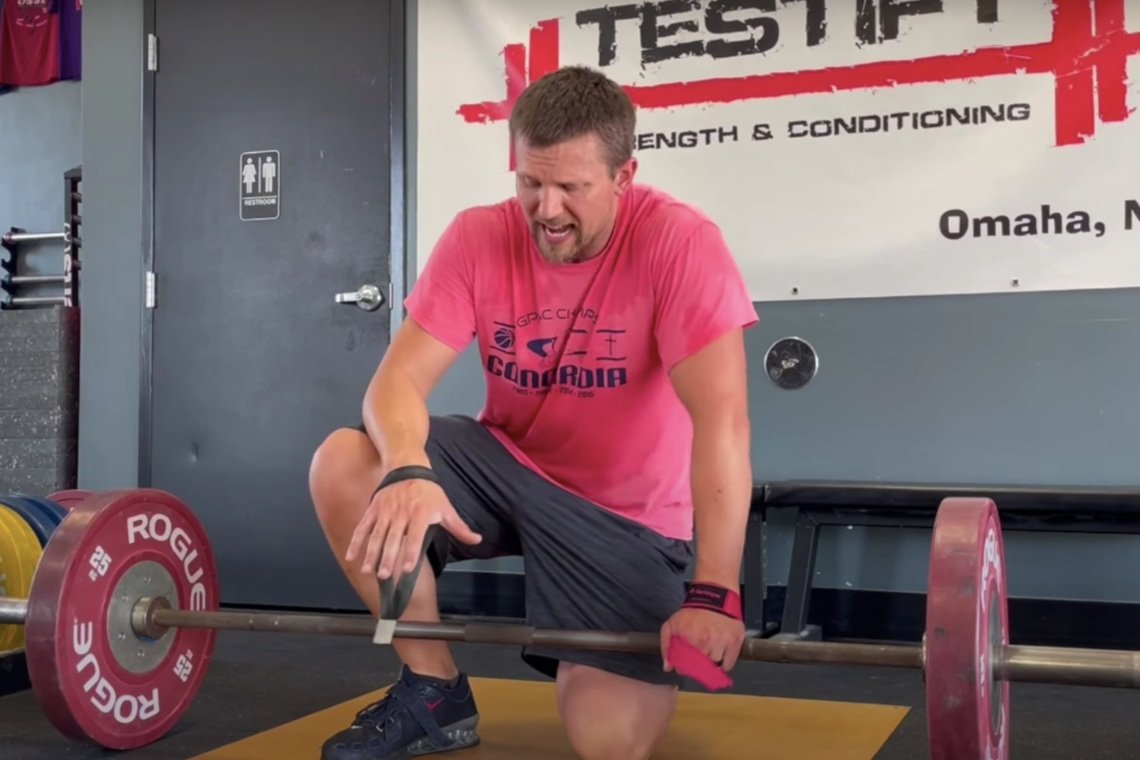
2. Resting Between Work Sets
You definitely want to rest between work sets. When you’re getting started with the Starting Strength linear progression, somewhere between three and five minutes will probably suffice. Treat that range as a minimum.

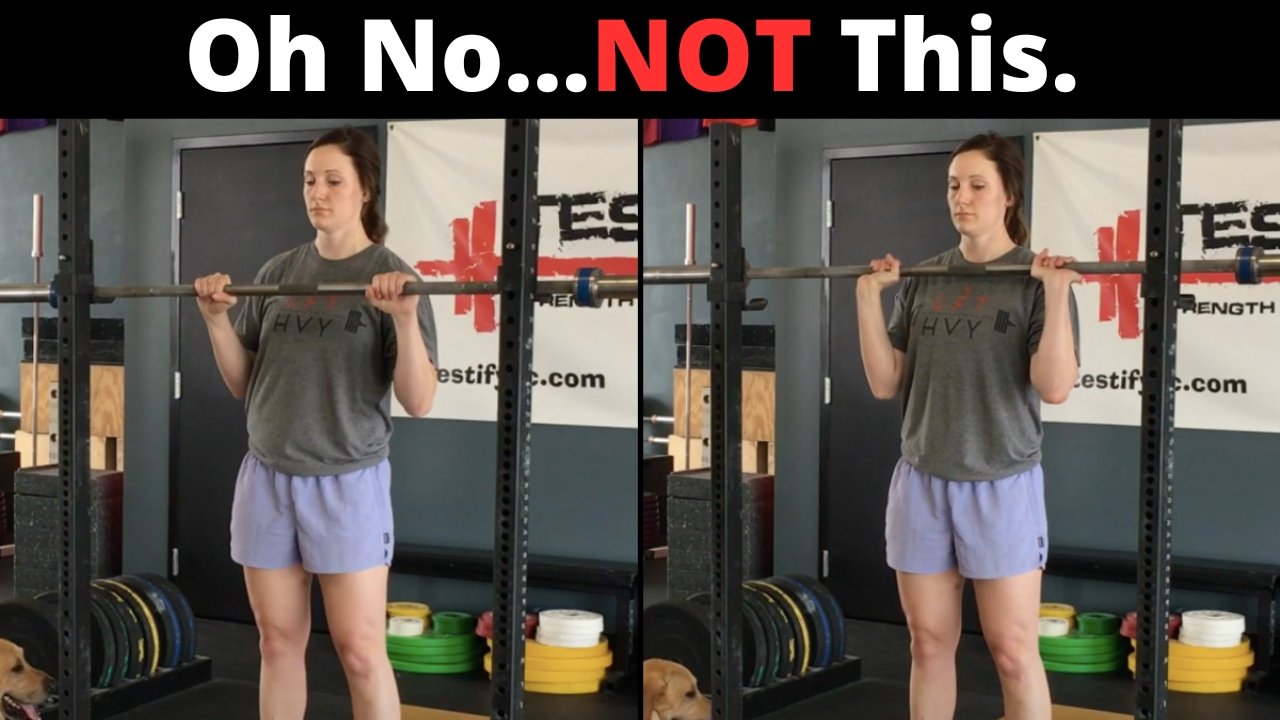
Want to squat 225 lb like Sarah? be sure to rest long enough between your work sets.

Remember that the purpose of strength training is - not surprisingly - to get stronger. To get stronger, you need to do the prescribed training for the day - you need to lift what you said you were going to lift - and to lift that weight, you need to rest enough to complete all the reps of your work sets.

The Main Point
That last part is the main point - rest long enough to ensure that you complete the next set successfully. When you read “three to five minutes,” remind yourself that this is appropriate for when you’re starting out, and also remind yourself that this is a minimum. When things get heavier and more challenging, there will come a time when you need to rest longer - you’ll rest six minutes, seven minutes, etc.

Establish the Habit
One of the most enjoyable parts of lifting weights is . . . not lifting weights, so force yourself to get used to resting - even at the beginning of your strength training journey.

If it’s your second workout, take the three, four, or five minute break even if you know you could get back under the bar and complete the next set with a shorter rest break. Start establishing the habit of getting adequate rest right away in your training. If you tend to rush things, a timer can be a handy tool to ensure that you’re waiting long enough before starting your next set.

Practical Limitations
There are, of course, some practical limitations to how long you’ll actually rest, and you’ll notice that I’m not suggesting that you rest 15 minutes between sets. Even if a 10-15 minute rest period might be useful, it simply may not be practical in terms of your schedule for the day.

Wrapping Up
In general, though, rest long enough to ensure that you can complete the next set. Completing your work sets will allow you to get stronger, and in this way, you will still be making progress on your linear progression four months, five months, or even six months into it instead of missing reps in the first or second month.

It may help to remember that this isn’t conditioning; of course, there will still be a conditioning benefit, but that’s not why you’re strength training. You’re doing it to get stronger, so take the appropriate rest, and as always, we hope this helps you get stronger and live better.

(Some links may be affiliate links. As an Amazon Associate, Testify earns from qualifying purchases.)

If you found this helpful, you’ll love our weekly email. It’s got useful videos, articles, and training tips just like the one in this article. Sign up below, and of course, if you don’t love it, you can unsubscribe at any time.


At Testify, we offer small group training, private coaching (in-person or remotely via Zoom), online coaching, and form checks. Would you like to get quality coaching from a Starting Strength Coach?

click here to start today

How to Fix Your Deadlift (solve this common error!)

Is your lower back rounding when you deadlift? Phil discusses this error as well as why it's a problem and gives several ways to fix the issue.

(This is a Blast from the Past video originally published on 02/14/22.)


At Testify, we offer small group training, private coaching (in-person or remotely via Zoom), online coaching, and form checks. Click the button below to get quality coaching from a Starting Strength Coach and start getting stronger TODAY.

Click here to start today

How to Unrack the Press: Use Your Legs!

Figure 1: Becky demonstrates how NOT to unrack the press.

(This is a Blast from the Past article originally posted on 10/08/21.)

A common problem with new lifters and the press is the act of unracking the press. They will often pick up the bar using their arms and their shoulders - in other words, they’re using their upper bodies to unrack the press, which is inefficient and difficult at heavy weights. Let’s fix this.

When you unrack the bar by incorrectly using your arms and shoulders, it looks like what Becky is demonstrating in Figure 1. Notice how she reaches out, grabs the bar with her arms, and tries to pull it back into position.

Also, note that she has her wrists in pretty severe extension (i.e., they are bent backwards), which we don’t want, and her elbows are behind the bar, which we don’t want either. In addition, it’s simply difficult to pick up a heavy press in this manner.

If this was actually a heavy weight instead of the empty bar, Becky might not be able to unrack it at all in this manner, and even if she did, she’d be in a weak position from which to start pressing.

Remember: When you unrack a press, you unrack it with your legs. 

Use the following steps:

1. Take your grip. (Figure 2a)

2. Walk right up the bar - your chest may actually touch the bar. (Figure 2b)

Figure 2a (left) and Figure 2b (right)

Figure 2a (left) and Figure 2b (right)

3. Squat down far enough that your elbows are slightly in front of the bar and you’ve got relatively straight wrists. (Figure 3a)

4. Stand the bar up with your legs. (Figure 3b)

Figure 3a (left) and Figure 3b (right)

Figure 3a (left) and Figure 3b (right)

Figure 4

Figure 4

5. Step back and establish your stance. (Figure 4)

Remember - unrack the press with your legs. As always, we hope this helps you get stronger and live better!

(Some links may be affiliate links. As an Amazon Associate, Testify earns from qualifying purchases.)

If you found this helpful, you’ll love our weekly email. It’s got useful videos, articles, and training tips just like the one in this article. Sign up below, and of course, if you don’t love it, you can unsubscribe at any time.


At Testify, we offer small group training, private coaching (in-person or remotely via Zoom), online coaching, and form checks. Would you like to get quality coaching from a Starting Strength Coach?

click here to start today

Do These FOUR Things When Starting Strength Gets Hard

What should you do when Starting Strength gets hard? Here are 4 steps to follow (plus 3 bonus tips).


At Testify, we offer small group training, private coaching (in-person or remotely via Zoom), online coaching, and form checks. Click the button below to get quality coaching from a Starting Strength Coach and start getting stronger TODAY.

Click here to start today

Testify Citizen - October 30, 2023

THIS WEEK'S SUBMISSION

From our video TINY GRANDMA SQUATS 205 LB! (click the title to watch):

Pops 355
Why leaned over????

Phil
Solid question – it’s a stronger position and makes better use of the musculature surrounding the hips and the knees. Trying to raise the chest too soon makes for a much more difficult squat.


ARTICLES & VIDEOS

Bench Press: He Should NOT Have Done This...
Phil addresses and helps you fix a common bench press error in this episode of our Two Minute Tactics. Click here to watch.


Lifting Straps | What You're Doing WRONG (common mistakes)
We cover several common mistakes that new lifters make with lifting straps (and how to fix them). Click here to read.


Blast from the Past: Weightlifting vs Powerlifting vs Hybrid Barbells in 2 minutes!
What's with the different markings on barbells? Phil quickly and simply explains what they mean, what purpose they serve, and how to know which one to use. Click here to watch.


Blast from the Past: Bar Math: Stop Doing This!
Quit using subtraction and division to load weight onto your bar! Share this with a friend who struggles with bar math, and if it's you, we can help. Click here to read.


NEW TESTIFY HOODIES ARE AVAILABLE!

Looking to train in style and comfort this fall? Get yourself a Testify hoodie - in practically any color! Get yours today and represent your favorite gym.

Click here to head to the Testify Store.


WHAT'S COMING UP

Below are a few of our upcoming events, and you can find out what else is on the calendar by heading to our events page at www.testifysc.com/events.

Free Intro to Deadlift Session

  • November 4, 2023

  • Are you interested in getting stronger? Book your free "Intro to Deadlift" session and learn to deadlift, meet some of our coaches, and see the gym! All ages and abilities are welcome.

  • Click here to book your free session.

Benching Bonanza! The Annual Testify Bench Press Jubilee

  • November 17, 2023

  • Benching Bonanza is a strength meet wherein the only contested lift is - you guessed it - the bench press. There will be one bar, and the meet will be conducted in a "rising bar" format, so the weight on the bar only goes up! It'll be a ton of fun, so come on out!

  • Click here to register or for more information.

Testify Christmas Classic

  • December 2, 2023

  • The annual Testify Christmas Classic is back, and you're invited! This is a weightlifting meet, so the contested lifts are the snatch and clean-and-jerk.

  • Click here to register or for more information.


IN OTHER NEWS . . .

This year, Testify Strength & Conditioning will be participating in Samaritan’s Purse Operation Christmas Child event as a way to support our community and beyond!  

Would you like to join us in sending a shoebox filled with gifts and personal items to a child in need this Christmas?  Your shoebox will be an expression of God’s love to a child in need around the world.  Any shoebox will do, fill it with toys, personal care items, school supplies and accessories.  You can choose to make your box specific to a boy or girl ages 2-14 years old. Fill out the envelope (located on the table outside the gym office) and add $10/box for shipping and attach it to your box.  

Check out the table outside the gym office for all the details and how to pack a box.  Our goal is to deliver 20 boxes to a local church drop-off site to be processed and sent out to the children.   Shoeboxes need to be returned to Testify no later than November 13th. 

 If you have any questions please contact Barb at barb.mueller@testifysc.com.


THIS WEEK’S CONDITIONING

Option 1
Sled
Outdoors:
10 rounds of:
Push sled 100 ft
Pull sled 100 ft (hand over hand)

Indoors:
20 rounds of:
Push sled 50 ft
Pull sled 50 ft (hand over hand)

Compare to 2023.08.28.

Option 2
Bike/Row for 9 rounds:
1 min on
1 min off

Record distance for each round.

Compare to 2023.08.07.

Option 3
Outdoors:
5-10 rounds:
10 sledgehammer strikes (5R, 5L)
50 yd farmer carry (25 yd down-back)
Rest 1 minute

Indoors:
5-10 rounds:
10 sledgehammer strikes (5R, 5L)
100 ft farmer carry (50 ft down-back)
Rest 1 minute

Compare to 2023.07.10.

Option 4
5-8 rounds:
50 ft sled push
50 ft sled pull (hand over hand)
Row 1 minute
Rest 1 minute

This can also be done in a group of three where the sledder determines how long the other two people row and rest.

Compare to 2023.07.10.

Lifting Straps | What You're Doing WRONG (common mistakes)

If you’re new to using lifting straps (or even if you’re not so new), there are a few common mistakes that you might be making. At best, these mistakes make the use of straps cumbersome, and at worst, these mistakes make straps a liability instead of an asset.

With that said, these mistakes are relatively easy to fix, and once we’ve solved them, you’ll never make them again, so let’s get to it.

As a quick side note, all of these mistakes and their solutions are far more easily seen and understood on video than in print, so be sure to watch the included video.

Figure 1: The correct position for straps (on the hand)

Mistake #1: Wearing straps in the wrong spot
Lifting straps are worn down on the hand (Figure 1) - not up on the wrist or arm. Although lifting straps are sometimes referred to as “wrist straps,” that can be a bit misleading - if you wear them on the wrist, you are wearing them too high. Whether it’s the type of DIY straps that we recommend (the black strap you see in these photos) or the “strap-and-loop” style of straps, be sure to wear them down on the hands.

See the included video for how to easily, cheaply, and quickly make yourself a pair of virtually indestructible lifting straps.

Mistake #2: Wrapping the straps in the wrong direction
When setting up and wrapping the strap around the bar, always wrap toward the thumb, i.e., toward the middle of the bar (Figure 2). Do not wrap the strap so that it heads toward the plates. This brings us to . . .

Figure 2: Correctly wrapping (the black strap) toward the middle of the bar

Mistake #3: Setting up the straps incorrectly
If you are using the “strap-and-loop” style of strap, make sure you have it positioned so that the strap points toward your thumb (Figure 3). If you have it set up so that it points toward your pinky, you won’t be able to wrap the strap in the correct direction (i.e., toward the middle of the bar). The straps for your right and left hands will need to be set up so that they mirror each other.

Figure 3: Positioning the strap so that it points toward the thumb

Mistake #4: Wrapping the strap multiple times
Wrap the strap around the bar once (Figure 4). That’s it - just once. Some straps do not have much excess length (like the black straps in these photos), so wrapping the strap around the bar won’t be a temptation anyway, but for straps that do have a lot of extra material, you still just wrap the strap once. Wrapping it around the bar multiple times is a waste of time and effort, and it doesn’t improve the grip of the strap. One time around.

Figure 4: wrap the strap only once as shown here. the extra material just hangs there.

Mistake #5: Wrapping in front of the bar
This will be obvious if you’ve used straps correctly, but it’s not very obvious for those who are new to straps - when you initially grab the bar, your palm goes in front of the bar, but the strap goes BEHIND the bar (Figure 5).

figure 5: correctly positioning the strap behind the bar when initially taking your grip

If you mess this up and put the strap in front of the bar (i.e., on the same side as your palm), the strap will not help your grip at all, and in fact, it will make the situation worse and make the bar harder to grip. The bar will simply want to roll right out of your hand, so be sure to put the strap behind the bar when you reach down to grab the bar.

As always, we hope these tips help you get stronger and live better.

(Some links may be affiliate links. As an Amazon Associate, Testify earns from qualifying purchases.)

If you found this helpful, you’ll love our weekly email. It’s got useful videos, articles, and training tips just like the one in this article. Sign up below, and of course, if you don’t love it, you can unsubscribe at any time.


At Testify, we offer small group training, private coaching (in-person or remotely via Zoom), online coaching, and form checks. Would you like to get quality coaching from a Starting Strength Coach?

click here to start today