Basic Barbell Maintenance

My wife, Becky, and I have two bare steel barbells in our garage gym, and while bare steel is unmatched in terms of grip and feel, it does require a bit of maintenance. Bars with a protective coating (e.g., zinc) will need some attention from time to time as well - simply less frequently.

With all of this in mind, let’s dive into how to perform some simple barbell maintenance.

Brush the Chalk Off the Barbell
The upside to chalk is that it absorbs the moisture of your hands and thus provides a secure grip on the bar. However, the downside is that chalk can hold some of that moisture and keep it on the bar even after you’re done training, and that can encourage rust formation on your bar.

To prevent this, simply brush the chalk off the bar every time you’re done training. A cheap nylon bristle brush will do the job just fine, and brushing off the chalk will take you about 20 seconds tops. Every member at Testify does this (whether the bar is bare steel or not) as well, and it helps tremendously.

APPLYING OIL TO THE BARBELL

Oil the Barbell Shaft
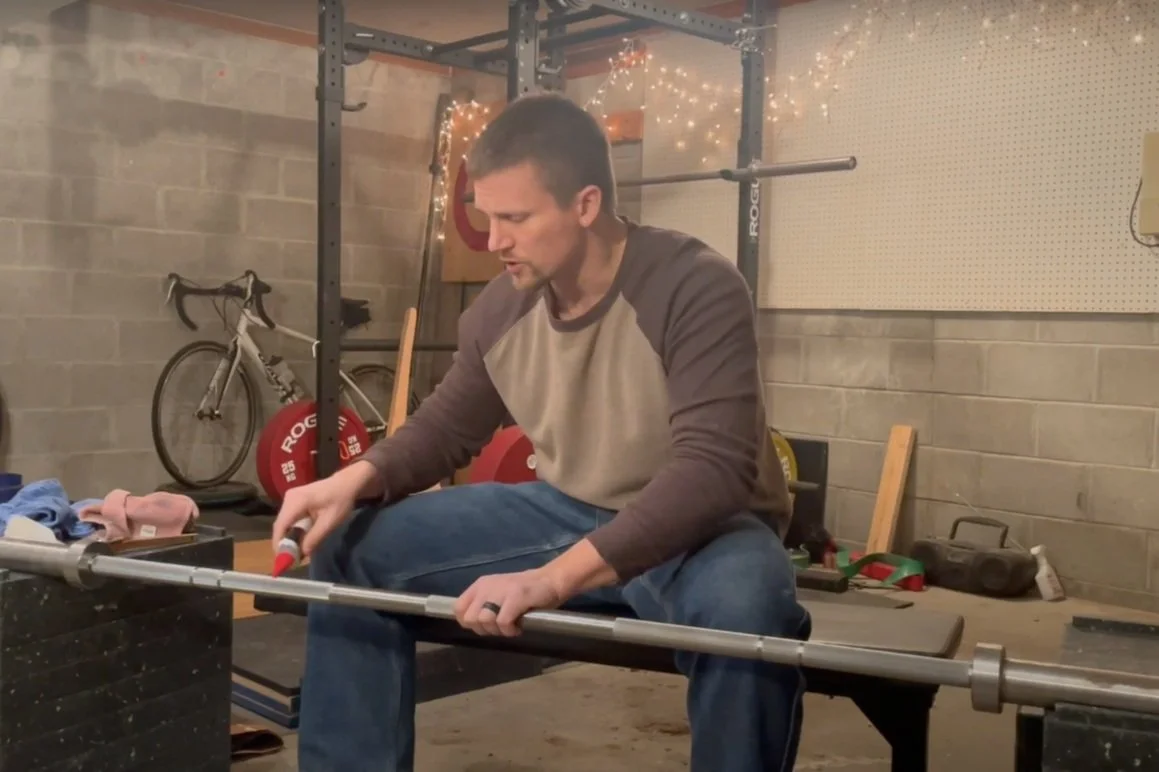
About once a month (perhaps even more infrequently), you’ll need a few things: 3-IN-ONE Multi-Purpose Oil, a brass bristle brush, and a clean rage or two. The oil will help remove rust from the bar as well as apply a protective coating to help prevent future rust. Simply apply a bit of oil to the bar (watch the video above for an example) and then use the brass bristle brush to brush in the oil. After that, take a clean rag and then wipe down the bar to absorb any excess oil.

You can spend more time on any trouble spots, but if you’re doing this on a semi-regular basis, this will do an excellent job of protecting and caring for your bar. If you’ve got a bar that needs some serious rust removal, we also have a video that goes into depth on that process.

As always, we hope this helps you get stronger and live better.

-Phil

PS: Whenever you want even more Testify in your life, here are some free resources:

  • Book a free intro and strategy session with us HERE.

  • Pick up a free copy of Testify’s Squat Guide: 12 Tips to Improve Your Squat Now HERE.

  • Get our free weekly email - containing useful videos, articles, and training tips - HERE.

  • Follow Testify on Instagram HERE.

  • Subscribe to Testify’s YouTube channel HERE.

(Some links may be affiliate links. As an Amazon Associate, Testify earns from qualifying purchases.)

At Testify, we offer small group training, private coaching (in-person or remotely via Zoom), online coaching, and form checks. Interested in getting stronger, looking better, and having more energy?

book a free intro

Week of 2023.01.09

This Week’s Conditioning

Option 1
Sled Pyramid – 4, 5, or 6 tiers
Go up and down a 4, 5, or 6 tier “sled pyramid” – rest as needed. The distance for each round is 80 m indoors (a down-back on the 40m course) or 200 ft outdoors (2 down-backs on the 50 ft course). Rest as needed.

For example, Bob does the following (4 tiers):
Round 1: Empty sled
Round 2: 25#
Round 3: 50#
Round 4: 75#
Round 5: 50#
Round 6: 25#
Round 7: Empty sled

Compare to 2022.11.07.

Option 2
Bike/row:
5 min on
4 min off
4 min on
3 min off
3 min on
2 min off
2 min on
1 min off
1 min on

Record distance for each interval and add for total distance.

Compare to 2022.10.17.

Option 3
5-10 rounds of:
30 sec ME tire flips
30 sec rest

Compare to 2022.09.19.

Option 4
For time:
500m row
5 x 80m sled push (200 ft if indoors)
500m row

Rest 1 minute after the first row and after each sled push.

Compare to 2022.09.19.

The 9th Circle of Deadlift Hell: The Drifting Barbell

(A Blast from the Past article originally posted on 12/30/22)

You’ve memorized the 5 step setup for the deadlift, you rehearse it in your head every night as you lie in bed, and yet, somehow, you still struggle with step 5 - “Drag the bar up your shins.” No matter how hard you try, that stupid bar seems to always swing away from your legs as you pull it off the floor.

In the deadlift, the barbell needs to be in a close, committed relationship with your shins as you pull it off the floor, and a bar that swings away from you betrays that relationship and makes for a much harder deadlift, so if you’re struggling to escape this 9th circle of deadlift hell, try out one of the following fixes:

Use Chalk
This is so obvious as to be painful, but please, for the love of all that is good in the world, use chalk when you’re lifting, and use chalk especially when deadlifting. Get some chalk on your hands before you start warming up the deadlift, and then apply some more chalk before you pull your work set(s).

If you won’t use chalk, summon up your inner Kelly Clarkson and just walk away. You’ve decided not to lift weights today, so leave the gym and come back when you’ve changed your mind.

As you can tell, the phenomenon of not using chalk aggravates me somewhat. Most people use chalk, and the phenomenon is - not surprisingly - restricted only to those who would lift more and be stronger if they also used chalk. I have other words on this topic, but they are not fit for print.

Chalk affects your ability to transmit force to the bar efficiently, and that, in turn, affects your ability to control the bar and keep it close. Use chalk.

Use the Appropriate Grip
You can’t use double overhand forever, so start using a hook grip, an alternate grip, or straps before your grip starts to become an issue. If you persist in using a grip that isn’t working for you, I have other words for you, too.

Grip affects your ability to transmit force to the bar efficiently, and that in turn affects your ability to control the bar and keep it close. Sounds familiar, doesn’t it? Get a grip.

Midfoot Balance
The combined center of mass of the lifter-barbell system should be balanced over the middle of the foot. In other words, you and the barbell together should be balanced - not on the balls of your feet and not on your heels - but rather right over the middle of your feet.

People often get onto the balls of their feet in steps two or three of the setup process - the “bend at the waist and take a grip” step or the “bend your knees to bring your shins to the bar” step, respectively - and this will cause the bar to swing away from you as you break it off the floor. The easiest fix is to simply make sure that you stay midfoot as you execute these steps, but if you find that you’ve rocked forward a bit onto the balls of your feet, simply rock back a bit until you are balanced over the middle of your feet again. Ideally, you want to do this before step four (i.e., before you squeeze your chest up to set your back).

“Pin It to Your Shins”
Your lats are responsible for keeping the bar close, i.e., keeping it on your shins, but you don’t need to think about your massive lats while deadlifting. Instead, just cue yourself to keep the bar pinned to your shins as you squeeze the bar off the floor. Pin it to your shins.

Step 4: Squeeze Your Chest Up . . . Then Pause
During step four of the setup process, you squeeze your chest up and set your back in rigid extension. Many people will squeeze their chest up and immediately try to break the bar off the floor. This often results in hips that drop and a bar that swings away from the lifter (if it actually comes off the floor at all).

Instead, try this: Squeeze your chest up hard like you always do (without dropping your hips), putting a lot of tension on the bar, and then . . . pause one second.

Do NOT relax that tension that you’ve placed on the bar - keep pulling. It should feel like the bar is bending upward in the middle, and indeed, if it’s heavy enough, it will be. THEN put even more tension on the bar, pulling harder until the bar comes off the floor.

This pause has helped a number of lifters for two reasons. First, it tends to discourage dropping the hips right before pulling the bar off the floor. Second, it also allows step four to function as a quick diagnostic step of sorts - when you’ve got a decent amount of tension on the bar, you can assess whether or not you and the barbell are still balanced on your midfoot and you can also assess whether or not you’re trying to keep the bar pinned to your shins. If you’re not doing one of these tasks, you can make a small correction and then pull the bar off the floor.

If your deadlift keeps swinging away, see if one of the tips above helps. Dante will be cheering for you.

As always, we hope this helps you get stronger and live better.

-Phil

PS: Whenever you want even more Testify in your life, here are some free resources:

  • Follow Testify on Instagram HERE.

  • Subscribe to Testify’s YouTube channel HERE.

  • Book a free intro and strategy session with us HERE.

  • Pick up a free copy of Testify’s Squat Guide: 12 Tips to Improve Your Squat Now HERE.

  • Get our free weekly email - containing useful videos, articles, and training tips - HERE.

(Some links may be affiliate links. As an Amazon Associate, Testify earns from qualifying purchases.)


At Testify, we offer small group training, private coaching (in-person or remotely via Zoom), online coaching, and form checks. Interested in getting stronger, looking better, and having more energy?

book a free intro

At Testify, we offer small group training, private coaching (in-person or remotely via Zoom), online coaching, and form checks. Would you like to get quality coaching from a Starting Strength Coach?

Click here to start today

Week of 2023.01.02

Reminder: We are closed on Monday, 01/02/23, in observance of New Year’s Day (you can also find this information on our Location & Hours page).

This Week’s Conditioning

Option 1
Sled
Outdoors:
10 rounds of:
Push sled 100 ft
Pull sled 100 ft (hand over hand)

Indoors:
20 rounds of:
Push sled 50 ft
Pull sled 50 ft (hand over hand)

Compare to 2022.10.31.

Option 2
Bike/row:
4 x 3 minutes

Rest 3 minutes between each round. Score = lowest distance.

Compare to 2022.10.10.

Option 3
Outdoors:
5-10 rounds:
50 yd sled push (25 yd down-back)
50 yd farmer carry (25 yd down-back)
Rest 1 min

Indoors:
5-10 rounds:
100 yd sled push (50 ft down-back)
100 yd farmer carry (50 ft down-back)
Rest 1 min

Compare to 2022.09.12.

Option 4
Row 10 x 100m
Rest 1 min between sprints. Your score is your slowest time.

Compare to 2022.09.12.

Chalk: Don't Be a Fool

Chalk is not a particularly exciting topic of conversation, so if you’re looking for a scintillating article on the finer points of lifting, you’ve come to the wrong place today, my friend. That said, man, this conversation needs to be had every now and then, so here we go.

There are two types of chalk abusers in the gym. The first type consists of those who simply don't use chalk for whatever reason - they don't like the feel of it, or they don't think they need it. This particular type simply needs to get their minds right or pull a Kelly Clarkson and just walk away. Don’t kid yourself - if you’re not willing to use chalk, you’re wasting your time. It’s not efficient, and at some point, it’s a recipe for disaster.

However, we’re really here today to talk about the second type of chalk abuser. You know this lifter. He takes a perfectly good block of chalk - the Sacred Block - and breaks it into smaller pieces. He coats his hands - sometimes even the back of his hands - with a thick layer of magnesium carbonate and inevitably leaves a bunch of excess chalk on the platform when he’s done lifting. And of course, he gets chalk everywhere on the floor and equipment around him while he’s actually chalking up.

You, of course, are not such a lifter. Because you know better. But you know such a lifter, and just on the off chance that you talk to this lifter, you can remind him how “chalking up” is properly accomplished:

Correctly chalked hands - this guy’s ready to lift.

  1. Put your hands in the bucket.

  2. Take the block (Do Not Break the Block) or the powder and rub some chalk on both of your hands.

  3. Rub your hands together so that any loose chalk falls back in the bucket.

Note that this entire process takes place inside the chalk bucket, and this way, any loose chalk ends up back in the bucket and not on the floor.

Be kind to your chalk, be kind to your gym, and I hope this helps you get stronger and live better. Now, I’m going to get back to yelling at those meddling kids walking across my lawn.

-Phil

PS: Whenever you want even more Testify in your life, here are some free resources:

  • Follow Testify on Instagram HERE.

  • Subscribe to Testify’s YouTube channel HERE.

  • Book a free intro and strategy session with us HERE.

  • Pick up a free copy of Testify’s Squat Guide: 12 Tips to Improve Your Squat Now HERE.

  • Get our free weekly email - containing useful videos, articles, and training tips - HERE.

(Some links may be affiliate links. As an Amazon Associate, Testify earns from qualifying purchases.)


At Testify, we offer small group training, private coaching (in-person or remotely via Zoom), online coaching, and form checks. Interested in getting stronger, looking better, and having more energy?

book a free intro

Week of 2022.12.26

Reminder: Below are the upcoming holiday hours (you can also find these on our Location & Hours page). Any days not listed retain their normal hours.

Monday, 12/26/22: Closed
Tuesday, 12/27/22: Regular Hours

Friday, 12/30/22: Regular Hours
Saturday, 12/31/22: Closed
Monday, 01/02/23: Closed
Tuesday, 01/03/23: Regular Hours

This Week’s Conditioning

Option 1
Sled
Outdoors:
10-20 x 25 yds EMOM at a weight of your choice

Every minute, push the sled 25 yards, i.e., if pushing the sled takes 20 seconds, then you have 40 seconds to rest. Perform 10-20 rounds.

Indoors:
10-20 x 100 ft EMOM at a weight of your choice

Every minute, push the sled 100 feet, i.e., if pushing the sled takes 20 seconds, then you have 40 seconds to rest. Perform 10-20 rounds.

Compare to 2022.10.24.

Option 2
Bike/row:
4 x 800m

Rest 3 minutes between each round. Score = slowest time.

Compare to 2022.10.03.

Option 3
1st: 5 x 50 ft seated sled pull. Add weight each round. Rest as needed.
2nd: 5 x 100 ft duck walk. Add weight each round. Rest as needed.

Compare to 2022.09.05.

Option 4
Outdoors
4 rounds:
50 yd farmer carry
80 m sled drag
Rest 2 min

Indoors
4 rounds:
100 ft farmer carry
100 ft sled drag
Rest 2 min

Compare to 2022.09.05.