It Doesn't Get Easier - But Everything Else Does

(A Blast from the Past article originally posted on 02/05/21)

A while back, one of our younger lifters - we’ll call him Mike - finished a set of 5 reps at 275 lb on the deadlift. Mike thought this was a pretty tough set, and upon lowering the barbell to the floor after the last rep, he stood up, turned to me, and we had the following conversation:

Mike: Phil - that was awful.

Me: The funny thing is, as you get stronger, someday you’re going to pull 315 lb for that same set of 5 reps, and it will be just as “awful,” but by the time you can do that, then doing what you did today - pulling 275 for 5 reps - will no longer be terribly difficult.

Mike: So . . . it’s kind of like eating really terrible food so that other food won’t taste as bad.

Me: Sure.

While this definitely made me chuckle, Mike actually understood the point quite well: Training doesn’t get easier, but everything else does.

IMG_6151.jpg

When a lifter is new at Testify, it’s pretty common to get some version of this question at the end of a set: “This Weight was pretty heavy - I should probably just stick with This Weight next time, right?”

While this is an understandable line of thinking, it misses out on a key concept, which is that only when you force yourself to lift The Next Weight and The Weight After That does lifting This Weight become easier. If squatting 135 lb is difficult right now, don’t worry - it will become easier after you’ve squatted 140 lb, 145 lb, and so on. Squatting 135 lb until the end of time doesn’t work.

In school, when you pass 6th grade, you move on to 7th grade, and then to 8th grade. By the time you’re in 8th grade, your 8th grade homework might be challenging, but the work you did back in 6th grade is easy by comparison. . . because you’re now in 8th grade.

Not only do previous work weights become easier to lift as you get stronger - other physical tasks in your life become easier as well. You become stronger, but the driveway doesn’t get any longer, and snow doesn’t get any heavier, so shoveling the driveway becomes easier. You become stronger, but gravity doesn’t become more powerful, so keeping your balance becomes easier.

Training will always be challenging, but the fact that you continue to step up to that challenge means you become stronger and more capable. So keep eating that terrible food. You’ll be better for it.

As always, we hope this helps you get stronger and live better.

-Phil

PS: Whenever you want even more Testify in your life, here are some free resources:

  • Book a free intro and strategy session with us HERE.

  • Pick up a free copy of Testify’s Squat Guide: 12 Tips to Improve Your Squat Now HERE.

  • Get our free weekly email - containing useful videos, articles, and training tips - HERE.

  • Follow Testify on Instagram HERE.

  • Subscribe to Testify’s YouTube channel HERE.

(Some links may be affiliate links. As an Amazon Associate, Testify earns from qualifying purchases.)


At Testify, we offer small group training, private coaching (in-person or remotely via Zoom), online coaching, and form checks. Interested in getting stronger, looking better, and having more energy?

Improve ALL of Your Lifts with This Cue?!

Due to their technical nature, cues usually are very lift-specific. For example, “hips back, chest down” works really well for the squat, but it doesn’t work for a press or a bench press. However, there are exceptions to this rule; not too long ago, we made a video (check it out below) about the idea of a positive cue versus a negative cue. I'm not going to give the whole video away right here, but that concept - it's not really a cue, but it's a type of cue - applies to all lifts, and today’s topic is very similar. 

We’re talking about the cue of “slow start” or simply “slow down.” Typically, when you use this cue (either of them), you're going to use it in your warm-ups or at least when the weight is light enough that slowing down shouldn't negatively affect the lift, i.e., it's not always going to work so well when the weight gets heavy. 

Let’s take a look at a few examples of this cue in action. On the press, some people struggle with “winding up the hips,” i.e., the hips should move forward first, but some lifters tend to move the hips backward before moving them forward. This can be a difficult habit to break, but if you simply tell yourself “slow down” or “slow start,” you can resist the urge to have your hips go back and instead slowly force your hips to go forward.

On the squat, a common error is to lead with the hips on the descent; in other words, the lifter bends or breaks at the hips first and then bend the knees, whereas we would like to see simultaneous breaking of the hips and knees.

If you break at the hips first, just tell yourself “slow start,” and that will give you the time - during those first couple inches of descent - to focus on making your knees go forward and out at the same time that your hips go backward.

On the clean, you want to make sure that the barbell touches your thighs at the jumping position (roughly the mid-thigh), so when we teach it - and you can always do this when you're when you're practicing this on your own - we go slow at first because we have to learn to touch that point on the thighs every single time.

Eventually, it will be quick, and in fact, eventually it must be quick since a heavy clean or snatch won’t be successful if it’s slow, but the lift needs to be correct before it’s quick. As a result, if you're missing that point on the thighs, simply tell yourself to slow down, and when you get to that point on your thighs, that’s when you speed up. Again, in reality, the entire lift should be speeding up, but if you’re working to correct something, slowing down can be very useful.

Hopefully, this helps you in your training, and as always, we hope this helps you get stronger and live better.

-Phil

PS: Whenever you want even more Testify in your life, here are some free resources:

  • Book a free intro and strategy session with us HERE.

  • Pick up a free copy of Testify’s Squat Guide: 12 Tips to Improve Your Squat Now HERE.

  • Get our free weekly email - containing useful videos, articles, and training tips - HERE.

  • Follow Testify on Instagram HERE.

  • Subscribe to Testify’s YouTube channel HERE.

(Some links may be affiliate links. As an Amazon Associate, Testify earns from qualifying purchases.)


At Testify, we offer small group training, private coaching (in-person or remotely via Zoom), online coaching, and form checks. Interested in getting stronger, looking better, and having more energy?

Basic Barbell Maintenance

My wife, Becky, and I have two bare steel barbells in our garage gym, and while bare steel is unmatched in terms of grip and feel, it does require a bit of maintenance. Bars with a protective coating (e.g., zinc) will need some attention from time to time as well - simply less frequently.

With all of this in mind, let’s dive into how to perform some simple barbell maintenance.

Brush the Chalk Off the Barbell
The upside to chalk is that it absorbs the moisture of your hands and thus provides a secure grip on the bar. However, the downside is that chalk can hold some of that moisture and keep it on the bar even after you’re done training, and that can encourage rust formation on your bar.

To prevent this, simply brush the chalk off the bar every time you’re done training. A cheap nylon bristle brush will do the job just fine, and brushing off the chalk will take you about 20 seconds tops. Every member at Testify does this (whether the bar is bare steel or not) as well, and it helps tremendously.

APPLYING OIL TO THE BARBELL

Oil the Barbell Shaft
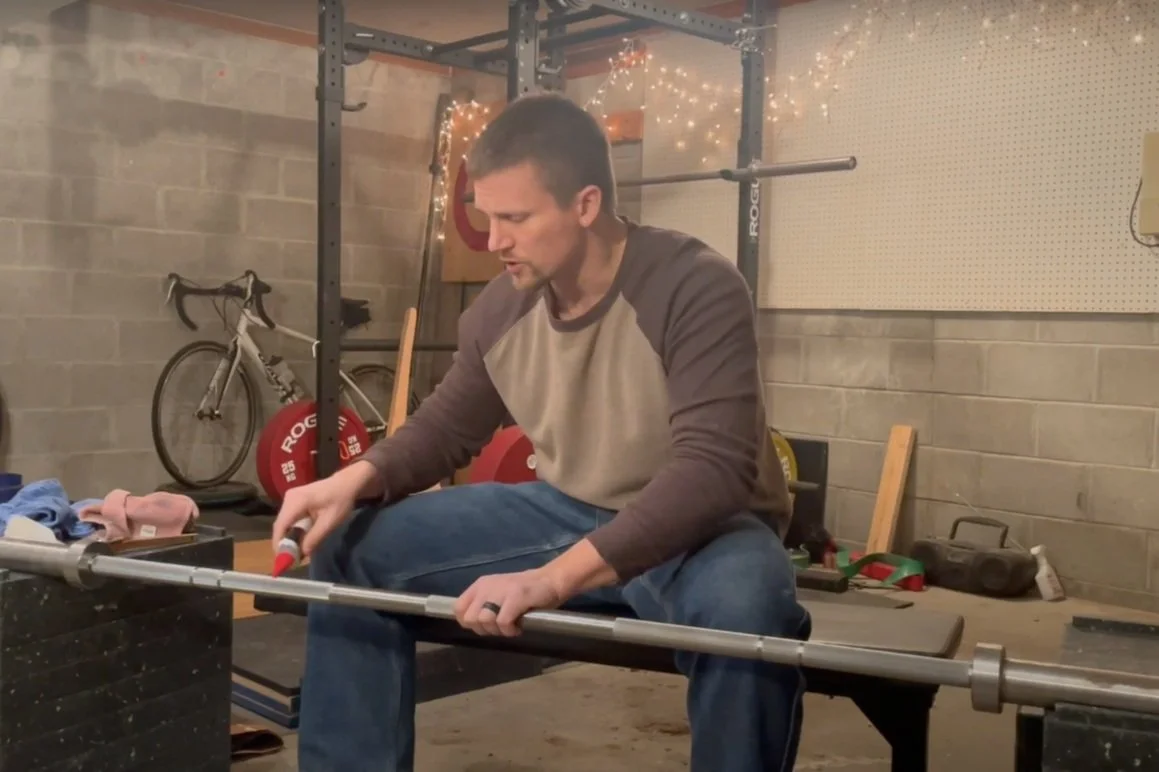
About once a month (perhaps even more infrequently), you’ll need a few things: 3-IN-ONE Multi-Purpose Oil, a brass bristle brush, and a clean rage or two. The oil will help remove rust from the bar as well as apply a protective coating to help prevent future rust. Simply apply a bit of oil to the bar (watch the video above for an example) and then use the brass bristle brush to brush in the oil. After that, take a clean rag and then wipe down the bar to absorb any excess oil.

You can spend more time on any trouble spots, but if you’re doing this on a semi-regular basis, this will do an excellent job of protecting and caring for your bar. If you’ve got a bar that needs some serious rust removal, we also have a video that goes into depth on that process.

As always, we hope this helps you get stronger and live better.

-Phil

PS: Whenever you want even more Testify in your life, here are some free resources:

  • Book a free intro and strategy session with us HERE.

  • Pick up a free copy of Testify’s Squat Guide: 12 Tips to Improve Your Squat Now HERE.

  • Get our free weekly email - containing useful videos, articles, and training tips - HERE.

  • Follow Testify on Instagram HERE.

  • Subscribe to Testify’s YouTube channel HERE.

(Some links may be affiliate links. As an Amazon Associate, Testify earns from qualifying purchases.)

At Testify, we offer small group training, private coaching (in-person or remotely via Zoom), online coaching, and form checks. Interested in getting stronger, looking better, and having more energy?

Chalk: Don't Be a Fool

Chalk is not a particularly exciting topic of conversation, so if you’re looking for a scintillating article on the finer points of lifting, you’ve come to the wrong place today, my friend. That said, man, this conversation needs to be had every now and then, so here we go.

There are two types of chalk abusers in the gym. The first type consists of those who simply don't use chalk for whatever reason - they don't like the feel of it, or they don't think they need it. This particular type simply needs to get their minds right or pull a Kelly Clarkson and just walk away. Don’t kid yourself - if you’re not willing to use chalk, you’re wasting your time. It’s not efficient, and at some point, it’s a recipe for disaster.

However, we’re really here today to talk about the second type of chalk abuser. You know this lifter. He takes a perfectly good block of chalk - the Sacred Block - and breaks it into smaller pieces. He coats his hands - sometimes even the back of his hands - with a thick layer of magnesium carbonate and inevitably leaves a bunch of excess chalk on the platform when he’s done lifting. And of course, he gets chalk everywhere on the floor and equipment around him while he’s actually chalking up.

You, of course, are not such a lifter. Because you know better. But you know such a lifter, and just on the off chance that you talk to this lifter, you can remind him how “chalking up” is properly accomplished:

Correctly chalked hands - this guy’s ready to lift.

  1. Put your hands in the bucket.

  2. Take the block (Do Not Break the Block) or the powder and rub some chalk on both of your hands.

  3. Rub your hands together so that any loose chalk falls back in the bucket.

Note that this entire process takes place inside the chalk bucket, and this way, any loose chalk ends up back in the bucket and not on the floor.

Be kind to your chalk, be kind to your gym, and I hope this helps you get stronger and live better. Now, I’m going to get back to yelling at those meddling kids walking across my lawn.

-Phil

PS: Whenever you want even more Testify in your life, here are some free resources:

  • Follow Testify on Instagram HERE.

  • Subscribe to Testify’s YouTube channel HERE.

  • Book a free intro and strategy session with us HERE.

  • Pick up a free copy of Testify’s Squat Guide: 12 Tips to Improve Your Squat Now HERE.

  • Get our free weekly email - containing useful videos, articles, and training tips - HERE.

(Some links may be affiliate links. As an Amazon Associate, Testify earns from qualifying purchases.)


At Testify, we offer small group training, private coaching (in-person or remotely via Zoom), online coaching, and form checks. Interested in getting stronger, looking better, and having more energy?

How to Easily Build a Lifting Platform (and the EASIEST way to cut stall mats)

A lifting platform is a very important part of your gym - it protects your equipment as well as your floor, it dampens the noise and vibrations of deadlifts, cleans, snatches, etc., and it clearly delineates the lifting space. This last factor - the abundantly clear “stay out of my lifting space” effect of the platform - is very useful when you have a training partner or little kids with you in the gym.

Fortunately, building a lifting platform is quite easy. In fact, “building” is a rather generous term for the process - we’re pretty much just assembling a platform. We’ll lay out the steps below, but I’d strongly recommend watching one of the videos linked throughout this article for a better understanding of the process.

First, lay two 4’ x 8’ sheets of OSB next to one another. I’d recommend what is commonly referred to as 3/4"-thick OSB, but the actual dimension will be listed as 23/32”.

Laying down the base layer of OSB sheets

These two sheets will run lengthwise, i.e., they’re run front-to-back. The sheets will probably have a slight bow to them (i.e., a curvature), and you’ll want to make sure that the crown of the board is up (so the board should make a mountain, not a valley).

Next, lay two more sheets of the same OSB on top of the base layer. These sheets will be perpendicular to the base layer sheets, so they’ll run side-to-side. Again, the crown should be up. Then you’ll use 1-1/4” screws to attach the second layer to the base layer. We use three screws on the short end of each board and four screws along the long end.

Laying down the 2nd layer of OSB sheets

Then, for the top layer, you’ll use a sheet of 3/4”-thick MDF to run down the middle. You could use something nicer like oak, but we like MDF as it’s nice and heavy and causes everything to lie nice and flat. You’ll need to do some cutting on the MDF as they are sized at 49” x 97”. You’ll cut the length to 96” (8 feet), and we recommend cutting the width to 42” (3.5 feet) as this gives you ample room between the plates and the MDF when you set down your deadlifts, cleans, etc (you can go with 4 feet wide, but 3.5 feet makes it much less likely that you’ll chip the MDF over time). You can do this yourself, or your lumber store may be willing to rip it for you.

Finally, you’ll use 3/4”-thick horse stall mats for the rest of the top layer. Stall mats are typically 4’ x 6’, so you’ll have some cutting to do here. The bigger piece on each side will be 72” x 27” (i.e., 6’ x 2’3”), and the smaller piece on each side will be 24” x 27” (i.e., 2’ x 2’3”). 

To attach the top layer to the second layer, use 1-5/8” screws. We put six screws into the MDF - three in front and three in back. For the stall mats, we simply put screws around the outside, front, and back of the platform - we don’t put any screws down the rubber edge near the MDF so that we can’t accidentally set our metal plates or bumper plates down on a screw that might be a bit proud.

Last note - when cutting stall mats, use a jig saw. It is - by far - the best way to do it. Check out the video above to see this process.

We hope this helps you quickly and easily build a lifting platform, and as always, we hope this helps you get stronger and live better.

Finished platform - complete with Addy, Milo, & Parker

(Some links may be affiliate links. As an Amazon Associate, Testify earns from qualifying purchases.)

If you found this helpful, you’ll love our weekly email. It’s got useful videos, articles, and training tips just like the one in this article. Sign up below, and of course, if you don’t love it, you can unsubscribe at any time.


At Testify, we offer small group training, private coaching (in-person or remotely via Zoom), online coaching, and form checks. Interested in getting stronger, looking better, and having more energy?

Your Training Log - Part 3: The PR Sheet

(If you like, you can scroll down to the end of this article and watch a video on this topic. This article is a Blast from the Past article originally posted on 01/15/21.)

A few months ago, we covered the importance of keeping a training log in Your Training Log - Part 1: Just Do It, and we also covered how to keep one in the cleverly titled article, Your Training Log - Part 2: How to Keep One. Today, we’re going to add to this series and discuss adding a PR sheet to your log.

The concept is very straightforward - simply designate one sheet of paper in your training log for keeping track of PRs (Personal Records). I would recommend using the first page of your book, the last page of your book, or you can keep a separate piece of paper in your book that is only used for PRs (but don’t let it fall out).

On this sheet, record your 1-5 rep PRs for the Big Four Lifts - the squat, press, bench press, and deadlift. If you snatch and clean-and-jerk, do the same for those lifts. Pull-ups? Absolutely. Curls? Sure. What about a 7-rep PR? Knock yourself out. If you compete, have two PR lists - one for training and one for competition (the competition list will only have 1-rep PRs). We’re not talking hard-and-fast rules here, but at the very least, having your 1-5 rep PRs written down for the Big Four is a good place to start.

Here’s a sample for the squat:

Weight Reps Date
310 1 03/25/20
285 2 05/18/19
275 3 02/20/20
4
265 5 10/18/19
250 3 x 5 10/06/19

It’s fine if your sheet has some blanks - as you can see, our imaginary lifter doesn’t have a 4-rep PR yet. You’ll also notice that this lifter recorded his “3 x 5” PR as well (i.e., the best he’s done for 3 sets of 5 reps), and that’s another solid idea.

When you start out, you’re setting PRs every single session, so this might not seem all that useful at first. However, the longer you train and the stronger you get, the harder it is and the longer it takes to get stronger and set new PRs, so having multiple opportunities to set new personal bests can be very helpful in the motivation department. Plus, it’s a lot of fun to discover that you just pulled your old 3-rep deadlift max for a set of five, and how will you ever know unless you track these things? Give it a shot.


At Testify, we offer small group training, private coaching (in-person or remotely via Zoom), online coaching, and form checks. Would you like to get quality coaching from a Starting Strength Coach?