Pulling Blocks: What, Why, and DIY vs. Commercial (Which Should YOU Use?)
/What are pulling blocks, why are they useful, and should you buy them or make them yourself? Phil covers it all.
At Testify, we offer small group training, private coaching (in-person or remotely via Zoom), online coaching, and form checks. Click the button below to get quality coaching from a Starting Strength Coach and start getting stronger TODAY.
Starting Out at the Gym? Don’t Miss These 4 Essentials
/
Which gym accessories are a “must” when you’re training? Let’s quickly cover four of them.
Accessory #1: Timer
At home, Becky and I have a magnetic kitchen timer attached to the squat rack (if you train at a commercial gym, simply keep it with you in your bag). We bought two pink timers - because pink is stylish and manly - for less than $9 from Amazon (it was a two-pack), but you can get them almost anywhere - Walmart, home improvement stores, grocery stores, etc.
Most of my workouts are fairly time-sensitive - I need to get in, get done, and get out in a certain amount of time, and the timer helps me do just that. Our timer has a count-up mode (i.e., it counts up continuously like a stopwatch) as well as a count-down mode (e.g., you set the timer for 5 minutes, and it will beep or flash when the time is up), and these are common features that you’ll find on most kitchen timers. I typically use the count-up feature, but many people prefer to use the count-down mode instead to keep track of rest periods.
Need to make sure you rest long enough between your squat sets? Or not too long? get a timer.
The timer is cheap, it’s effective, and it sticks to your squat rack, so if you find that your workouts are taking longer than you can afford, give it a try.
Accessory #2: Coffee
This should need no explanation, but I’ll do my best anyway. When it’s cold, you drink coffee. When it’s early, you drink coffee. When it’s hot, you still drink hot coffee (iced is fine, too). And when it’s late, you drink coffee.
Coffee. The original - and still the best - pre-workout. Drink it during the workout, too.
Accessory #3: Training Log
Sure, we can call this an accessory, but it’s really your most important piece of training equipment. If you’re going to train - if you’re going to lift intelligently - have a training log. I recommend a basic paper notebook, but if you want to go digital, that will also work. The point here is to have a training log and use it religiously.
The log is what separates training from exercise. If you want to exercise, that’s fine. You’ve got Jazzercise, you’ve got spin, you’ve got Zumba, you’ve got a lot of options. But if you want to train, have a training log. Record your warm-up sets, record your work sets, record what you’re going to do next time (before you walk out the door), and keep tabs on useful cues that you’re focusing on when performing the lifts. Get a training log.
Accessory #4: Fractional Plates
Get yourself a pair of 1.25 lb plates, or better yet, buy a set of fractional plates that has a pair (each) of 0.25 lb, 0.5 lb, 0.75 lb, and 1 lb plates. The set of 1.25 lb plates will permit you to make a 2.5 lb jump, which is a must for presses, bench presses, and even the squat and deadlift for some folks. The more complete set will allow even smaller jumps (e.g., a 1 lb jump using the two 0.5 lb plates), which will be extremely useful for many people on the press and the bench press.
Commercial gyms don’t carry plates smaller than 2.5 lb - which means you have to make jumps that are 5 lb or larger - and eventually, smaller jumps will be necessary to yield progress on a number of your lifts, so get a set before you need it and keep it with you in your gym bag.
As always, we hope this helps you get stronger and live better.
-Phil
PS: Whenever you want even more Testify in your life, here are some free resources:
Book a free intro and strategy session with us HERE.
Pick up a free copy of Testify’s Squat Guide: 12 Tips to Improve Your Squat Now HERE.
Get our free weekly email - containing useful videos, articles, and training tips - HERE.
Follow Testify on Instagram HERE.
Subscribe to Testify’s YouTube channel HERE.
(Some links may be affiliate links. As an Amazon Associate, Testify earns from qualifying purchases.)
At Testify, we offer small group training, private coaching (in-person or remotely via Zoom), online coaching, and form checks. Interested in getting stronger, looking better, and having more energy?
Center Knurl or Not? A Very Gripping Topic!
/What is that grippy section in the middle of the barbell? What is it for, why might you want it, and what can you do about it if your barbell doesn't have it?
(This video is a Blast from the Past video originally published on 09/27/21.)
At Testify, we offer small group training, private coaching (in-person or remotely via Zoom), online coaching, and form checks. Click the button below to get quality coaching from a Starting Strength Coach and start getting stronger TODAY.
Simple and Cheap DIY Chalk Stand
/
(A Blast from the Past article originally posted on 02/26/21)
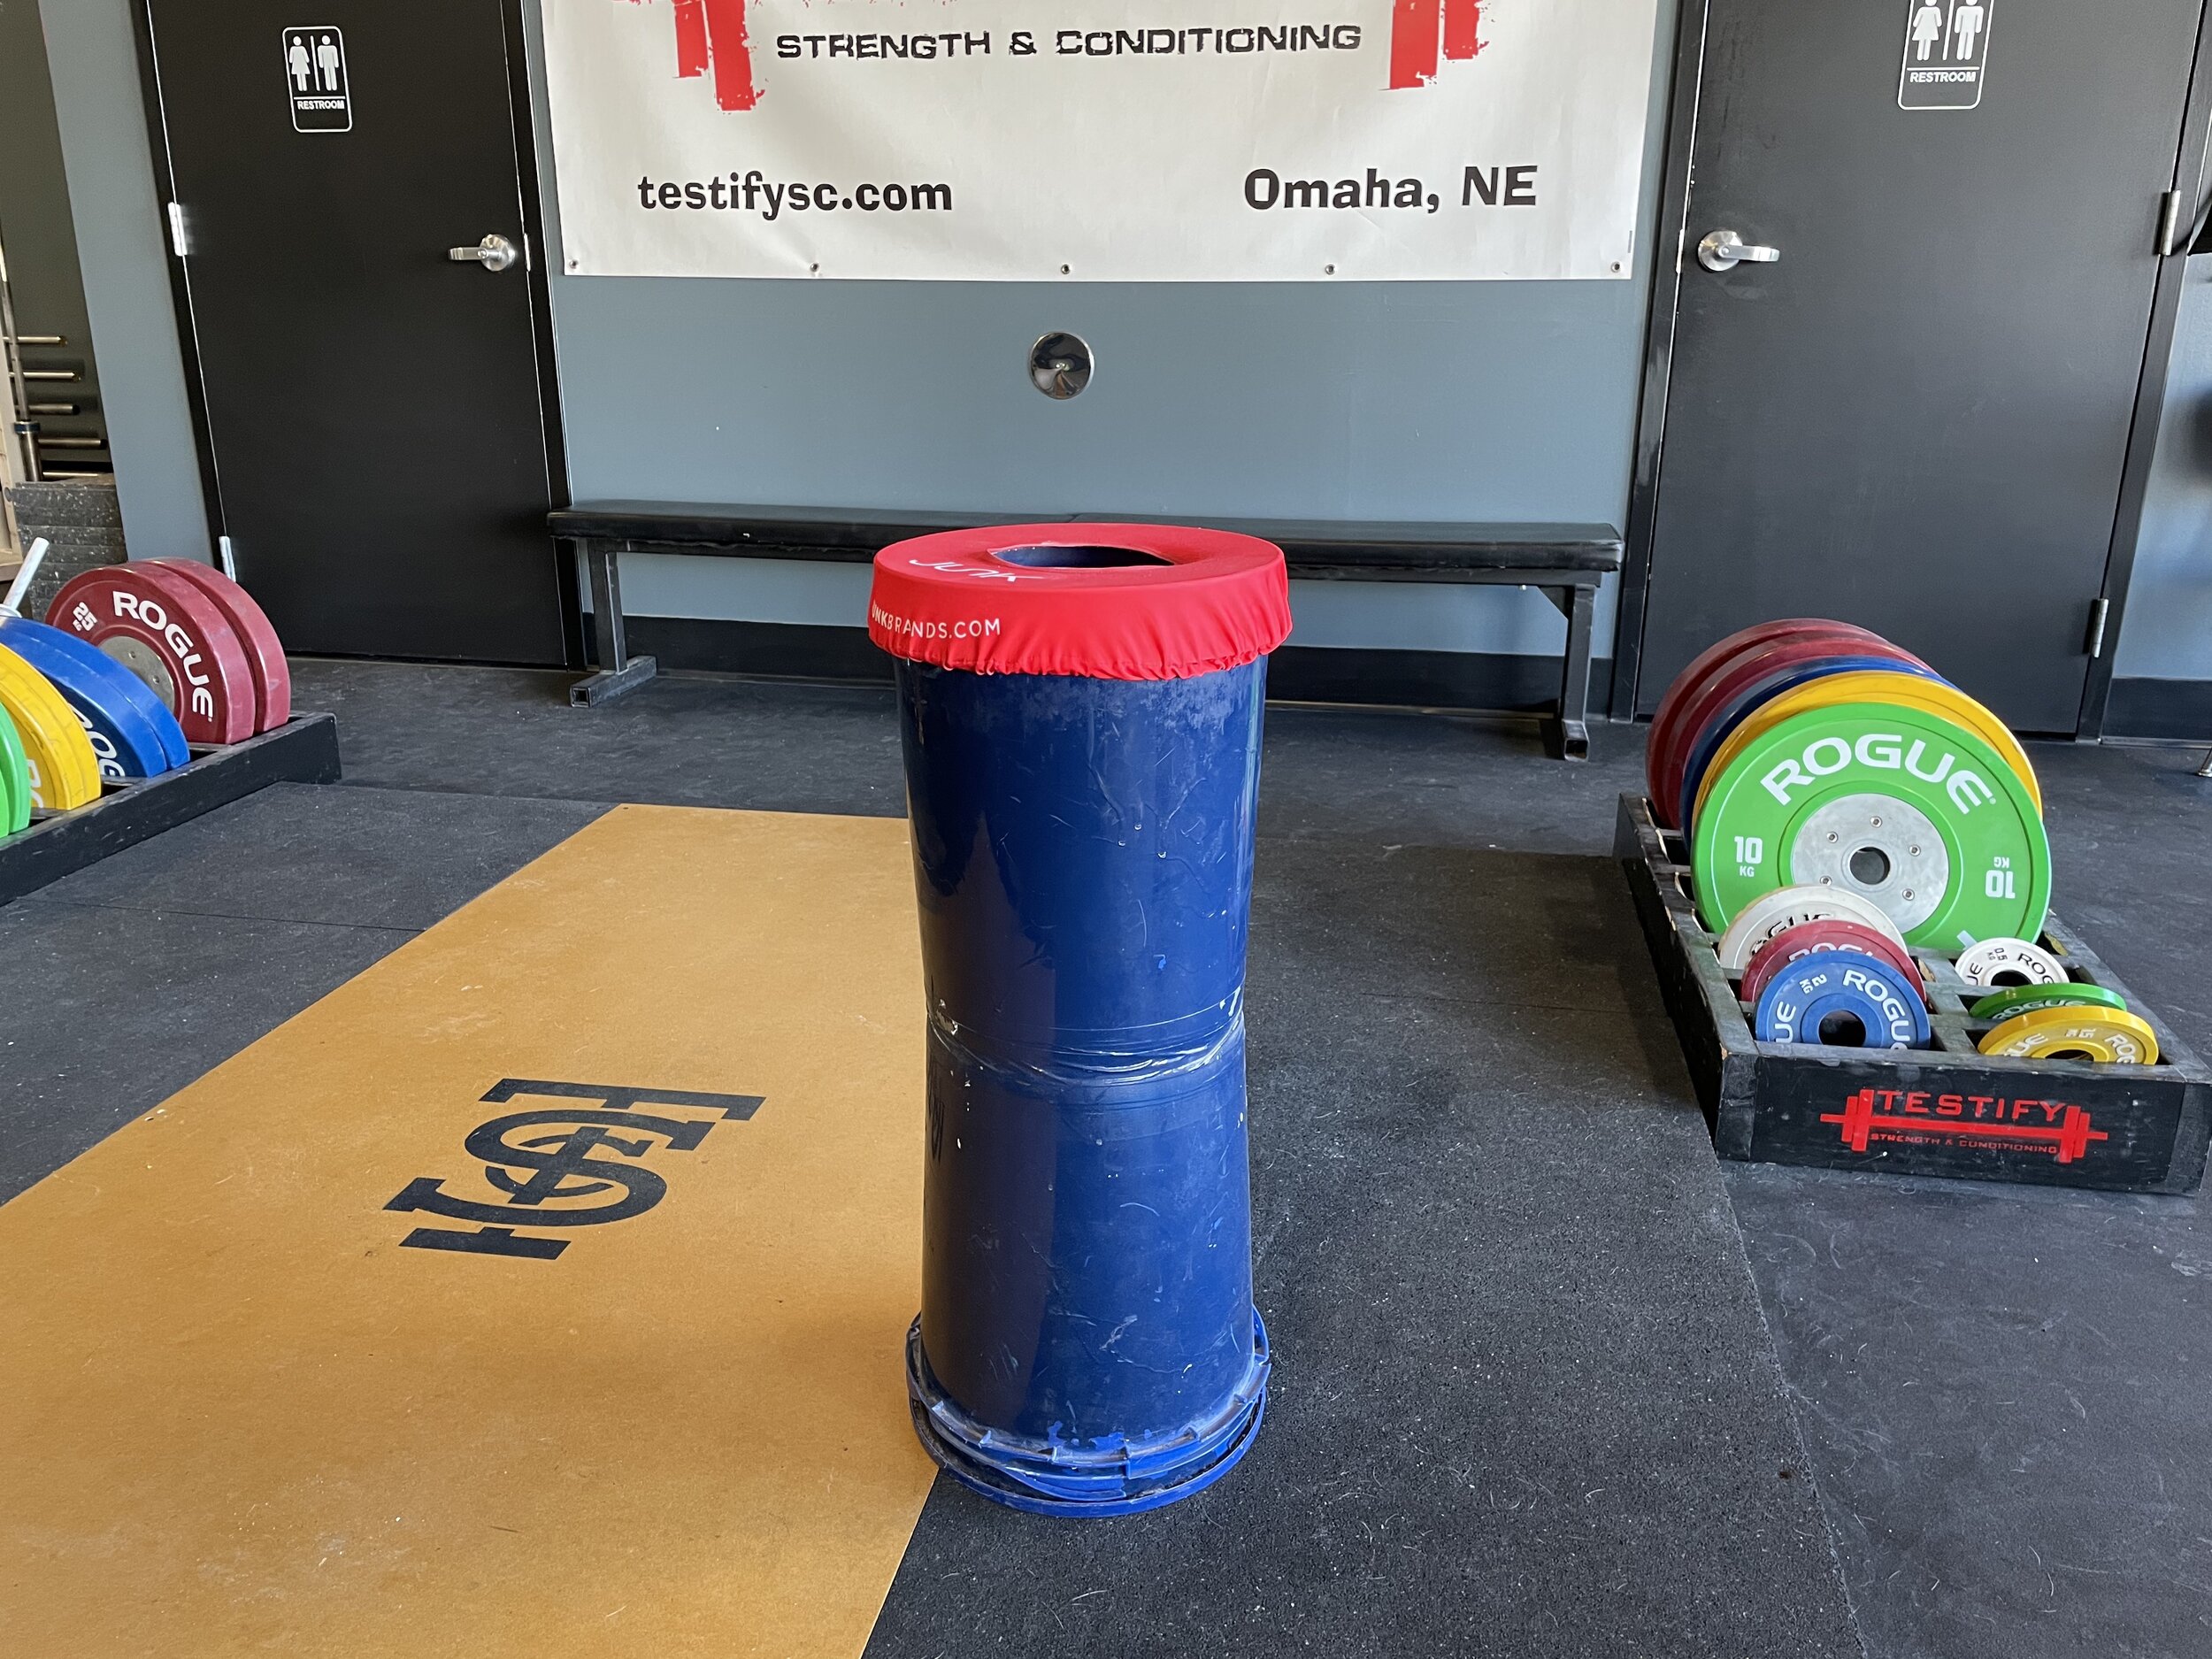
When you chalk up for your next set, it’s nice to have a chalk stand. It’s not absolutely necessary, of course, as you can just use a bag of chalk or - better yet - a chalk bucket sitting on the ground. Although those options work, a chalk stand makes much less of a mess than a bag of chalk, and as the stand is raised, you don’t have to reach all the way down to the floor level as you do with a bucket of chalk, which can be a bit of pain if you already have your belt tightened.
With all this in mind, here’s how you can make a simple and cheap chalk stand (feel free to watch the video above if you’d rather not read the steps below):
Step 1
Go to your nearest hardware store and purchase the following items (you may already have some of these items at home). If you’d rather not make the trip, you can click the items below and order from Amazon.
Two 5-gallon buckets. Choose a color option that allows you to find matching spray paint.
A lid for one of the buckets (preferably the same color as the buckets). You only need one lid.
One can of spray paint - ideally the same color as the buckets
One roll of duct tape
Step 2
Set one bucket on the ground - upside down.
Step 3
Set the other bucket on top of the first bucket - right side up. The closed ends of the two buckets should now be touching.

Step 4
Tape the two buckets together by wrapping duct tape around the buckets several times. Tape the “seam” between the buckets as well as above and below the seam. Five or six times around the buckets should do nicely.
Step 5
Spray paint the buckets. This step is optional and is for aesthetic purposes only - it covers up any logos or printing on the buckets. It’s nice to have the paint match the buckets (or as closely as possible) for two reasons:
This is supposed to be a quick process, so don’t worry too much about whether you’ve painted the entire apparatus or not. If the logos are covered and the paint closely matches the bucket, it will look just fine.
Eventually, the paint will chip or wear in places, and if the bucket is close to the same color as the paint, this won’t be a big deal.
Step 6
Place the lid on the ground - upside down - with a brick, 10 lb plate, or some other relatively heavy object on top of the lid, and then set your new chalk stand on top of the lid and press down so that the lid is attached to the stand. You’ve now weighted the base of your chalk stand and made it much less likely to tip over and spill.

Step 7
Put a chalk-topper over the top of the stand. This is optional, but if other people use your chalk stand, you’ll find this greatly helps keep the chalk dust inside the stand. Our chalk toppers are from www.junkbrands.com.
Step 8
Place some chalk in the top bucket, and you’re good to go!
As always, we hope this helps you get stronger and live better.
-Phil
PS: Whenever you want even more Testify in your life, here are some free resources:
Book a free intro and strategy session with us HERE.
Pick up a free copy of Testify’s Squat Guide: 12 Tips to Improve Your Squat Now HERE.
Get our free weekly email - containing useful videos, articles, and training tips - HERE.
Follow Testify on Instagram HERE.
Subscribe to Testify’s YouTube channel HERE.
(Some links may be affiliate links. As an Amazon Associate, Testify earns from qualifying purchases.)
At Testify, we offer small group training, private coaching (in-person or remotely via Zoom), online coaching, and form checks. Interested in getting stronger, looking better, and having more energy?
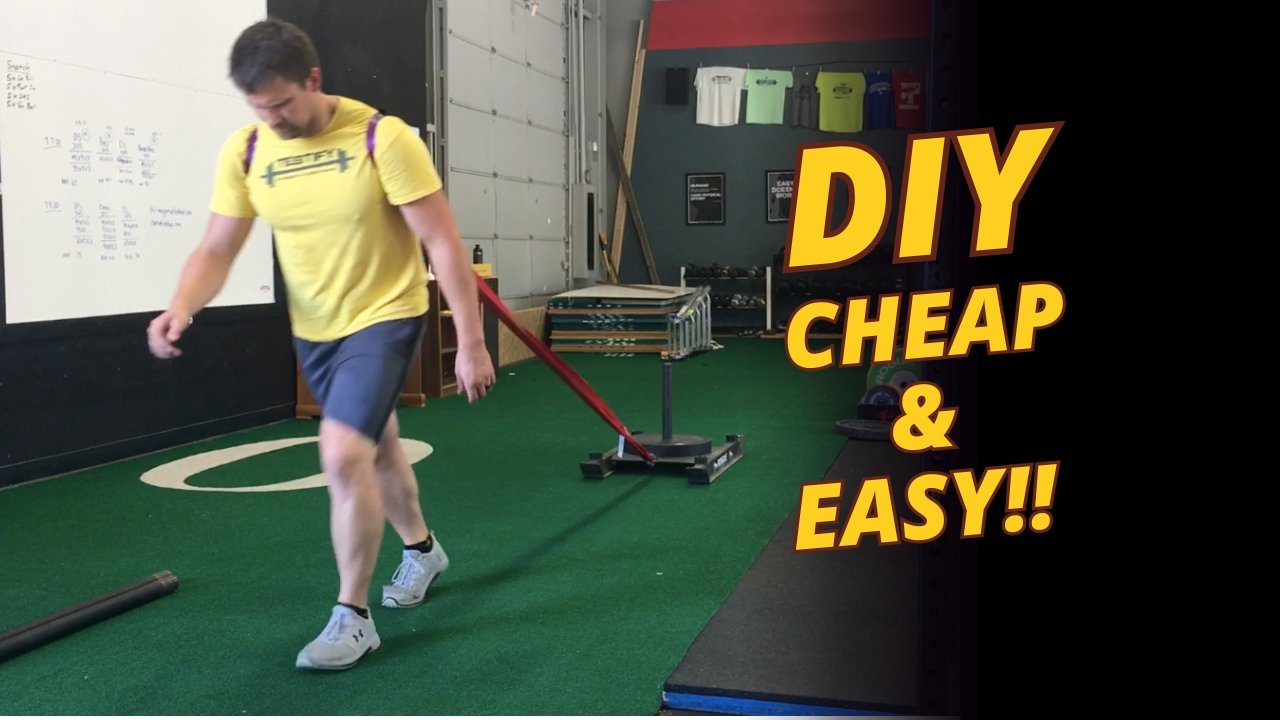
Cheap & Easy DIY Sled Drag Harness Options
/
The sled or prowler is an extremely effective conditioning tool (albeit a rather evil one). You can get in some great conditioning pushing the sled, but you can also get in some great conditioning pulling it, so let’s cover a couple of options to construct a simple and cheap sled drag harness so you don’t have to go out and buy an expensive one.
First, a few notes . . .
Sled vs Prowler
A sled has 2 skids while a prowler has 3 skids. They accomplish the same purpose as they both can be pushed or pulled, and for our purposes, I’m going to use the word “sled” for both implements.
Don’t Have a Sled?
If you don’t have a sled for pulling, you don’t need to go out and put down a bunch of cash for a new one. You can construct a “tire sled” from an old tire and an eyebolt - it’s cheap, pretty quick, and it works very well for pulls.
Watch the included video - Free (or cheap!) Strongman and Conditioning Equipment - to see what I’m talking about.
And now, let’s get to the harness options . . .
Sled Drag Harness - Waist Option
You’ll need a fairly large carabiner, and you’ll also need to get an automotive recovery strap, which you can obtain at pretty much any hardware store or by clicking here. Each end of the strap has a loop, and we’ll simply connect each loop to the carabiner, and then we’ll hook the carabiner to the sled. Simply place the middle of the recovery strap around your waist, and you’ve now got a cheap and easy-to-make harness for walking either forward or backward while dragging the sled.
Shoulder Harness option
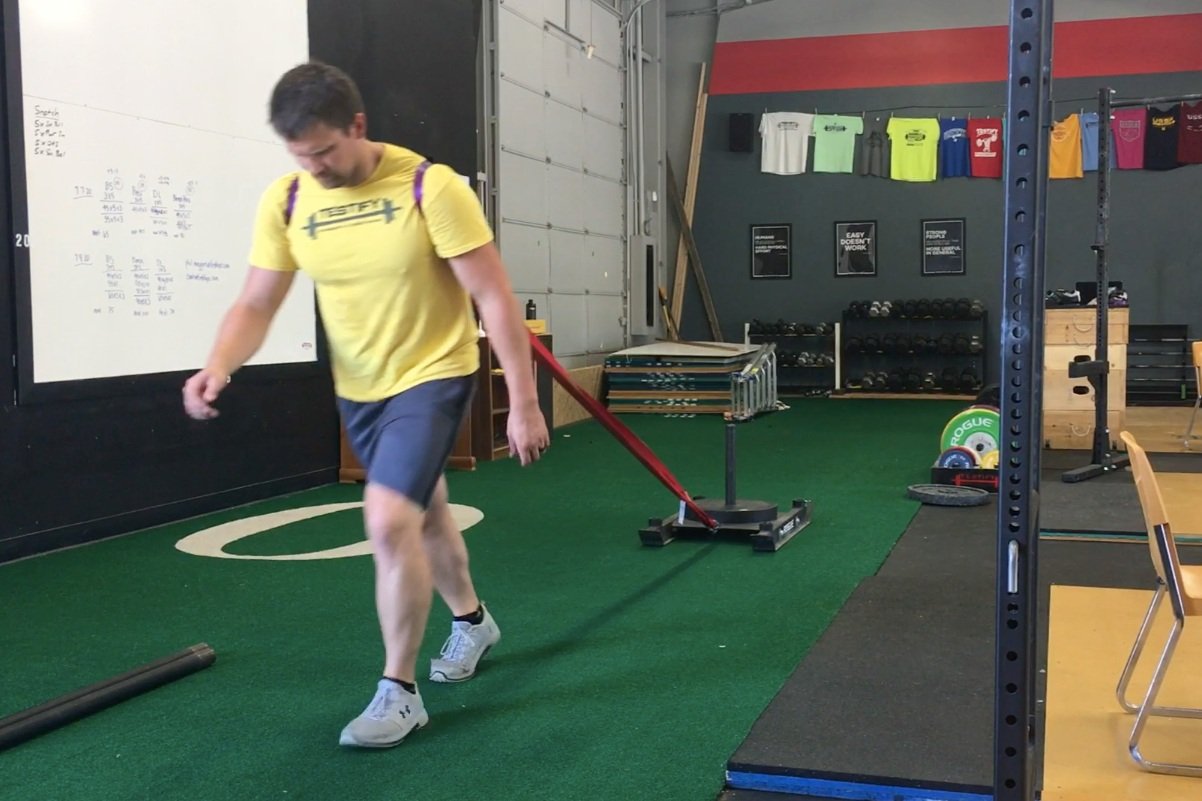
Sled Drag Harness - Shoulder Option
For this version, you’ll need to get some 1-inch climbing webbing. This is the same tubular webbing that we use for making lifting straps (see the video below) - you can find this type of webbing at an R.E.I. or a something store, or you can get some on Amazon by clicking here. You could probably use wider material if you want to make it more comfortable, but conditioning is not terribly comfortable anyway, and this is what we had on hand, and it works well.
Take 7-8 feet of webbing and tie a water knot with the ends to create one long, continuous loop. To tie a water knot (other knots won’t work as well with webbing), check out the DIY Sled Drag Harness Options video above. Feeding that loop through the loop created by your recovery strap, you have now created “backpack straps,” so simply put one arm through each end of the backpack straps, and you’re all set to go.
Seeing this on video helps quite a bit, so as mentioned earlier, I’d recommend watching the short DIY Sled Drag Harness Options video above (this video was the basis for this article).
As always, we hope this helps you get stronger (or at least more conditioned!) and live better.
-Phil
PS: Whenever you want even more Testify in your life, here are some free resources:
Follow Testify on Instagram HERE.
Subscribe to Testify’s YouTube channel HERE.
Book a free intro and strategy session with us HERE.
Pick up a free copy of Testify’s Squat Guide: 12 Tips to Improve Your Squat Now HERE.
Get our free weekly email - containing useful videos, articles, and training tips - HERE.
(Some links may be affiliate links. As an Amazon Associate, Testify earns from qualifying purchases.)