Timing and Bounce on the Jerk

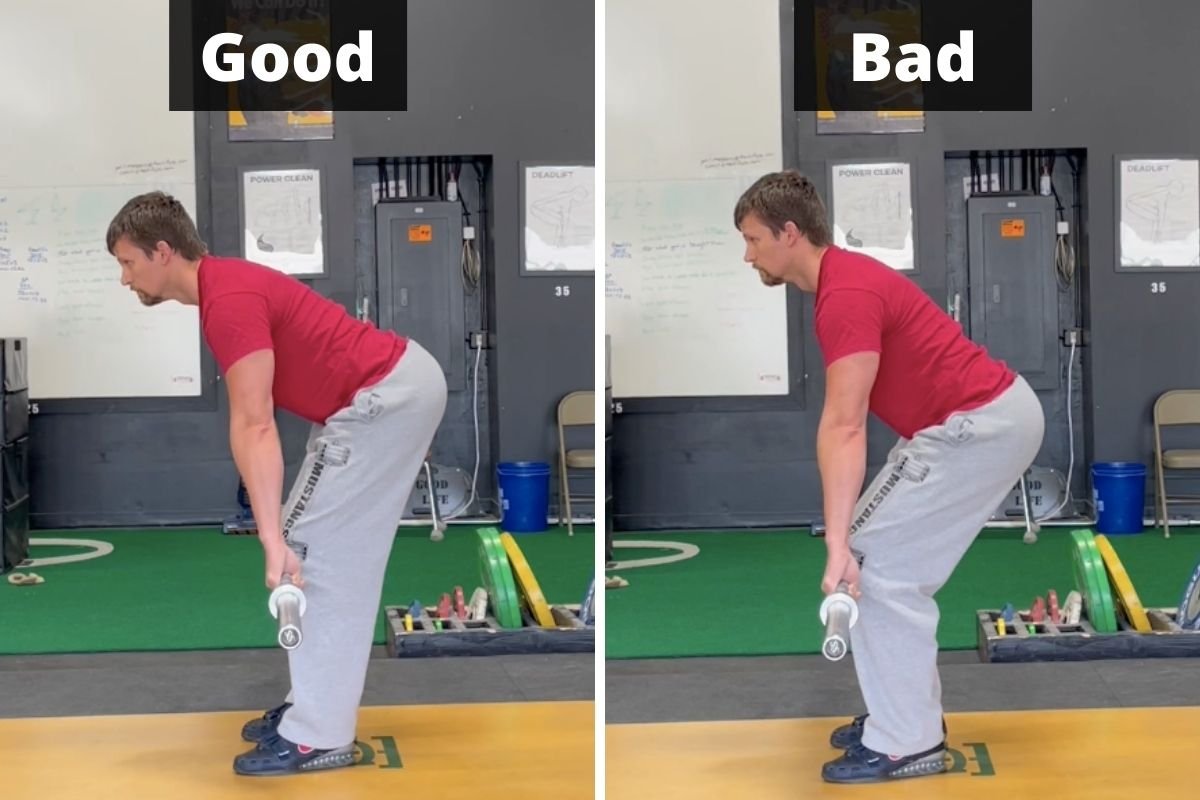
Let’s briefly address the “bounce and drive” aspect of the jerk. This applies to the split jerk, the power jerk, and the squat jerk. Note that we’re not referring to this motion as a “dip and drive” because we want the bounce of the jerk - i.e., the turnaround at the bottom of the movement - to be sharp and quick.

(Today’s topic is far more easily understood when watching it in action, so I’d strongly recommend watching the included video.)

By aiming for a short, quick, sharp bounce out of the bottom of the movement, we’re not only trying to impart as much upward momentum to the barbell as possible - we’re also endeavoring to take advantage of the flex (or whip) of the bar, and a sharp bounce does exactly this.

To achieve the proper “bounce and drive” that we’re aiming for, cue yourself “hard bounce” the next time you’re practicing your jerks. After the clean, immediately before starting the downward motion of the jerk, mentally remind yourself “hard bounce” and then try to get exactly that motion out of the bottom of the jerk.

As mentioned earlier, watching this motion in action is very helpful, so I’d recommend watching the video included earlier in this article. In the meantime, we hope this helps you get stronger and live better.

(Some links may be affiliate links. As an Amazon Associate, Testify earns from qualifying purchases.)

If you found this helpful, you’ll love our weekly email. It’s got useful videos, articles, and training tips just like the one in this article. Sign up below, and of course, if you don’t love it, you can unsubscribe at any time.


At Testify, we offer small group training, private coaching (in-person or remotely via Zoom), online coaching, and form checks. Interested in getting stronger, looking better, and having more energy?

Knee Position in the Split Jerk

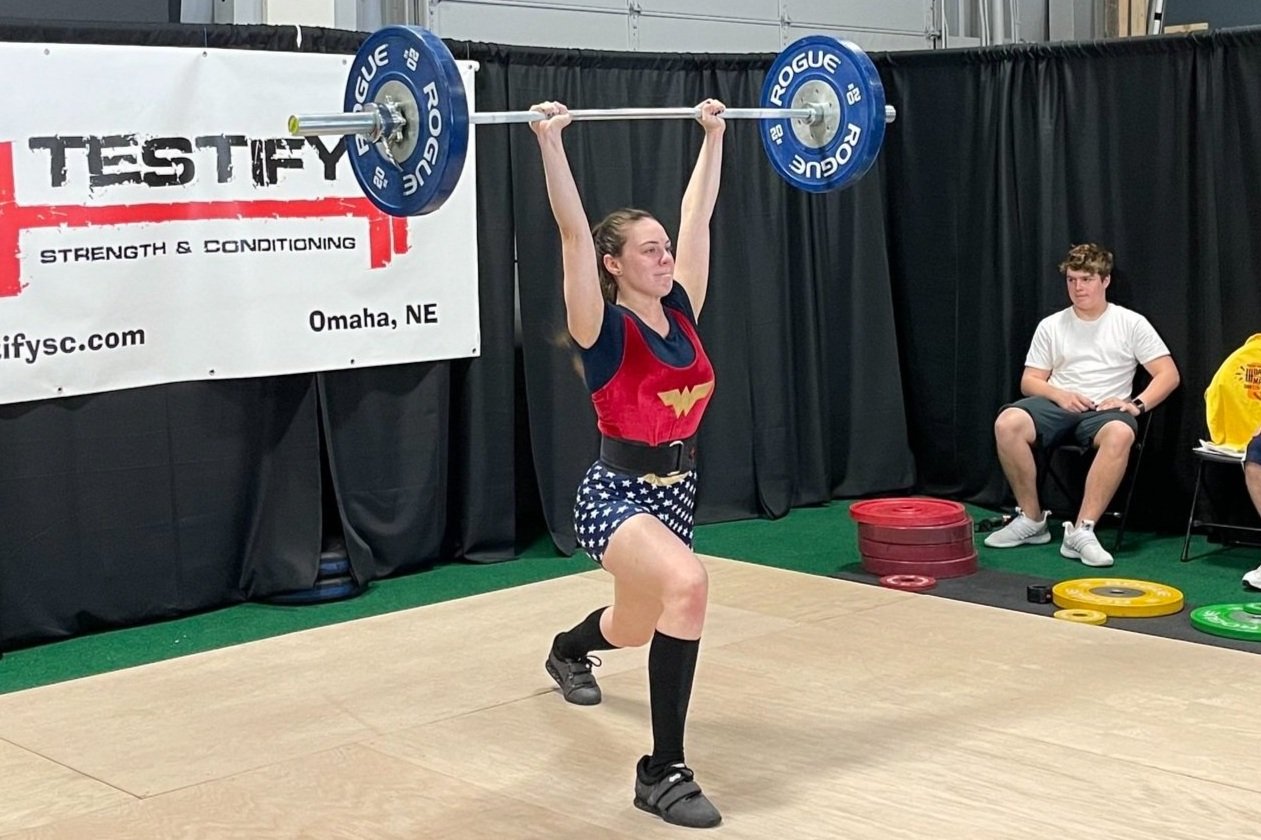
A common problem with new lifters and the split jerk - and it can be a problem with experience lifters, too - is that of knee position. The back knee often requires a bit more attention than the front knee, but we'll cover the front knee position briefly before moving on to the back knee.

Figure 1

For a demonstration of these problems and their solutions, check out the short video included near the end of this article.

Problem #1: Front Shin Angled Forward
When you lock the barbell out overhead in the split jerk, you want the front shin to be roughly vertical as Becky demonstrates in Figure 1, so if you find that your shin tends to be angled forward when you land as Becky demonstrates in Figure 2, you probably need to reach further with your front foot.

Figure 2: front shin angled forward

How to Fix This Problem
To help with this, try cueing yourself to reach further - specifically, reach forward with your front heel. Thus, the cue is “front heel forward” or “reach with your heel.”

If necessary, you can picture yourself landing with your front shin actually angled backward. In other words, envision your landing position with your front heel ahead of your front knee. While this mental picture is an exaggerated one and not the actual position we want (and thus represents an overcue), it can occasionally be useful in achieving the correct position.

Problem #2: Back Knee Completely Straight
As for the back leg, we want the knee to be bent or unlocked with the back heel off the ground as you see Becky demonstrate in Figure 1.

Figure 3: don’t do this.

While the knee bend is not going to be 90 degrees - so don't do what Becky’s doing in Figure 3 - we certainly don't want the back knee to be completely straight either, and that's a common problem that needs to be addressed.

A straight back leg tends to jam the lifter forward onto the front foot. Note the difference between the correct position in Figure 4a versus the straight leg position in Figure 4b.

If you find that you're landing forward with an excessive amount of weight on your front foot, it's very possible that you need to bend your back knee.

Another problem with a straight back leg is that the depth or amount of drop you can achieve in the split should come from the hip joint and the knee joints of both legs. You can clearly see this with the front leg - the hip is flexed (i.e., bent), and the knee is bent, and those two factors together allow the lifter to drop down into position.

Figure 4a (left) vs Figure 4b (right)

The hip and knee of the back leg should also contribute to the drop, but if the back knee is completely straight, it can't contribute to the dropping motion. This will typically mean that the only way to drop lower is to bend the front knee even more, which then pushes the front knee forward into a weaker position.

On a lesser note, allowing the back knee to bend means the hip of the back leg doesn't have to occupy as severe an angle as it otherwise would. Again, note the difference between the two positions shown in Figure 4a and 4b - if you try this yourself, you'll note the difference in sensation at the hip as well as in the low back. The bent knee position will feel stronger and more stable.

How to Fix This Problem
To help fix a straight back leg, try one of the following cues immediately before performing the jerk:

  • The most straightforward approach is simply “bend the back knee” or “bend the knee.”

  • If the above cue doesn’t work, try “drop the back knee” or simply “back knee down.”

  • Finally, you can also cue yourself to land with more weight on your back leg or foot.

As always, we hope this helps you get stronger and live better.

(Some links may be affiliate links. As an Amazon Associate, Testify earns from qualifying purchases.)

If you found this helpful, you’ll love our weekly email. It’s got useful videos, articles, and training tips just like the one in this article. Sign up below, and of course, if you don’t love it, you can unsubscribe at any time.


At Testify, we offer small group training, private coaching (in-person or remotely via Zoom), online coaching, and form checks. Would you like to get quality coaching from a Starting Strength Coach?

The Snatch & Clean: Stay Over the Bar!

DON’T CLEAN LIKE THIS DOOFUS.

When learning to snatch and clean (sometimes even after we’ve learned!), a common error is that of pulling the barbell around the knees or - equivalently - making the back angle become more vertical too soon.

To fix this - cue yourself to “stay over the bar.” In other words, you need to keep your back relatively horizontal for longer than you think - in fact, roughly until after it passes your knees. Of course, the bar travels upward before this point, but it does so because of knee extension, i.e., you should be pushing the floor away from you like a leg press.

Here’s a mental picture: It’s raining, and you’ve decided to lift outside (not a good decision, mind you, but it’s too late now). Staying over the bar means that, from the start of the pull (i.e., your setup position) until just after it passes your knees, you want to stay leaned over so that your shoulders and upper back are keeping the middle of the bar from getting rained on (your shoulders will actually be slightly in front of the bar). If you raise your torso too soon, the bar gets wet, and that’s no good.

Eventually, your back angle will become more vertical as you reach what we call in the teaching progression the “jumping position,” but during the first part of the lift, stay over the bar. You’ll have a more vertical bar path (which means the bar doesn’t have to travel as far), and you’ll be able to accelerate the bar better as well.

We hope this helps you get stronger and live better!

(Some links may be affiliate links. As an Amazon Associate, Testify earns from qualifying purchases.)

If you found this helpful, you’ll love our weekly email. It’s got useful videos, articles, and training tips just like the one in this article. Sign up below, and of course, if you don’t love it, you can unsubscribe at any time.

At Testify, we offer small group training, private coaching (in-person or remotely via Zoom), online coaching, and form checks. Would you like to get quality coaching from a Starting Strength Coach?

Fix Your Early Arm Bend on Your Cleans and Snatches!

Bent arms on a clean or snatch are a problem, so we’re going to try to solve this.

Figure 1: Becky reaches the top of the clean with straight arms, which is what we want.

In Figure 1, Becky demonstrates a clean with straight arms - which is what we want at this point in the lift.

In Figure 2, Becky demonstrates what we don’t want to see, which is a clean with an early arm pull (or “early arm bend”). In other words, we see her bend her arms before they are supposed to bend (for a real time view of this, watch the included video below).

Figure 2: Becky demonstrates an early arm pull (notice the bent elbows), which we don’t want.

The problem with bent arms is that they are deformable, i.e., they can change shape. If you’re Babe Ruth, and you want to hit a baseball, you want to do so with a bat - a rigid, non-deformable object. You don’t want to hit a baseball with a pool noodle because, no matter how strong or fast you are, you can’t effectively transfer that power into the baseball through a squishy pool noodle.

Likewise, during a clean (or snatch) you are trying to take all the power generated in your legs and hips and transfer it through your (hopefully) rigid spine and then down through your long, straight arms into the barbell. If your back isn’t rigid or if the arms aren’t straight, then those structures are deformable, which means they can absorb some of the power you’re trying to transmit to the bar. We don’t want this, so let’s cover some cues to solve this problem.

Cue #1: Long arms (or “straight arms”)
The first cue we’re going to use is the simplest approach. Just cue yourself “long arms” or “straight arms” (or even “straight elbows”). If this works, don’t make it any more complicated. The goal was long, straight arms, so we cued exactly that.

Cue #2: Flex your triceps (or “tight triceps”)
The job of the triceps is to extend (i.e., straighten) the elbow, so if you cue yourself to flex your triceps or tighten your triceps, then your elbows will be nice and straight, which is exactly what we’re looking for.

Cue #3: Shrug
If the first two cues don’t work, try cueing yourself to shrug at the top of the pull (i.e., the top part of the clean where your knees and hips are straight and you’re up on your toes - the top of the “jump”). A shrug is inherent to the movement anyway, but reminding yourself to aggressively shrug at the top of the clean will often solve a bent arm situation (very few people shrug with bent arms).

Cue #4: Leave it on the floor
This one requires some explanation before you actually try it out. The idea here is that you are endeavoring to have such long arms, straight arms that - even though you’re moving upward as you pull the bar off the floor - you are simultaneously trying to leave the bar on the floor. You’re trying to actively stretch your arms out so that, even while standing up, you’re trying to keep the bar down on the floor. It’s obviously an exaggerated mental picture - kind of a “go, go, Gadget-arms!” type of situation - but the cue itself shortens up to “leave it on the floor,” and it tends to work quite well.

We hope these cues help, and as always, we hope this helps you get stronger and live better!

(Some links may be affiliate links. As an Amazon Associate, Testify earns from qualifying purchases.)

If you found this helpful, you’ll love our weekly email. It’s got useful videos, articles, and training tips just like the one in this article. Sign up below, and of course, if you don’t love it, you can unsubscribe at any time.


At Testify, we offer small group training, private coaching (in-person or remotely via Zoom), online coaching, and form checks. Would you like to get quality coaching from a Starting Strength Coach?

Weightlifting Meets: Placing and Tiebreakers

IMG_6451.jpg

A lifter’s place (i.e., 1st place, 2nd place, etc.) at a weightlifting meet is determined by the total, i.e., the sum of the lifter’s heaviest successful snatch and the lifter’s heaviest successful clean-and-jerk. Since two lifters can have the same total, let’s look at the IWF (International Weightlifting Federation) rules for determining place and - specifically - breaking any ties that may occur. Let’s look at the rules in order of application (the official IWF phrasing is given in bold) using our sample lifters Bob and Joe.

Rule #1: Best result - highest first: if identical, then:
This one is pretty simple - if Bob’s total is 170 kg and Joe’s total is 165 kg, then Bob wins because his total is higher. If they both total 170 kg, then we move on to Rule #2 . . .

Rule #2: Best Clean & Jerk result – lowest first; if identical, then:
Bob and Joe both total 170 kg in keeping with the example above. Bob’s best clean-and-jerk is 90 kg while Joe’s best clean-and-jerk is 100 kg. Bob’s clean-and-jerk is lower than Joe’s, so Bob wins.

This logic can seem a bit strange at first, and we’ll address it after going through the rest of the rules. However, if their best clean-and-jerks are both 90 kg, then we move on to Rule #3 . . .

Rule #3: Best Clean & Jerk result’s attempt number – least number of attempt first; if identical, then:
As stated above, Bob and Joe’s best clean-and-jerks are both 90 kg. Bob hit 90 kg on his 2nd attempt while Joe hit 90 kg on his 3rd attempt. Bob’s attempt number is lower than Joe’s (i.e., 2 is lower than 3), so Bob wins.

Again, if the logic seems strange, don’t worry - we’ll get to it in a moment. On the other hand, if they both clean-and-jerked 90 kg (i.e., their best) on their 2nd attempt, then we move on to Rule #4 . . .

Rule #4: Previous attempt(s) – least number of attempt first; if identical, then:
Now, it gets slightly more complicated. Again, in our example, Bob and Joe both clean-and-jerked 90 kg (i.e., their best) on their 2nd attempt. Bob attempted 85 kg on his first attempt while Joe opened at 86 kg. Since 85 is less than 86, Bob wins.

If they both hit 90 kg for their best clean-and-jerk on their second attempts, and they both opened at 85 kg, then we move on to Rule #5 . . .

Rule #5: Lot number – lowest first.
Last time - we promise. Bob and Joe both clean-and-jerk 90 kg (i.e., their best) on their 2nd attempt, and they both opened at 85 kg. Bob’s lot number is 15 while Joe’s lot number is 23. Bob’s lot number is lower than Joe’s, so Bob wins.

These rules can seem pretty convoluted, but if you’re actually watching the meet, it’s pretty simple. Rule #1 is fairly obvious - whoever lifts the most wins. After that, when it comes to the tiebreaker rules (i.e., Rules #2-5), the basic idea is that whoever hits that 170 kg total first - in time - wins. For example, if Bob establishes his 170 kg total at 1:30 p.m., and Joe establishes his 170 kg total at 1:40 p.m., Bob wins since he got to 170 kg earlier in the day than Joe did. Seriously - that’s it.

In the example for Rule #2, Bob’s total is cemented in place when he hits 90 kg for his last successful lift. That means his total is 170 kg before Joe ever steps on the platform to attempt 100 kg. In other words, Bob is rewarded for having staked his claim to 170 kg first - Joe could have gone for 101 kg to total 171 kg, but he instead went for the tie at 170 kg, and since Bob got there first, he wins.

All of the other rules that follow are simply worded to guarantee that this same concept applies in all situations, which can require some serious thought when considering how the order of lifting is determined in weightlifting (for more on that, read this article).

So simply remember this - in the case of a tie, if you hit the total first, you win.

(Some links may be affiliate links. As an Amazon Associate, Testify earns from qualifying purchases.)

If you found this helpful, you’ll love our weekly email. It’s got useful videos, articles, and training tips just like the one in this article. Sign up below, and of course, if you don’t love it, you can unsubscribe at any time.

At Testify, we offer small group training, private coaching (in-person or remotely via Zoom), online coaching, and form checks. Would you like to get quality coaching from a Starting Strength Coach?

Stop Using Your Hands to Catch Your Cleans!

The clean is racked (i.e., caught or received) on the shoulders. Not in the hands.

This is the correct way to rack a clean.

Figure 1: This is the correct way to rack a clean.

When you rack a clean, you do so by rapidly punching your elbows forward and up so that the barbell can sit on the shelf provided by your delts (Figure 1). This shelf is extremely strong, stable, and it can support a lot of weight - more than you can clean, in fact.

On the other hand - or rather, hands - if you receive your cleans by supporting the bar in your hands (Figure 2), your poor, tiny, bent wrists will hate you for it, and it’s possible that your collarbones will too.

Don’t rack your cleans like this. Your wrists will despise you.

Figure 2: Don’t rack your cleans like this. Your wrists will despise you.

To rack the bar properly, jam the elbows forward and up and receive the bar with a loose grip - be sure to let the thumb slip out of the hook grip as you punch the elbows forward.

Elbows forward and up and a loose grip on the bar

Figure 3: Elbows forward and up and a loose grip on the bar

It’s possible that your pinky finger (maybe even your ring finger) will slip off the bar during the catch, and while this is not ideal (especially if you need to jerk the barbell overhead yet), it’s not the end of the world. Do whatever you need to do with your grip to permit the receiving of the bar on your shoulders.

Your wrists will not be straight when you catch a clean, and that’s perfectly fine. Whether a lifter receives the bar correctly on the shoulders or not, the wrists will be bent backwards in extension, but a bar caught on the shoulders (with elbows forward and up) is supported by the shoulders, so the wrists - although bent - do not take any of the load. A bar caught with low elbows, however, cannot be successfully supported by the shoulders and is instead supported on bent - and usually painful - wrists.

Tommy doesn’t even need hands to rack his cleans. (We do NOT recommend trying this at home, folks)

Tommy doesn’t even need hands to rack his cleans. (We do NOT recommend trying this at home, folks)

Be kind to your wrists and commit to catching your cleans on your shoulders. You’ll enjoy the lift far more when your wrists aren’t screaming at you.

As always, we hope this helps you get stronger and live better.

-Phil

PS: Whenever you want even more Testify in your life, here are some free resources:

  • Follow Testify on Instagram HERE.

  • Subscribe to Testify’s YouTube channel HERE.

  • Book a free intro and strategy session with us HERE.

  • Pick up a free copy of Testify’s Squat Guide: 12 Tips to Improve Your Squat Now HERE.

  • Get our free weekly email - containing useful videos, articles, and training tips - HERE.

(Some links may be affiliate links. As an Amazon Associate, Testify earns from qualifying purchases.)


At Testify, we offer small group training, private coaching (in-person or remotely via Zoom), online coaching, and form checks. Interested in getting stronger, looking better, and having more energy?