The Best Way to Put On a Lifting Belt! (and a secret weapon)

A lifting belt is an extremely useful tool for your strength training, and within a month or two of starting to train, you should be using one regularly. Putting on a lifting belt, however, can be a bit tricky, so let’s sort this out.

How to Do It
There is one way - that’s right, just one - to put on a belt correctly, and it involves the upright of your squat rack. The photos here show a double-prong belt in use, but the method works just as well for single prong belts (in fact, it’s slightly easier). The steps are below, and to learn it even quicker and better, watch the included video.

  1. Put the nose of your belt through the buckle and wrap the nose of the belt around the upright.

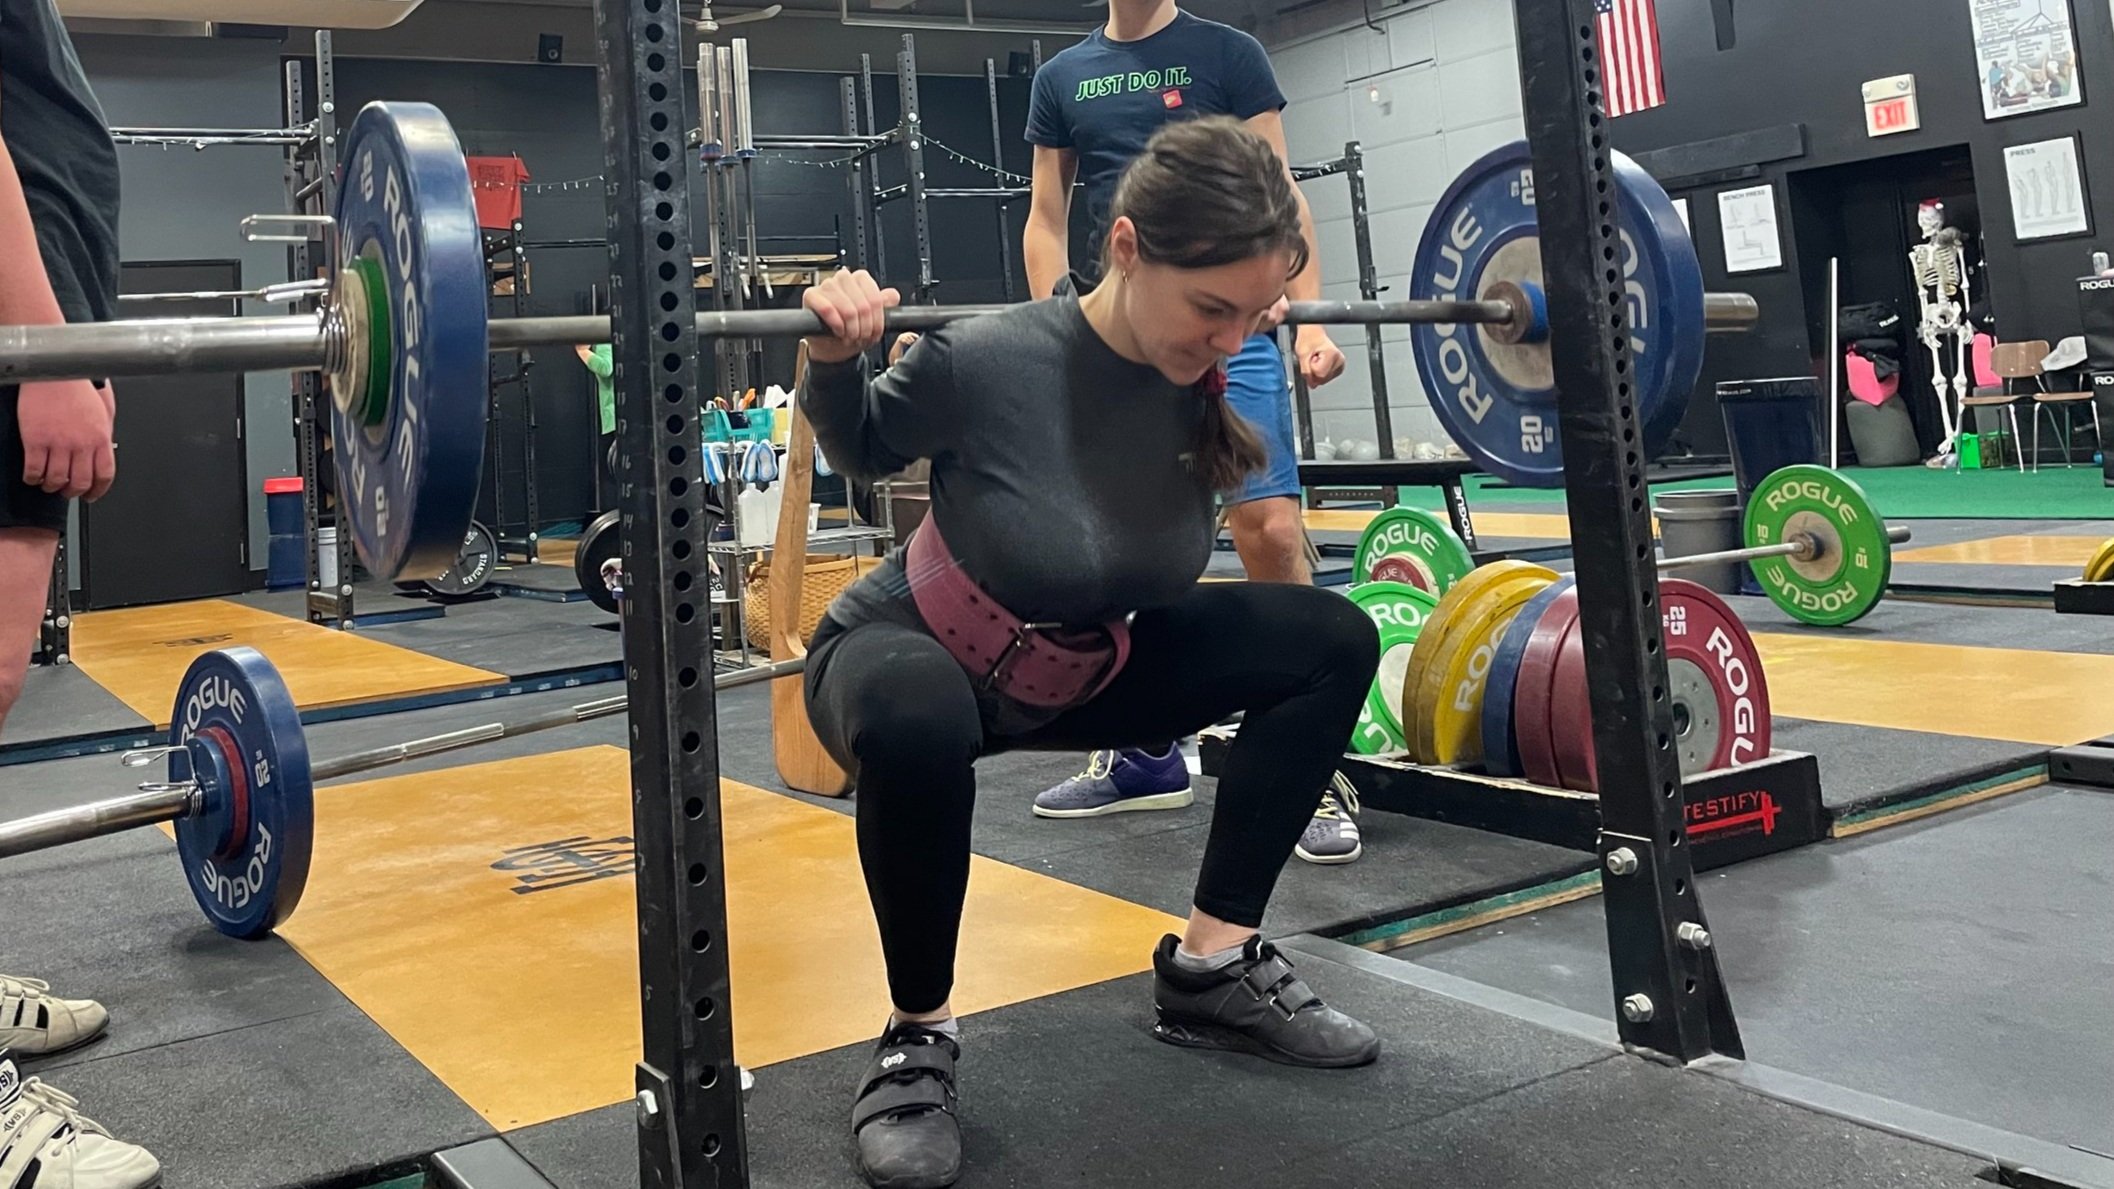
  2. Lean away from the upright. Be sure to lean away so that your hips move away from the rack as well (Figure 1); don’t lean away like you’re trying to avoid a punch (Figure 2).

  3. Twist your body away from the rack. For example, if the nose of the belt came around the right side of your body, twist to your left (Figure 3). This will tighten up the belt.

  4. Put the prong(s) through the appropriate hole(s).

Taking off the belt is much the same as putting it on - wrap the nose around the rack, lean away, twist to loosen, and then remove the prong(s).

Squat Stands vs Squat Racks
If you have a squat stand (free-standing, two uprights) instead of a squat rack (anchored to the floor, four uprights), it may tip toward you when you lean away. This is bad. However, it’s an easy problem to solve. Simply place your foot down on the far side of the floor support, and you’ll be able to keep the squat stand anchored in place.

Secret Weapon
I told you there’s only one way to put on a belt, and this is true . . . mostly. If you’re at a meet, you might not have a squat rack handy when you’re about to step on the competition platform. Oh, you’ll have plenty of racks in the warm-up room, but there will quite possibly be none near the competition platform. Here’s what you do (and again, watch the video above to see this in action):

  1. Put the nose of your belt through the buckle.

  2. Place the sharp end of the screwdriver through one of the holes of the belt (Figure 4).

  3. Grab that end of the screwdriver (don’t impale yourself), and pull back, treating the screwdriver as a lever (Figure 5). This will get the belt as tight as you like.

How Tight Should Your Belt Be?
When you’re new to wearing a lifting belt, it should be uncomfortably tight. If it’s comfortable to wear and easy to wiggle around, it’s merely a fashion accessory. Don’t let your belt be a fashion accessory. With practice, what was uncomfortably tight at the beginning will simply feel correct.

Need to Buy a Belt? Watch This First.
If you’re getting ready to buy a lifting belt, I’d recommend watching the included video here to get a good sense of what to look for when purchasing one. You’ll also find some links below to a few belts we recommend to our members.

Belts
My belt is from Best Belts, and I’d love to recommend them to you, but as of May 2023, they're backlogged and aren't taking orders, so with that in mind, here are the belt options we typically recommend:

(Some links may be affiliate links. As an Amazon Associate, Testify earns from qualifying purchases.)

As always, we hope this helps you get stronger and live better.

If you found this helpful, you’ll love our weekly email. It’s got useful videos, articles, and training tips just like the one in this article. Sign up below, and of course, if you don’t love it, you can unsubscribe at any time.


At Testify, we offer small group training, private coaching (in-person or remotely via Zoom), online coaching, and form checks. Would you like to get quality coaching from a Starting Strength Coach?

How to Start Lifting | General Equipment

What equipment do you need to start lifting weights and getting stronger? In this first video of the "How to Start Lifting" series, Phil covers the basic equipment that you'll need, and he also covers what equipment to avoid as well.

(This video is a Blast from the Past video originally published on 10/04/21.)


At Testify, we offer small group training, private coaching (in-person or remotely via Zoom), online coaching, and form checks. Click the button below to get quality coaching from a Starting Strength Coach and start getting stronger TODAY.

Pulling Blocks: What, Why, and DIY vs. Commercial (Which Should YOU Use?)

What are pulling blocks, why are they useful, and should you buy them or make them yourself? Phil covers it all.


At Testify, we offer small group training, private coaching (in-person or remotely via Zoom), online coaching, and form checks. Click the button below to get quality coaching from a Starting Strength Coach and start getting stronger TODAY.

4 Gym Accessories (CHEAP!) to Make Your Workouts More Effective

Which gym accessories are a “must” when you’re training? Let’s quickly cover four of them.

Accessory #1: Timer
At home, Becky and I have a magnetic kitchen timer attached to the squat rack (if you train at a commercial gym, simply keep it with you in your bag). We bought two pink timers - because pink is stylish and manly - for less than $9 from Amazon (it was a two-pack), but you can get them almost anywhere - Walmart, home improvement stores, grocery stores, etc.

Most of my workouts are fairly time-sensitive - I need to get in, get done, and get out in a certain amount of time, and the timer helps me do just that. Our timer has a count-up mode (i.e., it counts up continuously like a stopwatch) as well as a count-down mode (e.g., you set the timer for 5 minutes, and it will beep or flash when the time is up), and these are common features that you’ll find on most kitchen timers. I typically use the count-up feature, but many people prefer to use the count-down mode instead to keep track of rest periods.

The timer is cheap, it’s effective, and it sticks to your squat rack, so if you find that your workouts are taking longer than you can afford, give it a try.

Accessory #2: Coffee
This should need no explanation, but I’ll do my best anyway. When it’s cold, you drink coffee. When it’s early, you drink coffee. When it’s hot, you still drink hot coffee (iced is fine, too). And when it’s late, you drink coffee.

Coffee. The original - and still the best - pre-workout. Drink it during the workout, too.

Accessory #3: Training Log
Sure, we can call this an accessory, but it’s really your most important piece of training equipment. If you’re going to train - if you’re going to lift intelligently - have a training log. I recommend a basic paper notebook, but if you want to go digital, that will also work. The point here is to have a training log and use it religiously.

The log is what separates training from exercise. If you want to exercise, that’s fine. You’ve got Jazzercise, you’ve got spin, you’ve got Zumba, you’ve got a lot of options. But if you want to train, have a training log. Record your warm-up sets, record your work sets, record what you’re going to do next time (before you walk out the door), and keep tabs on useful cues that you’re focusing on when performing the lifts. Get a training log.

Accessory #4: Fractional Plates
Get yourself a pair of 1.25 lb plates, or better yet, buy a set of fractional plates that has a pair (each) of 0.25 lb, 0.5 lb, 0.75 lb, and 1 lb plates. The set of 1.25 lb plates will permit you to make a 2.5 lb jump, which is a must for presses, bench presses, and even the squat and deadlift for some folks. The more complete set will allow even smaller jumps (e.g., a 1 lb jump using the two 0.5 lb plates), which will be extremely useful for many people on the press and the bench press.

Commercial gyms don’t carry plates smaller than 2.5 lb - which means you have to make jumps that are 5 lb or larger - and eventually, smaller jumps will be necessary to yield progress on a number of your lifts, so get a set before you need it and keep it with you in your gym bag.

As always, we hope this helps you get stronger and live better.

(Some links may be affiliate links. As an Amazon Associate, Testify earns from qualifying purchases.)

If you found this helpful, you’ll love our weekly email. It’s got useful videos, articles, and training tips just like the one in this article. Sign up below, and of course, if you don’t love it, you can unsubscribe at any time.


At Testify, we offer small group training, private coaching (in-person or remotely via Zoom), online coaching, and form checks. Would you like to get quality coaching from a Starting Strength Coach?

Center Knurl or Not? A Very Gripping Topic!

What is that grippy section in the middle of the barbell? What is it for, why might you want it, and what can you do about it if your barbell doesn't have it?

(This video is a Blast from the Past video originally published on 09/27/21.)


At Testify, we offer small group training, private coaching (in-person or remotely via Zoom), online coaching, and form checks. Click the button below to get quality coaching from a Starting Strength Coach and start getting stronger TODAY.

Simple and Cheap DIY Chalk Stand

(A Blast from the Past article originally posted on 02/26/21)

When you chalk up for your next set, it’s nice to have a chalk stand. It’s not absolutely necessary, of course, as you can just use a bag of chalk or - better yet - a chalk bucket sitting on the ground. Although those options work, a chalk stand makes much less of a mess than a bag of chalk, and as the stand is raised, you don’t have to reach all the way down to the floor level as you do with a bucket of chalk, which can be a bit of pain if you already have your belt tightened.

With all this in mind, here’s how you can make a simple and cheap chalk stand (feel free to watch the video above if you’d rather not read the steps below):

Step 1
Go to your nearest hardware store and purchase the following items (you may already have some of these items at home). If you’d rather not make the trip, you can click the items below and order from Amazon.

Step 2
Set one bucket on the ground - upside down.

Step 3
Set the other bucket on top of the first bucket - right side up. The closed ends of the two buckets should now be touching.

IMG_6317.jpg

Step 4
Tape the two buckets together by wrapping duct tape around the buckets several times. Tape the “seam” between the buckets as well as above and below the seam. Five or six times around the buckets should do nicely.

Step 5
Spray paint the buckets. This step is optional and is for aesthetic purposes only - it covers up any logos or printing on the buckets. It’s nice to have the paint match the buckets (or as closely as possible) for two reasons:

  • This is supposed to be a quick process, so don’t worry too much about whether you’ve painted the entire apparatus or not. If the logos are covered and the paint closely matches the bucket, it will look just fine.

  • Eventually, the paint will chip or wear in places, and if the bucket is close to the same color as the paint, this won’t be a big deal.

Step 6
Place the lid on the ground - upside down - with a brick, 10 lb plate, or some other relatively heavy object on top of the lid, and then set your new chalk stand on top of the lid and press down so that the lid is attached to the stand. You’ve now weighted the base of your chalk stand and made it much less likely to tip over and spill.

IMG_6318.JPG

Step 7
Put a chalk-topper over the top of the stand. This is optional, but if other people use your chalk stand, you’ll find this greatly helps keep the chalk dust inside the stand. Our chalk toppers are from www.junkbrands.com.

IMG_6316.JPG

Step 8
Place some chalk in the top bucket, and you’re good to go!

As always, we hope this helps you get stronger and live better.

-Phil

PS: Whenever you want even more Testify in your life, here are some free resources:

  • Book a free intro and strategy session with us HERE.

  • Pick up a free copy of Testify’s Squat Guide: 12 Tips to Improve Your Squat Now HERE.

  • Get our free weekly email - containing useful videos, articles, and training tips - HERE.

  • Follow Testify on Instagram HERE.

  • Subscribe to Testify’s YouTube channel HERE.

(Some links may be affiliate links. As an Amazon Associate, Testify earns from qualifying purchases.)


At Testify, we offer small group training, private coaching (in-person or remotely via Zoom), online coaching, and form checks. Interested in getting stronger, looking better, and having more energy?