Use This Grip for a BIGGER Deadlift! (Tension Grip)
/
What is a tension grip, and why should you use it for pulling movements like the deadlift, row, and clean? This is the second article in our short series on the correct grip for each lift. In the first article, we discussed the compression grip, which is useful for pressing movements such as the bench press, press, close grip bench press, etc., and you can read that article by clicking here.
Today’s Topic: Pulling Movements
The grip we are covering today is the type of grip you would take for pulling movements such as the deadlift, the row, the clean, etc. This grip is commonly referred to as a tension grip (watch the included video for a demonstration).
Whether you execute a pulling lift (e.g., deadlift) or a pressing movement (e.g., bench press), the same principle is true - gravity wants the bar to go down, so your grip should put the bar in the lowest stable position possible. In this way, the bar cannot accidentally reach a lower position than that which it’s already occupying.
What NOT To Do
In a pressing movement - as discussed in the compression grip article - you place the bar at the base of the palm. However, since the hand will be pointing downward in a pulling movement, putting the base of the palm against the bar puts the bar in an unstable position. The compression grip is very strong for pushing and pretty terrible for pulling.

Figure 1: compression grip (shown in reverse for viewing purposes): good for pushing - terrible for pulling
Placing the base of the palm against the bar - this will look like you’re pushing down on the bar (Figure 1) - compromises the grip, and this will show up in several ways. First, if you can even break the bar off the floor, it may result in a soft lockout at the top of the lift (e.g., knees that are still bent) or the complete inability to finish the lift at all. Second, when your grip is compromised, everything else starts to compensate - your back starts to round, the weight feels heavier, and it will actually be harder to pull the bar off the floor.

Figure 2: tension grip (shown in reverse for viewing purposes): good for pulling
The Answer
Take a grip that permits the bar to sit a little lower in the hand - down by the fingers a bit more (Figure 2).
(As a side note, don’t take a monkey grip - you shouldn’t have a visible air gap between your hands and the bar.)
Put simply, it should look like you’re pulling up on the bar and not pushing down on the bar. Note the differences between a compression grip (bad for pulling) and a tension grip (good for pulling) in the photos below.


Whether you use a double overhand grip, a hook grip, or an alternate grip, make sure the bar is carried down by the fingers and not positioned up by the base of the palm. When in doubt, put some upward tension on the bar, and voilà - your wrists will straighten out, and the bar will be positioned correctly.
As always, we hope these tips help you get stronger and live better.
(Some links may be affiliate links. As an Amazon Associate, Testify earns from qualifying purchases.)
If you found this helpful, you’ll love our weekly email. It’s got useful videos, articles, and training tips just like the one in this article. Sign up below, and of course, if you don’t love it, you can unsubscribe at any time.
At Testify, we offer small group training, private coaching (in-person or remotely via Zoom), online coaching, and form checks. Would you like to get quality coaching from a Starting Strength Coach?
Deadlift Fix: 4 Cues for a Stronger, Smoother Pull
/
(A Blast from the Past article originally posted on 11/12/21)
Attempting to jerk or yank the bar off the floor when starting the deadlift is a common problem for new lifters.
Don’t do this.
You might be able to get away with it when the weight is light, but you won’t be able to get away with it when the weight gets heavy, and by that time, you’ll have accidentally ingrained a very counterproductive habit.
In the 5-step setup for the deadlift - stance, grip, shins, chest, pull/drag - this is typically a problem with step 4: squeezing your chest up to set your back in extension. When you lift your chest to set your back, you must start applying tension to the bar – you must start pulling on the bar even though you're not lifting it off the floor just yet. Treat the bar as an anchor against which you start to pull to help you set your back.
Here are 4 cues that you can use to help with this process:
Cue #1: Bend the bar.
When you start applying tension to the bar - when you squeeze your chest up to set your back in extension - picture yourself bending the bar upward in the middle (i.e., make the bar look like a mountain, not a valley). Will it actually bend? That depends on how much weight is on the bar, but you visualize yourself bending it nonetheless.
Cue #2: Bend it before you break it.
Bend the bar before you break it off the floor. Very similar to the first cue, but it reminds you to put a lot of tension on the bar before you decide to break it off the floor.
Plus, it's catchy - this is the “try it before you buy it” cue of the deadlift world.

Figure 1A: Note the dark gap or “slop” between the top of the shaft and the collar.
Cue #3: Pull the slack out of the bar.
Barbells have some slop in them. Take a close look at your barbell and note that there’s a little gap between the shaft of the bar and the collar of the bar (Figure 1A). Set your back hard enough - pull hard enough with long, straight arms - that this slop nearly or completely disappears (Figure 1B).

Figure 1B: Note that the gap has almost disappeared.
Plates (even competition plates to a small degree) also have some slop between themselves and the bar - this is what allows you to slide them on and off. When you walk up to your deadlift, the bar is resting on the plates. When you squeeze your chest up and start to apply tension, pull up hard enough that the plates start to rest or hang on the bar instead.
Cue #4: Pull the click out of the bar.
Same idea as the previous cue, but this emphasizes that you should hear it when you apply tension and pull the slack out of the bar.
Once you’ve applied a significant amount of tension to the bar using one of these cues - and you’ll find one that works best for you - then you squeeze the bar smoothly off the floor.
Remember, breaking the deadlift off the floor isn’t digital - it’s not a switch that you flip from off to on. It’s analog - it’s a dial that you keep turning up and turning up - pulling harder and harder - until the bar starts moving. This is a skill - not a particularly complicated one, but a skill nonetheless - and it’s one that you need to - and can - develop.
We hope these cues help you get stronger and live better!
(Some links may be affiliate links. As an Amazon Associate, Testify earns from qualifying purchases.)
If you found this helpful, you’ll love our weekly email. It’s got useful videos, articles, and training tips just like the one in this article. Sign up below, and of course, if you don’t love it, you can unsubscribe at any time.
At Testify, we offer small group training, private coaching (in-person or remotely via Zoom), online coaching, and form checks. Would you like to get quality coaching from a Starting Strength Coach?
This Simple Tactic FIXED His Squat & Deadlift in ONE Rep
/Want a cue that can work wonders for your squat and deadlift? It can even work for your press, bench, snatch, and clean. Check it out.
At Testify, we offer small group training, private coaching (in-person or remotely via Zoom), online coaching, and form checks. Click the button below to get quality coaching from a Starting Strength Coach and start getting stronger TODAY.
4 Easy Ways to Load Your Deadlift
/
(A Blast from the Past article originally posted on 11/05/21)
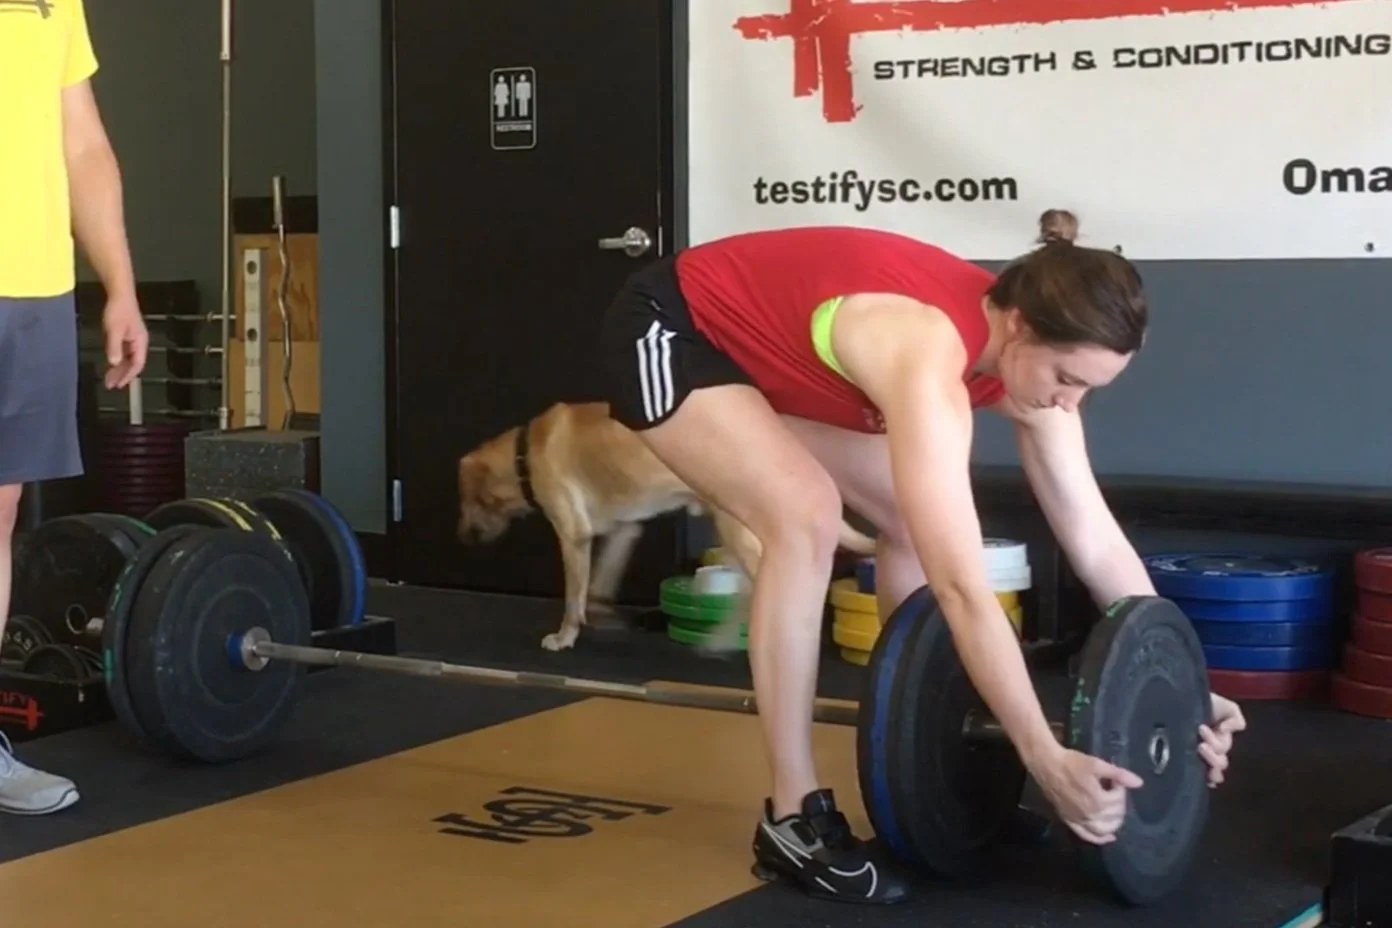
If you’re new to lifting, it may seem like loading and unloading your deadlift sometimes take an unseemly amount of effort. Let’s improve this situation, shall we?
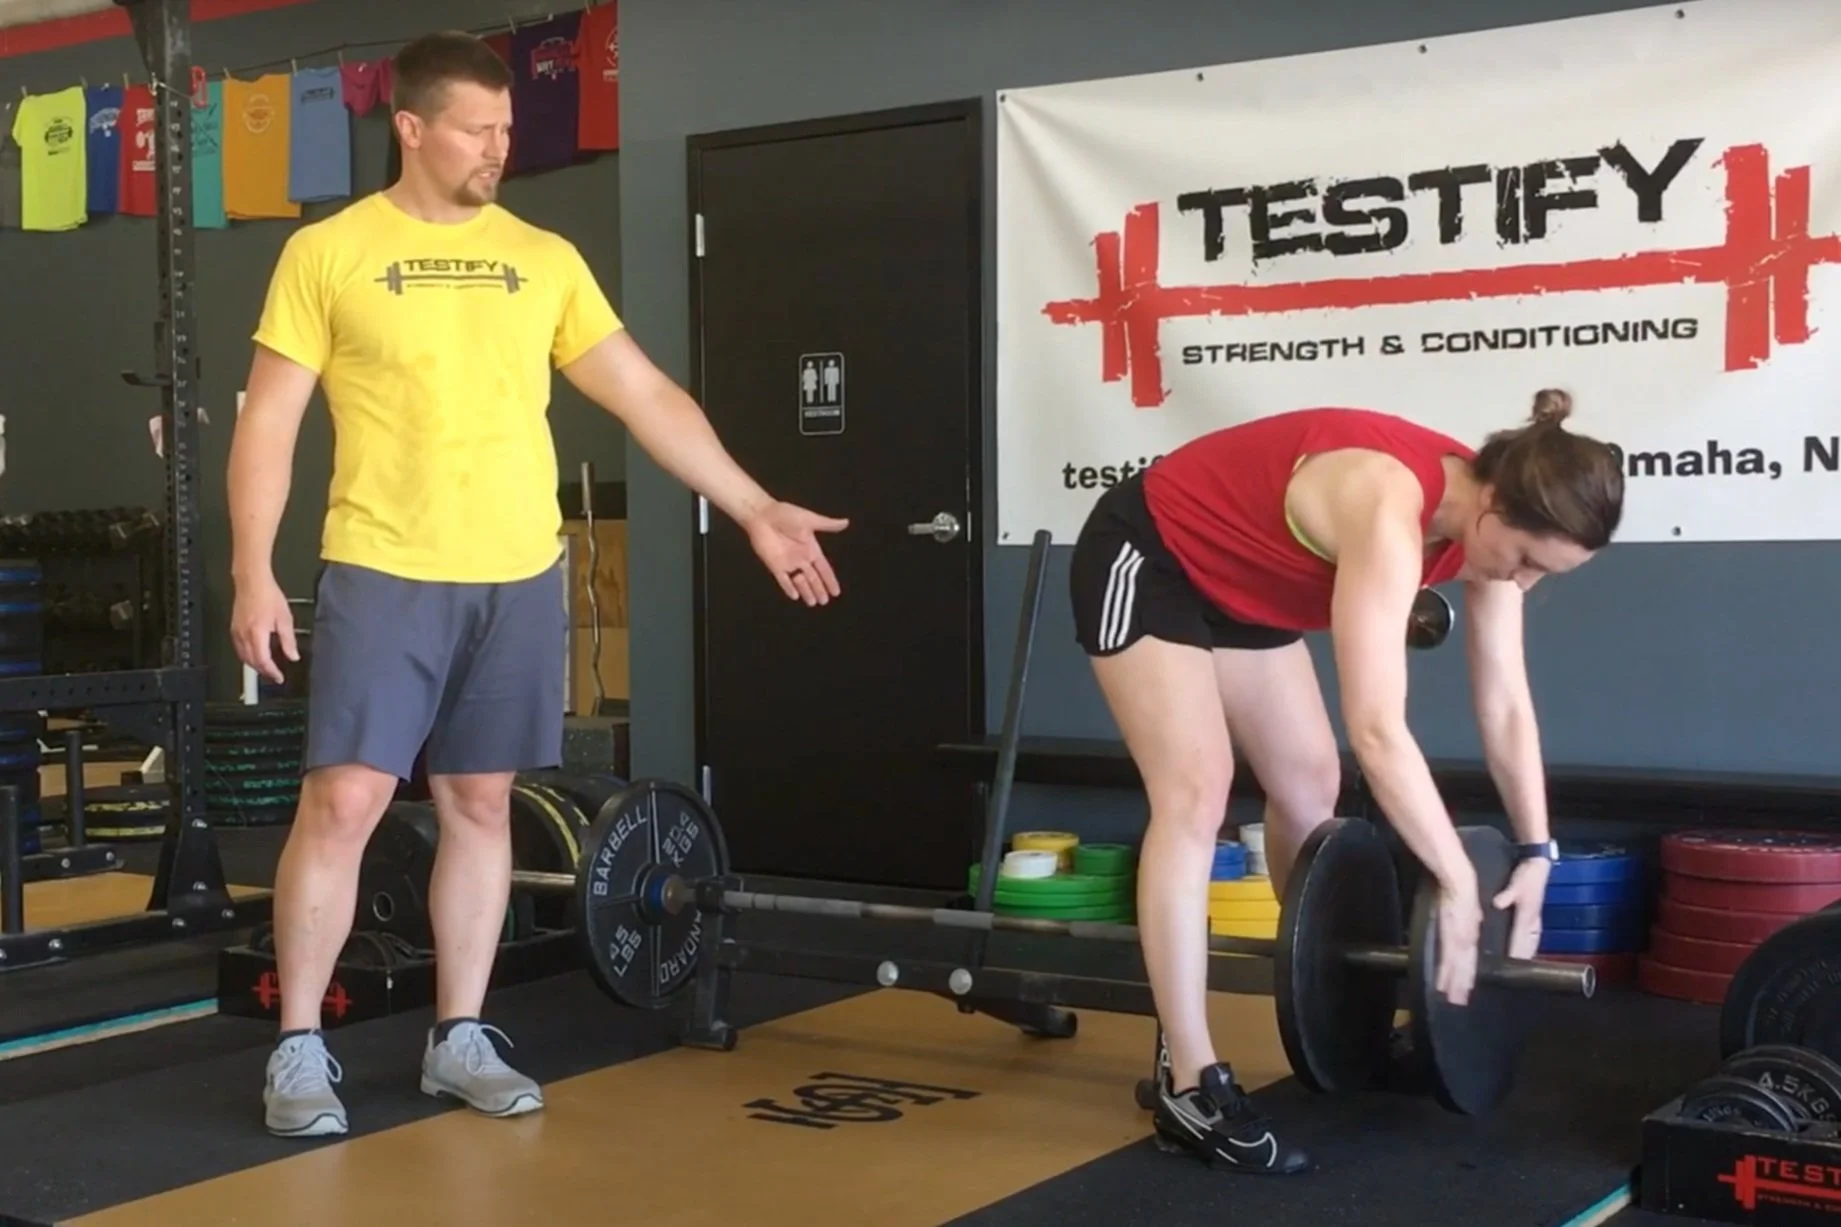
Option 1
If you’re using bumper plates, simply grab the plate about halfway down or just slightly lower than that, lean back a bit, and simply pull. You’re using your bodyweight to help pull the plate along - the plate will slide lightly along the floor, and you’ll be good to go.

One of the advantages to this method is that if there is some slop at the other end of the barbell, this tends to tighten up both sides simultaneously.


Option 2
Deadlifting with metal plates is preferable to deadlifting with bumper plates because, when you add other plates like 25s or 10s, you’re not adding a full size plate, so loading extra plates is relatively effortless until it’s time to add another 45 to each side.
When it’s time to add a 45 to each side, grab a 2.5 lb plate (5s or 10s also work, but 2.5s are best), and roll one side of the bar up onto the plate. This raises the bar enough that you can slide the next 45 on easily.
This method is also very useful when unloading your bar at the end. Simply roll the innermost 45 up onto a 2.5, which leaves the outer 45s off the ground. As a result, they are easy to slide off the bar.

Option 3
Whether you’re using metal plates or bumper plates, you can use a commercially available deadlift jack. On one hand, a deadlift jack is the best option in terms of ease of use, but it’s also the most expensive option as some models will cost you $150-$200 or more. It’s great . . . but it can be pricey. A more economical version of a deadlift jack would be . . .


Option 4
The fishhook! (if you’ve seen the movie “Moana,” you’ll understand the name) Anyone can make one of these - the process is simple, cheap, and we have a video covering the entire project (thanks to one of our coaches, Tyler Holm!), and you can scroll down to the end of this article to view that video.
With the fishhook, you can easily jack up one side of the bar, which makes it very easy to slide on either a bumper plate or a metal 45.
We hope these tips help you get stronger and live better!
(Some links may be affiliate links. As an Amazon Associate, Testify earns from qualifying purchases.)
If you found this helpful, you’ll love our weekly email. It’s got useful videos, articles, and training tips just like the one in this article. Sign up below, and of course, if you don’t love it, you can unsubscribe at any time.
At Testify, we offer small group training, private coaching (in-person or remotely via Zoom), online coaching, and form checks. Would you like to get quality coaching from a Starting Strength Coach?
Improve Your Deadlift by FIXING These 3 Errors!
/
Let’s quickly address three common deadlift mistakes that we see with new lifters . . . and sometimes experienced lifters as well.

Figure 1: Don’t do this.
Mistake #1: Shrugging at the Top of the Deadlift
See what Becky is doing in Figure 1? Don’t do that. Don’t shrug at the top of your deadlifts. It’s inefficient, unnecessary, and at heavy weights, you can’t do it anyway, so trying to do so is a waste of effort and energy.
To fix this, don’t bother telling yourself, “Don’t shrug.” When you do this, you are saying the one word - shrug - that you don’t want running around in your head.

figure 2: much better
We often refer to this type of cue as a negative cue or an avoidance cue, and although it can sometimes work, a better approach is to give yourself something to do as opposed to something not to do.
With this in mind, cue yourself, “Chest up, shoulders down,” or simply “Shoulders down” (Figure 2). This will help ensure that the bar is simply hanging from your shoulders and that your shoulders are not actively contributing to the elevation of the barbell.
Mistake #2: Releasing Your Valsalva Early
Do you exhale at the top of your deadlift? Don’t do that.
Breath is support, so stay tight and keep your valsalva (i.e., hold your breath against a closed glottis) until the bar is back on the ground. You won’t run out of air - it only takes another half-second to lower the barbell - and then you can release your breath.
Cues to fix this issue include “Hold your breath,” “Hold your valsalva,” or “Lift silently.” That last cue comes courtesy of SSC Mia Inman in her article Lift Silently from Starting Strength, and it wonderfully conveys what you should hear as you complete your deadlift . . . nothing. After the bar leaves the floor, there’s no noise. Specifically, you don’t hear any noise from exhalation - until the bar is back on the floor.
Mistake #3: Lowering the Barbell Around Your Knees
After you’ve locked out your deadlift at the top of the lift - with shoulders down and your breath held, of course - you want to lower the bar in a nice, straight, vertical line back to its starting point right over the middle of your foot.

figure 3: becky lowers the bar around her knees. don’t do this.
Lowering the bar in a curved path around the knees (Figure 3), on the other hand, is inefficient, and as a result, it’s harder. Additionally, it causes you to set the bar down in front of the middle of your foot, which means you’ve got another variable to deal with before starting the next rep.
This problem arises when you try to keep a vertical torso when setting the bar down, which means you are primarily bending the knees to set it down, which in turn means that your knees become obstacles for the correct bar path.

Figure 4: becky pushes her hips back, bends over, and “bows to the floor.”
The solution for this is to reach back with your hips, very consciously bend over at the hips (Figure 4), and slide the bar down your thighs.
Your knees will be unlocked, but keep them back until the bar passes the knees. If this concept doesn’t work for you try one of the two following approaches:
While setting the bar down, watch the middle of your foot and sight the bar into place as you lower it. In other words, aim for the middle of your foot.
Bow to the floor. That’s it. Simply cue yourself to “bow to the floor,” and you will naturally bend over to set the bar down. It can be useful to remember that the bar’s job is to go straight back down to where it started. Your job - on the other hand - is to stay out of the bar’s way, so bow to the floor and set it down.
As always, we hope these tips help you get stronger and live better.
(Some links may be affiliate links. As an Amazon Associate, Testify earns from qualifying purchases.)