Week 2021.03.08

Reminder: Please note that the gym will be closed this Saturday, 03/13/21, as we are hosting the annual Testify Leprechaun Lift-off weightlifting meet.

This Week’s Conditioning

Option 1
“Prowler Base”
1. Load up a manageable weight.
2. Sprint 40m at 85% intensity.
3. Rest until breathing and heart rate slow down. (45 sec – 2 min)
4. Repeat 5-15 times.

Courtesy of “Death by Prowler” (on Starting Strength).

Compare to 2021.01.04.

Option 2
Bike/row:
5 min on
4 min off
4 min on
3 min off
3 min on
2 min off
2 min on
1 min off
1 min on

Record distance for each interval and add for total distance.

Compare to 2020.12.14.

Option 3
5-10 rounds of:
30 sec ME tire flips
30 sec rest

Compare to 2020.11.16.

Option 4
10 x 50 ft yoke carry
Each carry is 25 feet down and 25 feet back and is for time. Rest 1 minute between carries.

Compare to 2020.11.09.

Save Time During Your Workouts!

You like being at the gym, but you also like other things besides being at the gym, and people are often on a tight schedule, so if your workouts are taking longer than you would like (or can afford), we are going to give you two tactics to save time at the gym. These tactics both revolve around the warm-up, because the warm-up is the best place to save time when you train.

First, don’t rest between your warm-up sets. You need to change the weights as you warm-up, and the act of unloading and loading plates between warm-up sets will provide enough rest for the purpose of warming up. Remember, these are warm-up sets - they’re not terribly difficult - you don’t need a whole lot of rest. After your last warm-up set, you’ll want to rest a few minutes (perhaps 2-4 minutes) before performing your first work set, but if you’re resting 3-5 minutes between all of your warm-up sets and you’re wondering how to shorten your workout time, this is where you start.

Second, if you really need to speed things up, start warming up your next lift between the work sets of your current lift. Let’s say you’ve just done your first work set of squats, and bench press is your next lift - while you’re resting, go ahead and grab a barbell and do your empty bar warm-up for the bench (if it’s the press, you don’t even need a rack - you can just pick it up off the floor and press it). Then, sit down and rest until it’s time to squat again. After your second set of squats, go ahead and do your next bench warm-up set. You might still have some warming up to do on the bench press when you’re done squatting, but this method will certainly shave some time off the length of your training session.

Most importantly, don’t let this tactic tire you out for your current work sets. The squat/bench press example we’ve given here will not tire you out for squatting because the bench press warm-ups are light and because the bench press is unrelated to squatting, but warming up your deadlift between work sets of squats may not be the greatest idea.

Try these tactics the next time you train, and you’ll save yourself some valuable time. Of course, you could probably shorten those 15-minute-between-set-conversations you have with your lifting buddies as well.

As always, we hope this helps you get stronger and live better.

-Phil

PS: Whenever you want even more Testify in your life, here are some free resources:

  • Book a free intro and strategy session with us HERE.

  • Pick up a free copy of Testify’s Squat Guide: 12 Tips to Improve Your Squat Now HERE.

  • Get our free weekly email - containing useful videos, articles, and training tips - HERE.

  • Follow Testify on Instagram HERE.

  • Subscribe to Testify’s YouTube channel HERE.

(Some links may be affiliate links. As an Amazon Associate, Testify earns from qualifying purchases.)


At Testify, we offer small group training, private coaching (in-person or remotely via Zoom), online coaching, and form checks. Interested in getting stronger, looking better, and having more energy?

book a free intro

Week 2021.03.01

This Week’s Conditioning

Option 1
Sled
Outdoors:
10-20 x 25 yds EMOM at a weight of your choice

Every minute, push the sled 25 yards, i.e., if pushing the sled takes 20 seconds, then you have 40 seconds to rest. Perform 10-20 rounds.

Indoors:
10-20 x 100 ft EMOM at a weight of your choice

Every minute, push the sled 100 feet, i.e., if pushing the sled takes 20 seconds, then you have 40 seconds to rest. Perform 10-20 rounds.

Compare to 2020.12.28.

Option 2
Bike/row:
4 x 3 minutes

Rest 3 minutes between each round. Score = lowest distance.

Compare to 2020.12.07.

Option 3
Outdoors:
5-10 rounds:
50 yd sled push (25 yd down-back)
50 yd farmer carry (25 yd down-back)
Rest 1 min

Indoors:
5-10 rounds:
100 yd sled push (50 ft down-back)
100 yd farmer carry (50 ft down-back)
Rest 1 min

Compare to 2020.11.09.

Option 4
For time:
500m row
5 x 80m sled push (200 ft if indoors)
500m row

Rest 1 minute after the first row and after each sled push.

Compare to 2020.11.02.

Simple and Cheap DIY Chalk Stand

When you chalk up for your next set, it’s nice to have a chalk stand. It’s not absolutely necessary, of course, as you can just use a bag of chalk or - better yet - a chalk bucket sitting on the ground. Although those options work, a chalk stand makes much less of a mess than a bag of chalk, and as the stand is raised, you don’t have to reach all the way down to the floor level as you do with a bucket of chalk, which can be a bit of pain if you already have your belt tightened.

With all this in mind, here’s how you can make a simple and cheap chalk stand (feel free to watch the video above if you’d rather not read the steps below):

Step 1
Go to your nearest hardware store and purchase the following items (you may already have some of these items at home). If you’d rather not make the trip, you can click the items below and order from Amazon.

Step 2
Set one bucket on the ground - upside down.

Step 3
Set the other bucket on top of the first bucket - right side up. The closed ends of the two buckets should now be touching.

Step 4
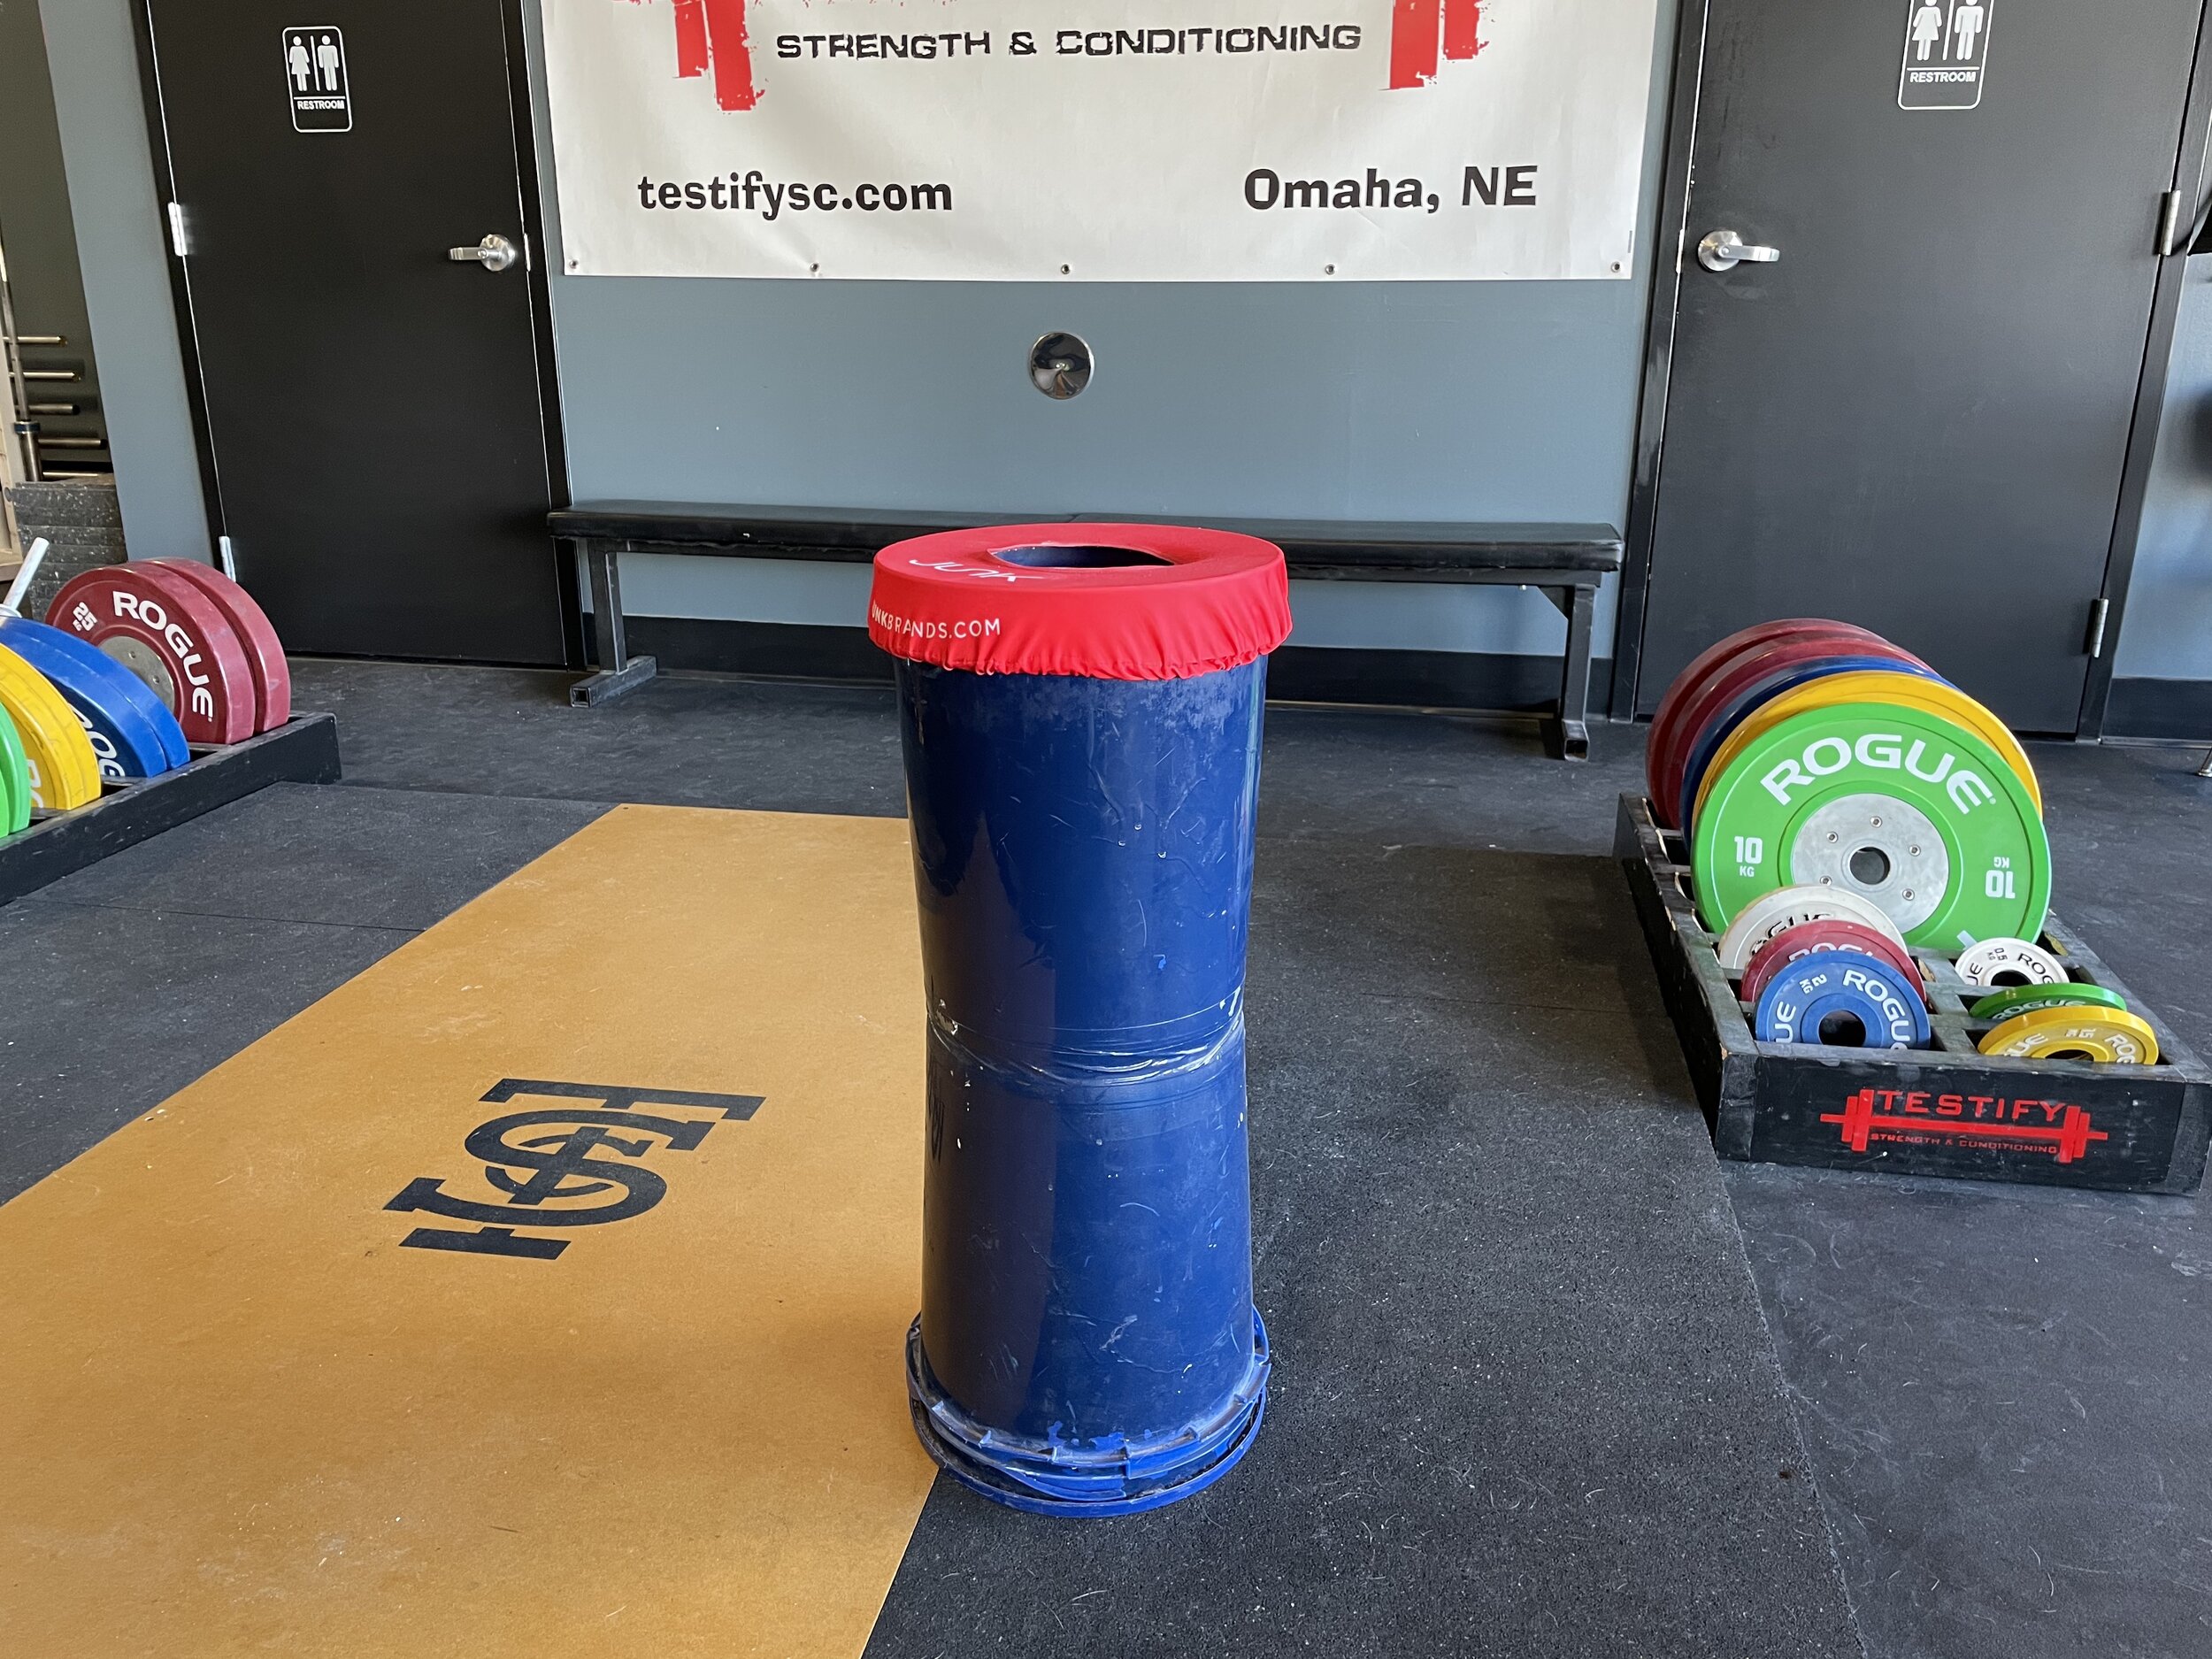
Tape the two buckets together by wrapping duct tape around the buckets several times. Tape the “seam” between the buckets as well as above and below the seam. Five or six times around the buckets should do nicely.

Step 5
Spray paint the buckets. This step is optional and is for aesthetic purposes only - it covers up any logos or printing on the buckets. It’s nice to have the paint match the buckets (or as closely as possible) for two reasons:

  • This is supposed to be a quick process, so don’t worry too much about whether you’ve painted the entire apparatus or not. If the logos are covered and the paint closely matches the bucket, it will look just fine.

  • Eventually, the paint will chip or wear in places, and if the bucket is close to the same color as the paint, this won’t be a big deal.

Step 6
Place the lid on the ground - upside down - with a brick, 10 lb plate, or some other relatively heavy object on top of the lid, and then set your new chalk stand on top of the lid and press down so that the lid is attached to the stand. You’ve now weighted the base of your chalk stand and made it much less likely to tip over and spill.

IMG_6318.JPG

Step 7
Put a chalk-topper over the top of the stand. This is optional, but if other people use your chalk stand, you’ll find this greatly helps keep the chalk dust inside the stand. Our chalk toppers are from www.junkbrands.com.

IMG_6316.JPG

Step 8
Place some chalk in the top bucket, and you’re good to go!

As always, we hope this helps you get stronger and live better.

-Phil

PS: Whenever you want even more Testify in your life, here are some free resources:

  • Book a free intro and strategy session with us HERE.

  • Pick up a free copy of Testify’s Squat Guide: 12 Tips to Improve Your Squat Now HERE.

  • Get our free weekly email - containing useful videos, articles, and training tips - HERE.

  • Follow Testify on Instagram HERE.

  • Subscribe to Testify’s YouTube channel HERE.

(Some links may be affiliate links. As an Amazon Associate, Testify earns from qualifying purchases.)


At Testify, we offer small group training, private coaching (in-person or remotely via Zoom), online coaching, and form checks. Interested in getting stronger, looking better, and having more energy?

book a free intro

Week 2021.02.22

This Week’s Conditioning

Option 1
Sled
Outdoors:
10 rounds of:
Push sled 100 ft
Pull sled 100 ft (hand over hand)

Indoors:
20 rounds of:
Push sled 50 ft
Pull sled 50 ft (hand over hand)

Compare to 2020.12.21.

Option 2
Bike/row:
4 x 800m

Rest 3 minutes between each round. Score = slowest time.

Compare to 2020.11.30.

Option 3
1st: 5 x 50 ft seated sled pull. Add weight each round. Rest as needed.
2nd: 5 x 100 ft duck walk. Add weight each round. Rest as needed.

Compare to 2020.11.02.

Option 4
Row 10 x 100m
Rest 1 min between sprints. Your score is your slowest time.

Compare to 2020.10.26.

Why Do You Put the Bar There When You Squat?

Listen up, folks - we’re going to discuss something you’ve probably never thought about before - why we put the barbell in the low bar position when we squat. Specifically, we’re going to discuss an anatomical rationale for placing the bar in The Position, so for today, we’ll be skipping the mechanical discussions about moment arms, hip drive, etc. (but as I was a physics teacher in a past life, we can geek out on that some other time if you like).

If you take a person who has never squatted before, maybe even a person who has squatted before, and you say, “Hey, go over there and squat that bar down and up” - which is unfortunately a fairly common approach to coaching - pretty much everyone in the world will go over to the rack, get under the bar, and they will then place the bar in what is called the high bar position (only they don’t know it’s called that), and they’ll stand upright with the bar sitting up high on the shelf provided by your traps.

They will do this because it’s easy and it’s obvious. It’s easy because it doesn’t require much - if any - flexibility (although it actually can be tough for some people), and it’s obvious because it’s the first potential shelf that the bar runs into as you slide under the bar.

However, remember that this position - the position of standing upright - is the easiest position in the entire squat. You know this because you can stand there supporting a lot more weight than you can actually squat. As this is the easiest position to assume, we might be wise not to let this position dictate the location of the bar.

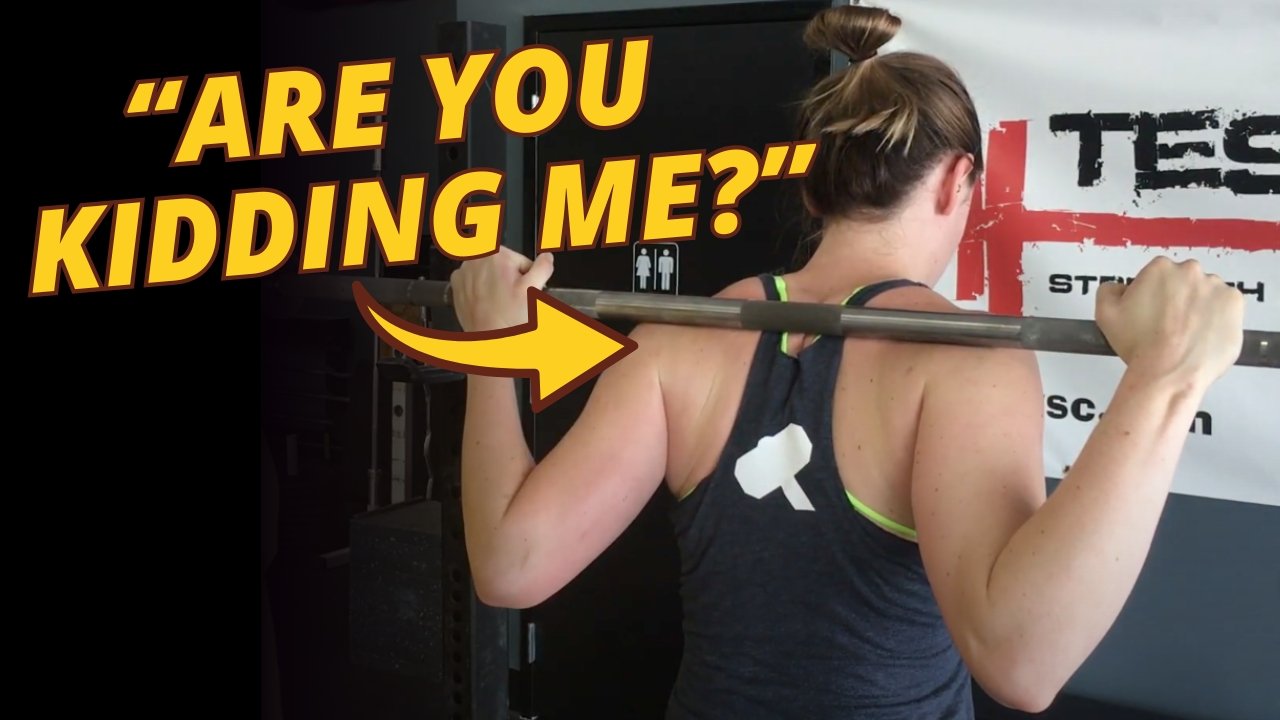
Instead, we’re going to slide just a bit further forward - further under the bar, if you will - until the bar slides past the traps and is now supported on the shelf provided by your delts. We choose this location for the bar - not because it’s the easiest position to achieve when standing up (because it is not) - but rather because it’s the most secure location for the bar when you’re actually squatting.

Picture yourself at the bottom of your squat - you’ve got a nice, leaned-over torso, and now, with the bar sitting in The Position, any downward motion of the bar (i.e., rolling or sliding down your back) is blocked by your delts, and any upward motion is blocked by your traps. The bar is pinned between these two muscle groups in a very secure manner, and a bar that doesn’t want to move up or down your back is a very good thing when squatting heavy weights.

Now that you’ve got something to think about as you rest between work sets, it’s time to get to squatting.

As always, we hope this helps you get stronger and live better.

-Phil

PS: Whenever you want even more Testify in your life, here are some free resources:

  • Book a free intro and strategy session with us HERE.

  • Pick up a free copy of Testify’s Squat Guide: 12 Tips to Improve Your Squat Now HERE.

  • Get our free weekly email - containing useful videos, articles, and training tips - HERE.

  • Follow Testify on Instagram HERE.

  • Subscribe to Testify’s YouTube channel HERE.

(Some links may be affiliate links. As an Amazon Associate, Testify earns from qualifying purchases.)


At Testify, we offer small group training, private coaching (in-person or remotely via Zoom), online coaching, and form checks. Interested in getting stronger, looking better, and having more energy?

book a free intro