"This Made Him Look STUPID!" | Squat Mistake

Quit making this mistake. It looks silly, it’s pointless, and it can cause a problem, so let’s fix it fast.

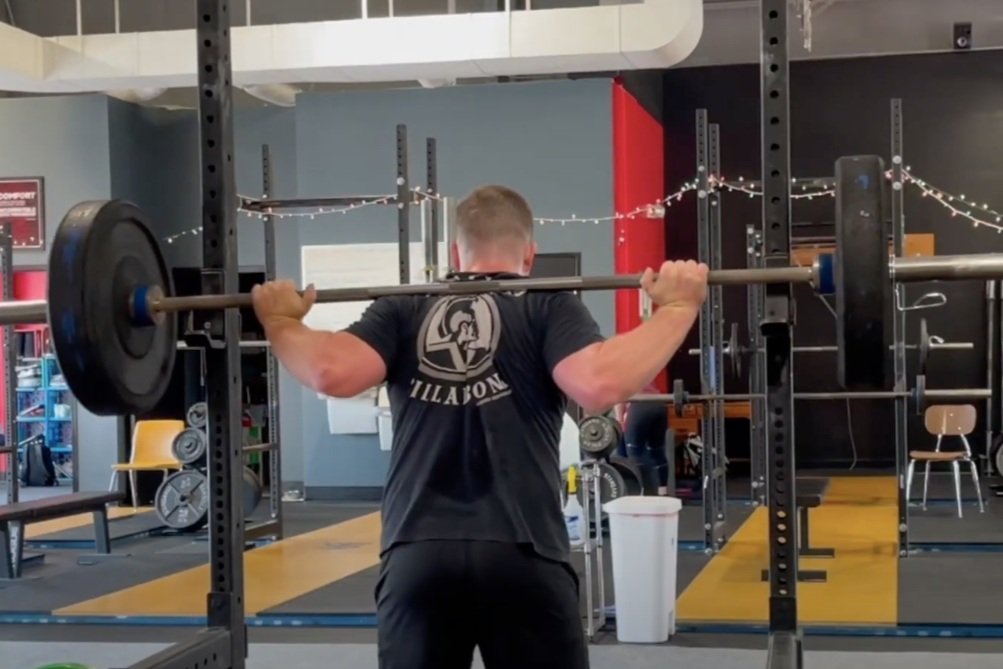
Figure 1: don’t do this.

The Mistake
What’s the mistake? It is that of looking for the hooks (AKA “j-hooks”) when racking the squat. After all, unless you have an incredibly cruel training partner, the hooks didn’t go anywhere while you were squatting, so there’s no need for you to look sideways for them when racking the barbell at the end of your set (Figure 1).

Why is This a Problem?
Looking for the hooks is unnecessary, it’s a waste of time and energy, and it makes you look like a newbie. Additionally - and most importantly - it increases the chance that someday (probably not today, but someday), you’re going to end up as a great candidate for a YouTube fail video because - while you’re going to make the hook that you’re looking for - you’re eventually going to miss the hook that you’re not looking for.

You Don’t Really Care About the Hooks Anyway, Right?
It’s useful to remember that you don’t aim for the hooks anyway - you simply want to get the bar to hit the uprights and then stay in contact with the uprights as you slide the bar down a few inches until it’s resting on the hooks.

figure 2: this . . . is much better.

How to Fix the Problem
With this in mind, when you finish your set of squats, keep looking at the same focal point you used when squatting (on the floor roughly four to six feet in front of you) and walk straight ahead until the bar runs into the uprights (Figure 2). You’ll know because . . . you’ll stop moving.

Once you’ve hit the uprights, and assuming that you’ve set your hooks at a reasonable height (and if you’re not sure, be sure to watch the included video below), maintain bar contact with the uprights while you use your legs to dip down slightly until the bar is sitting in the hooks.

This last point is worth repeating - as long as you maintain contact with the uprights, you’ll end up with the bar correctly resting in the hooks every single time.

Put simply, be smart. Looking at the hooks when racking the bar is unnecessary, it’s a waste of time and effort, and it increases the chance that you’re going to do something silly like end up with half a barbell still on your back when you think it’s completely back on the hooks.

As always, we hope this helps you get stronger and live better.

(Some links may be affiliate links. As an Amazon Associate, Testify earns from qualifying purchases.)

If you found this helpful, you’ll love our weekly email. It’s got useful videos, articles, and training tips just like the one in this article. Sign up below, and of course, if you don’t love it, you can unsubscribe at any time.


At Testify, we offer small group training, private coaching (in-person or remotely via Zoom), online coaching, and form checks. Interested in getting stronger, looking better, and having more energy?

Starting Strength Squat/Low Bar Squat | Fix Your HIPS and KNEES!

Is the timing of your hips and knees ruining your squat? In this video - our sixth in a series of Saturday Shorts on fixing the squat - Phil and Becky quickly discuss and demonstrate how to solve this problem.

(A Blast from the Past video originally published on 09/03/22)


At Testify, we offer small group training, private coaching (in-person or remotely via Zoom), online coaching, and form checks. Interested in getting stronger, looking better, and having more energy?

Never Make This Squat Mistake Again (fast fix)

Today’s topic is a mistake that is all too common - even in a few experienced lifters. It’s an error that is awfully silly, borderline dangerous, and fantastically simple to correct.

The mistake is that of setting your j-hooks - or simply “hooks” - too high.

Why This Happens
There are a number of reasons this occurs; first, a lifter simply might not have a good idea of where to set the hooks. Second, the lifter is ignorant of the downsides of setting the hooks too high. Third, the lifter is lazy and doesn’t like to stand the barbell up any more than necessary when unracking it from the hooks. There are perhaps other reasons, but this list suffices for now.

If you’d rather watch a video on this topic as well as see this mistake in action, be sure to check out the included video.

figure 1: there’s dumb . . . and then there’s this guy. don’t be this guy.

Why This is a Silly Mistake
You don’t ever want to finish a heavy set of squats (or bench press, but let’s focus on the squat) and then have to tiptoe the bar back into the rack because the hooks are too high.

You’re tired at the end of the set, and you should never have to do a calf raise to rack the bar (see Figure 1). Additionally, putting yourself in this position means you run the risk of failing to rack the bar and thus creating a rather catastrophic, YouTube-fail worthy disaster.

Where Should You Set the Hooks?
Set the hooks so that the bar sits roughly at the height of your mid-sternum.

When in doubt, err on the side of setting the hooks slightly too low rather than too high - if it’s a little low, you can always dip down a bit more to unrack the bar. Those few inches represent the top few inches of the squat, which is the easiest part of the lift anyway, so it’s not difficult to get a little bit lower, get under the bar, and then stand it up.

By setting the hooks at this height, you never need to look at the hooks when you rack the bar at the end of the set (a habit which is problematic all by itself - check out the included video). Simply keep looking at the same focal point you used while squatting and walk the bar straight ahead until the bar makes contact with both uprights. At this point - if you’ve set your hooks at a reasonable height - you can then merely dip down slightly, allowing the bar to slide down the uprights, and the bar ends up back in the hooks.

This makes for an effective, efficient, and safe way to rack the bar, and you reap the additional benefit of looking like you know what you’re doing (because you do!). 

As always, we hope this helps you get stronger and live better.

(Some links may be affiliate links. As an Amazon Associate, Testify earns from qualifying purchases.)
If you found this helpful, you’ll love our weekly email. It’s got useful videos, articles, and training tips just like the one in this article. Sign up below, and of course, if you don’t love it, you can unsubscribe at any time.


At Testify, we offer small group training, private coaching (in-person or remotely via Zoom), online coaching, and form checks. Interested in getting stronger, looking better, and having more energy?

SHOULDER FLEXIBILITY for the Squat | EASY Stretch to Fix Your Shoulders

Do you have a tough time achieving the low bar position when you squat due to your tight, inflexible shoulders? Starting Strength Coach Phil Meggers discusses and demonstrates the bar stretch - a simple way to improve your situation without adding time to your training.

(A Blast from the Past video originally published on 08/29/22)


At Testify, we offer small group training, private coaching (in-person or remotely via Zoom), online coaching, and form checks. Interested in getting stronger, looking better, and having more energy?

The Perfect Squat in 1 Minute | How to Squat Correctly

Learn the correct technique for squatting in 60 seconds. Starting Strength Coach Phil Meggers how to squat safely, effectively, and efficiently.


At Testify, we offer small group training, private coaching (in-person or remotely via Zoom), online coaching, and form checks. Interested in getting stronger, looking better, and having more energy?

Get a Bigger Squat Now with 3 Simple Tips

Let’s cover three ways to immediately improve your squat.

Tip #1: Focal Point
First, have a focal point - don’t allow your eyes to wander during the rep or even between reps. Second, for the location of your focal point, pick a point on the floor roughly 4-6 feet in front of you and stare at it throughout the entire set.

This is useful for balance, and it also encourages you to lean over as you start your descent and stay leaned over as you initiate your hip drive coming up out of the hole.

Tip #2: Knees Out
As you start your descent, shove your knees out. Specifically, shove them in the direction of your toes, and since you’re going to take a shoulder-width stance with your toes pointed out at roughly 30 degrees, this means your knees should travel both forward and out (i.e., forward and apart). With that said, focus on the “out” or the “apart” aspect of this movement. 

Rob shoves his knees apart so his femurs track in line with his toes, and addy approves.

Shoving your knees apart makes it easier to hit depth in the squat and also makes for a stronger, more efficient squat as it helps involve your adductors more in the movement.

As a side note, it is possible - though less common - to shove your knees too far out. In this case, your femurs are tracking outside of your toes, and we don’t want this either, so simply point your knees in the direction your shoes are pointing, and you’ll quite literally be headed in the right direction.

Tip #3: Your Lean
This is the most counterintuitive of the tips presented in this article, but it contributes mightily to the effectiveness and efficiency of your squat.

Lean over as you start your descent, and stay leaned over as you come up out of the hole on the ascent.

In other words, as you begin the squat, reach back with your hips and point your chest at the floor. As you initiate your hip drive coming out of the bottom of the squat, stay leaned over longer than you think you should. This will put you in a better, stronger position for squatting.

Yes, your back angle becomes vertical eventually (after all, you finish the squat in an upright position), but it should not become vertical right away, and to try to make your torso vertical right away makes for a weaker, disadvantaged squat. With all of this in mind, get leaned over, and then stay leaned over.

As always, we hope this helps you get stronger and live better.

(Some links may be affiliate links. As an Amazon Associate, Testify earns from qualifying purchases.)

If you found this helpful, you’ll love our weekly email. It’s got useful videos, articles, and training tips just like the one in this article. Sign up below, and of course, if you don’t love it, you can unsubscribe at any time.


At Testify, we offer small group training, private coaching (in-person or remotely via Zoom), online coaching, and form checks. Interested in getting stronger, looking better, and having more energy?