These Aren't the Rests You're Looking For - Part Deux

A while back in These Aren't the Rests You're Looking For - Part 1, we covered the importance of being economical with your time between reps in the deadlift. It’s important not to spend any more time than necessary with the barbell sitting on the floor because that semi-crouched position is not a very good resting position.

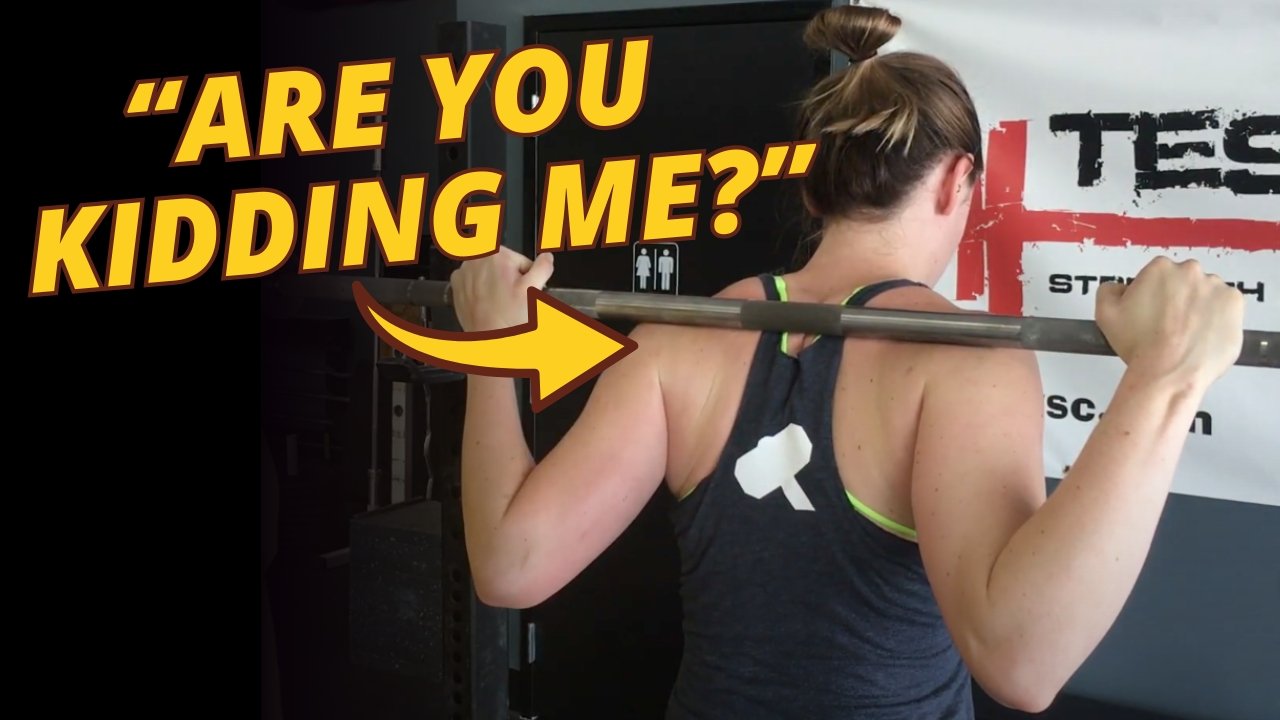
The same advice applies to the top of the squat as well. When the weight gets heavy, it’s easy to fall into the habit of taking too much time between reps in the squat. You’ve seen this in the gym - the lifter who takes 10-20 seconds between reps 4 and 5 of their work set.

Don’t be this lifter.

Yes, the top of the squat is the easiest place to support the weight, and thus, we take our breath at this position, but don’t spend any more time than necessary here. You’re still supporting a heavy load, and you want to get done with squatting, not simply put off the next rep. Taking 8 breaths and waiting 20 seconds before you squat the next rep simply makes the next rep harder.

Keep it simple. Keep it short. Take 1 breath between each rep, get tight (remember the Valsalva maneuver?), and then squat. You might take 2 breaths (maybe even 3) before your last rep, but don’t use breathing as a stalling technique. That chair over in the corner is a much better resting position than standing at the top of the squat with a bunch of weight on your back. Get the set done - you’ll be glad you did.

We hope this helps you get stronger and live better!

(Some links may be affiliate links. As an Amazon Associate, Testify earns from qualifying purchases.)

If you found this helpful, you’ll love our weekly email. It’s got useful videos, articles, and training tips just like the one in this article. Sign up below, and of course, if you don’t love it, you can unsubscribe at any time.


At Testify, we offer small group training, private coaching (in-person or remotely via Zoom), online coaching, and form checks. Would you like to get quality coaching from a Starting Strength Coach?

Looking Down in the Squat

A Blast from the Past article originally posted on 11/20/18)

When we teach the squat, we teach people to look at a point on the floor about 3-6 feet in front of them. In other words, we look down (and forward, but I digress). But why?

Loren looks down . . . to go up.

Let's chat . . .

If you lifted in high school, you probably heard some “coach” tell you to look up when squatting. “You gotta look up to go up!” is the loud refrain heard throughout high school weight rooms and powerlifting meets ‘round the world. Rarely is any type of rationale given for this advice, but if pressed for a reason, people might offer something like “ . . . your body follows your head, so to stand up, you should look up.”

This might sound reasonable at first, but let’s think about it. Do you look at the ceiling when you get up out of bed in the morning? What about when you get up out of a chair? I’m going to guess your answer is no. Considering this, we can see that the body doesn’t necessarily follow the head, but it is true that your chest typically does.

Therein lies the major problem with lifting the head while squatting - lifting the head typically causes the lifter to lift the chest. When the chest comes up (i.e., the torso becomes more vertical), the knees shift forward. When the knees shift forward, so do the hips (since the hips and knees are connected by the femurs), and in this “knees forward/hips forward” position, we have now asked the knees to do more and the hips to do less, which is rather silly of us since the hips are the larger of the two joints and are surrounded by more muscle mass than the knees. Without diving too deeply into the physics and anatomy of the situation, we use both the hips and the knees when squatting, and since we want to use them to drive the barbell upward in the most efficient manner possible, that means asking the larger joint (i.e., the hips) to do its fair share of the work.

With this in mind, you look down when you squat since it’s an effective way to keep your hips (and knees) right where they are supposed to be, and this allows you drive upward efficiently with your hips.

As always, we hope this helps you get stronger and live better.

(Some links may be affiliate links. As an Amazon Associate, Testify earns from qualifying purchases.)

If you found this helpful, you’ll love our weekly email. It’s got useful videos, articles, and training tips just like the one in this article. Sign up below, and of course, if you don’t love it, you can unsubscribe at any time.


At Testify, we offer small group training, private coaching (in-person or remotely via Zoom), online coaching, and form checks. Would you like to get quality coaching from a Starting Strength Coach?

Squat Tip: Hips Back AND Chest Down

Here’s a quick squat tip: When you initiate your squat by reaching back with your hips (i.e., your butt), you need to also point your chest at the floor (i.e., lean over). The converse is also true - when you point your chest at the floor, you need to reach back with your hips. 

Note that Tyler’s hips are traveling back while he points his chest at the floor.

These two movements - hips back and chest down - go hand-in-hand with each other, and if you briefly think about it, it will seem rather obvious why this is so. On one hand, if you reach back with your hips while trying to maintain an upright torso, you’ll fall over backward, which is rather unfortunate in any circumstance and especially when squatting with a barbell on your back. On the other hand, if you lean over (i.e., point your chest at the floor) without reaching back with your hips, you’ll fall over forward. Again - preposterous.

So remember, when you initiate your squat, if you’ve got a cue like one of the following running through your head . . .

  • Hips back

  • Butt back

  • Reach backward

  • Sit back

. . . it can be useful to also tell yourself one of the following cues . . .

  • Chest down

  • Lean over

  • Point your chest at the floor 

This will help your balance, and it will also help you get into a position where you can effectively drive your hips out of the bottom of the squat.

We hope this helps you get stronger and live better!

(Some links may be affiliate links. As an Amazon Associate, Testify earns from qualifying purchases.)

If you found this helpful, you’ll love our weekly email. It’s got useful videos, articles, and training tips just like the one in this article. Sign up below, and of course, if you don’t love it, you can unsubscribe at any time.


At Testify, we offer small group training, private coaching (in-person or remotely via Zoom), online coaching, and form checks. Would you like to get quality coaching from a Starting Strength Coach?

Enter the TUBOW

(This article is a Blast from the Past article originally posted on 11/20/18).

What on earth is a TUBOW?
So glad you asked! A TUBOW is a Terribly Useful Block Of Wood. Many of you have seen us use 2-foot lengths of 4 x 4 lumber when people squat from time to time - these are TUBOWs.

Why would one use a TUBOW?
We use TUBOWs in the squat, and there are a couple reasons we might use a TUBOW. The most common use is to fix the knee's forward position on the way down.

becky’s knees are so far forward that parker refuses to watch.

Two common errors that we see when people squat is either (a) the lifter's knees travel forward all the way down, or (b) the knees travel forward at the bottom of the squat.

We would like to see the knee establish its final forward position about 1/3 to 1/2 of the way into the descent of the squat, and touching the TUBOW with the knee at this point provides excellent tactile feedback as to whether or not the lifter is doing that correctly. If the lifter accidentally knocks the TUBOW over, it provides excellent negative feedback that the knee has traveled too far forward.

becky touches her knees lightly to the tubow during the descent.

Another use of the TUBOW is to fix the knee's lateral position in the squat, i.e., is the lifter shoving the knees out (to the side) far enough, or perhaps even too far? The TUBOW gives the lifter something concrete (well, lumber, actually) to aim for, and very often, this will help solve the issue.

One of the great side effects of fixing the knee position is that it will often fix the back angle in the squat as well. If the lifter's knees can only travel "so far" forward on the descent, then the hips will have to travel backward (since your hips and knees are connected by your femurs . . . you know . . . the leg bone). If the hips have to travel backward, the lifter will have to lean over during the descent to avoid falling over backward and stay balanced on the midfoot, and that leaned over position is precisely what we want in the low bar squat. Pretty awesome.

Are you one of those people who is deeply, intensely, spiritually, emotionally, and morally opposed to using the TUBOWs? If so, you're probably the type of person whose squat would benefit most from using them. And if your squat benefits, then you benefit, because you'll get stronger - faster.

Where do I get a TUBOW?
You can go to your nearest lumber supply store and get a 4 x 4 (and they'll often cut it to size for you), but if you'd rather just order a 2 foot section of 4 x 4 online and have it show up at your front door, then just click here.

(Some links may be affiliate links. As an Amazon Associate, Testify earns from qualifying purchases.)

If you found this helpful, you’ll love our weekly email. It’s got useful videos, articles, and training tips just like the one in this article. Sign up below, and of course, if you don’t love it, you can unsubscribe at any time.


At Testify, we offer small group training, private coaching (in-person or remotely via Zoom), online coaching, and form checks. Would you like to get quality coaching from a Starting Strength Coach?

Why Do You Put the Bar There When You Squat?

Listen up, folks - we’re going to discuss something you’ve probably never thought about before - why we put the barbell in the low bar position when we squat. Specifically, we’re going to discuss an anatomical rationale for placing the bar in The Position, so for today, we’ll be skipping the mechanical discussions about moment arms, hip drive, etc. (but as I was a physics teacher in a past life, we can geek out on that some other time if you like).

If you take a person who has never squatted before, maybe even a person who has squatted before, and you say, “Hey, go over there and squat that bar down and up” - which is unfortunately a fairly common approach to coaching - pretty much everyone in the world will go over to the rack, get under the bar, and they will then place the bar in what is called the high bar position (only they don’t know it’s called that), and they’ll stand upright with the bar sitting up high on the shelf provided by your traps.

They will do this because it’s easy and it’s obvious. It’s easy because it doesn’t require much - if any - flexibility (although it actually can be tough for some people), and it’s obvious because it’s the first potential shelf that the bar runs into as you slide under the bar.

However, remember that this position - the position of standing upright - is the easiest position in the entire squat. You know this because you can stand there supporting a lot more weight than you can actually squat. As this is the easiest position to assume, we might be wise not to let this position dictate the location of the bar.

Instead, we’re going to slide just a bit further forward - further under the bar, if you will - until the bar slides past the traps and is now supported on the shelf provided by your delts. We choose this location for the bar - not because it’s the easiest position to achieve when standing up (because it is not) - but rather because it’s the most secure location for the bar when you’re actually squatting.

Picture yourself at the bottom of your squat - you’ve got a nice, leaned-over torso, and now, with the bar sitting in The Position, any downward motion of the bar (i.e., rolling or sliding down your back) is blocked by your delts, and any upward motion is blocked by your traps. The bar is pinned between these two muscle groups in a very secure manner, and a bar that doesn’t want to move up or down your back is a very good thing when squatting heavy weights.

Now that you’ve got something to think about as you rest between work sets, it’s time to get to squatting.

As always, we hope this helps you get stronger and live better.

-Phil

PS: Whenever you want even more Testify in your life, here are some free resources:

  • Book a free intro and strategy session with us HERE.

  • Pick up a free copy of Testify’s Squat Guide: 12 Tips to Improve Your Squat Now HERE.

  • Get our free weekly email - containing useful videos, articles, and training tips - HERE.

  • Follow Testify on Instagram HERE.

  • Subscribe to Testify’s YouTube channel HERE.

(Some links may be affiliate links. As an Amazon Associate, Testify earns from qualifying purchases.)


At Testify, we offer small group training, private coaching (in-person or remotely via Zoom), online coaching, and form checks. Interested in getting stronger, looking better, and having more energy?

Bar Rolling Up or Down Your Back in the Squat?

The correct bar position

The correct bar position

A bar that moves up or down on your back during the squat is - to put it mildly - not a good thing. Squatting is a challenging endeavor. It’s supposed to be challenging, and the fact that it is challenging - the fact that it stresses your body - is what makes you stronger for having done it. But don’t make it more challenging than it needs to be by tolerating a barbell that rolls up your back or slides down your back. That is plain silliness.

An issue that often causes unnecessary bar movement is the bar’s position on your back. The bar should rest “on a ‘shelf’ under the traps and on top of the posterior deltoids” (Rippetoe 24). In short, the bar will be below the traps and above the delts.

For a video demonstration with explanation, see the short video at the end of this article.

Here, the bar is too high on the back.

Here, the bar is too high on the back.

If the bar sits too high on your back - on the traps or even above them - the bar will tend to roll up the back toward your neck. This wreaks havoc on your balance, on your ability to create the proper back angle, and thus it also wreaks havoc on your ability to drive your hips up out of the bottom.

Here, the bar is too low on the back.

Here, the bar is too low on the back.

On the other hand, if the bar sits too low on your back - below the top of your delts - the bar will tend to roll or slide down your back. The delts provide the shelf for the bar, so if the bar is not above your delts, you have no shelf left to support the bar. Now, your hands and wrists are left with the task of supporting a heavy bar, and as these relatively flimsy appendages are not well suited to this task, the bar starts moving further down your back as the set progresses. In addition, this “too-low” position tends to aggravate either your wrists, elbows, or shoulders over time.

To sum up, if the bar moves up your back, it might be too high on your back to begin with, and if the bar moves down your back, it might be too low on your back to begin with. Get a coach, a friend, or even an enemy to take a closer look at your bar position if you struggle with this issue, and let’s put this obstacle in your rearview.

Rippetoe, Mark. Starting Strength: Basic Barbell Training, 3rd edition. The Aasgaard Company, 2017.

(Some links may be affiliate links. As an Amazon Associate, Testify earns from qualifying purchases.)

If you found this helpful, you’ll love our weekly email. It’s got useful videos, articles, and training tips just like the one in this article. Sign up below, and of course, if you don’t love it, you can unsubscribe at any time.


At Testify, we offer small group training, private coaching (in-person or remotely via Zoom), online coaching, and form checks. Would you like to get quality coaching from a Starting Strength Coach?