The BEST Conditioning Tool NOBODY Uses (Starting Strength and Cardio?)

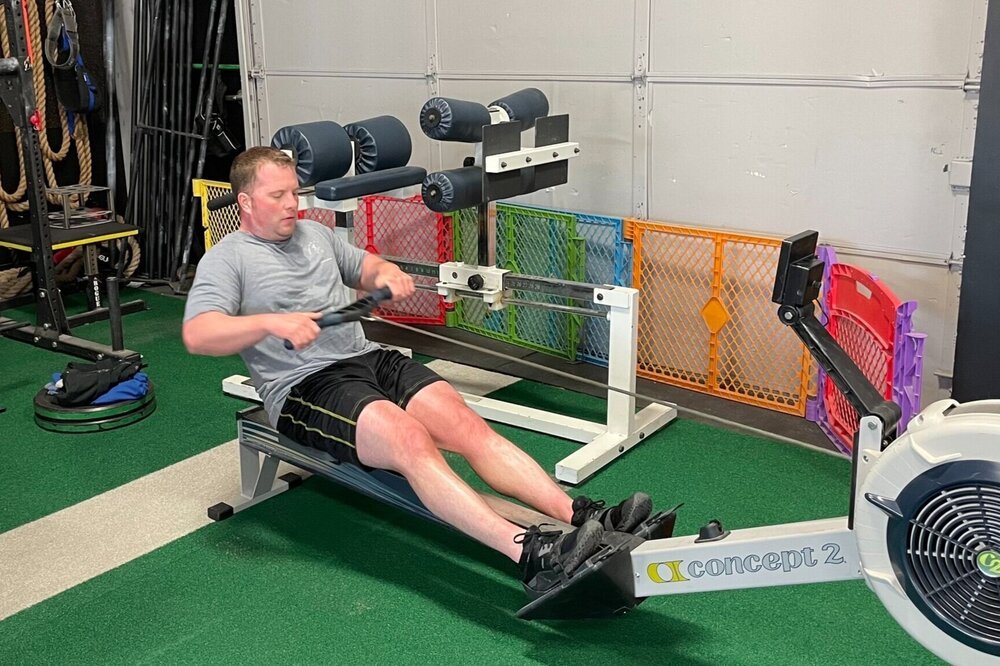
What’s the best conditioning tool that nobody uses?

It just might be the rower.

You know what I mean - you go to your local globo gym, and there’s 15 treadmills, 20 ellipticals, 5 steppers, there’s a few bikes, and people are using all of them.

Then, over in the corner, you see one rower. And it’s lonely. It’s always lonely.

This is terribly unfortunate because the rower is a powerful and effective conditioning tool, so let’s quickly discuss why this is so, how to schedule it within the context of your strength training, and let’s cover some sample workouts as well.

Why is the rower such an effective conditioning tool?
The rower (AKA ergometer or simply erg) is effective because it does not have a loaded eccentric phase.

No worries if you’re not sure what that means - no one else is, either, so let’s quickly cover it.

Take an air squat (i.e., a squat with only your bodyweight for resistance), for example. If you do 100-200 reps of those, there’s a solid chance you’re going to have some significant soreness the next day or so, and this is because the eccentric phase (the descent of the squat) is loaded, i.e., gravity pulls on your body and thus pulls you downward. You have to resist the load of your own bodyweight - otherwise, you’d collapse down onto the floor.

It turns out that it’s this loaded aspect of the eccentric phase that causes the soreness. 

In rowing, the equivalent of the squat’s descent is called the recovery, and it’s when you pull yourself back to the starting position, or the “catch” position. Here’s the key part - unlike the squat, wherein gravity pulls you down, in rowing, you have to pull yourself back to this position. Thus the eccentric phase is not loaded, which means 20 minutes of hard rowing doesn’t wreck you the same way that 20 minutes of air squats does.

As a side note, both biking and pushing a prowler or sled are good options as well as they, too, lack a loaded eccentric phase.

When to schedule your rowing
Let’s make a few assumptions here. Not all of these will apply to everyone, of course, but they will help us understand the key concepts.

  1. You strength train on Monday, Wednesday, and Friday.

  2. You plan to condition twice a week.

  3. You plan to row for both of those conditioning sessions (you can certainly have more variety here, but this is a rowing article, after all)

For starters, put one of your two conditioning days on Saturday. It’s separate from your strength training days, and you still get to rest on Sunday before hitting the strength training again on Monday.

You have a couple options for your other conditioning day:

  1. Row immediately after you perform your strength training on Monday or Wednesday. The upside is that you’re already at the gym, and the downside is that it makes for a longer training session.

  2. If you’ve reached the point where you have a light squat day on Wednesday, then you could row on Tuesday. The upside here is that it doesn’t add training time to any of your strength training days, and the downside is that you have to drive to the gym an additional day (unless you have a home gym).

Both options are reasonable, so you simply need to decide on the tradeoffs you’re willing to accept. The two principles in play are that you don’t want your rowing to derail your strength training, and you’d also like the schedule to be as manageable as possible from a time and convenience perspective (consistency is key, and most people will start skipping sessions if the schedule is too inconvenient).

Now, let’s dive into a few sample workouts, and if you’d like more workouts, you can head over to this article.

Workout #1
3 rounds of:
8 x 20 sec on/40 sec off
Rest 3 min between each round.

Score = least distance covered in any 20 second interval

For this workout, row for 20 seconds, then rest 40 seconds (thus the rowing and resting periods add up to 1 minute), and repeat this sequence for 8 minutes. These 8 minutes comprise round 1.

Rest 3 minutes, perform round 2, rest another 3 minutes, perform round 3, and you’re done. You are trying to cover as much distance in each 20 second interval, but your score is your lowest distance, so you are also aiming for consistency.

Workout #2
4 rounds of:
800m
Rest 3 minutes between each round.

Score = slowest time

For this workout, row 800 meters, rest 3 minutes, and repeat this for 4 rounds. You are gunning for fast times, but your score is your slowest time, so again, consistency is rewarded.

Workout #3
8 rounds of:
30 sec on/2:00 off

Score = least distance covered in any 30 second interval

For this workout, row for 30 seconds, then rest 2 minutes, and repeat this for 8 rounds.

If you are just starting out with your conditioning, be conservative at first - you don’t want your enthusiasm to derail your strength training.

As always, we hope this helps you get stronger - or in this case better conditioned - and live better.

-Phil

PS: Whenever you want even more Testify in your life, here are some free resources:

  • Book a free intro and strategy session with us HERE.

  • Pick up a free copy of Testify’s Squat Guide: 12 Tips to Improve Your Squat Now HERE.

  • Get our free weekly email - containing useful videos, articles, and training tips - HERE.

  • Follow Testify on Instagram HERE.

  • Subscribe to Testify’s YouTube channel HERE.

(Some links may be affiliate links. As an Amazon Associate, Testify earns from qualifying purchases.)


At Testify, we offer small group training, private coaching (in-person or remotely via Zoom), online coaching, and form checks. Interested in getting stronger, looking better, and having more energy?

Are You Setting Your Back WRONG in the Deadlift?!

It's easy to set the back incorrectly by confusing shoulder retraction with back extension. Let's fix this in less than 2 minutes. Starting Strength Coach Phil Meggers explains.

(A Blast from the Past video originally published on 12/10/22)

Whenever you want even more Testify in your life, here are some free resources:

  • Book a free intro and strategy session with us HERE.

  • Pick up a free copy of Testify’s Squat Guide: 12 Tips to Improve Your Squat Now HERE.

  • Get our free weekly email - containing useful videos, articles, and training tips - HERE.

  • Follow Testify on Instagram HERE.

  • Subscribe to Testify’s YouTube channel HERE.


At Testify, we offer small group training, private coaching (in-person or remotely via Zoom), online coaching, and form checks. Interested in getting stronger, looking better, and having more energy?

What Every New Lifter Gets Wrong

(A Blast from the Past article originally posted on 03/12/21)

If you’re a new lifter, there are a couple of mistakes that you’re probably going to make within your first few weeks or months of training. To help you avoid them, let’s take a look at a few:

Misloading the bar
Bar math can be tough, and you’re eventually going to load your barbell heavier or lighter than you intended. For example, you intend to add 10 lb to the bar, and instead, you absentmindedly add 10 lb to each side of the bar and thus end up adding 20 lb to the bar by mistake.

If you do a work set, and it’s significantly harder than you expected, double-check what’s on the bar. Be sure to check your math if the set is significantly easier than expected as well, and check it again if the weight felt lopsided. In all of these scenarios, there’s a reasonable chance you misloaded the bar. Don’t worry - we’ve all done it, and it won’t be the last time you do it.

Forgetting to wear your belt
You finish your set - it was a bit harder than expected - and you then see your lifting belt sitting on the ground. There’s a very easy solution here - every time you finish a set, hang your belt over the middle of your barbell. Now, you won’t be able to miss it. This also works well for wrist wraps.

Forgetting to use chalk or a hook/switch grip for your deadlift
Grip plays a pivotal role in the deadlift, and you can’t pull as heavy without chalk and a hook or switch grip (or straps) as you can with these things. Eventually, chalking before pulling will be second nature - as will taking the proper grip - but in the meantime, write yourself a large, neat reminder in your training journal. “CHALK + HOOK GRIP” or something of the sort will do nicely.

We’ll examine a few other newbie mistakes in a future article, but in the meantime, give these solutions a try.

Milo understands . . . he’s made a few mistakes, too.

Milo understands . . . he’s made a few mistakes, too.

As always, we hope this helps you get stronger and live better.

-Phil

PS: Whenever you want even more Testify in your life, here are some free resources:

  • Book a free intro and strategy session with us HERE.

  • Pick up a free copy of Testify’s Squat Guide: 12 Tips to Improve Your Squat Now HERE.

  • Get our free weekly email - containing useful videos, articles, and training tips - HERE.

  • Follow Testify on Instagram HERE.

  • Subscribe to Testify’s YouTube channel HERE.

(Some links may be affiliate links. As an Amazon Associate, Testify earns from qualifying purchases.)


At Testify, we offer small group training, private coaching (in-person or remotely via Zoom), online coaching, and form checks. Interested in getting stronger, looking better, and having more energy?

10 WORST Deadlift Mistakes Most Lifters Don't Know They Are Making (most are guilty of 3)

Are you unknowingly sabotaging your deadlift? Starting Strength Coach Phil Meggers breaks down 10 deadlift mistakes most lifters don’t even realize they’re making — and chances are good you’re guilty of at least 3. Whether you’re a beginner or a seasoned lifter, this video will help you lift smarter, safer, and stronger.

Whenever you want even more Testify in your life, here are some free resources:

  • Book a free intro and strategy session with us HERE.

  • Pick up a free copy of Testify’s Squat Guide: 12 Tips to Improve Your Squat Now HERE.

  • Get our free weekly email - containing useful videos, articles, and training tips - HERE.

  • Follow Testify on Instagram HERE.

  • Subscribe to Testify’s YouTube channel HERE.


At Testify, we offer small group training, private coaching (in-person or remotely via Zoom), online coaching, and form checks. Interested in getting stronger, looking better, and having more energy?

Testify Journal - June 2, 2025

THIS WEEK'S SUBMISSION

From our video When Deadlifting Heavy, Don't Stand Up & Try This Instead (click the title to watch):

Major.Tom.1973
"stay over the bar longer than you think" is what worked for me, thank you!

Phil
Glad to hear that it worked for you, and you’re welcome!

Walter Heisenberg
I can echo this. I’m not and never have been a heavy deadlifter but I was always getting hurt in my lower back. Since scaling down the weight and focusing on staying over the bar longer, I’ve felt no pain.

Phil
I’m glad to hear that staying over the bar longer has worked well for you also, Walter!


TESTIFY ONLINE COACHING

Interested in getting stronger working one-on-one remotely with us? Click here to book your free strategy session.

Get Stronger. Live Better. Start Today.


ARTICLES & VIDEOS

12 Outdated Lifting Trends to Ditch in 2025 (and What to Do Instead)
Still doing these outdated lifting trends? It's time to level up. We break down 12 common lifting habits, techniques, and myths that need to be left behind - and what you should be doing instead to actually get stronger. No gimmicks. No fluff. Just real, effective strength training advice. Click here to watch.


The Bench Press Truth No One Told You
Want to improve your bench press? Make sure you're doing this . . . and not that. Click here to read.


Blast from the Past: Use THIS CUE to PR Your Lifts!
Try out this simple cue the next time you're going for a heavy single at the gym or in competition. It just might help you nail that PR you've been chasing. Click here to watch.


Blast from the Past: Better Deadlifts Start When You Ignore This Muscle
Phil describes a mental picture as well as a few cues to help you use your lats in the deadlift without having to think about them. Click here to read.


SLEEVES ARE OVERRATED - GRAB A TESTIFY TANK!

Sun's out, guns out, and we've got men's and women’s tank tops in multiple colors.

Get yours today and represent your favorite gym!

Click here to head to the Testify Store.


WHAT'S COMING UP

Below are a few of our upcoming events, and you can find out what else is on the calendar by heading to our events page at www.testifysc.com/events.

Testify Game Night

  • Join us for the first-ever Testify Game Night at 6:30 p.m. on Friday, June 6th!

  • Bring on the cards, the board games, the bags (AKA cornhole), and whatever else you’ve got!

  • Bring a game, a snack/drink, and get ready for a fun, relaxed evening with the Testify crew!

  • Click here to RSVP.

Testify IronFest VII

  • June 20, 2025

  • IronFest is a team-based strength meet wherein the contested lifts will be the squat, press, bench press, and deadlift. Competitors will form teams of 2 lifters/team and perform all 4 lifts; each lifter will perform one upper body lift and one lower body lift, and each lifter will receive 3 attempts for each lift.

  • Click here to register or for more information.

Deadapalooza! The Annual Testify Deadlift Festival

  • August 15, 2025

  • Deadapalooza is a strength meet wherein the only contested lift is - you guessed it - the deadlift. There will be one bar (possibly multiple bars if numbers dictate), and the meet will be conducted in a "rising bar" format, so the weight on the bar only goes up! It's a ton of fun, so come on out!

  • Click here to register or for more information.


THIS WEEK’S CONDITIONING

Option 1
Sled
Outdoors:
10-20 x 25 yds EMOM at a weight of your choice

Every minute, push the sled 25 yards, i.e., if pushing the sled takes 20 seconds, then you have 40 seconds to rest. Perform 10-20 rounds.

Indoors:
10-20 x 100 ft EMOM at a weight of your choice

Every minute, push the sled 100 feet, i.e., if pushing the sled takes 20 seconds, then you have 40 seconds to rest. Perform 10-20 rounds.

Compare to 2025.04.28.

Option 2
Bike/row:
3 rounds of:
8 x 20 sec on/40 sec off
Rest 3 min between rounds

Score = lowest distance

Compare to 2025.03.10.

Option 3
1. Work up to a heavy single on the axle clean-and-press (i.e., ground to overhead).
2. 5 x 100 ft Zercher carry (50 ft down-back). Add weight each round. Rest as needed.

Compare to 2025.02.10.

Option 4
Outdoors:
5 rounds:
15 cal row
50 yd sled push, 100#/50#

Indoors:
5 rounds:
15 cal row
100 ft sled push, 250#/125#

Push sled slow for recovery. Score is slowest row.

Compare to 2025.02.10.


As always, we hope this helps you get stronger and live better!

Whenever you want even more Testify in your life, here are some free resources:

  • Book a free intro and strategy session with us HERE.

  • Pick up a free copy of Testify’s Squat Guide: 12 Tips to Improve Your Squat Now HERE.

  • Get our free weekly email - containing useful videos, articles, and training tips - HERE.

  • Follow Testify on Instagram HERE.

  • Subscribe to Testify’s YouTube channel HERE.

The Bench Press Truth No One Told You

Here’s a simple tip regarding your bench press technique that - especially if you’re self-taught - you might not be aware of . . .

Retract your shoulders in the setup.

When you bench, you want your shoulders pulled back. Specifically, you want to pull them back and down (i.e., toward your rear end), but if you’re driving up the bench with your legs and properly supporting your arch by doing so, you’ll be taking care of the down aspect.

To see what this looks like in action, watch any of the short videos included in this article.

This retraction allows your shoulders to create a broader base of support on the bench, reduces the risk of shoulder impingement, and as an added bonus, shaves off the extra, unstable range of motion that is accidentally created with inefficient shoulder positioning.

Mike correctly has his shoulders protracted.

Thus, by retracting your shoulders, you create a stronger, safer, and more efficient position from which to bench.

sadly, mike does not have his shoulders retracted here and thus has a weaker and less stable position from which to bench press.

Pull your shoulders back before you unrack the bar and then keep them pulled back throughout the entire set. If you lose some retraction either during the unracking process or during a rep, make sure to re-retract them before your next rep.

Your shoulders - and your bench press PR - will thank you.

As always, we hope this helps you get stronger and live better.

-Phil

PS: Whenever you want even more Testify in your life, here are some free resources:

  • Book a free intro and strategy session with us HERE.

  • Pick up a free copy of Testify’s Squat Guide: 12 Tips to Improve Your Squat Now HERE.

  • Get our free weekly email - containing useful videos, articles, and training tips - HERE.

  • Follow Testify on Instagram HERE.

  • Subscribe to Testify’s YouTube channel HERE.

(Some links may be affiliate links. As an Amazon Associate, Testify earns from qualifying purchases.)


At Testify, we offer small group training, private coaching (in-person or remotely via Zoom), online coaching, and form checks. Interested in getting stronger, looking better, and having more energy?