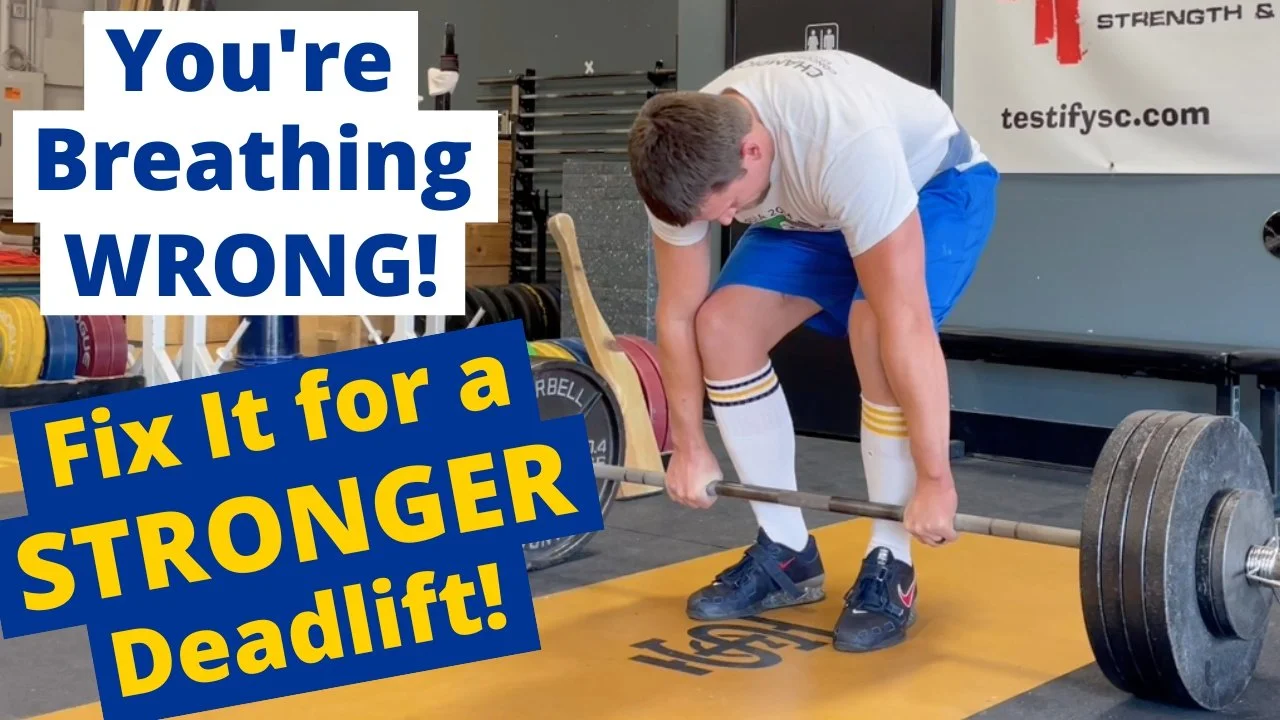
The Deadlift: You're Doing This Wrong - Part 5

This is Part 5 in our series of articles on common deadlift errors and how to fix them. Today’s error is that of having a compromised grip.

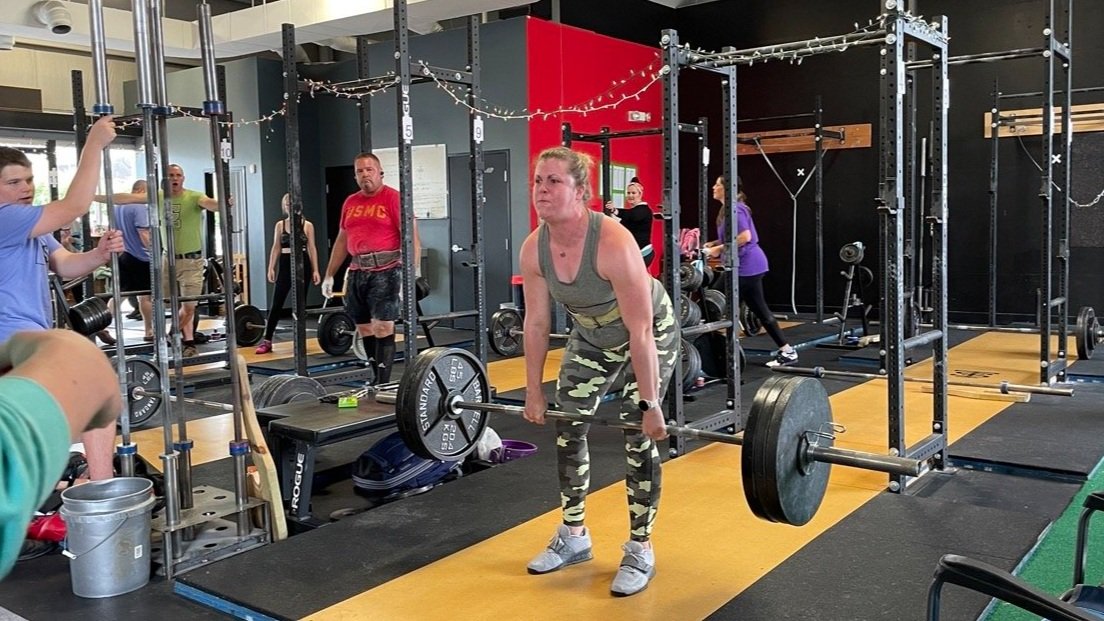
Don’t worry - Brianne is NOT doing this part wrong.

Grip should never be the limiting factor when deadlifting. After all, the deadlift is a tremendous developer of leg, hip, and back strength, so it seems rather silly and shortsighted to blunt the training effect of the deadlift simply because we’re doing stupid things with our grip. Of course, YOU’RE not being stupid with your grip, but some people are.

Two points here:

1. Your double overhand grip won’t cut it anymore.
When the weight gets heavy enough, a double overhand grip will no longer do the job (a double overhand grip is one wherein both hands are pronated, i.e., hands in front of the barbell with palms facing backward).

This isn’t a strength issue - the double overhand grip is simply not a terribly strong position for the hands to begin with, so don’t stress out about it. Instead, simply start using either a hook grip or a mixed grip (AKA “alternating grip” or “switch grip”).

There are no bonus points for taking your double-overhand-grip-deadlift as heavy as possible. We care about heavy deadlifts . . . nobody cares about not-so-heavy-and-artifically-limited-double-overhand-grip-deadlifts.

2. Chalk is mandatory. Tell your lifting buddy to stop being a fool about this.
Friction is important for grip, and everyone’s hands have a certain amount of natural moisture - oil, sweat, etc. - that inhibits friction. The absorption of this moisture - and the corresponding increase in grip strength that accompanies this absorption - is why rock climbers and gymnasts use chalk, and it’s why we use chalk when lifting.

Chalk is useful in all lifts (yes, even squatting, benching, and pressing), but it is absolutely critical in pulling movements such as the snatch, clean, and the deadlift. Use chalk. Put some on your hands when you start your lifting, reapply when you start warming up your deadlift, and certainly reapply when you get to your deadlift workset(s).

All my thoughts on people who don’t use chalk (or enough chalk) start to get rather grumpy past this point, so I’ll stop here.

In summary, use the appropriate grip and use chalk - these two points will help you develop a stronger deadlift and therefore a stronger you.

As always, we hope this helps you get stronger and live better.

(Some links may be affiliate links. As an Amazon Associate, Testify earns from qualifying purchases.)

If you found this helpful, you’ll love our weekly email. It’s got useful videos, articles, and training tips just like the one in this article. Sign up below, and of course, if you don’t love it, you can unsubscribe at any time.


At Testify, we offer small group training, private coaching (in-person or remotely via Zoom), online coaching, and form checks. Would you like to get quality coaching from a Starting Strength Coach?

Click here to start today

Week 2022.07.18

This Week’s Conditioning

Option 1
Sled
Outdoors:
10-20 x 25 yds EMOM at a weight of your choice

Every minute, push the sled 25 yards, i.e., if pushing the sled takes 20 seconds, then you have 40 seconds to rest. Perform 10-20 rounds.

Indoors:
10-20 x 100 ft EMOM at a weight of your choice

Every minute, push the sled 100 feet, i.e., if pushing the sled takes 20 seconds, then you have 40 seconds to rest. Perform 10-20 rounds.

Compare to 2022.05.16.

Option 2
Bike/row:
4 x 3 minutes

Rest 3 minutes between each round. Score = lowest distance.

Compare to 2022.04.25.

Option 3
8 rounds:
Outdoors:
4 tire flips
50 yd sled push (25 yd down-back)
Rest 1 minute

Indoors:
4 tire flips
100 ft sled push (50 ft down-back)
Rest 1 minute

Compare to 2022.03.28.

Option 4
Sandbag-over-bars
Set yoke at #33 for women or #35 for men.
1. 1 minute AMRAP
2. 5 rounds of 2 reps every 2 minutes (speed!)
3. 1 minute AMRAP

Weights
Female under 40 years
140 lbs and under: 75 lbs
140.1 lbs – 185 lbs: 100 lbs
185.1 lbs and over: 150 lbs

Female 40 years and over
140 lbs and under: 50 lbs
185 lbs and under: 75 lbs
185.1 lbs and over: 100 lbs

Male under 40 years
185 lbs and under: 150 lbs
185.1 lbs – 235 lbs: 200 lbs
235.1 lbs and over: 250 lbs

Male 40 years and over
185 lbs and under: 100 lbs
185.1 lbs – 235 lbs: 150 lbs
235.1 lbs and over: 200 lbs

Compare to 2022.03.28.

The Deadlift: You're Doing This Wrong - Part 4

This is Part 4 in our series of articles on common deadlift errors and how to fix them. Today’s error is that of raising your chest prematurely or, equivalently, pulling the barbell around your knees.

Good heavens - it’s painful to watch, let alone actually DO.

When the deadlift begins, it is dominated by knee extension, i.e., your knees need to start straightening right off the floor. Now, it’s true that your hip joint starts to open right away as well (i.e., your back angle starts to become more vertical right away), but the start of the movement is dominated by knee extension.

If you start raising your chest too much as you’re pulling the bar off the floor, your knees won’t be contributing as effectively to the start of the movement, and not only this, your knees have actually become an obstacle as you’ve now forced yourself to pull the bar around your knees, thus ruining that nice, vertical bar path you were trying to achieve.

A couple of cues to help with this (and watch the included video to see these cues in action):

  1. Push the floor: Imagine that your body is stuck in place and you are instead pushing the floor down and away from you by straightening your knees.

  2. Pull your kneecaps back or push your kneecaps back: Try to make your kneecaps go backward slightly as you start the movement.

A final note - the goal is not to make your knees lock out right away. After all, your knees shouldn’t finish extending until the top of the deadlift, but they do need to start straightening right away.

As always, we hope this helps you get stronger and live better.

(Some links may be affiliate links. As an Amazon Associate, Testify earns from qualifying purchases.)

If you found this helpful, you’ll love our weekly email. It’s got useful videos, articles, and training tips just like the one in this article. Sign up below, and of course, if you don’t love it, you can unsubscribe at any time.


At Testify, we offer small group training, private coaching (in-person or remotely via Zoom), online coaching, and form checks. Would you like to get quality coaching from a Starting Strength Coach?

Click here to start today

Week 2022.07.11

Thanks to everyone who came out and competed at this past weekend’s IronFest IV! Also, a big thank you goes to those who helped out!

This Week’s Conditioning

Option 1
Sled
Outdoors:
10 rounds of:
Push sled 100 ft
Pull sled 100 ft (hand over hand)

Indoors:
20 rounds of:
Push sled 50 ft
Pull sled 50 ft (hand over hand)

Compare to 2022.05.09.

Option 2
Bike/row:
4 x 800m

Rest 3 minutes between each round. Score = slowest time.

Compare to 2022.04.18.

Option 3
Outdoors:
10 rounds:
25 yd yoke carry
Rest 1 minute

Indoors:
10 rounds:
30 yd yoke carry (15 yd down-back)
Rest 1 minute

Compare to 2022.03.21.

Option 4
10 x 50 ft farmer carry
Each carry is 25 ft down and 25 ft back and is for time. Rest 1 minute between carries.

Women: 97# per handle (80# of plates)
Men: 137# per handle (120# of plates)
(Note: Each handle weighs 17#.)

Compare to 2022.03.21.

The Deadlift: You're Doing This Wrong - Part 3

This is Part 3 in our series of articles on common deadlift errors and how to fix them. Today’s error is that of too much breathing and therefore too much time spent on the floor between reps.

“One breath. Ok, here I go . . . maybe another breath. Ok, got it, let’s go . . . well, one more breath will probably help . . .”

The trap of spending too much time between reps in the deadlift is an incredibly easy one to fall into - you’ve set the barbell down, you’re tired, the weight is heavy, you’ve started to question whether or not you’ll get the next rep - next, you start to question whether or not you’ll even attempt the next rep.

Spending a lot of time between reps is not productive, and in fact, it will actually tire you out - you’re in a crouched position of sorts, and it takes energy to stay in the position - so spending less time with the bar on the floor between reps will actually make for a more efficient (read: easier) set. The only truly good resting position for a deadlift is sitting down in the chair when you’ve completed the set, so let’s fix this problem.

When you’ve set down a completed rep and you’re getting ready to pull the next one, treat the breathing situation as “one-and-done” - take one breath, set your back in extension, and then go.

Here’s a very useful mantra to have running in your head between reps: Breath. Chest. Pull. Assuming that the bar is in place over the middle of the foot, your shins are touching the bar, and you’re balanced on the middle of your foot, here’s how it works:

  1. Breath: Take one breath. Not two or three. ONE.

  2. Chest: Squeeze your chest up to set your back in extension.

  3. Pull: Drag the bar up your legs.

Keep it simple. Toward the end of a set, you may have to take two breaths between reps, but keep it limited. Get. The. Set. Done. Then, go sit in that chair.

As always, we hope this helps you get stronger and live better.

(Some links may be affiliate links. As an Amazon Associate, Testify earns from qualifying purchases.)

If you found this helpful, you’ll love our weekly email. It’s got useful videos, articles, and training tips just like the one in this article. Sign up below, and of course, if you don’t love it, you can unsubscribe at any time.


At Testify, we offer small group training, private coaching (in-person or remotely via Zoom), online coaching, and form checks. Would you like to get quality coaching from a Starting Strength Coach?

Click here to start today

Week 2022.07.04

Reminders:

  • The gym will be closed today (i.e., Monday, 07/04/22) in honor of Independence Day.

  • The gym will be closed for training on Saturday, 07/09/22, as we are hosting our annual IronFest competition.

This Week’s Conditioning

Option 1
Sled Pyramid – 4, 5, or 6 tiers
Go up and down a 4, 5, or 6 tier “sled pyramid” – rest as needed. The distance for each round is 80 m indoors (a down-back on the 40m course) or 200 ft outdoors (2 down-backs on the 50 ft course). Rest as needed.

For example, Bob does the following (4 tiers):
Round 1: Empty sled
Round 2: 25#
Round 3: 50#
Round 4: 75#
Round 5: 50#
Round 6: 25#
Round 7: Empty sled

Compare to 2022.05.02.

Option 2
Bike/row:
4 x 3 minutes

Rest 3 minutes between each round. Score = lowest distance.

Compare to 2022.04.11.

Option 3
Outdoors:
5-10 rounds:
10 sledgehammer strikes (5R, 5L)
50 yd farmer carry (25 yd down-back)
Rest 1 minute

Indoors:
5-10 rounds:
10 sledgehammer strikes (5R, 5L)
100 ft farmer carry (50 ft down-back)
Rest 1 minute

Compare to 2022.03.14.

Option 4
1. 5 yoke carries @ 30 yd (15 yd downback) – work up to heaviest carry
2. 5 rounds of 5 reps on the axle “clean and press away” – work up to heavy set of 5

Compare to 2022.03.14.