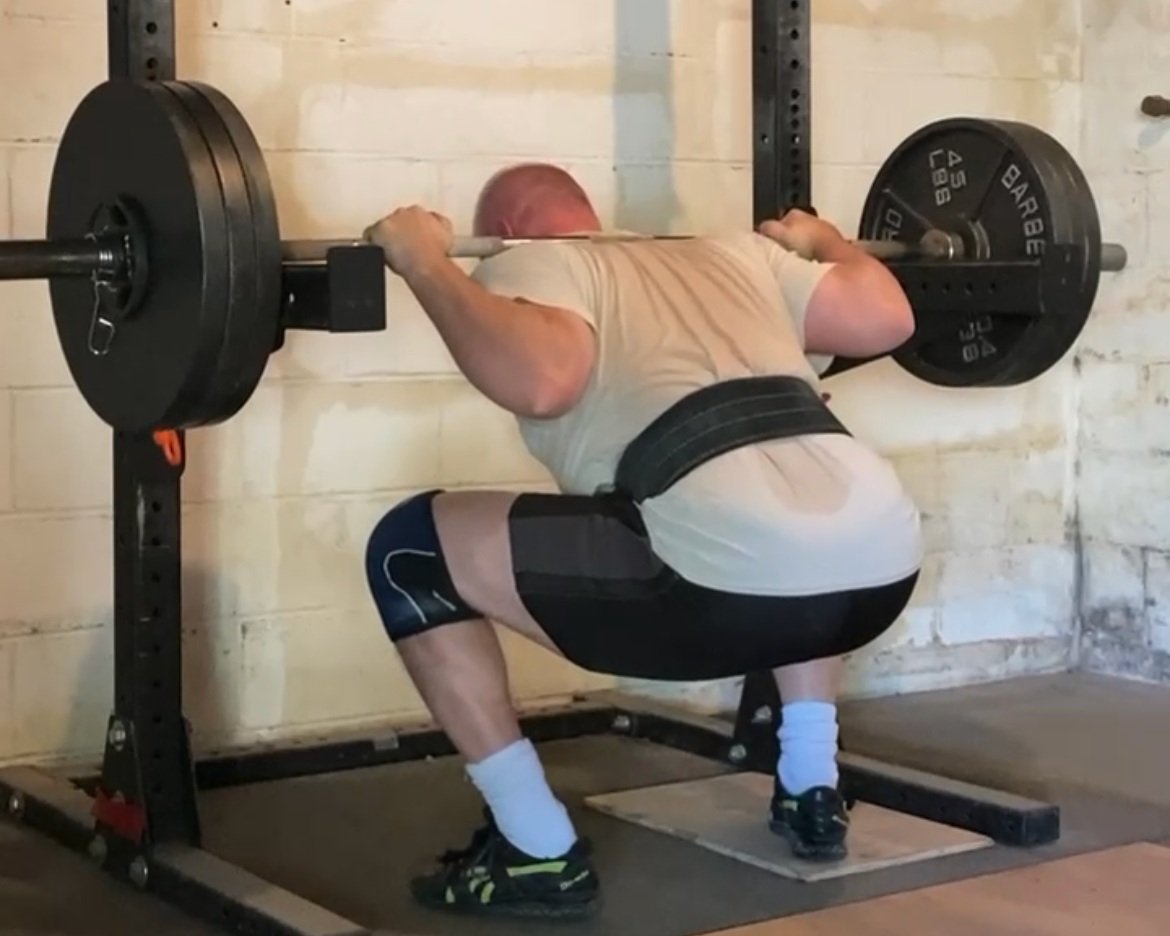
The Squat: Don't Be a Moron

A lot of good advice in life can be summed up with the phrase, “Don’t be a moron,” and racking the squat is certainly no exception.

Listen, in the time it took you to squat your work set, the hooks (you know - the things the bar rests upon in the rack) didn’t go anywhere, so when you rack the bar, quit looking for them. Some lifters are either under the impression that their hooks have the ability to wander off while they squat, or they think they have incredibly cruel training partners who will steal their hooks while they squat.

You, however, are not one of these lifters. When finished with your set of squats, you just keep looking at your focal point (the same one you stared at while squatting) or you look straight ahead, and you then simply walk the barbell forward until it hits the uprights, whereupon you set it down - magically - on the hooks. You know that if you stay nice and tall as you walk back to the rack, hitting the uprights guarantees the bar will be over the hooks.

You also know that if you develop the silly-looking habit of craning your neck to look for the hooks, you’ll tend to walk the bar back to the rack in a rather cattywampus fashion, and one day, you’ll eventually miss one of the hooks (i.e., the one you’re not looking at). This makes for a wonderful YouTube video but a rather disastrous training experience. Fortunately, you don’t do this.

But . . . perhaps your friend does this. In this case, be sure to tell him, “Hey - don’t be a moron.”

As always, we hope this helps you get stronger and live better.

(Some links may be affiliate links. As an Amazon Associate, Testify earns from qualifying purchases.)

If you found this helpful, you’ll love our weekly email. It’s got useful videos, articles, and training tips just like the one in this article. Sign up below, and of course, if you don’t love it, you can unsubscribe at any time.


At Testify, we offer small group training, private coaching (in-person or remotely via Zoom), online coaching, and form checks. Interested in getting stronger, looking better, and having more energy?

The Box Squat: What, How, and Why

In two of our recent articles, we covered the tempo squat and the pin squat. Today, let’s briefly discuss the box squat.

What is a box squat?
A box squat is a squat wherein you descend, pause with your rear end on a box, stack of bumper plates, or something similarly sturdy, and then squat the weight back up again.

How do you perform a box squat?
You descend as you would in a normal squat - hips go back, knees go forward and out (staying in line with your toes), and your chest points down - but you’re going to heavily focus on reaching back with your hips as you descend.

The box needs to be at a height so that - when your butt is on the box - your hip crease is just below the top of your patella. In other words, the box needs to be set so that you can hit depth. This may seem obvious, but checking this on video is always a good idea if you’re coaching yourself.

At the bottom of the squat, pause a legitimate one to two seconds (“one-thousand-one, one-thousand-two”) and stay tight during this pause. The box will take a little of the weight when your rear end is on the box, but it shouldn’t take much - we’re not relaxing at the bottom, and we’re not rocking back-and-forth. You should still be supporting most of the weight of the barbell.

After the pause, drive the hips up out of the hole as you would in a normal squat and continue your ascent. It will be slower than a regular squat as we’ve taken out the stretch reflex.

Why might you do box squats or where might you see them in your programming? 
Perhaps your coach has programmed you within a Heavy-Light-Medium structure or something similar. In this case, you might see a box squat show up as a medium day squat or even a light day squat (the loading and volume need to be carefully managed - especially if it’s a light day squat).

Due to the pause on the box, the box squat eliminates the stretch reflex out of the bottom, so it’s a disadvantaged squat, and thus you’ll need to use a lighter weight than with your regular squat, so it fits the bill for a medium or light squat. However, as with our previously discussed tempo squat and pin squat, remember that “lighter” does not necessarily mean easy.

The box squat, like the tempo squat and pin squat, can also be useful for a number of other reasons - one of which is that it can help a lifter focus on a specific technical issue. For example, if Jim-Bob struggles to reach backward with his hips as he initiates his descent and therefore tends to squat with a rather vertical back angle, a box squat can help with this since it gives a target for his hips. This can help him focus on reaching his hips back for something specific and tangible and thus will help him point his chest at the floor at the same time (because the lifter has to lean over more in order to reach back farther with the hips).

Box squats can also be used to help with achieving depth. Let's suppose that Jim-Bob is just starting off and is not strong enough to get down to depth and successfully squat back up again; in this case, we can set up a box height that is higher than normal (thus creating an above parallel squat). We would choose a height at which he can squat down, touch his butt to the box lightly, and then drive back up again.

On subsequent workouts, we would lower the box slightly each time (roughly an inch) and keep lowering it until Jim-Bob is actually squatting to depth. At this point, we’d remove the box. It’s worth noting that, in this case, we’re just using the box as a marker for depth, so Jim-Bob would lightly touch his butt to the box and immediately drive back up (i.e., don’t pause on the box when using the box for this purpose).

This wraps up our short discussion of the box squat, and as always, we hope this helps you get stronger and live better.

(Some links may be affiliate links. As an Amazon Associate, Testify earns from qualifying purchases.)

If you found this helpful, you’ll love our weekly email. It’s got useful videos, articles, and training tips just like the one in this article. Sign up below, and of course, if you don’t love it, you can unsubscribe at any time.


At Testify, we offer small group training, private coaching (in-person or remotely via Zoom), online coaching, and form checks. Would you like to get quality coaching from a Starting Strength Coach?

The Pin Squat: What, How, and Why

In last Friday’s article, we covered the tempo squat. Today, let’s briefly discuss the pin squat. 

What is a pin squat?
A pin squat is a squat wherein you descend, set the bar on the pins (AKA safeties, crash bars, or spotter arms) at the bottom of the squat, pause for a moment, and then squat the weight back up again.

How do you perform a pin squat?
You descend as you would in a normal squat - hips go back, knees go forward and out (staying in line with your toes), and your chest points down. The pins should be set so that - at the bottom of your squat (when the bar is on the pins) - your hip crease is just below the top of your patella.

In other words, the pins need to be set so that you can hit depth, and checking this on video is always a good idea if you’re coaching yourself.

Once both sides of the barbell are in contact with the pins, pause a legitimate one to two seconds (“one-thousand-one, one-thousand-two”), and stay tight during this pause. You should still be supporting most of the weight of the bar.

After the pause, drive the hips up out of the hole as you would in a normal squat and continue your ascent. Don’t be surprised at how slow the ascent is - pin squats are never fast.

Why might you do pin squats or where might you see them in your programming? 
Let’s say your coach has programmed you within a Heavy-Light-Medium structure or something similar - in this case, you might see a pin squat show up as a medium day squat or even a light day squat (the loading and volume need to be carefully managed - especially if it’s a light day squat).

Due to the pause on the pins, the pin squat eliminates the stretch reflex out of the bottom, so it’s a disadvantaged squat, and thus you’ll need to use a lighter weight than with your regular squat, so it fits the bill for a medium or light squat.

However, as with last week’s tempo squat (click here for the article or check out the video earlier in this article), remember that “lighter” does not necessarily mean easy.

The pin squat - again like last week’s tempo squat - can also be useful for a number of other reasons - one of which is that it can help a lifter focus on a specific aspect of his technique.

For example, if Peter tends to squat with his knees too far forward and his back angle too vertical, a pin squat will encourage him to lean over more to get the bar down to the pins. On the other hand, if Mary struggles with hitting depth, a pin squat will force her to correct this - quite simply, if the bar doesn’t contact the pins, the rep doesn’t count (a box squat can be used for this as well). Finally, if Ben tends to relax and “get loose” as he descends, a pin squat will punish this type of behavior, and thus it will remind him to stay tight throughout the entire rep.

This wraps up our short discussion of the pin squat, and in an upcoming article, we’ll move on to the box squat.

As always, we hope this helps you get stronger and live better.

-Phil

PS: Whenever you want even more Testify in your life, here are some free resources:

  • Book a free intro and strategy session with us HERE.

  • Pick up a free copy of Testify’s Squat Guide: 12 Tips to Improve Your Squat Now HERE.

  • Get our free weekly email - containing useful videos, articles, and training tips - HERE.

  • Follow Testify on Instagram HERE.

  • Subscribe to Testify’s YouTube channel HERE.

(Some links may be affiliate links. As an Amazon Associate, Testify earns from qualifying purchases.)


At Testify, we offer small group training, private coaching (in-person or remotely via Zoom), online coaching, and form checks. Interested in getting stronger, looking better, and having more energy?

The Tempo Squat: What, How, and Why

What is a tempo squat?
A tempo squat is a squat wherein we assign a certain amount of time to each portion of the movement. Tempo squats are usually given with three numbers: the first represents the eccentric (or downward) phase of the lift, the second number represents the pause at the bottom (if any), and the third number represents the concentric (or upward) phase of the lift.

How do you perform a tempo squat?
We’ll use the example of the 3-0-3 tempo squat - also known as a Denver squat (since 303 is an area code for Denver). In a Denver squat, you spend three seconds going down, there is no pause at the bottom (since the middle number is zero), and then you spend three seconds going back up again.

Another example would be the 3-1-2 tempo squat - also known as a Chicago squat. In this case, you spend three seconds descending, you pause for one second at the bottom, and you then spend two seconds ascending again.

These are the most common tempos we use here at Testify, but of course, there are other options - literally an infinite number of options. With that being said, I’d advise you not to go off the deep end here, or your ego may be writing checks your body can’t cash.

Why might you do tempo squats or where might you see them in your programming? 
Let’s say your coach has programmed you within a Heavy-Light-Medium structure or something similar - in this case, you might see tempo squats show up as a light or medium day squat. It’s not usually the first choice I’ll make for a light or medium day - I tend to keep it as simple as possible at first, and that means literally a lighter squat (usually in the 80-90% range), nothing fancier than that - but eventually, a lifter might see a tempo squat inserted there.

Why might we do that? A tempo squat - since it’s a slow, torturous event - will use a lighter weight than a normal squat, so it fits the bill for a light or medium squat (but note that light and medium do not mean easy). 

The tempo squat can be also useful for a number of other reasons - one of which is that it can help a lifter focus on a specific aspect of his or her technique. If Bert tends to get forward at the bottom of his squat, a tempo squat allows him to think and focus very hard on maintaining his balance over the midfoot. If Ernie struggles to set his knees correctly on the descent, a tempo squat forces Ernie to take more time to do it correctly.

Tempo squats can also be used to help in cases of tendinopathy, and I have Will Morris to thank here for his recommendation of the 3-1-2 tempo squat (AKA Chicago squat). I will leave it to more educated professionals such as Will, John Petrizzo, Rori Alter, and Nick D’Agostino to give a detailed explanation of why this tends to work well - the people I just mentioned are all both physical therapists as well as Starting Strength Coaches and are excellent resources. From a purely physics perspective, I suspect that some of it has to do with the concept of impulse (i.e., change in momentum) and the inverse relationship between the force and time necessary to create a specific impulse. However, this is a topic for another day, so it suffices to say that tempo squats tend to be very useful in cases of tendinopathy.

This wraps up our discussion on tempo squats, and remember, if your coach programs them for you, there’s probably a good reason . . . or maybe your coach just likes to watch you suffer.

As always, we hope this helps you get stronger and live better.

(Some links may be affiliate links. As an Amazon Associate, Testify earns from qualifying purchases.)

If you found this helpful, you’ll love our weekly email. It’s got useful videos, articles, and training tips just like the one in this article. Sign up below, and of course, if you don’t love it, you can unsubscribe at any time.


At Testify, we offer small group training, private coaching (in-person or remotely via Zoom), online coaching, and form checks. Would you like to get quality coaching from a Starting Strength Coach?

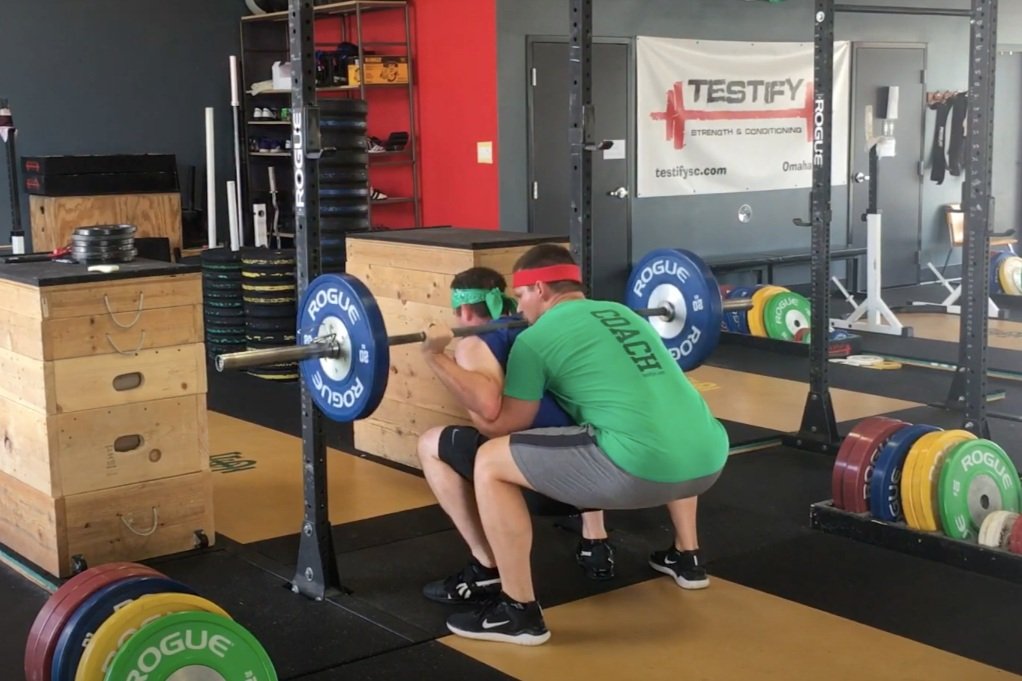
Spotting the Squat: Don't Make These Mistakes!

Spotting the squat is important, but it’s often done terribly and awkwardly, so let’s briefly discuss how NOT to spot the squat.

Don’t Space Out.
This isn’t the time for selfies or catching up on your pleasure reading. You need to keep your hands off the barbell unless it moves in a direction other than upward, but you still need to be available and attentive throughout the entire set.

A missed rep can happen quickly, especially if it’s due to a loss of balance, so be ready.

figure 1: Don’t Do This. (note the crooked barbell)

Don’t Touch the Bar . . . When the Lifter is Walking It Back In.
At the end of a successful set, do not try to help the lifter get the bar back to the hooks (Figure 1). By touching the bar, you’ll simply cause the lifter to be uneven (because you and the other spotter will not provide equal amounts of assistance) and possibly miss one or both of the hooks.

At the end of a set, the lifter already squatted the weight on his own - he can certainly walk it back on his own. Spotters should simply be present as the bar contacts the uprights to make sure that the bar does not bounce back from the rack.

figure 2: Don’t be like these fools.

No 1-Person Spots
Spotting the squat is performed by two people - never one person. Spotting the squat from behind the lifter is awkward at best and dangerous at worst as the spotter is in a terrible position to handle a heavy load should the lifter fail (Figure 2).

When setting up to spot, the spotter on the lifter’s left should have his left foot forward, and the spotter on the lifter’s right should have his right foot forward - this way, you are both facing the lifter as well as each other.

Keep your hands off the bar unless the bar moves in a direction other than up - any rep touched by you cannot be counted by the lifter. However, if the lifter does need assistance, you need to provide it, and you do so by spotting the bar with the crook of your elbow, and both hands will help by grabbing the plate (Figure 3). At this point, the lifter and the spotters together will lift the bar and take it back to the hooks (the lifter should NEVER abandon the bar).

Figure 3: The correct way to spot a failed rep

As always, we hope this helps you get stronger and live better.

(Some links may be affiliate links. As an Amazon Associate, Testify earns from qualifying purchases.)
If you found this helpful, you’ll love our weekly email. It’s got useful videos, articles, and training tips just like the one in this article. Sign up below, and of course, if you don’t love it, you can unsubscribe at any time.


At Testify, we offer small group training, private coaching (in-person or remotely via Zoom), online coaching, and form checks. Would you like to get quality coaching from a Starting Strength Coach?

The Squat: You "Kneed" to Do This

You’re ready to squat - your lifting shoes are on, the barbell is situated on your rear delts in that snug, low bar position, and you’ve got your focal point nailed down. What’s next?

Good heavens, this is painful to look at.

Reach back with your hips, point your chest down, and Shove. Your. Knees. Out.

When we say “shove your knees out,” we mean that your knees should go sideways. Of course, your knees will also go forward (after all, that’s what knees do when they bend in the squat), but we’re also going to shove them sideways.

This . . . is much better.

In other words, when you’ve taken your shoulder width stance with toes pointed roughly 30 degrees out, you’re simply going to point your knees (and thus your femurs) in the same direction as your toes. Simply put, your toes will act as arrows for your knees so that the knees go forward and out.

When we do this - when we shove our knees out and keep them out as we squat down and back up again - we force our abductors and external rotators to perform the task of keeping our knees out. As a result, we get to train that muscle mass - and this also allows our adductors (i.e., groin muscles) to contribute to coming back up again, so we get to train that muscle mass too.

Training all of this muscle mass helps us lift more weight, so we can get . . . you know . . . stronger. Getting our knees out also has the added benefit of making it easier to achieve depth in the squat.

Lots of muscle mass, a long range of motion, and lots of weight lifted . . . these sound like three very nice criteria for a lift designed to help us get stronger.

As always, we hope this helps you get stronger and live better.

(Some links may be affiliate links. As an Amazon Associate, Testify earns from qualifying purchases.)

If you found this helpful, you’ll love our weekly email. It’s got useful videos, articles, and training tips just like the one in this article. Sign up below, and of course, if you don’t love it, you can unsubscribe at any time.


At Testify, we offer small group training, private coaching (in-person or remotely via Zoom), online coaching, and form checks. Would you like to get quality coaching from a Starting Strength Coach?