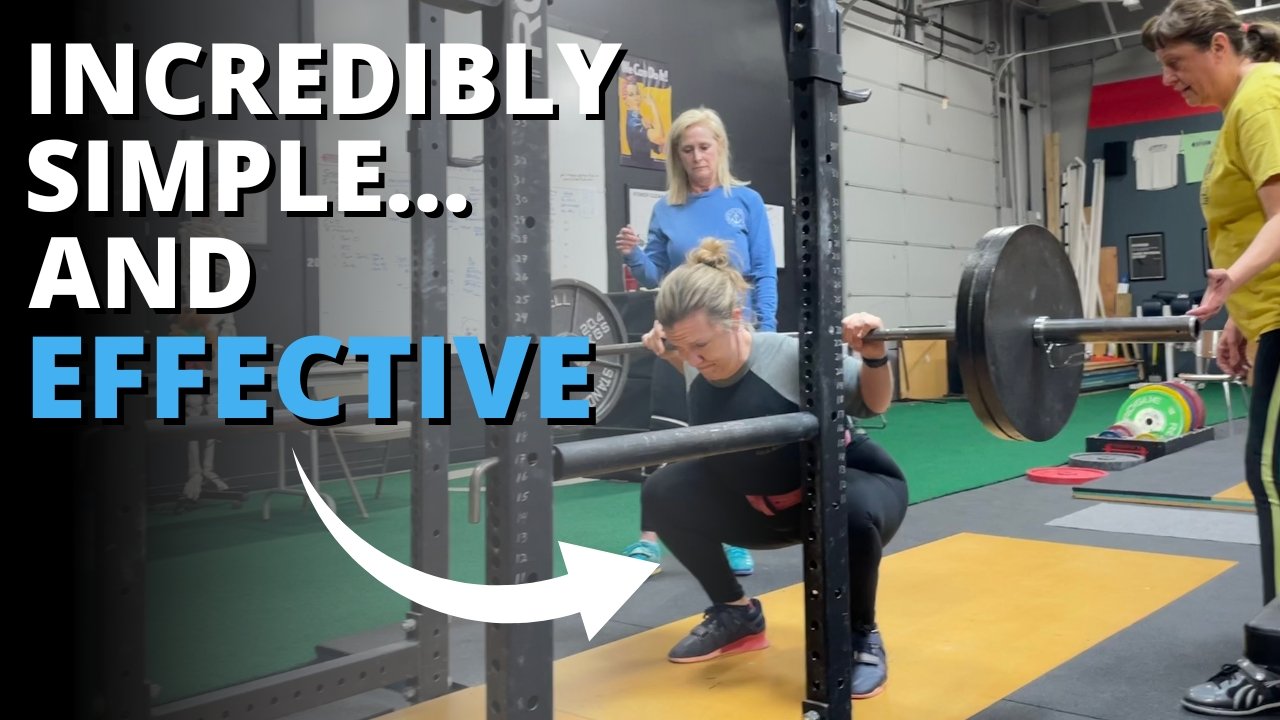
Spotting the Squat: Don't Make These Mistakes!

Spotting the squat is important, but it’s often done terribly and awkwardly, so let’s briefly discuss how NOT to spot the squat.

Don’t Space Out.
This isn’t the time for selfies or catching up on your pleasure reading. You need to keep your hands off the barbell unless it moves in a direction other than upward, but you still need to be available and attentive throughout the entire set.

A missed rep can happen quickly, especially if it’s due to a loss of balance, so be ready.

figure 1: Don’t Do This. (note the crooked barbell)

Don’t Touch the Bar . . . When the Lifter is Walking It Back In.
At the end of a successful set, do not try to help the lifter get the bar back to the hooks (Figure 1). By touching the bar, you’ll simply cause the lifter to be uneven (because you and the other spotter will not provide equal amounts of assistance) and possibly miss one or both of the hooks.

At the end of a set, the lifter already squatted the weight on his own - he can certainly walk it back on his own. Spotters should simply be present as the bar contacts the uprights to make sure that the bar does not bounce back from the rack.

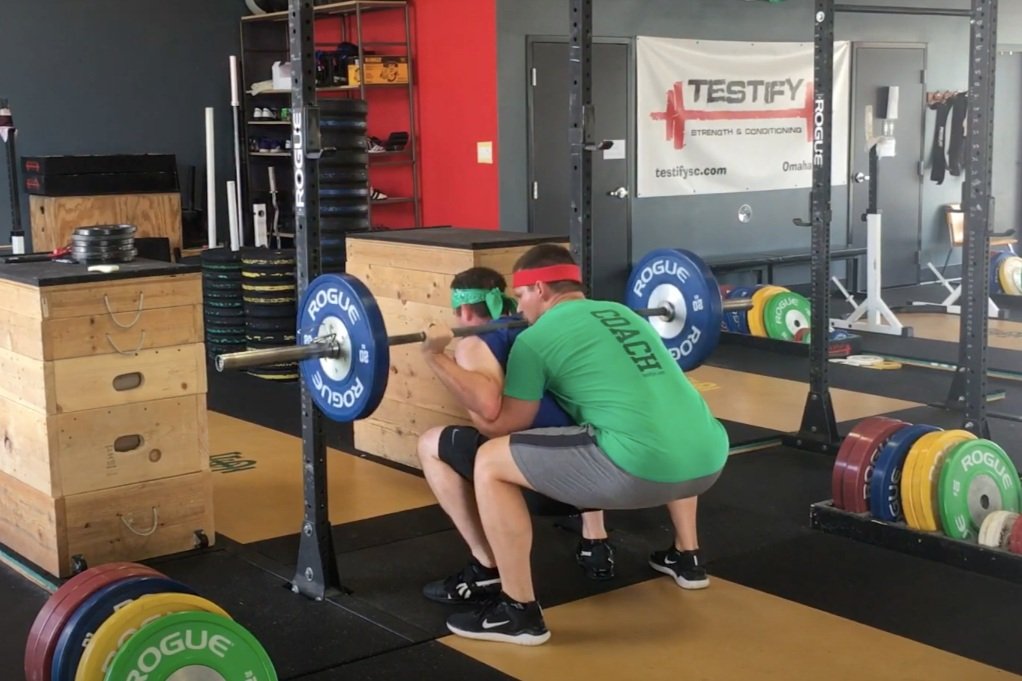
figure 2: Don’t be like these fools.

No 1-Person Spots
Spotting the squat is performed by two people - never one person. Spotting the squat from behind the lifter is awkward at best and dangerous at worst as the spotter is in a terrible position to handle a heavy load should the lifter fail (Figure 2).

When setting up to spot, the spotter on the lifter’s left should have his left foot forward, and the spotter on the lifter’s right should have his right foot forward - this way, you are both facing the lifter as well as each other.

Keep your hands off the bar unless the bar moves in a direction other than up - any rep touched by you cannot be counted by the lifter. However, if the lifter does need assistance, you need to provide it, and you do so by spotting the bar with the crook of your elbow, and both hands will help by grabbing the plate (Figure 3). At this point, the lifter and the spotters together will lift the bar and take it back to the hooks (the lifter should NEVER abandon the bar).

Figure 3: The correct way to spot a failed rep

As always, we hope this helps you get stronger and live better.

(Some links may be affiliate links. As an Amazon Associate, Testify earns from qualifying purchases.)

If you found this helpful, you’ll love our weekly email. It’s got useful videos, articles, and training tips just like the one in this article. Sign up below, and of course, if you don’t love it, you can unsubscribe at any time.


At Testify, we offer small group training, private coaching (in-person or remotely via Zoom), online coaching, and form checks. Would you like to get quality coaching from a Starting Strength Coach?

The Squat: You "Kneed" to Do This

You’re ready to squat - your lifting shoes are on, the barbell is situated on your rear delts in that snug, low bar position, and you’ve got your focal point nailed down. What’s next?

Good heavens, this is painful to look at.

Reach back with your hips, point your chest down, and Shove. Your. Knees. Out.

When we say “shove your knees out,” we mean that your knees should go sideways. Of course, your knees will also go forward (after all, that’s what knees do when they bend in the squat), but we’re also going to shove them sideways.

This . . . is much better.

In other words, when you’ve taken your shoulder width stance with toes pointed roughly 30 degrees out, you’re simply going to point your knees (and thus your femurs) in the same direction as your toes. Simply put, your toes will act as arrows for your knees so that the knees go forward and out.

When we do this - when we shove our knees out and keep them out as we squat down and back up again - we force our abductors and external rotators to perform the task of keeping our knees out. As a result, we get to train that muscle mass - and this also allows our adductors (i.e., groin muscles) to contribute to coming back up again, so we get to train that muscle mass too.

Training all of this muscle mass helps us lift more weight, so we can get . . . you know . . . stronger. Getting our knees out also has the added benefit of making it easier to achieve depth in the squat.

Lots of muscle mass, a long range of motion, and lots of weight lifted . . . these sound like three very nice criteria for a lift designed to help us get stronger.

As always, we hope this helps you get stronger and live better.

(Some links may be affiliate links. As an Amazon Associate, Testify earns from qualifying purchases.)

If you found this helpful, you’ll love our weekly email. It’s got useful videos, articles, and training tips just like the one in this article. Sign up below, and of course, if you don’t love it, you can unsubscribe at any time.


At Testify, we offer small group training, private coaching (in-person or remotely via Zoom), online coaching, and form checks. Would you like to get quality coaching from a Starting Strength Coach?

The Squat: Are You Making This Mistake?

Are you trying to arch your back when you squat? Knock that off. We don’t want a soft, rounded back when squatting, of course, but we also don’t want the opposite of that - an arched back, i.e., an overextended back.

Figure 1: What a fool . . . even Parker can see that, and Milo can’t bear to watch.

If a lifter has this problem, it often shows up right at the beginning of the descent. So, if you look like you’re about to twerk when you initiate your squat, pay attention.

We want a straight, rigid back when we squat; again, rounded is no good, but neither is overextended, and that’s the problem we’re addressing here (see Figure 1).

Overextension of the back is neither a comfortable nor a strong position in which to support a heavy barbell on your back. If you’re overextending your back when squatting (watch one of the included videos for a demonstration), remind yourself to clamp down on your abs extremely hard (i.e., contract your abs as hard as you can) before you start the rep and then keep them tightly contracted throughout the entire rep.

If that reminder doesn’t work, you can try overcueing yourself by telling yourself to “round your back” slightly while squatting. Be careful with this cue - we DO NOT actually want a rounded back, but if you are overextending your back, then overcueing with this exaggerated mental picture may be just what you need to achieve the straight back that we actually do want.

As always, we hope this helps you get stronger and live better.

(Some links may be affiliate links. As an Amazon Associate, Testify earns from qualifying purchases.)

If you found this helpful, you’ll love our weekly email. It’s got useful videos, articles, and training tips just like the one in this article. Sign up below, and of course, if you don’t love it, you can unsubscribe at any time.


At Testify, we offer small group training, private coaching (in-person or remotely via Zoom), online coaching, and form checks. Would you like to get quality coaching from a Starting Strength Coach?

The Squat: You're Going to Do This Wrong

You’ve read the Blue Book, you’ve watched the videos, the bar is sitting in that nice, low bar position, and you’ve correctly performed the Valsalva maneuver - you’re ready to squat.

Don’t be like this fool.

If you’re new to squatting, though, you’re about to do something wrong . . .

You’re going to try and maintain a vertical back angle as you descend - in other words, you’re going to try and keep your torso as upright as possible.

Everyone does this at first, so don’t worry, you’re not a mutant, but we need to correct it, and we want to correct it right away. Simply tell yourself, “Point my chest at the floor” as you start your descent. In other words, reach back with your butt and lean over as you squat (check out the video below for a demonstration).

It’s easy to accidentally confuse “vertical back” with “straight back.” We want a straight, rigid back, but we don’t want a vertical back while squatting.

This . . . is much better.

Of course, it will be vertical at the beginning and the end of the movement (when we’re standing up), but your squat will be stronger and more efficient if your point your chest at the floor as you start your descent and then keep it pointed at the floor as you drive back up out of the bottom as well.

As always, we hope this helps you get stronger and live better.

(Some links may be affiliate links. As an Amazon Associate, Testify earns from qualifying purchases.)

This . . . is also much better.

If you found this helpful, you’ll love our weekly email. It’s got useful videos, articles, and training tips just like the one in this article. Sign up below, and of course, if you don’t love it, you can unsubscribe at any time.


At Testify, we offer small group training, private coaching (in-person or remotely via Zoom), online coaching, and form checks. Would you like to get quality coaching from a Starting Strength Coach?

The Squat: Vertical Will Happen . . . Eventually.

For both new and experienced lifters, a common problem in the squat is that of trying to make the back angle become more vertical right away as the lifter starts the ascent. In other words, the lifter is lifting the chest when he starts his ascent instead of maintaining his “lean” and driving his hips up.

If you have this problem, here’s something to remember: Vertical will happen eventually, but wait for it.

In other words, your back angle will become more vertical eventually - we do finish the lift in a completely upright position - but don’t try to make your back angle more vertical (i.e., don’t raise your chest) - right away. It makes life difficult, uncomfortable, and it makes for a weaker squat.

Drive your hips. Stay in your lean. Stay leaned over. Keep your chest pointed at the floor. These are simply different cues for the same motion, and reminding yourself that “vertical happens eventually, but wait for it” might be a good reminder for you as well.

So, unlike Jester and Maverick, don’t go vertical - at least not right away. As always, we hope this helps you get stronger and live better.

(Some links may be affiliate links. As an Amazon Associate, Testify earns from qualifying purchases.)

If you found this helpful, you’ll love our weekly email. It’s got useful videos, articles, and training tips just like the one in this article. Sign up below, and of course, if you don’t love it, you can unsubscribe at any time.


At Testify, we offer small group training, private coaching (in-person or remotely via Zoom), online coaching, and form checks. Would you like to get quality coaching from a Starting Strength Coach?

Improve Your Squat in ONE Easy Step!

Want to improve your squat in one easy step? It’s ridiculously simple.

Squat with spotters.

Seriously, that’s it. Now, of course, squatting with safeties (AKA pins, crash bars, spotter arms) is just fine, and if you train on your own, that’s the only option you have. However, if you train with some other reasonably intelligent and educated lifters, get two of them to spot you.

One person stands on either side of you (watch the included video for more on how to spot the squat . . . and how not to spot the squat). Do not have a single person spot you from behind because that’s stupid. It’s common, but it’s still stupid (the physics of this situation becomes rather obvious and untenable with heavy loads . . . try holding 300, 400, or 500+ lb out in front of you, and you’ll quickly agree).

You’ll squat better because the pressure of having two people right next to you will force you to do so. You’ll focus better and work harder because you don’t want to fail and make your spotters actually take the bar. You’re using peer pressure for good instead of evil. This is a very real effect, and we see it all the time.

If you’re not used to being spotted when you squat, you probably won’t like it at first, but you’ll get used to it, and in the long run, you’ll squat better for having done it. We hope this helps you get stronger and live better!

(Some links may be affiliate links. As an Amazon Associate, Testify earns from qualifying purchases.)

If you found this helpful, you’ll love our weekly email. It’s got useful videos, articles, and training tips just like the one in this article. Sign up below, and of course, if you don’t love it, you can unsubscribe at any time.


At Testify, we offer small group training, private coaching (in-person or remotely via Zoom), online coaching, and form checks. Would you like to get quality coaching from a Starting Strength Coach?