Diamond Grip for the Press and Bench Press

When learning to press or bench press, getting the correct grip can be tricky at first. A very common error is to take a grip that carries the bar back in the fingers (Figure 1).

Figure 1: This is no good.

Let’s fix this.

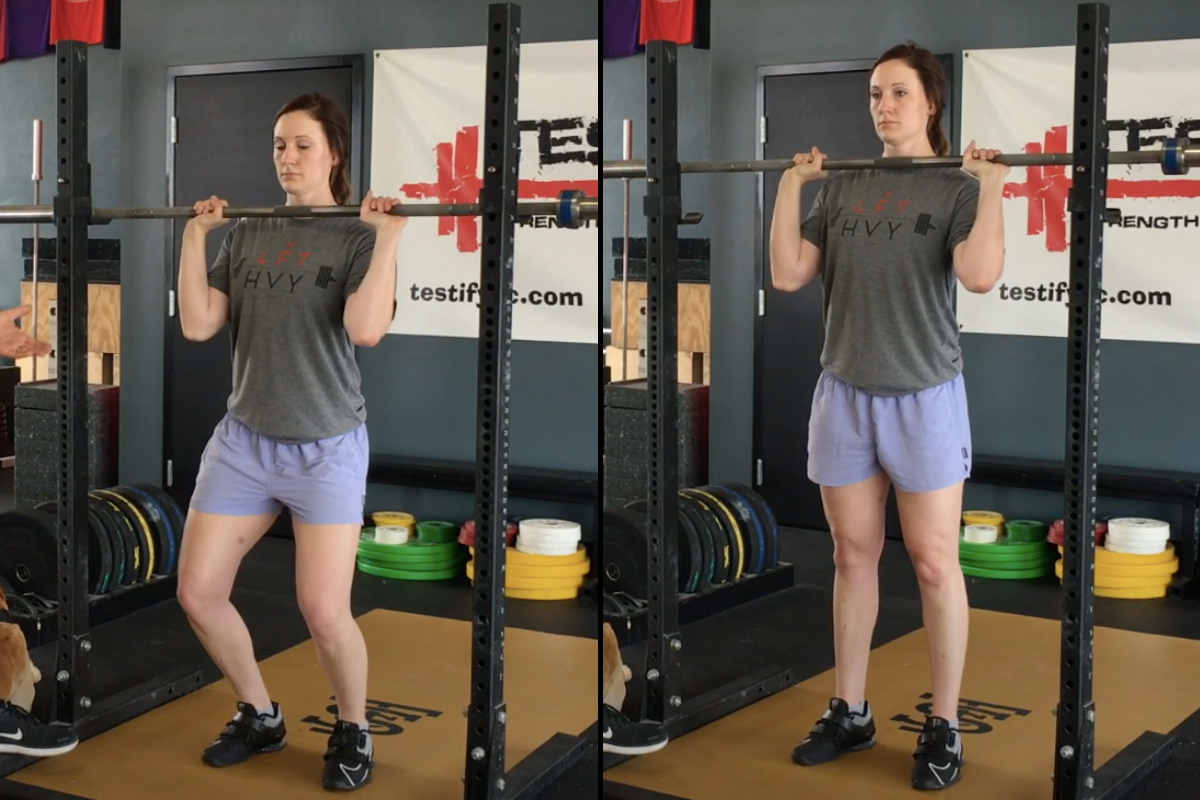
When we press or bench press, we’d like the barbell to be supported directly over the bones of the forearms, and to do this, we pronate our grip so that the bar sits on the heel of the palm. This provides for excellent force transfer between our arms and hands and the bar, whereas holding the bar back in the fingers with wrists in full extension creates a very weak and flimsy position.

Pronating your grip (Figure 2) simply means that you’re going to rotate your thumbs down toward your feet, and after that, you squeeze the bar tightly with your fingers (“crush the bar” is a good cue).

Figure 2: This . . . is much better.

With this said, new lifters sometimes screw up the pronation step, either rotating their hands the wrong way or spinning their hands on top of the bar (in the press). If this is you, take the “diamond grip” approach as shown in Figure 3:

Figure 3: The Diamond Grip approach

Step 1
Place your palms on the bar - palms will face the wall (not the floor) with thumbs below the bar and in contact with each other.

Step 2
Rotate your hands so that your index fingers are now in contact with each other (above the bar). The gap between your hands will make a diamond if you’ve done this correctly.

Step 3
Slide your hands away from each other until you reach the correct grip width - narrow for the press (about shoulder width) and about a hand-width wider than that for the bench press.

Step 4
Squeeze the bar tightly with your fingers.

Make a diamond with your hands and then slide your hands outward - it’s that simple.

We hope this helps you get stronger and live better!

(Some links may be affiliate links. As an Amazon Associate, Testify earns from qualifying purchases.)

If you found this helpful, you’ll love our weekly email. It’s got useful videos, articles, and training tips just like the one in this article. Sign up below, and of course, if you don’t love it, you can unsubscribe at any time.


At Testify, we offer small group training, private coaching (in-person or remotely via Zoom), online coaching, and form checks. Would you like to get quality coaching from a Starting Strength Coach?

The Press: Finish Where You Start!

A common problem with new lifters and the press is achieving the correct start position for each rep - specifically, achieving the correct start position for every rep after your first rep.

After all, the correct start position for the first rep should be accomplished by correctly gripping and unracking the bar in the first place (watch the included video that covers this), but today, we're specifically talking about getting the correct start position for the rest of your set (e.g., your 2nd rep all the way to the end of the set).

Figure 1

The key is to finish the press where you start the press, so make sure that you start with elbows slightly in front of the bar, squeezing the bar tightly and with relatively straight wrists (technically, they will be slightly in extension) as you see in Figure 1. Then, after locking out the rep overhead, simply remind yourself to lower it back to this exact same position.

Figure 2: Don’t be like this fool.

Specifically, we do not want to lower the bar back to the position you see in Figure 2, where the lifter has his elbows behind the bar and wrists in severe extension. It’s a weaker position - it’s tough to support a heavy weight in this position, and now you’ve got to spend time and energy getting back to the correct start position.

Even worse, if you don’t spend that time and energy getting back to the correct position, it’s harder to press the bar overhead from this weak position. This poor position often contributes to a forward bar path on the next rep, which can easily be the difference between a successful rep and a missed rep at challenging weights.

Figure 3

Again, the key is to finish where you start (FWYS).

If you still find that lowering the bar consistently to the correct start position is difficult, try this mental picture (Figure 3) - imagine that you are standing very close to a wall with the bar locked out overhead. While lowering the bar, picture yourself dragging your elbows down the wall while keeping your fists (and therefore the bar) away from the wall.

Remember to aim for your nose with the bar on the way down as well as on the way up. This “elbows-dragging-down-the-wall” image is a slightly exaggerated picture of what we actually want to happen (watch the included video to see this in action), but a number of our members have found this very useful.

We hope this helps you get stronger and live better!

(Some links may be affiliate links. As an Amazon Associate, Testify earns from qualifying purchases.)

If you found this helpful, you’ll love our weekly email. It’s got useful videos, articles, and training tips just like the one in this article. Sign up below, and of course, if you don’t love it, you can unsubscribe at any time.


At Testify, we offer small group training, private coaching (in-person or remotely via Zoom), online coaching, and form checks. Would you like to get quality coaching from a Starting Strength Coach?

How to Unrack the Press: Use Your Legs!

Figure 1: Becky demonstrates how NOT to unrack the press.

Figure 1: Becky demonstrates how NOT to unrack the press.

A common problem with new lifters and the press is the act of unracking the press. They will often pick up the bar using their arms and their shoulders - in other words, they’re using their upper bodies to unrack the press, which is inefficient and difficult at heavy weights. Let’s fix this.

When you unrack the bar by incorrectly using your arms and shoulders, it looks like what Becky is demonstrating in Figure 1. Notice how she reaches out, grabs the bar with her arms, and tries to pull it back into position.

Also, note that she has her wrists in pretty severe extension (i.e., they are bent backwards), which we don’t want, and her elbows are behind the bar, which we don’t want either. In addition, it’s simply difficult to pick up a heavy press in this manner.

If this was actually a heavy weight instead of the empty bar, Becky might not be able to unrack it at all in this manner, and even if she did, she’d be in a weak position from which to start pressing.

Remember: When you unrack a press, you unrack it with your legs. 

Use the following steps:

1. Take your grip. (Figure 2a)

2. Walk right up the bar - your chest may actually touch the bar. (Figure 2b)

Figure 2a (left) and Figure 2b (right)

Figure 2a (left) and Figure 2b (right)

3. Squat down far enough that your elbows are slightly in front of the bar and you’ve got relatively straight wrists. (Figure 3a)

4. Stand the bar up with your legs. (Figure 3b)

Figure 3a (left) and Figure 3b (right)

Figure 3a (left) and Figure 3b (right)

Figure 4

Figure 4

5. Step back and establish your stance. (Figure 4)

Remember - unrack the press with your legs. As always, we hope this helps you get stronger and live better!

(Some links may be affiliate links. As an Amazon Associate, Testify earns from qualifying purchases.)

If you found this helpful, you’ll love our weekly email. It’s got useful videos, articles, and training tips just like the one in this article. Sign up below, and of course, if you don’t love it, you can unsubscribe at any time.


At Testify, we offer small group training, private coaching (in-person or remotely via Zoom), online coaching, and form checks. Would you like to get quality coaching from a Starting Strength Coach?