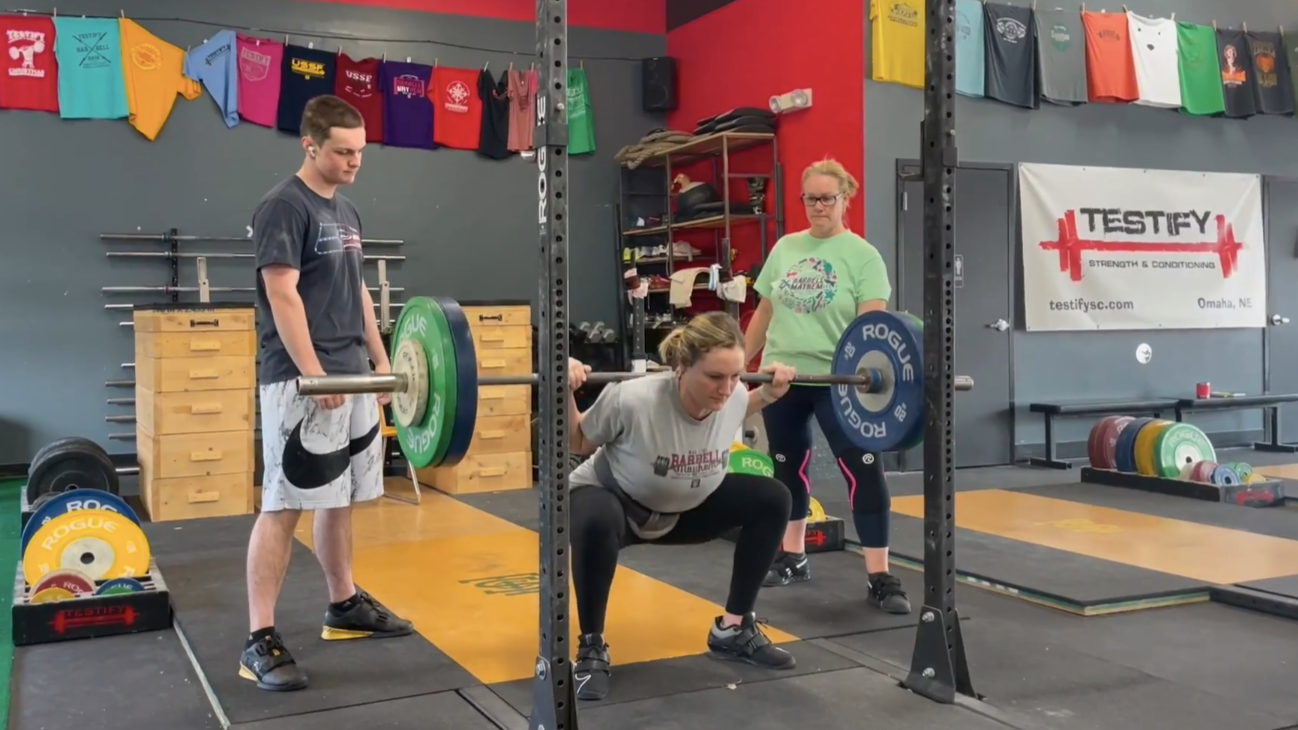
Part 2: Your Squat Called. It Wants You to Stop Doing This.

Are you making this squat error? Let’s fix it fast.

In Part 1 of this series, we covered a common mistake lifters make with their stance. Today, we’re talking about your eyes.

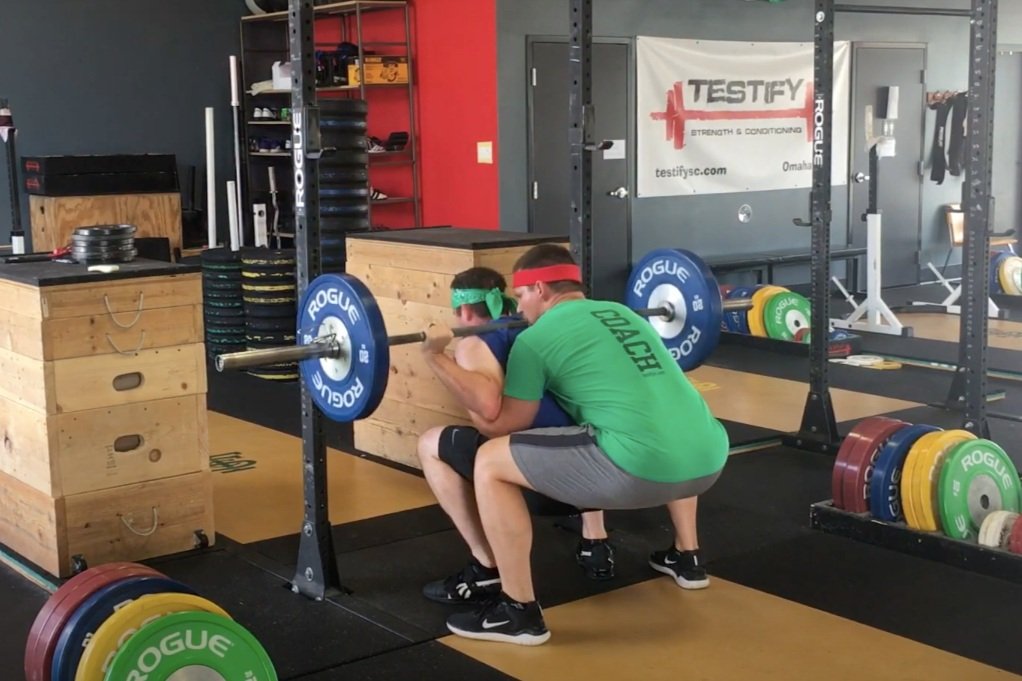
Stop using a ridiculous – or nonexistent – focal point.

If you’re looking up (Figure 1) or if you’re not even sure where you’ve been looking when you squat, I’m talking to you.
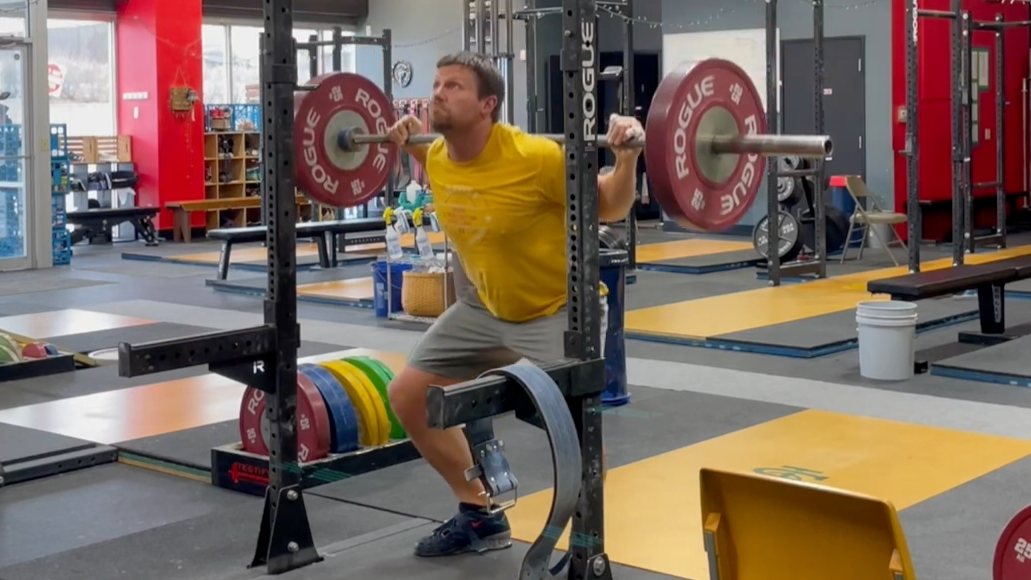
figure 1: don’t be like this fool.

Your focal point matters. Having a fixed focal point reinforces your balance (rather important with a heavy barbell on your back), and if chosen wisely, your focal point reinforces your technique as well.

With this in mind, find a spot on the floor roughly 4-6 feet in front of you and stare at it. Burn a hole in the ground with your eyes.

Find that focal point after you finalize your stance, stare at it during your first rep, between reps, and during every rep thereafter. After you rack the bar, then you can look elsewhere.

Until then, that’s where you look.
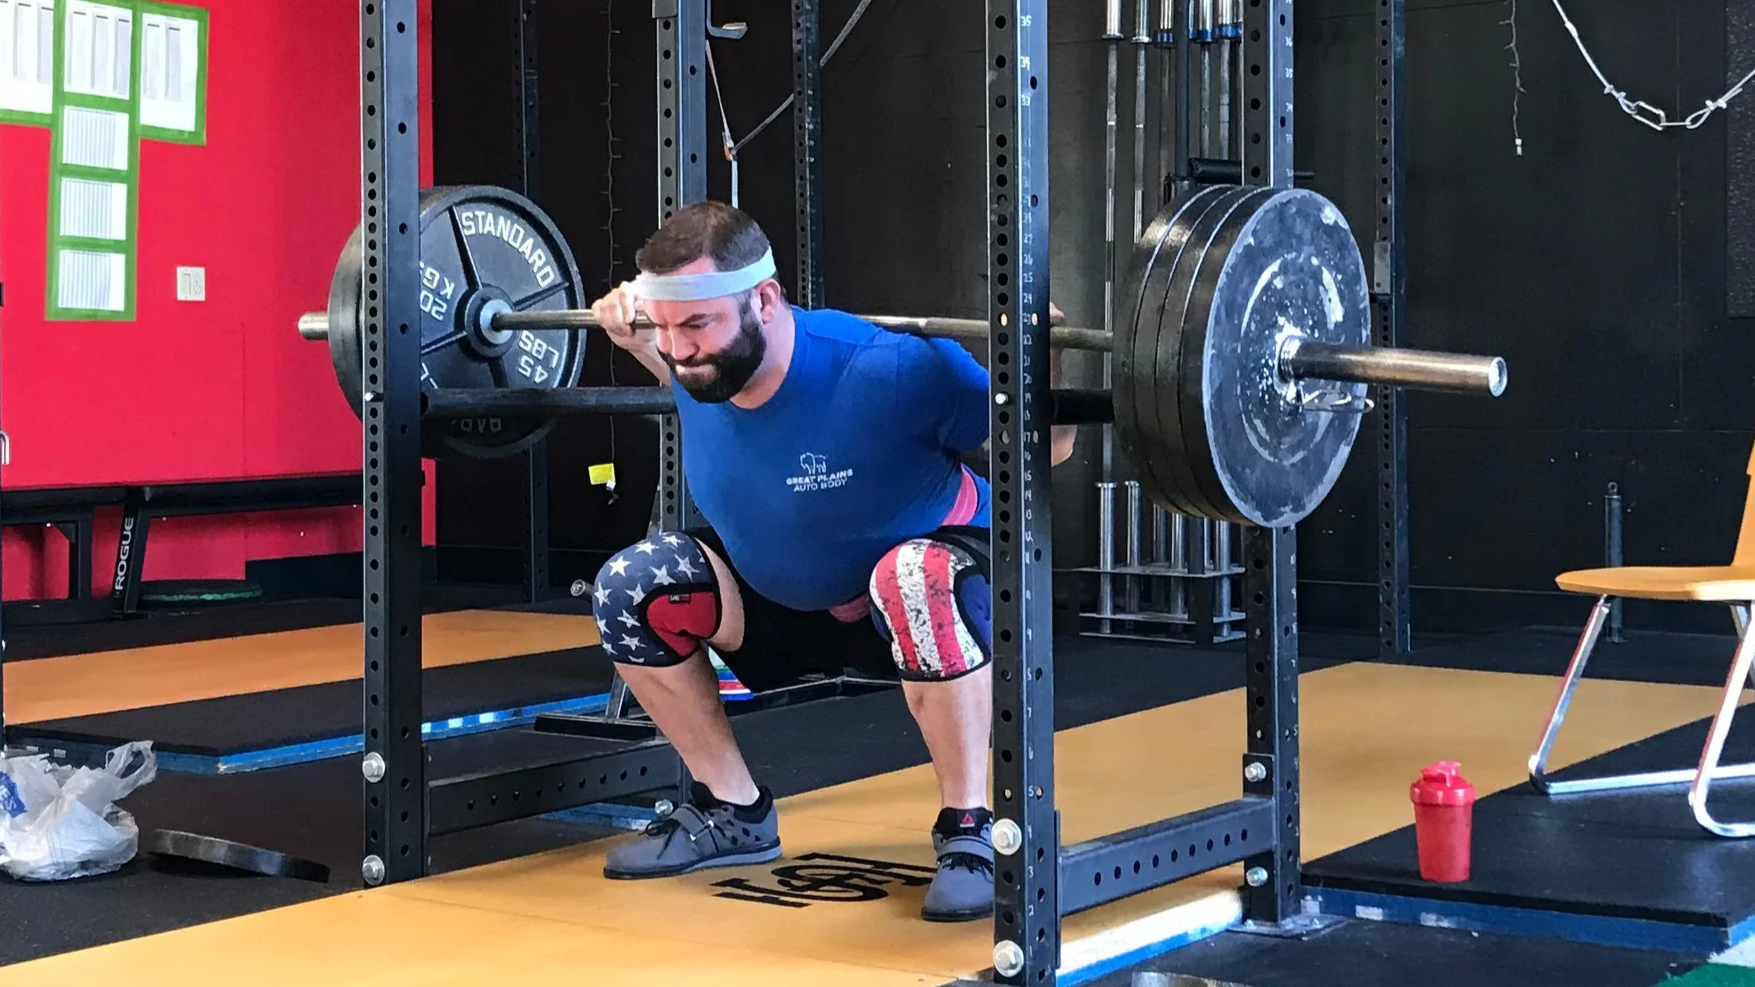
Figure 2: This . . . is much better.

That focal point (Figure 2) helps your balance, it helps you establish the correct back angle on the descent, and it helps you maintain the correct back angle on the ascent.

Additional tip: you might not actually be sure where you look when you squat, and if that’s the case, pay attention the next time you train. Also, record yourself from a front-oblique angle every once in a while. It’s not usually the best angle for spotting errors, but you might think that you have a solid, constant focal point only to find out that your gaze has been wandering when squatting. A video or two from the front will point this error out in a hurry.

As always, we hope this helps you get stronger and live better.

-Phil

PS: Whenever you want even more Testify in your life, here are some free resources:

  • Book a free intro and strategy session with us HERE.

  • Pick up a free copy of Testify’s Squat Guide: 12 Tips to Improve Your Squat Now HERE.

  • Get our free weekly email - containing useful videos, articles, and training tips - HERE.

  • Follow Testify on Instagram HERE.

  • Subscribe to Testify’s YouTube channel HERE.

(Some links may be affiliate links. As an Amazon Associate, Testify earns from qualifying purchases.)


At Testify, we offer small group training, private coaching (in-person or remotely via Zoom), online coaching, and form checks. Interested in getting stronger, looking better, and having more energy?

Your Squat Called. It Wants You to Stop Doing This.

Countless new and experienced lifters commit this squat error. It wastes time and energy, so let’s identify the problem and fix it fast.

Stop messing with your squat stance.

If you unrack the bar and then proceed to take the next 30 seconds setting up and making minute adjustments, I’m talking to you.

If you are squatting a challenging weight (and I hope you are), then efficiency matters. We don’t want to rush anything, but we also don’t want to spend any extra time supporting that heavy load – after all, the squat itself should provide the work, not standing there wiggling your feet around like a doofus.

Here’s the solution: “right step, left step, right adjust, left adjust.”

In other words, after standing the bar up from the hooks, take one step back with your right foot, take one step back with your left foot, make a small adjustment with your right foot, and then make a small adjustment with your left foot.

Additional tip: keep either your toes or your heel on the ground when making small changes. When you lift your entire foot off the ground, you typically make too big of an adjustment.

Do this, and you’ll save energy, you’ll look like you know what you’re doing (not strictly necessary, but always nice), and you’ll spend less time with a heavy barbell on your back.

As always, we hope this helps you get stronger and live better.

-Phil

PS: Whenever you want even more Testify in your life, here are some free resources:

  • Book a free intro and strategy session with us HERE.

  • Pick up a free copy of Testify’s Squat Guide: 12 Tips to Improve Your Squat Now HERE.

  • Get our free weekly email - containing useful videos, articles, and training tips - HERE.

  • Follow Testify on Instagram HERE.

  • Subscribe to Testify’s YouTube channel HERE.

(Some links may be affiliate links. As an Amazon Associate, Testify earns from qualifying purchases.)


At Testify, we offer small group training, private coaching (in-person or remotely via Zoom), online coaching, and form checks. Interested in getting stronger, looking better, and having more energy?

How to Squat Heavy ALONE! | How to Fail a Squat Safely

(A Blast from the Past article originally posted on 01/12/24)

When lifting weights, it's generally a good idea to not end up dead or - for that matter - even injured. With this in mind, let's quickly cover how to avoid getting yourself trapped under a heavy squat that you just failed.

Figure 1: For so many reasons, this is stupid. don’t spot like this.

Spotters are fantastic (when possible)
Ideally, when training, you don't want to fail a rep. You try to avoid it whenever possible, but sometimes these things happen, and in the squat, the best solution is to have spotters that you trust. Specifically, get two spotters, i.e., one on each side.

Forget the whole “spotter-behind-you” thing (Figure 1). It’s stupid, the back spotter is in a terribly mechanically disadvantaged position, and it’s a good way to get both you and your spotter injured. It can, however, make for viral “YouTube-fail” videos.

The video included in this article covers how to spot the squat as well as how to squat alone, so I’d recommend watching that.

The great thing about having spotters is this: the moment you start to fail, i.e, the moment you start to go back down, the spotters immediately take the bar. You don’t have to go all the way down to the pins.

figure 2: This is much better.

If you start to fail a rep, you only descend an inch or two, and your spotters step in and support the bar (Figure 2). At this point, you and your spotters - because you stay under the bar and never abandon your spotters - lift the barbell up and put it back in the rack.

What if you train alone?
Spotters are indeed great; however, if you often train alone (and I understand that as I usually do also), you need to be able to set the safeties (AKA “pins” or “crash bars”) correctly. Whether you’re using pin/pipe safeties, spotter arms, or even strap safeties, the concept and process are both quite simple:

Set the pins low enough that they don’t cause a problem but high enough that they save you from a problem.

The process is as follows:

Figure 3: Parker helps check for adequate clearance.

Step 1: Make sure the pins are low enough
As you’re warming up with the empty bar, look to the side at the bottom of the rep (don’t do this on a regular basis, but doing this a few times with the empty bar is fine). Make sure that, when you’re at the correct depth, you’ve still got a couple inches of clearance between the bar and the pins (Figure 3). You want a couple of inches (and not just a tiny sliver of space) because you need to be able to accidentally go a bit too deep on your squat and not immediately run into the safeties. Going an inch too deep on a squat happens every now and then, and running into the safeties makes the ascent much harder, so give yourself a little room.

figure 4: Parker helps me perform a practice fail.

Step 2: Practice failing a rep
Next, either with the empty bar or with a very light weight on the bar, do a “practice fail” (Figure 4). To do this, perform a couple of normal reps, and then on the third or perhaps fourth rep, go down, start coming back up an inch or two, pretend it’s too heavy, then simply relax your upper back, squat back down, and set the bar on the pins.

At this point, you’ll perform the COS (Crawl of Shame), and crawl out - either forward or backward - from underneath the barbell.

Don’t envision this - actually practice it. You need to know you are still safe in the even of a missed rep.

WARNING: STUPIDITY
I do NOT recommend ever dumping the bar backward off your back and onto the floor. I don’t recommend it with a high bar squat, and I certainly do not recommend it with the squat we teach, which is commonly referred to as a low bar squat. It’s a silly practice, requires a decent amount of nimbleness - which you may or may not possess when grinding out a challenging, exhausting rep - and lastly, it encourages you to quit on a rep that you very well might have been able to get if you had spotters or safeties that you trusted.

You’re welcome to dump it off your back if you like - it’s your life - but be forewarned that it’s stupid. At the very least, don’t do it in my gym.

Wrapping it up
Back to sanity . . . be sure to practice a failed rep, and then adjust the safeties accordingly if they are too low. Again, the safeties need to be low enough that they don't cause a problem but high enough that they save you from a problem.

Don't wait until it gets heavy to find out whether you've set them correctly.

As always, we hope this helps you get stronger and live better.

-Phil

PS: Whenever you want even more Testify in your life, here are some free resources:

  • Follow Testify on Instagram HERE.

  • Subscribe to Testify’s YouTube channel HERE.

  • Book a free intro and strategy session with us HERE.

  • Pick up a free copy of Testify’s Squat Guide: 12 Tips to Improve Your Squat Now HERE.

  • Get our free weekly email - containing useful videos, articles, and training tips - HERE.

(Some links may be affiliate links. As an Amazon Associate, Testify earns from qualifying purchases.)


At Testify, we offer small group training, private coaching (in-person or remotely via Zoom), online coaching, and form checks. Interested in getting stronger, looking better, and having more energy?

If You Only Watch One Squat Video, Make It This

Want a better squat? Start here. These seven squat tips cover the details that can make your squats stronger, more consistent, and easier to execute – including two tips that may not be what you expect.

Whenever you want even more Testify in your life, here are some free resources:

  • Book a free intro and strategy session with us HERE.

  • Pick up a free copy of Testify’s Squat Guide: 12 Tips to Improve Your Squat Now HERE.

  • Get our free weekly email - containing useful videos, articles, and training tips - HERE.

  • Follow Testify on Instagram HERE.

  • Subscribe to Testify’s YouTube channel HERE.

(Some links may be affiliate links. As an Amazon Associate, Testify earns from qualifying purchases.)


At Testify, we offer small group training, private coaching (in-person or remotely via Zoom), online coaching, and form checks. Interested in getting stronger, looking better, and having more energy?

How to Get a Bigger Squat EFFORTLESSLY | 4 Mindset Shifts

Want to get a bigger, stronger squat? Here are 4 simple mindset shifts that will help - Starting Strength Coach Phil Meggers explains.

(A Blast from the Past video originally published on 07/31/23)

Whenever you want even more Testify in your life, here are some free resources:

  • Book a free intro and strategy session with us HERE.

  • Pick up a free copy of Testify’s Squat Guide: 12 Tips to Improve Your Squat Now HERE.

  • Get our free weekly email - containing useful videos, articles, and training tips - HERE.

  • Follow Testify on Instagram HERE.

  • Subscribe to Testify’s YouTube channel HERE.


At Testify, we offer small group training, private coaching (in-person or remotely via Zoom), online coaching, and form checks. Interested in getting stronger, looking better, and having more energy?

4 ERRORS Beginners Make that Experienced Lifters NEVER Do | Part 1 - The Squat

In this multi-part series, we cover four mistakes that lifters often make when starting out. We cover one mistake each for the squat, press, deadlift, and bench press. These are all errors of inefficiency, and as such, people often don’t realize they’re making these mistakes.

Today’s lift is the squat, and the error is that of doing too much with your feet. This shows up in four different ways, so let’s cover each version of the error.

Version #1: Squat Stand
Don’t back out a mile from the squat stand.

Some lifters back out far enough that the safeties stand very little chance of being useful in the event of a missed rep. As a result, the lifter wastes energy backing out farther than needed and potentially puts himself in danger.

Stay within the radius of your safeties (Figure 1) – it’s smarter, safer, and it doesn’t waste energy.

figure 1: this is a reasonable distance back from the rack while staying within the radius of the spotter arms.

Version #2: Deep Power Rack
A power rack (i.e., a squat rack with four uprights) often prevents you from committing version #1 of today’s error (i.e., backing out too far). When you stand the bar up from the hooks and step back, the presence of the uprights behind you tends to provide a subconscious pressure that keeps you from stepping too far back (Figure 2).

figure 2: Megan demonstrates the proper setup inside a power rack.

However, there are plenty of power racks that are quite deep - three to four feet deep for some models (Figure 3). With racks such as these, it’s still quite possible to waste both time and energy backing out too far.

figure 4

The solution is simple – once you’ve stood the barbell up from the hooks, take one step back with your left foot, then one step back with your right foot, and you’ll be an appropriate distance back from the uprights without having wasted energy backing up an excessive amount.

Version #3: Spotters
Squatting with spotters is ideal (Figure 4). You have the social pressure of not wanting to fail a rep when your buddies are spotting you – everyone squats better with spotters – and in the event of a failed rep, you don’t end up performing the crawl of shame out from under your bar (which ends up sitting on the safeties when you squat without spotters).

Figure 4: becky squats as Dawson and jill are ready to spot.

In the case of a failed rep, you also get to avoid the annoying process of unloading your bar, getting it back up to the hooks, and then reloading your bar to finish your set. Instead, when the point of failure occurs, your spotters step in, and then you and your spotters lift the bar back up to the hooks together.

However, squatting with spotters is similar to squatting at a squat stand or in a deep power rack since it’s easy to back out too far from the rack. The solution here is the same as it was in version #2: one step back with your right foot, then one step back with your left foot, and you’re good to go . . . unless you commit version #4 of today’s error . . .

Version #4: Stance Fidgeting
Quit messing with your stance.

You are now efficient when backing up from the uprights – right step, then left step – so don’t ruin that efficiency by messing around with your stance for the next 30 seconds.

Give yourself one chance to adjust your right foot, then one chance to adjust your left foot, and that’s it. With a very small amount of practice, that’s all you’ll need to take a consistently accurate stance.

To help with this, make it a practice to keep part of your foot on the ground when adjusting your stance. Move your toes or your heel – not both at the same time (i.e., don’t lift your entire foot up). When you pick your foot up off the ground, you’ll usually make too large of an adjustment.

The entire process is now very simple – one step with your right foot, one step with your left foot, small adjustment with your right foot, and then small adjustment with your left foot.

It’s quick, straightforward, and you don’t waste any energy preparing for your work set.

As always, we hope this helps you get stronger and live better.

-Phil

PS: Whenever you want even more Testify in your life, here are some free resources:

  • Book a free intro and strategy session with us HERE.

  • Pick up a free copy of Testify’s Squat Guide: 12 Tips to Improve Your Squat Now HERE.

  • Get our free weekly email - containing useful videos, articles, and training tips - HERE.

  • Follow Testify on Instagram HERE.

  • Subscribe to Testify’s YouTube channel HERE.

(Some links may be affiliate links. As an Amazon Associate, Testify earns from qualifying purchases.)


At Testify, we offer small group training, private coaching (in-person or remotely via Zoom), online coaching, and form checks. Interested in getting stronger, looking better, and having more energy?