The Testify Anchor - January 15, 2024
/THIS WEEK'S SUBMISSION
From our video Starting Strength Squat Looks HORRIFYING, Here's Why (click the title to watch):
oooBoEoNooo
These "old" people in the video - who supposedly lean their upper body too far forward - have something over many younger people: they take training seriously and they don't use their cell phones while training :-)
I would love to train with these people and in this studio.
Phil
It would be great to have you!
ARTICLES & VIDEOS

TWO Signs You're Accidentally KILLING Your Deadlift
Two deadlift mistakes: one simple cue to fix them both. Phil addresses two common deadlift errors and covers how to correct them with only one cue. Click here to watch.

How to Squat Heavy ALONE! | How to Fail a Squat Safely
Everybody needs to squat, but if you train alone, you need to be able to fail a squat safely. What to do? It's simple - we cover how to handle it. Click here to read.

Blast from the Past: Loading Plates: Numbers In or Numbers Out?
When we load plates on the bar or on the weight tree, which way should the numbers face (and why)? Hint: It's different for each one. Click here to watch.

Blast from the Past: The FWYS Principle: If You Don't Change This, Your Press Will ALWAYS Suffer
A common problem in the press is achieving the correct start position for each rep - specifically for every rep AFTER your first rep. Let's fix this fast. Click here to read.

NEW TESTIFY HOODIES ARE AVAILABLE!
Looking to train in style and comfort this winter? Get yourself a Testify hoodie - in practically any color! Get yours today and represent your favorite gym.
Click here to head to the Testify Store.
WHAT'S COMING UP
Below are a few of our upcoming events, and you can find out what else is on the calendar by heading to our events page at www.testifysc.com/events.
Women's Strength Class
6-week class, starts on February 6th
Are you interested in learning to lift correctly, getting stronger, and making great friends in the process? If so, come join Starting Strength Coach Barb Mueller and get started on your journey of strength!
Tuesdays and Thursdays from 6:00 pm to 7:30 pm
NO EXPERIENCE NEEDED! Open to all women who want to get strong!
Click here to register.
Testify Strengthlifting Challenge
April 6, 2024
The annual Testify Strengthlifting Challenge is back, and we invite you to be a part of it! This is a strengthlifting meet, which means the contested lifts will be the squat, press, and deadlift.
Click here to register or for more information.
Starting Strength Self-Sufficient Lifter Camp
May 18, 2024
Spend the day learning the Squat, Press, and Deadlift and how to self-evaluate your lifts while training in your garage or commercial gym without a coach.
Click here to register or for more information.
THIS WEEK’S CONDITIONING
Option 1
Sled
Outdoors:
10 rounds of:
Push sled 100 ft
Pull sled 100 ft (hand over hand)
Indoors:
20 rounds of:
Push sled 50 ft
Pull sled 50 ft (hand over hand)
Compare to 2023.11.13.
Option 2
Bike/row:
3 rounds of:
8 x 20 sec on/40 sec off
Rest 3 min between rounds
Score = lowest distance
Compare to 2023.10.23.
Option 3
Outdoors:
5-10 rounds:
10 sledgehammer strikes (5R, 5L)
50 yd farmer carry (25 yd down-back)
Rest 1 minute
Indoors:
5-10 rounds:
10 sledgehammer strikes (5R, 5L)
100 ft farmer carry (50 ft down-back)
Rest 1 minute
Compare to 2023.09.25.
Option 4
1. 5 yoke carries @ 30 yd (15 yd downback) – work up to heaviest carry
2. 5 rounds of 5 reps on the axle “clean and press away” – work up to heavy set of 5
Compare to 2023.09.25.
How to Squat Heavy ALONE! | How to Fail a Squat Safely
/When lifting weights, it's generally a good idea to not end up dead or - for that matter - even injured. With this in mind, let's quickly cover how to avoid getting yourself trapped under a heavy squat that you just failed.
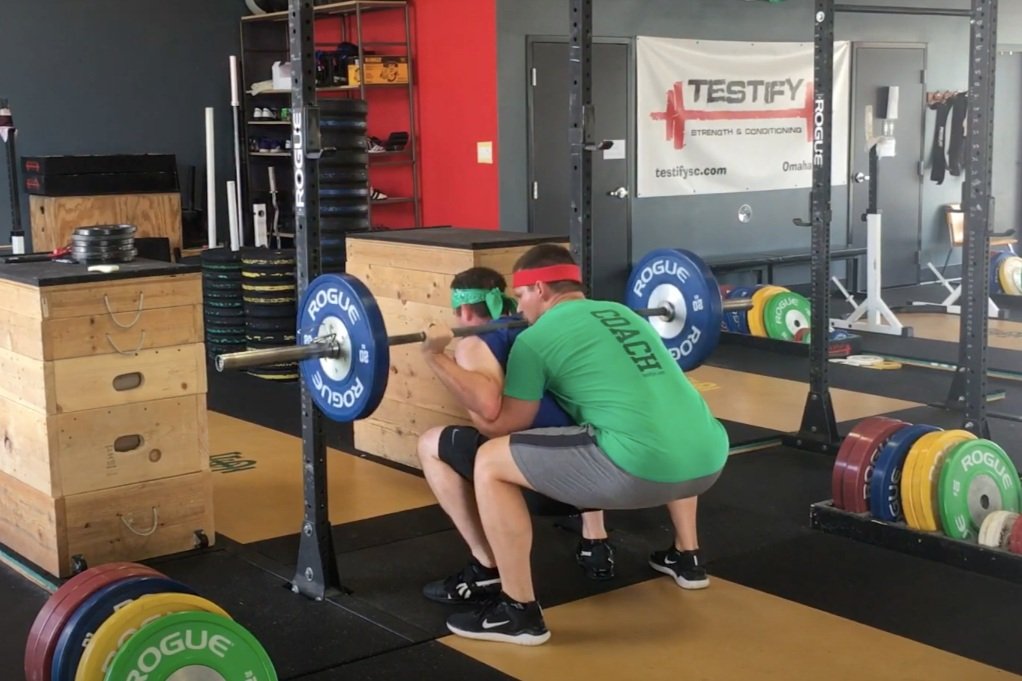
Figure 1: For so many reasons, this is stupid. don’t spot like this.
Spotters are fantastic (when possible)
Ideally, when training, you don't want to fail a rep. You try to avoid it whenever possible, but sometimes these things happen, and in the squat, the best solution is to have spotters that you trust. Specifically, get two spotters, i.e., one on each side.
Forget the whole “spotter-behind-you” thing (Figure 1). It’s stupid, the back spotter is in a terribly mechanically disadvantaged position, and it’s a good way to get both you and your spotter injured. It can, however, make for viral “YouTube-fail” videos.
The video included in this article covers how to spot the squat as well as how to squat alone, so I’d recommend watching that.
The great thing about having spotters is this: the moment you start to fail, i.e, the moment you start to go back down, the spotters immediately take the bar. You don’t have to go all the way down to the pins.

figure 2: This is much better.
If you start to fail a rep, you only descend an inch or two, and your spotters step in and support the bar (Figure 2). At this point, you and your spotters - because you stay under the bar and never abandon your spotters - lift the barbell up and put it back in the rack.
What if you train alone?
Spotters are indeed great; however, if you often train alone (and I understand that as I usually do also), you need to be able to set the safeties (AKA “pins” or “crash bars”) correctly. Whether you’re using pin/pipe safeties, spotter arms, or even strap safeties, the concept and process are both quite simple:
Set the pins low enough that they don’t cause a problem but high enough that they save you from a problem.
The process is as follows:
Figure 3: Parker helps check for adequate clearance.
Step 1: Make sure the pins are low enough
As you’re warming up with the empty bar, look to the side at the bottom of the rep (don’t do this on a regular basis, but doing this a few times with the empty bar is fine). Make sure that, when you’re at the correct depth, you’ve still got a couple inches of clearance between the bar and the pins (Figure 3). You want a couple of inches (and not just a tiny sliver of space) because you need to be able to accidentally go a bit too deep on your squat and not immediately run into the safeties. Going an inch too deep on a squat happens every now and then, and running into the safeties makes the ascent much harder, so give yourself a little room.

figure 4: Parker helps me perform a practice fail.
Step 2: Practice failing a rep
Next, either with the empty bar or with a very light weight on the bar, do a “practice fail” (Figure 4). To do this, perform a couple of normal reps, and then on the third or perhaps fourth rep, go down, start coming back up an inch or two, pretend it’s too heavy, then simply relax your upper back, squat back down, and set the bar on the pins.
At this point, you’ll perform the COS (Crawl of Shame), and crawl out - either forward or backward - from underneath the barbell.
Don’t envision this - actually practice it. You need to know you are still safe in the even of a missed rep.
WARNING: STUPIDITY
I do NOT recommend ever dumping the bar backward off your back and onto the floor. I don’t recommend it with a high bar squat, and I certainly do not recommend it with the squat we teach, which is commonly referred to as a low bar squat. It’s a silly practice, requires a decent amount of nimbleness - which you may or may not possess when grinding out a challenging, exhausting rep - and lastly, it encourages you to quit on a rep that you very well might have been able to get if you had spotters or safeties that you trusted.
You’re welcome to dump it off your back if you like - it’s your life - but be forewarned that it’s stupid. At the very least, don’t do it in my gym.
Wrapping it up
Back to sanity . . . be sure to practice a failed rep, and then adjust the safeties accordingly if they are too low. Again, the safeties need to be low enough that they don't cause a problem but high enough that they save you from a problem.
Don't wait until it gets heavy to find out whether you've set them correctly.
As always, we hope this helps you get stronger and live better.
(Some links may be affiliate links. As an Amazon Associate, Testify earns from qualifying purchases.)
If you found this helpful, you’ll love our weekly email. It’s got useful videos, articles, and training tips just like the one in this article. Sign up below, and of course, if you don’t love it, you can unsubscribe at any time.
At Testify, we offer small group training, private coaching (in-person or remotely via Zoom), online coaching, and form checks. Would you like to get quality coaching from a Starting Strength Coach?
Loading Plates: Numbers In or Numbers Out?
/When we load plates on the bar or on the weight tree, which way should the numbers face, and why does it even matter?
(A Blast from the Past video originally published on 03/26/22)
At Testify, we offer small group training, private coaching (in-person or remotely via Zoom), online coaching, and form checks. Click the button below to get quality coaching from a Starting Strength Coach and start getting stronger TODAY.
The FWYS Principle: If You Don't Change This, Your Press Will ALWAYS Suffer
/(A Blast from the Past article originally posted on 12/24/21)
A common problem with new lifters and the press is achieving the correct start position for each rep - specifically, achieving the correct start position for every rep after your first rep.
After all, the correct start position for the first rep should be accomplished by correctly gripping and unracking the bar in the first place (watch the included video that covers this), but today, we're specifically talking about getting the correct start position for the rest of your set (e.g., your 2nd rep all the way to the end of the set).

Figure 1
The key is to finish the press where you start the press, so make sure that you start with elbows slightly in front of the bar, squeezing the bar tightly and with relatively straight wrists (technically, they will be slightly in extension) as you see in Figure 1. Then, after locking out the rep overhead, simply remind yourself to lower it back to this exact same position.

Figure 2: Don’t be like this fool.
Specifically, we do not want to lower the bar back to the position you see in Figure 2, where the lifter has his elbows behind the bar and wrists in severe extension. It’s a weaker position - it’s tough to support a heavy weight in this position, and now you’ve got to spend time and energy getting back to the correct start position.
Even worse, if you don’t spend that time and energy getting back to the correct position, it’s harder to press the bar overhead from this weak position. This poor position often contributes to a forward bar path on the next rep, which can easily be the difference between a successful rep and a missed rep at challenging weights.

Figure 3
Again, the key is to finish where you start (FWYS).
If you still find that lowering the bar consistently to the correct start position is difficult, try this mental picture (Figure 3) - imagine that you are standing very close to a wall with the bar locked out overhead. While lowering the bar, picture yourself dragging your elbows down the wall while keeping your fists (and therefore the bar) away from the wall.
Remember to aim for your nose with the bar on the way down as well as on the way up. This “elbows-dragging-down-the-wall” image is a slightly exaggerated picture of what we actually want to happen (watch the included video to see this in action), but a number of our members have found this very useful.
We hope this helps you get stronger and live better!
(Some links may be affiliate links. As an Amazon Associate, Testify earns from qualifying purchases.)