Improve Your Squat in ONE Easy Step!

Want to improve your squat in one easy step? It’s ridiculously simple.

Squat with spotters.

Seriously, that’s it. Now, of course, squatting with safeties (AKA pins, crash bars, spotter arms) is just fine, and if you train on your own, that’s the only option you have. However, if you train with some other reasonably intelligent and educated lifters, get two of them to spot you.

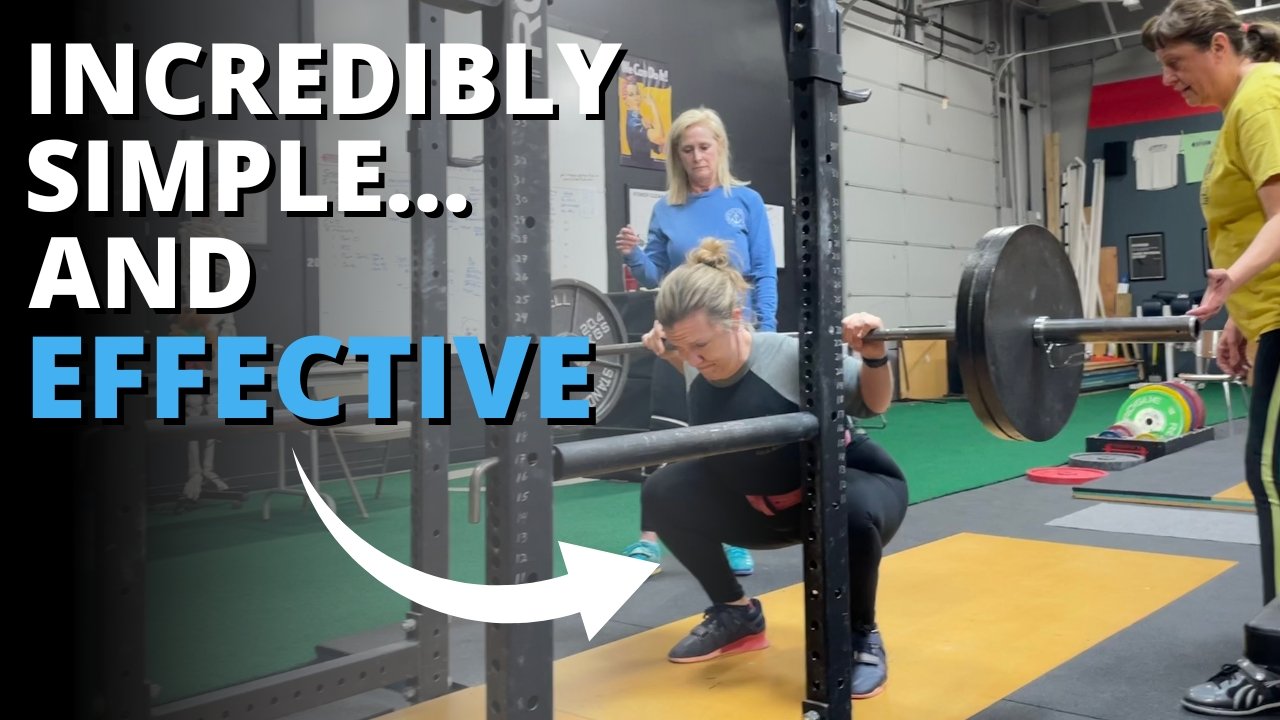
One person stands on either side of you (watch the included video for more on how to spot the squat . . . and how not to spot the squat). Do not have a single person spot you from behind because that’s stupid. It’s common, but it’s still stupid (the physics of this situation becomes rather obvious and untenable with heavy loads . . . try holding 300, 400, or 500+ lb out in front of you, and you’ll quickly agree).

You’ll squat better because the pressure of having two people right next to you will force you to do so. You’ll focus better and work harder because you don’t want to fail and make your spotters actually take the bar. You’re using peer pressure for good instead of evil. This is a very real effect, and we see it all the time.

If you’re not used to being spotted when you squat, you probably won’t like it at first, but you’ll get used to it, and in the long run, you’ll squat better for having done it. We hope this helps you get stronger and live better!

(Some links may be affiliate links. As an Amazon Associate, Testify earns from qualifying purchases.)

If you found this helpful, you’ll love our weekly email. It’s got useful videos, articles, and training tips just like the one in this article. Sign up below, and of course, if you don’t love it, you can unsubscribe at any time.


At Testify, we offer small group training, private coaching (in-person or remotely via Zoom), online coaching, and form checks. Would you like to get quality coaching from a Starting Strength Coach?

click here to start today

Week 2022.02.21

This Week’s Conditioning

Option 1
Sled
Outdoors:
10 rounds of:
Push sled 100 ft
Pull sled 100 ft (hand over hand)

Indoors:
20 rounds of:
Push sled 50 ft
Pull sled 50 ft (hand over hand)

Compare to 2021.12.20.

Option 2
Bike/row:
4 x 800m

Rest 3 minutes between each round. Score = slowest time.

Compare to 2021.11.29.

Option 3
Outdoors:
10 rounds:
25 yd yoke carry
Rest 1 minute

Indoors:
10 rounds:
30 yd yoke carry (15 yd down-back)
Rest 1 minute

Compare to 2021.11.01.

Option 4
10 x 50 ft farmer carry
Each carry is 25 ft down and 25 ft back and is for time. Rest 1 minute between carries.

Women: 97# per handle (80# of plates)
Men: 137# per handle (120# of plates)
(Note: Each handle weighs 17#.)

Compare to 2021.11.01.

How to Warm-up for Lifting Weights: Stop Using Percentages!

For new lifters, figuring out what weights to select for your warm-up sets can be a bit mind-boggling, and for this reason, a percentage-based warm-up chart provides a handy approach. With that said, as you gain experience as a lifter, you’ll be better off if you eventually stop using this approach and instead make your own warm-up weight selections. In the long run, it’ll be faster and easier.

When structuring your warm-up sets, use the three principles below, and for more demonstrations, examples, and explanations, be sure to check out the included videos.

Warm-up sets should . . .

Principle 1: Prepare you for your work sets. Because of this, the weight for each set should gradually increase in roughly equal increments. The increases don’t need to be exactly the same each time - “roughly equal” is just fine - and if you have a bigger jump, it’s better to have it near the beginning of the warm-up than near the end. 

Principle 2: Not exhaust you before you get to your work sets. Because of this, it’s wise to taper your warm-up reps, i.e., use fewer reps as the weight increases. At Testify, we usually recommend 2 sets of 5 reps with the empty barbell and then a 5-3-2-1 approach for the weighted sets (you’ll see this in the examples below). When starting out, you might not need this many warm-up sets. 

Principle 3: Be convenient whenever possible and reasonable. Warm-ups don’t usually need to be all that precise, and the further you are from your work set, the less precision is required. For example, if your work weight is 245 lb and you’re deciding between 90 lb and 95 lb, go with 95 lb since it’s much simpler to load (one 25-lb plate per side compared to two 10-lb plates and a 2.5-lb plate per side).  Additionally, there’s no need to use fractional plates in your warm-ups, and as you get stronger, you might not use 2.5 lb plates in your warm-ups either.

Below are a few good warm-up examples.

Example #1
Work weight: 105 lb
45 x 5 x 2
65 x 5 x 1
85 x 3 x 1
95 x 2 x 1
—————
105 x 5 x 3 (work sets)

Example #2
Work weight: 235 lb
45 x 5 x 2
95 x 5 x 1
135 x 3 x 1
185 x 2 x 1
215 x 1 x 1
—————
235 x 5 x 3 (work sets)

Example #3
Work weight: 385 lb
45 x 5 x 2
135 x 5 x 1
225 x 3 x 1
275 x 2 x 1
315 x 1 x 1
350 x 1 x 1 (needed another single)
—————
385 x 5 x 3 (work sets)

In the examples above, if the lifter is deadlifting, simply remove the empty bar sets (you’ll need bumper plates for any weights under 135 lb).

With practice, structuring your warm-ups becomes a very quick and easy process, and the longer you train, the more you’ll find that your first few warm-up sets don’t change very often from workout to workout, which makes things even easier.

We hope this helps you get stronger and live better!

(Some links may be affiliate links. As an Amazon Associate, Testify earns from qualifying purchases.)

If you found this helpful, you’ll love our weekly email. It’s got useful videos, articles, and training tips just like the one in this article. Sign up below, and of course, if you don’t love it, you can unsubscribe at any time.


At Testify, we offer small group training, private coaching (in-person or remotely via Zoom), online coaching, and form checks. Would you like to get quality coaching from a Starting Strength Coach?

click here to start today

Week 2022.02.14

This Week’s Conditioning

Option 1
Sled
Outdoors:
10-20 x 25 yds EMOM at a weight of your choice

Every minute, push the sled 25 yards, i.e., if pushing the sled takes 20 seconds, then you have 40 seconds to rest. Perform 10-20 rounds.

Indoors:
10-20 x 100 ft EMOM at a weight of your choice

Every minute, push the sled 100 feet, i.e., if pushing the sled takes 20 seconds, then you have 40 seconds to rest. Perform 10-20 rounds.

Compare to 2021.12.13.

Option 2
Bike/row:
4 x 3 minutes

Rest 3 minutes between each round. Score = lowest distance.

Compare to 2021.11.22.

Option 3
Outdoors:
5-10 rounds:
10 sledgehammer strikes (5R, 5L)
50 yd farmer carry (25 yd down-back)
Rest 1 minute

Indoors:
5-10 rounds:
10 sledgehammer strikes (5R, 5L)
100 ft farmer carry (50 ft down-back)
Rest 1 minute

Compare to 2021.10.25.

Option 4
10 x 50 ft yoke carry
Each carry is 25 feet down and 25 feet back and is for time. Rest 1 minute between carries.

Compare to 2021.10.25.

Diamond Grip for the Press and Bench Press

When learning to press or bench press, getting the correct grip can be tricky at first. A very common error is to take a grip that carries the bar back in the fingers (Figure 1).

Figure 1: This is no good.

Let’s fix this.

When we press or bench press, we’d like the barbell to be supported directly over the bones of the forearms, and to do this, we pronate our grip so that the bar sits on the heel of the palm. This provides for excellent force transfer between our arms and hands and the bar, whereas holding the bar back in the fingers with wrists in full extension creates a very weak and flimsy position.

Pronating your grip (Figure 2) simply means that you’re going to rotate your thumbs down toward your feet, and after that, you squeeze the bar tightly with your fingers (“crush the bar” is a good cue).

Figure 2: This . . . is much better.

With this said, new lifters sometimes screw up the pronation step, either rotating their hands the wrong way or spinning their hands on top of the bar (in the press). If this is you, take the “diamond grip” approach as shown in Figure 3:

Figure 3: The Diamond Grip approach

Step 1
Place your palms on the bar - palms will face the wall (not the floor) with thumbs below the bar and in contact with each other.

Step 2
Rotate your hands so that your index fingers are now in contact with each other (above the bar). The gap between your hands will make a diamond if you’ve done this correctly.

Step 3
Slide your hands away from each other until you reach the correct grip width - narrow for the press (about shoulder width) and about a hand-width wider than that for the bench press.

Step 4
Squeeze the bar tightly with your fingers.

Make a diamond with your hands and then slide your hands outward - it’s that simple.

We hope this helps you get stronger and live better!

(Some links may be affiliate links. As an Amazon Associate, Testify earns from qualifying purchases.)

If you found this helpful, you’ll love our weekly email. It’s got useful videos, articles, and training tips just like the one in this article. Sign up below, and of course, if you don’t love it, you can unsubscribe at any time.


At Testify, we offer small group training, private coaching (in-person or remotely via Zoom), online coaching, and form checks. Would you like to get quality coaching from a Starting Strength Coach?

click here to start today

Week 2022.02.07

This Week’s Conditioning

Option 1
Sled
Outdoors:
10 rounds of:
Push sled 100 ft
Pull sled 100 ft (hand over hand)

Indoors:
20 rounds of:
Push sled 50 ft
Pull sled 50 ft (hand over hand)

Compare to 2021.12.06.

Option 2
Bike/row:
5 min on
4 min off
4 min on
3 min off
3 min on
2 min off
2 min on
1 min off
1 min on

Record distance for each interval and add for total distance.

Compare to 2021.11.15.

Option 3
5-10 rounds of:
30 sec ME tire flips
30 sec rest

Compare to 2021.10.18.

Option 4
For time:
500m row
5 x 80m sled push (200 ft if indoors)
500m row

Rest 1 minute after the first row and after each sled push.

Compare to 2021.10.18.