Squat Tip: Hips Back AND Chest Down

Here’s a quick squat tip: When you initiate your squat by reaching back with your hips (i.e., your butt), you need to also point your chest at the floor (i.e., lean over). The converse is also true - when you point your chest at the floor, you need to reach back with your hips. 

Note that Tyler’s hips are traveling back while he points his chest at the floor.

These two movements - hips back and chest down - go hand-in-hand with each other, and if you briefly think about it, it will seem rather obvious why this is so. On one hand, if you reach back with your hips while trying to maintain an upright torso, you’ll fall over backward, which is rather unfortunate in any circumstance and especially when squatting with a barbell on your back. On the other hand, if you lean over (i.e., point your chest at the floor) without reaching back with your hips, you’ll fall over forward. Again - preposterous.

So remember, when you initiate your squat, if you’ve got a cue like one of the following running through your head . . .

  • Hips back

  • Butt back

  • Reach backward

  • Sit back

. . . it can be useful to also tell yourself one of the following cues . . .

  • Chest down

  • Lean over

  • Point your chest at the floor 

This will help your balance, and it will also help you get into a position where you can effectively drive your hips out of the bottom of the squat.

We hope this helps you get stronger and live better!

(Some links may be affiliate links. As an Amazon Associate, Testify earns from qualifying purchases.)

If you found this helpful, you’ll love our weekly email. It’s got useful videos, articles, and training tips just like the one in this article. Sign up below, and of course, if you don’t love it, you can unsubscribe at any time.


At Testify, we offer small group training, private coaching (in-person or remotely via Zoom), online coaching, and form checks. Would you like to get quality coaching from a Starting Strength Coach?

click here to start today

Week 2022.01.10

This Week’s Conditioning

Option 1
Sled
Outdoors:
10-20 x 25 yds EMOM at a weight of your choice

Every minute, push the sled 25 yards, i.e., if pushing the sled takes 20 seconds, then you have 40 seconds to rest. Perform 10-20 rounds.

Indoors:
10-20 x 100 ft EMOM at a weight of your choice

Every minute, push the sled 100 feet, i.e., if pushing the sled takes 20 seconds, then you have 40 seconds to rest. Perform 10-20 rounds.

Compare to 2021.11.08.

Option 2
Bike/row:
5 min on
4 min off
4 min on
3 min off
3 min on
2 min off
2 min on
1 min off
1 min on

Record distance for each interval and add for total distance.

Compare to 2021.10.18.

Option 3
Outdoors:
8 rounds:
4 tire flips
50 yd sled push (25 yd down-back)
Rest 1 minute

Indoors:
8 rounds:
4 tire flips
100 ft sled push (50 ft down-back)
Rest 1 minute

Compare to 2021.09.20.

Option 4
5 rounds:
4 tire flips
8 sledgehammer strikes
6 pull-ups
10 push-ups

Pull-ups and push-ups can be modified – talk to the coaches for options.

Compare to 2021.09.20.

Deadlift Tip: Quit Bending Your Arms!

Here’s a quick deadlift tip: Don’t Bend Your Arms.

Ever.

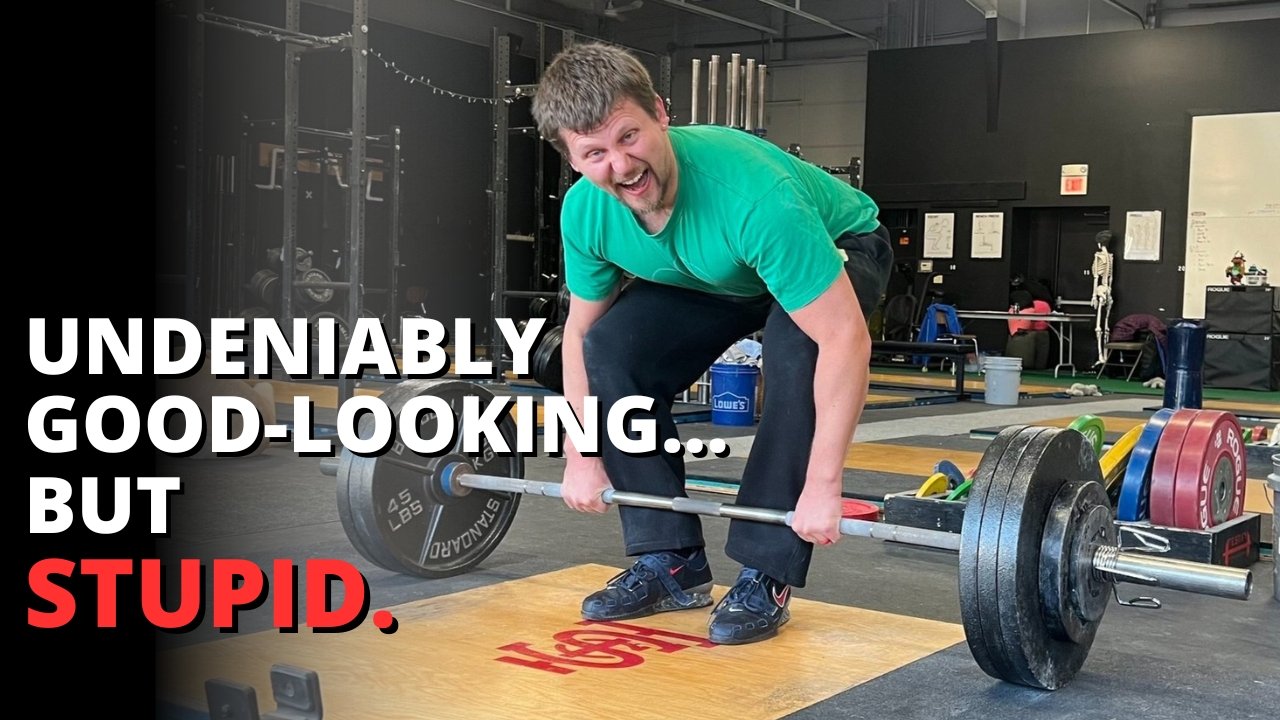
don’t be like this fool when setting up to pull.

This will seem rather obvious to many people - after all, who would voluntarily try to pull a heavy weight off the floor with bent arms? Nonetheless, this problem shows up in the setup for some lifters, and interestingly enough, it will occasionally rear its ugly head on the pull itself.

If you have this issue in your setup, remember that, when you bend your knees slightly to touch your shins to the bar, the knees go out (i.e., sideways) slightly and touch the inside of your elbows. Don’t shove the knees out so hard that you end up causing your elbows to bend. This is what we like to refer to as . . . ridiculous.

This . . . is much better.

Whether you’re setting up or pulling, remember - keep your arms straight. Bent arms are highly inefficient when pulling heavy weights off the floor . . . and they just look so silly. Don’t be silly.

We hope this helps you get stronger and live better!

(Some links may be affiliate links. As an Amazon Associate, Testify earns from qualifying purchases.)
If you found this helpful, you’ll love our weekly email. It’s got useful videos, articles, and training tips just like the one in this article. Sign up below, and of course, if you don’t love it, you can unsubscribe at any time.


At Testify, we offer small group training, private coaching (in-person or remotely via Zoom), online coaching, and form checks. Would you like to get quality coaching from a Starting Strength Coach?

click here to start today

Week 2022.01.03

This Week’s Conditioning

Option 1
Sled
Outdoors:
10 rounds of:
Push sled 100 ft
Pull sled 100 ft (hand over hand)

Indoors:
20 rounds of:
Push sled 50 ft
Pull sled 50 ft (hand over hand)

Compare to 2021.11.01.

Option 2
5 rounds:
10 cal bike
1 min rest
4 sandbag-over-bars
1 min rest

Set the yoke crossmember at 35/33, and the weight is 150#/75#.

Compare to 2021.10.11.

Option 3
5-10 rounds:
50 ft yoke carry
50 ft yoke push
100 ft sandbag carry and S.O.B. (sandbag-over-bar)

Perform 1 round every 2-3 minutes.

Compare to 2021.09.13.

Option 4
Row/Tire 10 min ladder:
2 cal row
2 tire flips
4 cal row
4 tire flips
6 cal row
6 tire flips

Climb the ladder as high as possible in 10 minutes.

Compare to 2021.09.13.

Lifting Shoes: What and Why

What are lifting shoes, and why should you use them? We’re going to cover the 3 features of a lifting shoe, why lifting shoes are beneficial, and we’ll also touch on what not to buy.

Feature #1: Sole
The first and most important feature of a lifting shoe is its rigid, non-compressible sole. This helps with force transfer, which is rather important when lifting heavy weights.

If you're going to squat, press, or clean-and-jerk in running shoes, you’ll find that doing so is similar to trying to do those while standing on a pillow - comfy on the feet, of course, but also rather silly. We would like to have a very rigid surface on which to lift so that we have efficient force transfer between us and the floor. A lifting shoe provides this. A regular shoe does not. 

Feature #2: Metatarsal Strap(s)
The second feature of a lifting shoe is either one or two metatarsal straps. These straps provide lateral support as well as arch support, and the presence of both types of support provide yet another reason why a regular shoe is not as good of an option as an actual lifting shoe.

To a certain extent, the metatarsal strap(s) will also prevent the foot from sliding forward, which is a nice feature to have when performing something like a split jerk.

Feature #3: Heel
The third feature you’ll notice on a lifting shoe is the slightly raised heel. Typically, a heel height somewhere between ½ inch and ¾ inch will work nicely. Some Olympic lifters may prefer a slightly taller heel, but this range serves most people quite well. The heel gets a little more quad involvement in the lift and also makes depth in the squat easier to achieve.

These 3 features will give you an idea of what to look for when you’re shopping for lifting shoes. A number of manufacturers make quality lifting shoes - Nike, Do-Win, Inov-8, and Adidas are just a few of the more well-known brands. Below are some of the shoe recommendations and links we usually send to new members as a starting point for shopping:

If you’re going to lift, wear lifting shoes. Runners wear running shoes, basketball players wear basketball shoes, and lifters wear lifting shoes. Once you’ve trained in lifting shoes, trying to lift in regular shoes (tennis shoes, running shoes, etc.) will feel like lifting while standing on a pillow.

Finally, a note on lifting in Chuck Taylors. Just . . . don’t. Chucks are the lifting shoe for people who started to think about lifting shoes but never completed the thought. They don’t have a rigid sole, they don’t provide any arch or lateral support, and they don’t have an elevated heel, so they fail all of the criteria listed above. For those who prefer to lift in a non-heeled shoe, there are options out there that provide a far more rigid sole, and for those who want to deadlift in an extremely low-profile (i.e., close to the ground) shoe, there are options out there that are far more low-profile.

Can you lift in Chucks? Of course you can. If LeBron James wore running shoes, he could still play basketball, and he would certainly still beat me in a game of 1-on-1 . . . but he chooses to play in basketball shoes. I recommend that you choose to lift in lifting shoes.

As always, we hope this helps you get stronger and live better.

(Some links may be affiliate links. As an Amazon Associate, Testify earns from qualifying purchases.)

If you found this helpful, you’ll love our weekly email. It’s got useful videos, articles, and training tips just like the one in this article. Sign up below, and of course, if you don’t love it, you can unsubscribe at any time.


At Testify, we offer small group training, private coaching (in-person or remotely via Zoom), online coaching, and form checks. Would you like to get quality coaching from a Starting Strength Coach?

click here to start today

Week 2021.12.27 - New Year's Hours

Reminder: Below are the hours for this week (you can also find these on our Location & Hours page). Any days not listed retain their normal hours.

New Year’s Week
Thursday, 12/30/21: Regular hours
Friday, 12/31/21: Closed
Saturday, 01/01/22: Closed

This Week’s Conditioning

Option 1
Sled Pyramid – 4, 5, or 6 tiers
Go up and down a 4, 5, or 6 tier “sled pyramid” – rest as needed. The distance for each round is 80 m indoors (a down-back on the 40m course) or 200 ft outdoors (2 down-backs on the 50 ft course). Rest as needed.

For example, Bob does the following (4 tiers):
Round 1: Empty sled
Round 2: 25#
Round 3: 50#
Round 4: 75#
Round 5: 50#
Round 6: 25#
Round 7: Empty sled

Compare to 2021.10.25.

Option 2
Bike/Row for 9 rounds:
1 min on
1 min off

Record distance for each round.

Compare to 2021.10.04.

Option 3
Outdoors:
5-10 rounds:
10 sledgehammer strikes (5R, 5L)
50 yd farmer carry (25 yd down-back)
Rest 1 minute

Indoors:
5-10 rounds:
10 sledgehammer strikes (5R, 5L)
100 ft farmer carry (50 ft down-back)

Rest 1 minute

Compare to 2021.09.06.

Option 4
5-8 rounds:
50 ft sled push
50 ft sled pull (hand over hand)
Row 1 minute
Rest 1 minute

This can also be done in a group of three where the sledder determines how long the other two people row and rest.

Compare to 2021.09.06.