Week 2021.09.13

This Week’s Conditioning

Option 1
“Prowler Base”
1. Load up a manageable weight.
2. Sprint 40m at 85% intensity.
3. Rest until breathing and heart rate slow down. (45 sec – 2 min)
4. Repeat 5-15 times.

Courtesy of “Death by Prowler” (on Starting Strength).

Compare to 2021.07.12.

Option 2
Bike/row:
8 x 30 sec on/2:00 off

Score = least distance covered in any 30 second interval

Compare to 2021.06.21.

Option 3
5-10 rounds:
50 ft yoke carry
50 ft yoke push
100 ft sandbag carry and S.O.B. (sandbag-over-bar)

Perform 1 round every 2-3 minutes.

Compare to 2021.05.24.

Option 4
Row/Tire 10 min ladder:
2 cal row
2 tire flips
4 cal row
4 tire flips
6 cal row
6 tire flips

Climb the ladder as high as possible in 10 minutes.

Compare to 2021.05.24.

To Stand Up . . . Stay Leaned Over!

Loren.JPG

I had a conversation this week with one of our members after his last set of squats that went something like this:

  • Me: “That last rep was spot on.”

  • Member: “Yeah, that rep was so much easier since I stayed leaned over longer on the way up. It’s so strange how that works, and I sometimes just forget it.”

  • Me: “Yep, it can be counterintuitive, but you have to stay leaned over to make standing up easier.”

This conversation illustrates a common problem with newer and even experienced lifters, which is that of trying to raise the chest prematurely when coming up out of the hole on the squat. In other words, they try to make their back angle more vertical right away on the ascent. We sometimes refer to this problem as “not staying in your hips,” and today, we’re going to solve this issue.

Remember, during the ascent of the squat, your back angle will eventually become more vertical - after all, we finish the squat in an upright (i.e., vertical) position. However, if you try to make it vertical too soon, it makes for a slower, more difficult squat. To avoid this problem, we cue people to “drive the hips” or “stay in your hips” as they come up out of the hole (very often, this cue is reduced to simply “Hips!”).

With that being said, if these cues don’t work for you and you still find yourself raising your chest too soon on your ascent, try one of the following cues as you drive up out of the bottom of the squat:

  1. “Stay in your lean.” 

  2. “Stay leaned over.”

With these cues, you are reminding yourself to preserve your back angle - to preserve that leaned-over position - for longer than you think on the way up. You’re not telling yourself to become more leaned over - you’re just trying to keep your back angle relatively constant as you start to ascend. 

Don’t worry - you will eventually raise your chest as you continue to ascend, and it will happen without you thinking about it.  We just don’t want it to happen immediately, and these cues may just help you accomplish this.

We hope this helps you get stronger and live better!

Week 2021.09.06 (Closed on Labor Day)

Reminder: We are closed on Monday, 09/06/21, in observance of Labor Day.

This Week’s Conditioning

Option 1
Sled
Outdoors:
10-20 x 25 yds EMOM at a weight of your choice

Every minute, push the sled 25 yards, i.e., if pushing the sled takes 20 seconds, then you have 40 seconds to rest. Perform 10-20 rounds.

Indoors:
10-20 x 100 ft EMOM at a weight of your choice

Every minute, push the sled 100 feet, i.e., if pushing the sled takes 20 seconds, then you have 40 seconds to rest. Perform 10-20 rounds.

Compare to 2021.07.05.

Option 2
Bike/row:
4 x 800m

Rest 3 minutes between each round. Score = slowest time.

Compare to 2021.06.14.

Option 3
Outdoors:
5-10 rounds:
10 sledgehammer strikes (5R, 5L)
50 yd farmer carry (25 yd down-back)
Rest 1 minute

Indoors:
5-10 rounds:
10 sledgehammer strikes (5R, 5L)
100 ft farmer carry (50 ft down-back)

Rest 1 minute

Compare to 2021.05.17.

Option 4
5-8 rounds:
50 ft sled push
50 ft sled pull (hand over hand)
Row 1 minute
Rest 1 minute

This can also be done in a group of three where the sledder determines how long the other two people row and rest.

Compare to 2021.05.17.

Deadlift Fix: Big Toe Down!

This . . . is no good.

This . . . is no good.

If you find yourself rocking back on your heels or standing mostly on the outside edges of your feet while deadlifting, let’s fix this.

We want to stay balanced over the middle of the foot when lifting - both front-to-back (i.e., heel-to-toe) and side-to-side (i.e., from the inside edge of your foot to the outside of your foot). If you notice that you tend to get back on your heels or that you pull while standing on the outside “knife-edge” of your feet, take the simplest approach first - simply cue yourself, “Midfoot.” You are merely reminding yourself to stand with your balance over the middle of your foot.

This . . . is much better.

This . . . is much better.

However, if that doesn’t work, try this cue: “Big toe down.” With this cue, you remind yourself to keep your big toe on the ground; it gives you a very small anatomical point to focus on - which tends to simplify things when we’re dealing with heavy loads - and it can help solve both of the issues we’re discussing in this article.

For a video on this topic, see below. We hope this helps you get stronger and live better!

Week 2021.08.30

Announcement: We will be closed on Monday, 09/06/21, in observance of Labor Day.

This Week’s Conditioning

Option 1
Sled
Outdoors:
10 rounds of:
Push sled 100 ft
Pull sled 100 ft (hand over hand)

Indoors:
20 rounds of:
Push sled 50 ft
Pull sled 50 ft (hand over hand)

Compare to 2021.06.28.

Option 2
Bike/row:
4 x 3 minutes

Rest 3 minutes between each round. Score = lowest distance.

Compare to 2021.06.07.

Option 3
5-10 rounds of:
30 sec ME tire flips
30 sec rest

Compare to 2021.05.10.

Option 4
1. 5 yoke carries @ 30 yd (15 yd downback) – work up to heaviest carry
2. 5 rounds of 5 reps on the axle “clean and press away” – work up to heavy set of 5

Compare to 2021.05.10.

Barbell Rings - What Are These Things For?!

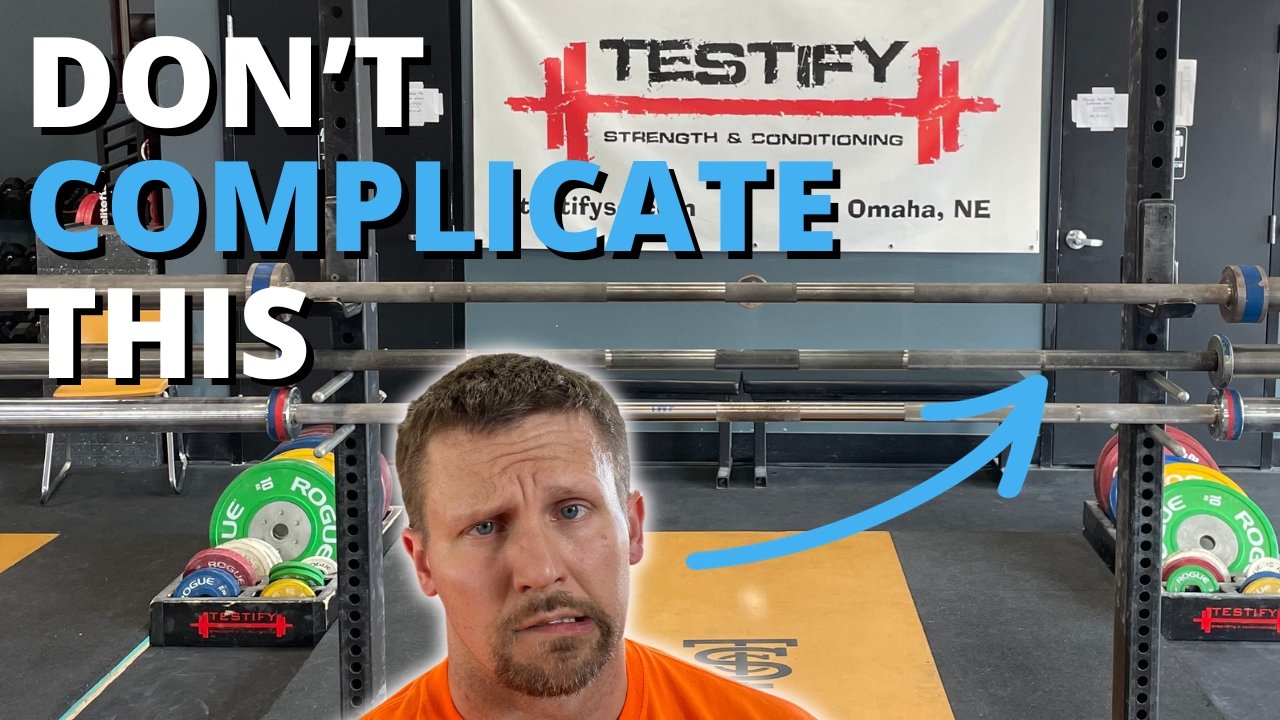
Every barbell has one or two pairs of rings - also known as score marks or knurl marks. Today, we’re going to talk about the two types of rings, the purpose of the rings, and how they might pose a problem for a new or inexperienced lifter.

For further explanation and demonstration of the topics covered in this article, be sure to check out any of the included videos.

From top to bottom - barbells with (A) power rings only, (B) weightlifting and powerlifting rings, and (C) weightlifting rings only

From top to bottom - barbells with (A) power rings only, (B) weightlifting and powerlifting rings, and (C) weightlifting rings only

The 2 Types of Rings
Using a dual-ringed bar (i.e., a bar with both sets of rings) for reference, the inner rings are known as the powerlifting rings or simply the power rings, and these marks are 81 cm apart (approximately 32 in). The outer rings are known as the weightlifting rings or the olympic rings, and these marks are 91 cm apart (approximately 36 in).

Purpose
Both sets of rings are used for reference points when you take your grip on the bar. In the sport of powerlifting, the power rings on a dedicated powerlifting barbell (or “power bar”) represent the maximum legal grip width for the bench press (i.e., at the widest legal grip, the index fingers still need to be in contact with the rings). In lifts other than the bench press (e.g., the squat) the rings still serve as a reference point upon which to base your grip.

In the sport of weightlifting - i.e., the snatch and clean-and-jerk - due to the wider grip widths used in the clean, the jerk, and specifically the snatch, it is useful to have a wider set of rings for reference, and thus, the weightlifting rings are set a bit wider than the power rings.

The Problem
A potential problem arises when a lifter switches from one barbell to a different barbell. Suppose, for example, that Jack is accustomed to training on a bar that only has one set of rings, and then he travels somewhere and ends up using a dual-ringed bar. Suddenly, Jack’s not sure which set he should be using for his reference point for his grip. 

Conversely, let’s say Jill has been training with a dual-ringed bar, and then she goes to her first competition, and the competition bar only has one set of rings. As Jill steps onto the competition platform, she isn’t sure whether she’s looking at the power rings or the weightlifting rings.

The solution here is pretty simple - know your equipment. If you’re not sure which rings you’ve been using, you can easily figure it out. If it’s a dual-ringed bar, you hopefully already know whether you’ve been using the inner set or outer set, and if it's a single-ringed bar, break out your tape measure and check the distance between the rings (32 inches = powerlifting rings and 36 inches = weightlifting rings).

If you have to go train or compete on a different bar, know the following points:

  • At a powerlifting meet, you’ll either encounter a power bar (i.e., a bar with power rings) or a bar with both sets of rings (less common at a meet).

  • At a weightlifting meet, you’ll either encounter a weightlifting bar (i.e., a bar with weightlifting rings) or a bar with both sets of rings (again, less common at a meet).

  • In general training, if you encounter a single-ringed bar, you’re probably - probably - looking at the power rings as these bars are far more common than dedicated weightlifting bars.

  • While the above points are useful, your best bet is to still measure.

Knowing these facts, you can keep your technique reproducible and therefore consistent wherever you go.

As always, we hope this helps you get stronger and live better.

-Phil

PS: Whenever you want even more Testify in your life, here are some free resources:

  • Follow Testify on Instagram HERE.

  • Subscribe to Testify’s YouTube channel HERE.

  • Book a free intro and strategy session with us HERE.

  • Pick up a free copy of Testify’s Squat Guide: 12 Tips to Improve Your Squat Now HERE.

  • Get our free weekly email - containing useful videos, articles, and training tips - HERE.

(Some links may be affiliate links. As an Amazon Associate, Testify earns from qualifying purchases.)


At Testify, we offer small group training, private coaching (in-person or remotely via Zoom), online coaching, and form checks. Interested in getting stronger, looking better, and having more energy?

book a free intro