Week 2021.08.02

This Week’s Conditioning

Option 1
Sled
Outdoors:
10 rounds of:
Push sled 100 ft
Pull sled 100 ft (hand over hand)

Indoors:
20 rounds of:
Push sled 50 ft
Pull sled 50 ft (hand over hand)

Compare to 2021.05.31.

Option 2
Bike/row:
4 x 3 minutes

Rest 3 minutes between each round. Score = lowest distance.

Compare to 2021.05.10.

Option 3
Outdoors:
5-10 rounds:
10 sledgehammer strikes (5R, 5L)
50 yd farmer carry (25 yd down-back)
Rest 1 minute

Indoors:
5-10 rounds:
10 sledgehammer strikes (5R, 5L)
100 ft farmer carry (50 ft down-back)
Rest 1 minute

Compare to 2021.04.12.

Option 4
1. 5 yoke carries @ 30 yd (15 yd downback) – work up to heaviest carry
2. 5 rounds of 5 reps on the axle “clean and press away” – work up to heavy set of 5

Compare to 2021.04.05.

Convert Kilograms to Pounds the Easy Way!

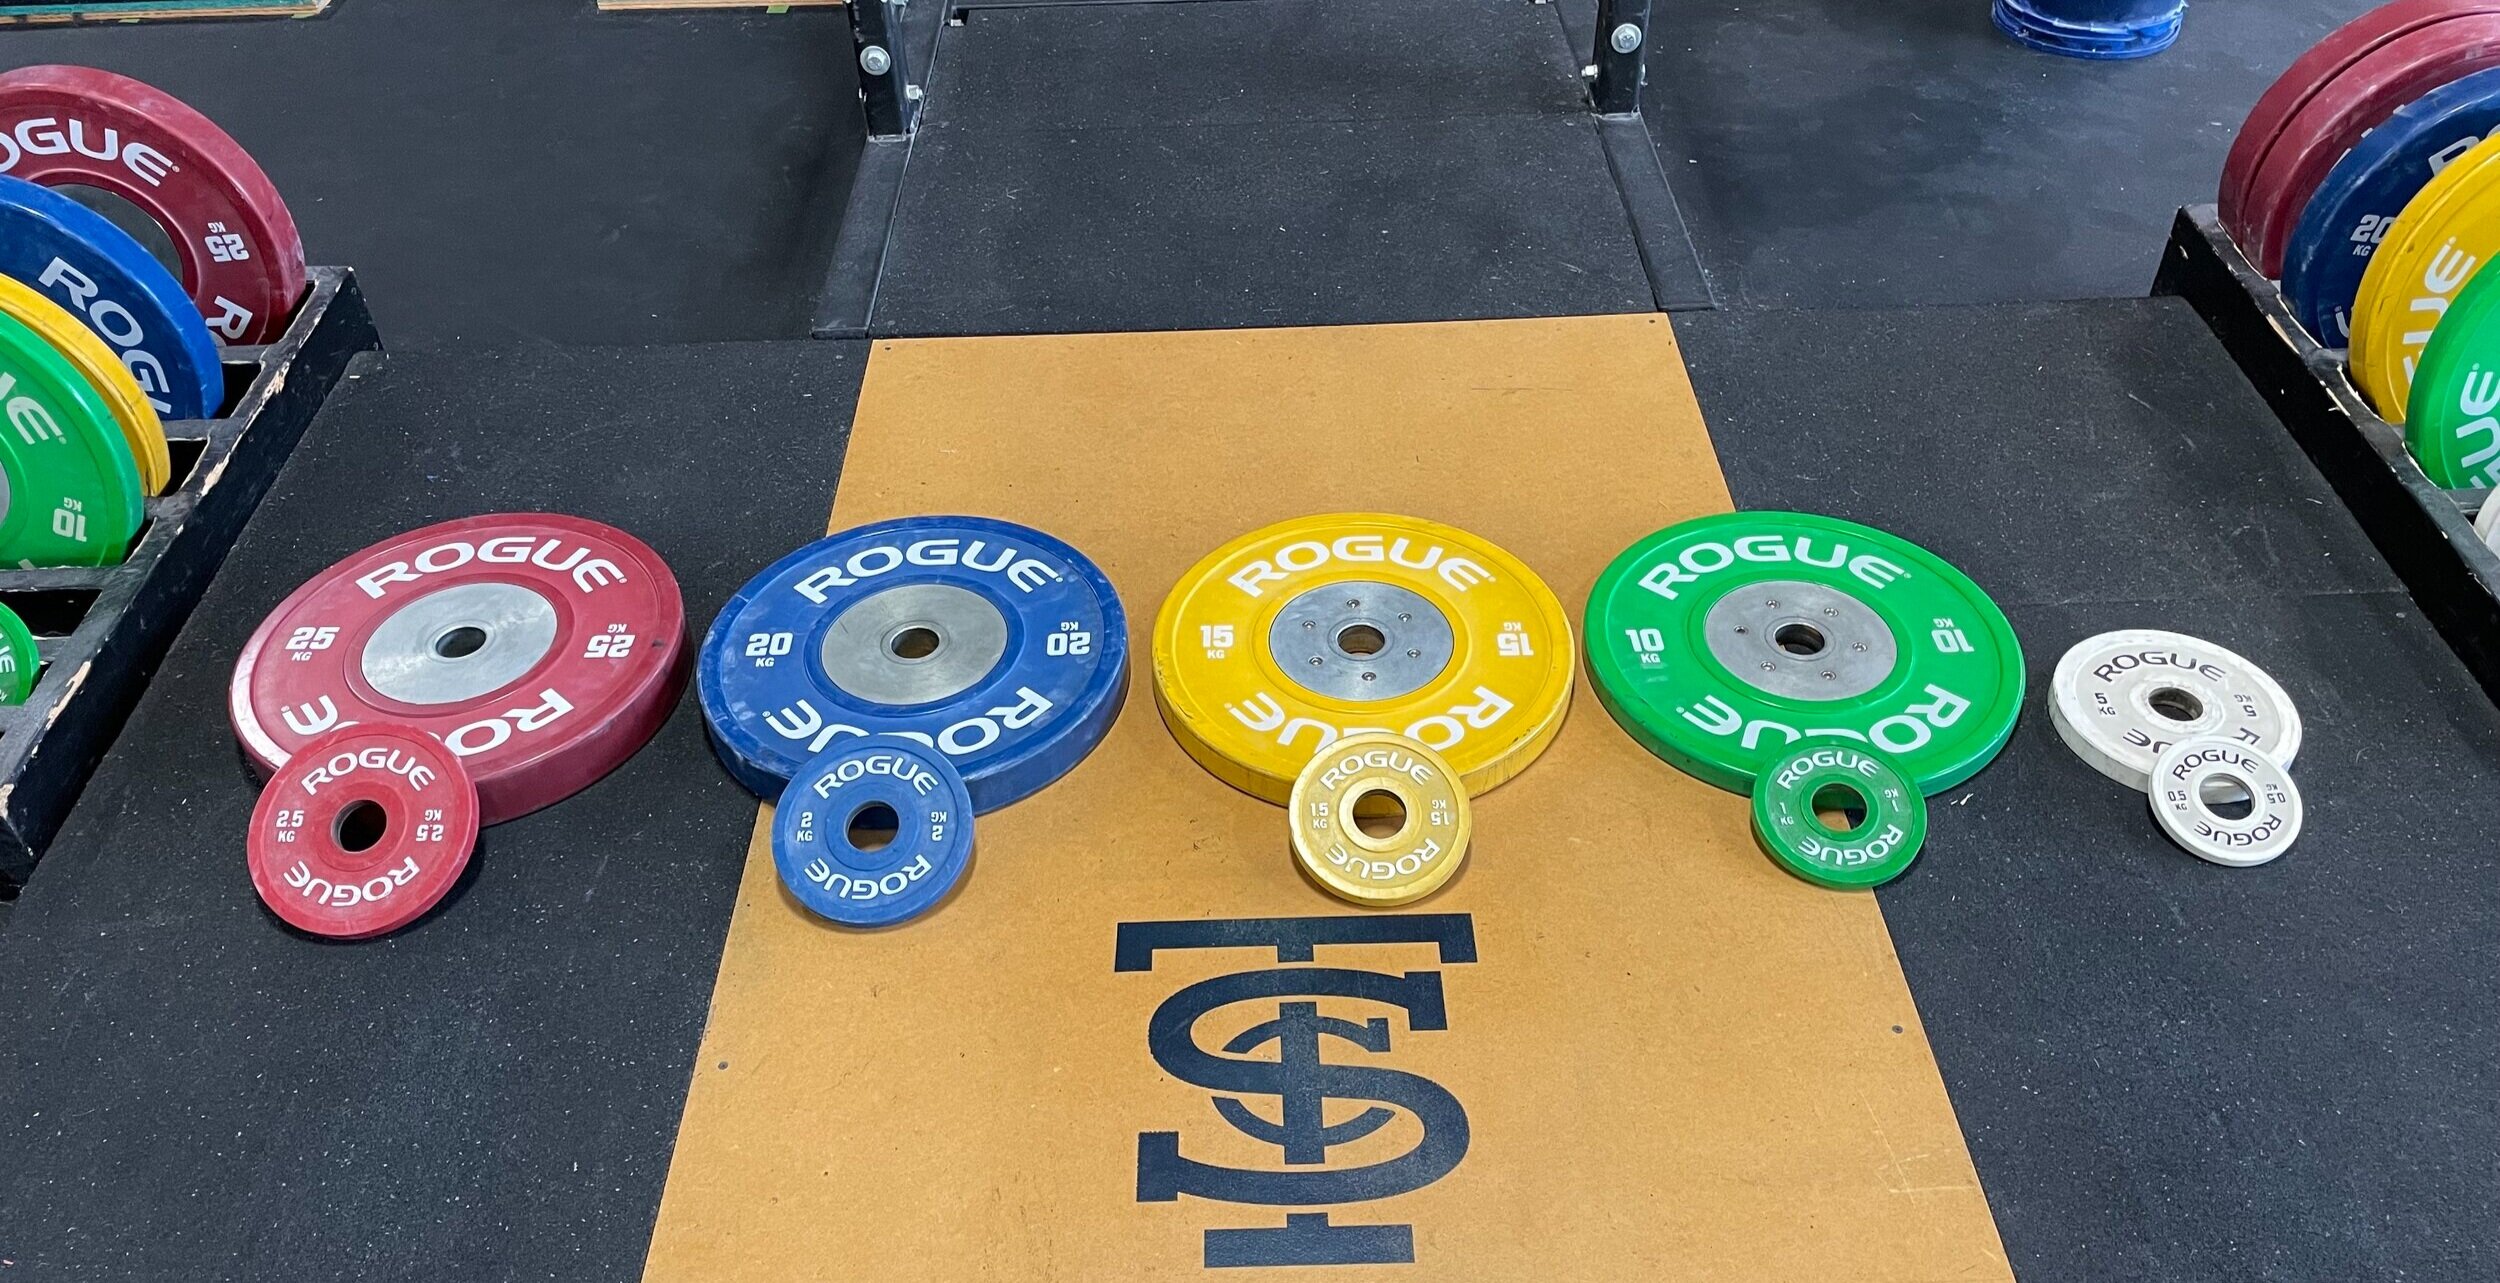
As a lifter, you may occasionally find it necessary to do some mental math and convert from kilograms to pounds. The common recommendation is to take the number of kilograms, multiply that number by 2.2, and you’ll have your answer (the conversion factor is actually 2.2046226 . . ., but let’s not get carried away). If you’ve been doing this . . . stop. Stop it right now.

Do this instead:

Plates1.jpg
  1. Take the number of kilograms and double it.

  2. Find 10% of your result (i.e., move the decimal point one place to the left).

  3. Add the two numbers from step 1 and step 2 together.

  4. Amaze your friends with your lightning-fast mental math.

This method is equivalent to multiplying by 2.2, but it’s easier to do in your head than trying to multiply by 2.2.

Let’s try this out with 90 kg: 

  1. 90 x 2 = 180

  2. 10% of 180 = 18 (remember - you’re just moving the decimal point)

  3. 180 + 18 = 198

Thus, 90 kg = 198 lbs.

Here’s a slightly more challenging example with 105 kg:

  1. 105 x 2 = 210

  2. 10% of 210 = 21

  3. 210 + 21 = 231

Thus, 105 kg = 231 lbs.

You’ll note that both 90 kg and 105 kg are multiples of 5, which makes the process fairly straightforward. If you have a weight that isn’t a multiple of 5, you can still use this method, or you can simply use the nearest multiple of 5 and make a small adjustment after the fact (using the knowledge that 1 kg = 2.2 lbs). Let’s try this with 36 kg. Since 36 is close to 35, we’ll use 35 as our “base number”:

  1. 35 x 2 = 70

  2. 10% of 70 = 7

  3. 70 + 7 = 77

  4. Since 36 kg is 1 kg larger than 35 kg, and 1 kg is just a little over 2 lbs, we can add 2 lbs to 77 lbs to get 79 lbs.

Thus, 36 kg is equal to just a bit over 79 lbs (79.366 . . . if you want to compare our approximate answer with the actual value).

With practice, this method will be faster than getting out your phone and using its calculator or asking Siri. It becomes even quicker because you’ll naturally (and almost accidentally) start to memorize the multiples of 5 (i.e., 5 kg = 11 lbs, 10 kg = 22 lbs, 15 kg = 33 lbs, etc.). 

Now you know, and as a famous action figure once said, knowing is half the battle.

(Some links may be affiliate links. As an Amazon Associate, Testify earns from qualifying purchases.)

If you found this helpful, you’ll love our weekly email. It’s got useful videos, articles, and training tips just like the one in this article. Sign up below, and of course, if you don’t love it, you can unsubscribe at any time.


At Testify, we offer small group training, private coaching (in-person or remotely via Zoom), online coaching, and form checks. Would you like to get quality coaching from a Starting Strength Coach?

click here to start today

Week 2021.07.26

This Week’s Conditioning

Option 1
Sled Pyramid – 4, 5, or 6 tiers
Go up and down a 4, 5, or 6 tier “sled pyramid” – rest as needed. The distance for each round is 80 m indoors (a down-back on the 40m course) or 200 ft outdoors (2 down-backs on the 50 ft course). Rest as needed.

For example, Bob does the following (4 tiers):
Round 1: Empty sled
Round 2: 25#
Round 3: 50#
Round 4: 75#
Round 5: 50#
Round 6: 25#
Round 7: Empty sled

Compare to 2021.05.24.

Option 2
Bike/row:
5 min on
4 min off
4 min on
3 min off
3 min on
2 min off
2 min on
1 min off
1 min on

Record distance for each interval and add for total distance.

Compare to 2021.05.03.

Option 3
5-10 rounds of:
30 sec ME tire flips
30 sec rest

Compare to 2021.04.05.

Option 4
Sandbag-over-bars
Set yoke at #33 for women or #35 for men.
1. 1 minute AMRAP
2. 5 rounds of 2 reps every 2 minutes (speed!)
3. 1 minute AMRAP

Weights
Female under 40 years
140 lbs and under: 75 lbs
140.1 lbs – 185 lbs: 100 lbs
185.1 lbs and over: 150 lbs

Female 40 years and over
140 lbs and under: 50 lbs
185 lbs and under: 75 lbs
185.1 lbs and over: 100 lbs

Male under 40 years
185 lbs and under: 150 lbs
185.1 lbs – 235 lbs: 200 lbs
235.1 lbs and over: 250 lbs

Male 40 years and over
185 lbs and under: 100 lbs
185.1 lbs – 235 lbs: 150 lbs
235.1 lbs and over: 200 lbs

Compare to 2021.03.29.

Lifting Notation: Reps are Always Second

Lifting notation.JPG

(A Blast from the Past article originally posted on 11/20/18)

You train - you don't exercise. And because you train, you keep a training journal. You record your warm-ups and your work sets, but one thing that keeps tripping you up is the notation. You can never remember which comes first . . . sets? Reps? Weights?

Let's talk a bit about this. Generally, there are two methods of notating your training: "sets x reps" and "weight x reps x sets." Thus, if your program calls for you to squat 3 sets of 5 reps, you'll probably see "3 x 5" in your program, and when you record your work sets in your journal, you'll write "165 x 5 x 3" (if you squatted 165 lbs, for example).

You'll notice that the order of "reps" vs "sets" gets reversed in the two methods, and this is what throws people off. With that in mind, allow me to suggest a rule that might help you keep things straight: Reps are always second.

For example, if you see "4 x 6," you'll know that it means 4 sets of 6 reps since 6 is the second number, and reps are always second. Likewise, if you write "145 x 6 x 4" for your squat workout, you're indicating that you squatted 145 for 4 sets of 6 reps since - again - 6 is the second number, and . . . reps are always second. In this case, you call on your grade school skills and use context clues to determine that 145 lbs must be the weight and 4 must be the number of sets . . . since squatting 4 lbs for 145 sets is just plain ridiculous.

Hope this helps!

Week 2021.07.19

This Week’s Conditioning

Option 1
”Prowler Base+1”
1. Load up a manageable weight.
2. Sprint 40m at 85% intensity.
3. Rest 30 sec.
4. Repeat 5-15 times.

Courtesy of “Death by Prowler” (on Starting Strength).

Compare to 2021.05.17.

Option 2
5 rounds:
10 cal bike
1 min rest
4 sandbag-over-bars
1 min rest

Set the yoke crossmember at 35/33, and the weight is 150#/75#.

Compare to 2021.04.26.

Option 3
Outdoors:
5-10 rounds:
10 sledgehammer strikes (5R, 5L)
50 yd farmer carry (25 yd down-back)
Rest 1 minute

Indoors:
5-10 rounds:
10 sledgehammer strikes (5R, 5L)
100 ft farmer carry (50 ft down-back)
Rest 1 minute

Compare to 2021.03.29.

Option 4
1. 5 yoke carries @ 30 yd (15 yd downback) – work up to heaviest carry
2. 5 rounds of 5 reps on the axle “clean and press away” – work up to heavy set of 5

Compare to 2021.03.22.

Knee Sleeves: What, Why, Where, and When!

Knee sleeve 2.JPG

What on earth are knee sleeves, and why might you want to wear them? Let’s chat.

What is a knee sleeve?

A knee sleeve is a sleeve . . . that goes on your knee. They are generally made of neoprene, and they should fit quite snugly. A reasonable approach is to make sure that they are snug, but not so snug that you need someone else to help you put them on. If they’re so tight that you need to take them off between sets, I’d recommend something a little less snug.

Why might you want knee sleeves?

The main reason is if you have the highly specific medical condition known as “cranky knees.” Now, if you have achy knees when you squat (and we’re generally talking about the squat here), there may be some technical considerations to examine as well as some programming considerations, and your coach can help you with that. Nonetheless, to put it simply, knee sleeves simply help your knees feel better. They provide some warmth and some compression, and without getting into the weeds here, both of those factors generally make your knees more comfortable. It’s a nice, warm hug for your knees. One of our coaches, Mike, once accused me years ago of holding out on him because I evidently hadn’t suggested knee sleeves until a year or so into his training. Once he put them on, it was love at first squat.

Knee sleeve 1.JPG

Where can you get knee sleeves?

You can find some at your local sporting goods store, but your best bet is this thing they’ve developed called the internet, which they have on computers now. The usual suspects - Amazon, Rogue, etc. - will have a host of options, which brings us to . . .

What should you get?

5 mm and 7 mm are both common thicknesses, and having used both, I’d recommend the 7 mm option. There are a ton of companies that make them - some of the more popular ones are brands like Rehband, SBD, STrong (Mark Bell), Stoic, and Rogue. 

There’s a big price range from about $35-$45 for a pair of sleeves to $35-$45 for a single sleeve (which reflects the prices of the brands listed above). The biggest difference seems to be simple longevity - the cheap ones tend to wear out and tear within a couple of years, whereas the pricier ones typically last quite a bit longer - to the point that I’d probably say you’ll spend less money in the long run by going with the more expensive pairs. Of course, your mileage may vary. 

When do you use knee sleeves?

The short answer is - squats and Olympic lifting. You’ll appreciate them for squatting, and you’ll appreciate them for the Olympic lifts because of the squatting involved in both snatching and cleaning (there is probably some benefit for the impact of landing as well). 

What about using them on the press and bench press? Go ahead if you’d like - they won’t help, but they won’t hurt either. 

The deadlift gets a little more discussion. In the deadlift, the knee doesn’t go through a large range of motion (as opposed to the knee’s longer ROM in the squat), so if your knees ache while squatting, but they feel fine while deadlifting, I’d recommend not wearing sleeves. The thickness of the sleeve - while not huge - is still one more thing you have to deal with when trying to keep the bar close on the pull, so if you don’t need them, don’t use them. But if your knees also ache on the deadlift, and you find that the sleeves help, then go right ahead.

As always, we hope this helps you get stronger and live better!